Struggling to captivate your audience with your website? Feel like it’s blending into the endless sea of sites that look just like it?
Well, you’re in luck! Today, we’ll be diving into a game-changing concept – how to add custom fonts in WordPress and elevate your website without breaking a sweat!
Why Use Custom Fonts in WordPress?
While WordPress offers a basic set of fonts, adding custom fonts can take your website design to the next level.
By using the same unique custom font across your website and other marketing materials, you’re able to establish a more cohesive and recognizable brand identity.
Traditional Methods to Add Custom Fonts in WordPress
Let’s explore the different ways you can add custom fonts to your WordPress website and why they fall short.
Method 1: Using a WordPress Custom Fonts Plugin
The first method is using a third-party plugin. You’ll find quite a variety of options in the plugin directory, but is this really the best approach? Using a third-party plugin to upload custom fonts comes with a few significant downsides:
Impact on website performance: Installing additional plugins can negatively impact website performance, slowing it down and increasing the risk of site issues.
Extra costs: Custom font plugins may come with their own price tag, or while initially free, require a premium upgrade to unlock all features.
Limited typography settings: You may only have access to basic font customization options, limiting your ability to style custom fonts to their full potential.
Security & Compatibility Issues: Too many plugins can introduce security risks and lead to compatibility issues with future updates.
Method 2: Adding Custom Fonts Manually With CSS
The second method is manually adding custom fonts using CSS. This avoids third-party plugins but comes with its own limitations:
Requires coding knowledge: You need at least a basic understanding of code to follow this method smoothly.
Risk of theme updates overwriting changes: Future theme updates might override your custom font changes, requiring you to reapply them.
Complex & time-consuming: This method can be quite complex, especially when using multiple custom fonts.
Prone to errors: Due to the complexity of this approach, it’s easier to make mistakes.
Why Choose Kirki for Custom Fonts and Typography
While the above methods work, they have their limitations. But what if there was an easier and more advanced way to add custom fonts without plugins or coding?
Introducing Kirki — the freeform WordPress website builder with a built-in custom font upload feature and an extensive suite of advanced typography controls!
No extra plugins needed: Kirki’s built-in font upload feature lets you add custom fonts without relying on any third-party plugins, keeping your site lightweight and running smoothly.
Zero coding required: No coding knowledge? No problem! Kirki simplifies the process so anyone can upload and manage custom fonts effortlessly.
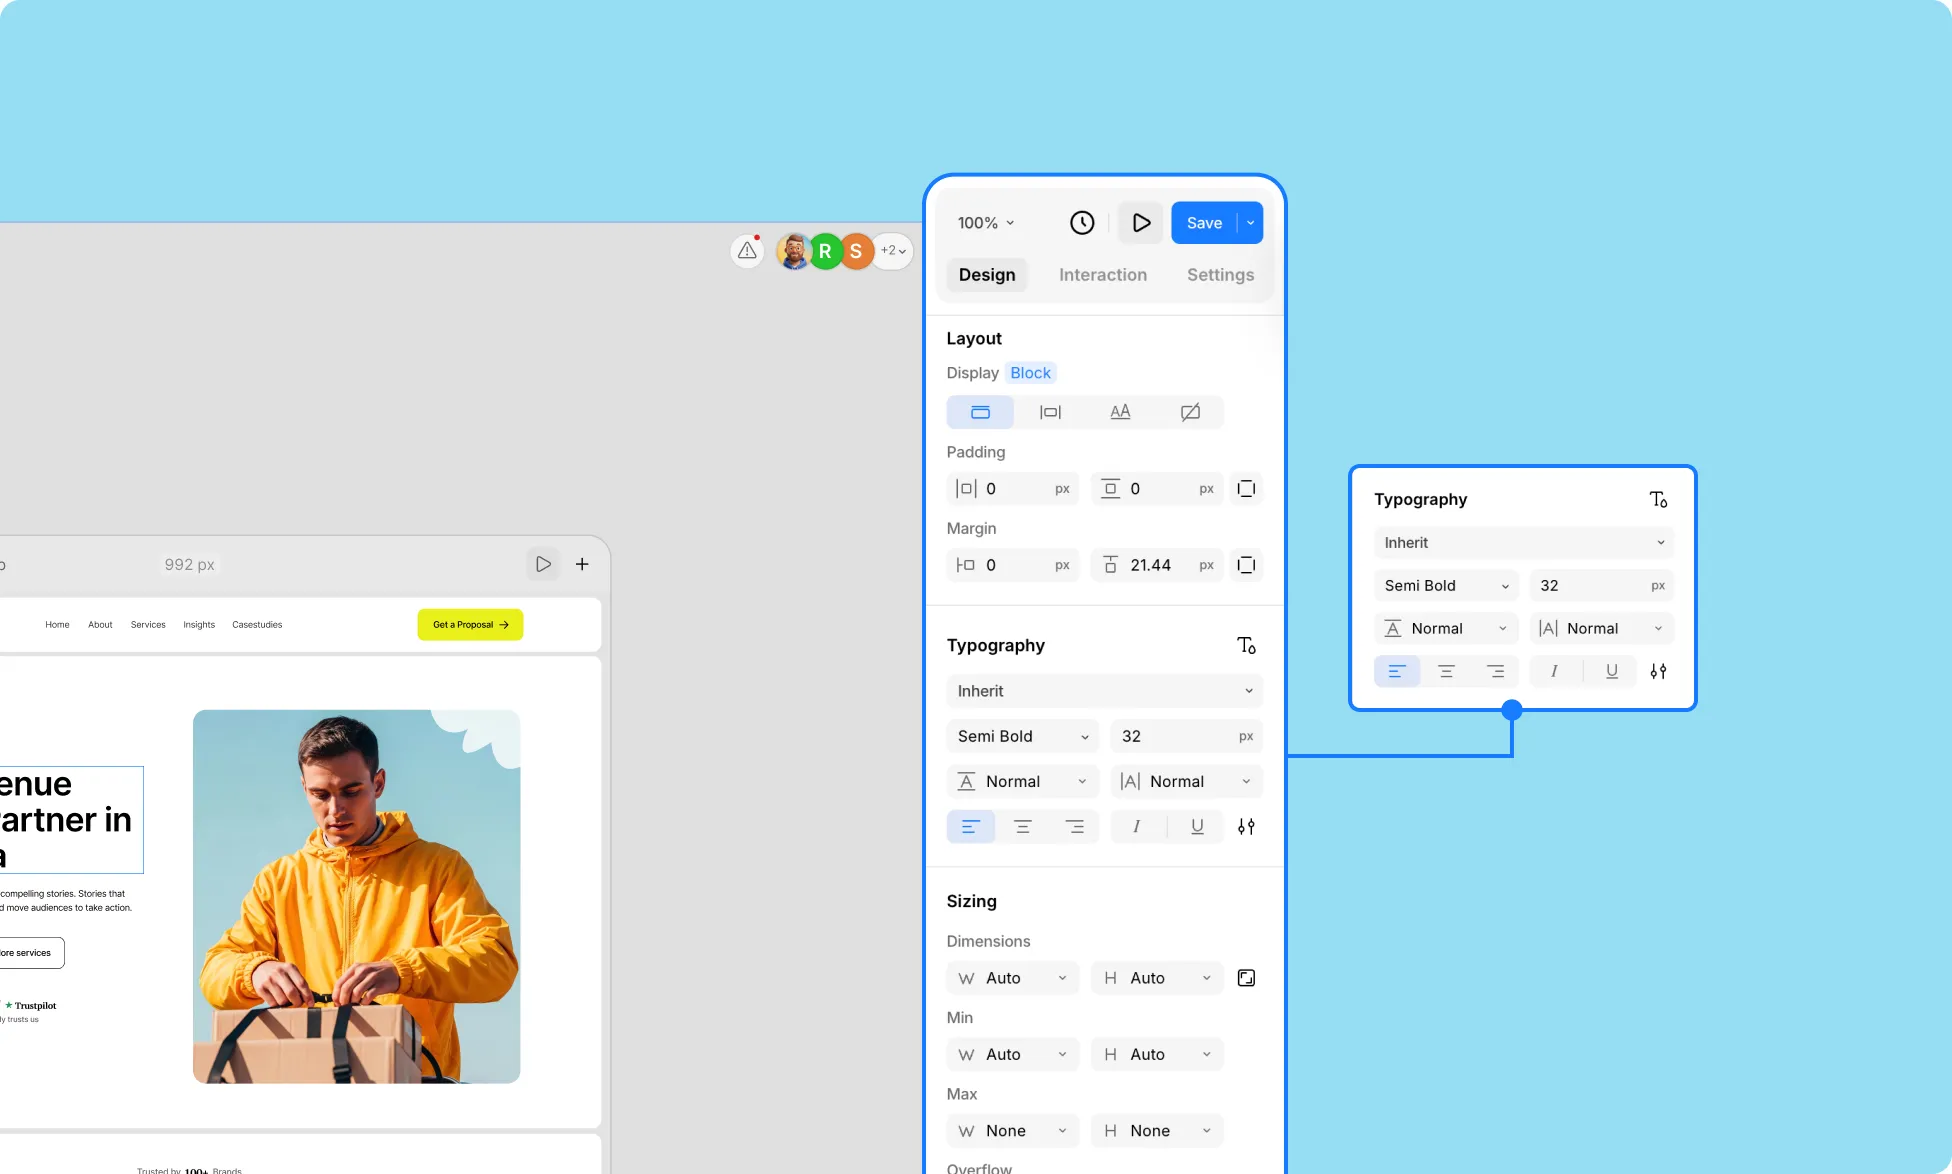
Advanced typography options: Kirki offers an extensive range of advanced typography controls, accessible via the Advanced Typography panel in the Design tab. These include:
- Clamp: Set a Base, Minimum, and Maximum value to adjust font size dynamically based on the viewport — ensuring perfectly responsive typography across all devices.
- Chars (W): Define a container width that limits the horizontal span of text, causing line breaks to occur once the specified limit is reached.
- Word Break: Control exactly where line breaks appear when text overflows its container.
- Text Overflow: Define how text behaves when it overflows its container.
- Decoration: Apply underline, strikethrough, and other text decoration styles directly from the panel.
- Case: Toggle between uppercase, lowercase, capitalize, and other case transformations with a single click.
You’ll even find another set of options dedicated to OpenType Features, for more precise typographic control over fonts with an expanded character set:
- Ligature: Replace separate letters with ligatures i.e. combined glyphs that enhance spacing and readability.
- Kerning: Adjust the spacing between specific letter pairs to make the overall character spacing more visually uniform.
Of course, these are just a few of the many options available. For a comprehensive guide, check out our Typography documentation.
Live Preview: Customize your custom fonts easily with a real-time view of your changes and easily ensure your typography looks exactly as you envisioned it.
How to Add a Custom Font Using Kirki
Here’s how to upload and use a custom font in Kirki with no plugins, no code:
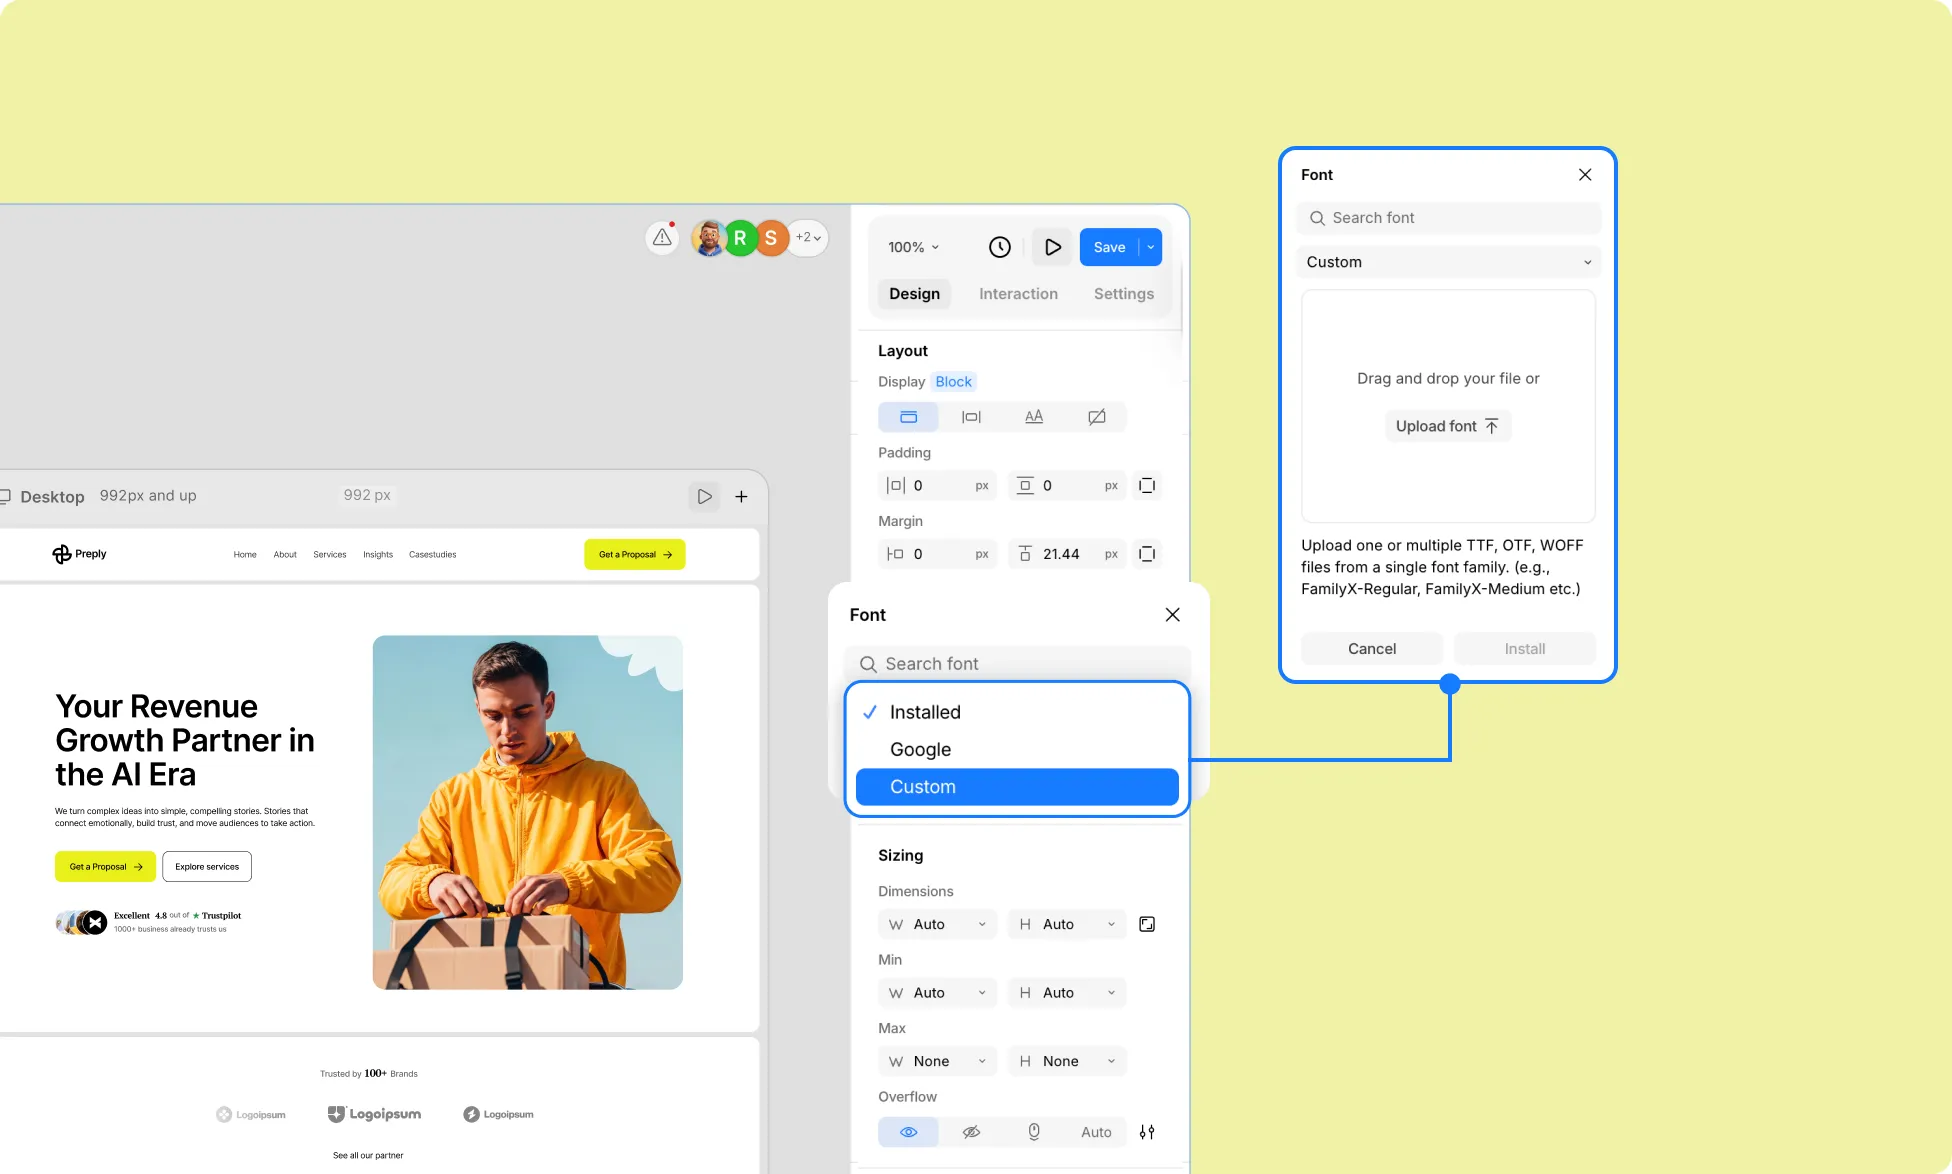
Step 1: Select any text element on your canvas and go to the Typography section in the Design tab on the right panel. Click the font name to open the Font picker.
Step 2: In the Font picker, select the Custom tab.
Step 3: Upload your custom font file. Kirki supports TTF and OTF formats directly — simply upload your file and you’re good to go!
And that’s it, your custom font is now available to use across your entire website!
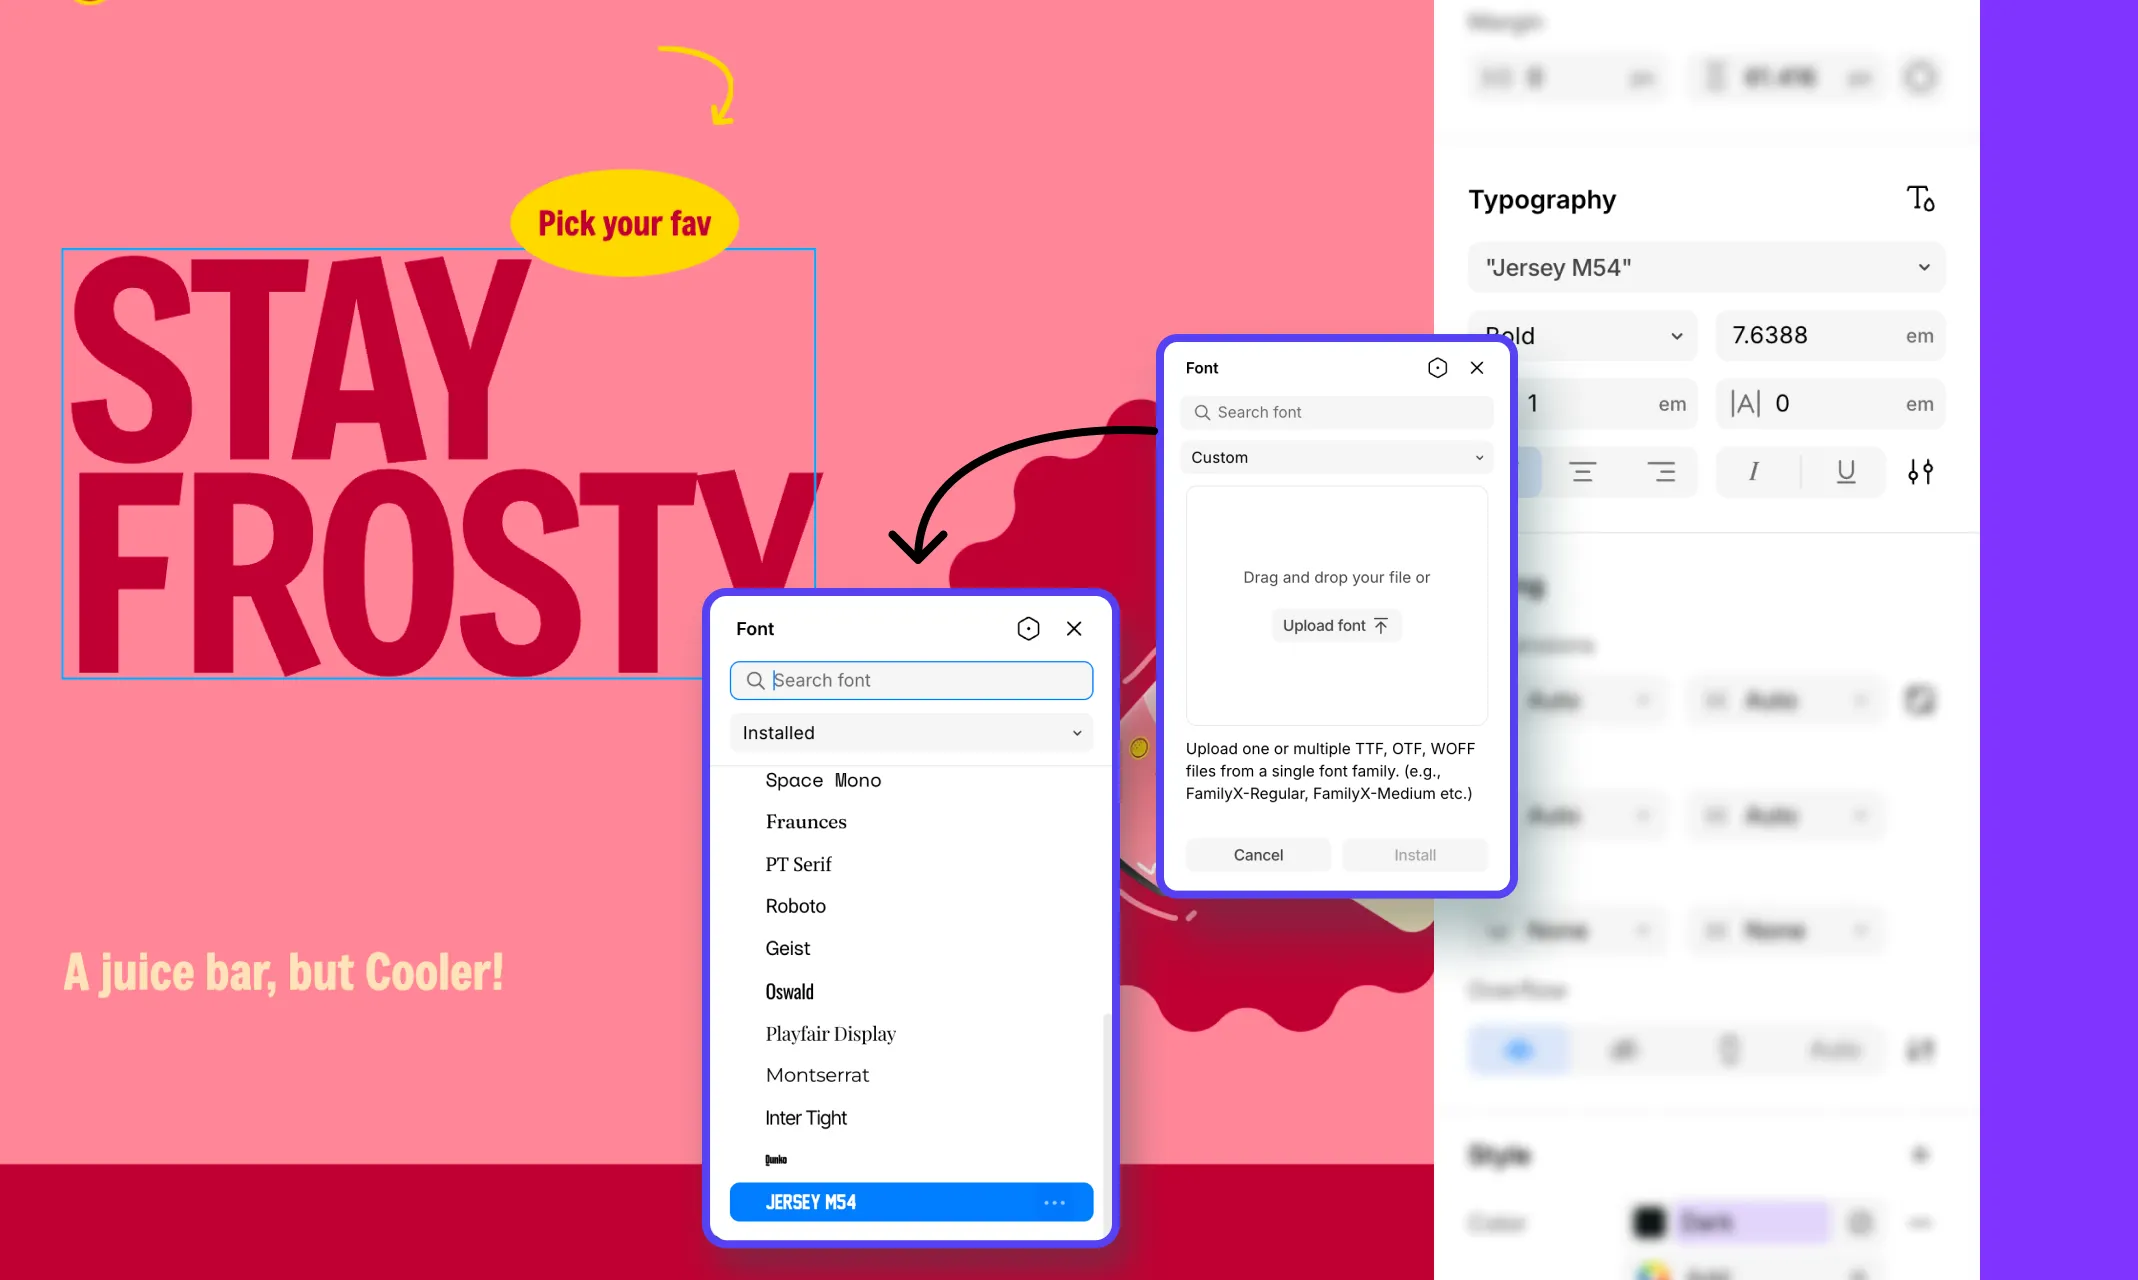
💡 Tip: Once uploaded, your custom font will also appear under the Installed tab in the Font picker, alongside all other installed and system fonts, for easy access anytime.
Typography Best Practices for Better Readability
While custom fonts can elevate your brand, keep these key principles in mind for the best user experience:
Keep it consistent: Using too many different font styles can hurt readability and weaken your brand identity. Stick to a purposeful, limited set of fonts.
Consider your website’s purpose: A law firm’s typography will differ greatly from a recipe blog’s. Choose fonts that reflect your brand’s personality and goals.
Design with readability in mind: Prioritize readability through font choice, character spacing, line height, and color contrast. Kirki’s Advanced Typography panel gives you precise control over all of these.
Ensure responsiveness: Use Kirki’s Clamp feature to make your typography fluid and perfectly sized across all screen sizes automatically.
Try Kirki Today!
So what are you waiting for? Get Kirki – the first freeform infinite canvas website builder for WordPress and start designing stunning, responsive websites complete with the most unique fonts that perfectly fit your brand identity!