


Most handoffs fail before the meeting even happens. The client sees nothing until the big reveal, then reacts to months of work all at once.
So skip the big reveal. With Kirki, you can hand over a WordPress site to your client piece by piece, starting while you build: let the client follow along and give feedback as the site takes shape, run QA page by page, move the site from staging to live seamlessly, and more.
By the final handover, the client already knows the site, so there’s nothing left to reveal.
TL;DR:
- Start a handoff document: Log each domain, host, and license as it’s created, beginning at kickoff.
- Share a View-Only Link: Send it with your first version so the client can watch the build without edit access.
- Collect feedback in real time: Use Real-Time Collaboration and in-canvas Comments to get input on each section as you build.
- Run the audit page by page: Check each page for accessibility and SEO problems, and set its SEO details as you finish it.
- Move staging to live: Export from staging, then import on the live site with Download with Media enabled.
- Complete the handoff: With the client already familiar with the site and holding the accounts, send a written confirmation along with handing over the site. Keep the comment thread open after launch to allow distinction for post-launch requests.
Start a Handoff Document at Kickoff
Domain and hosting are usually set up early, so record them in a handoff document as they’re created. Open this document at kickoff and add each new account, license, or subscription as the project grows, instead of piecing it together in the last week.
Starting this work early means the administrative side of the handoff can happen alongside the website, rather than becoming another last-minute task.
Note: Leave passwords out of the document itself; use a password manager or another secure method for those.
Share WordPress Site Preview With View-Only Link
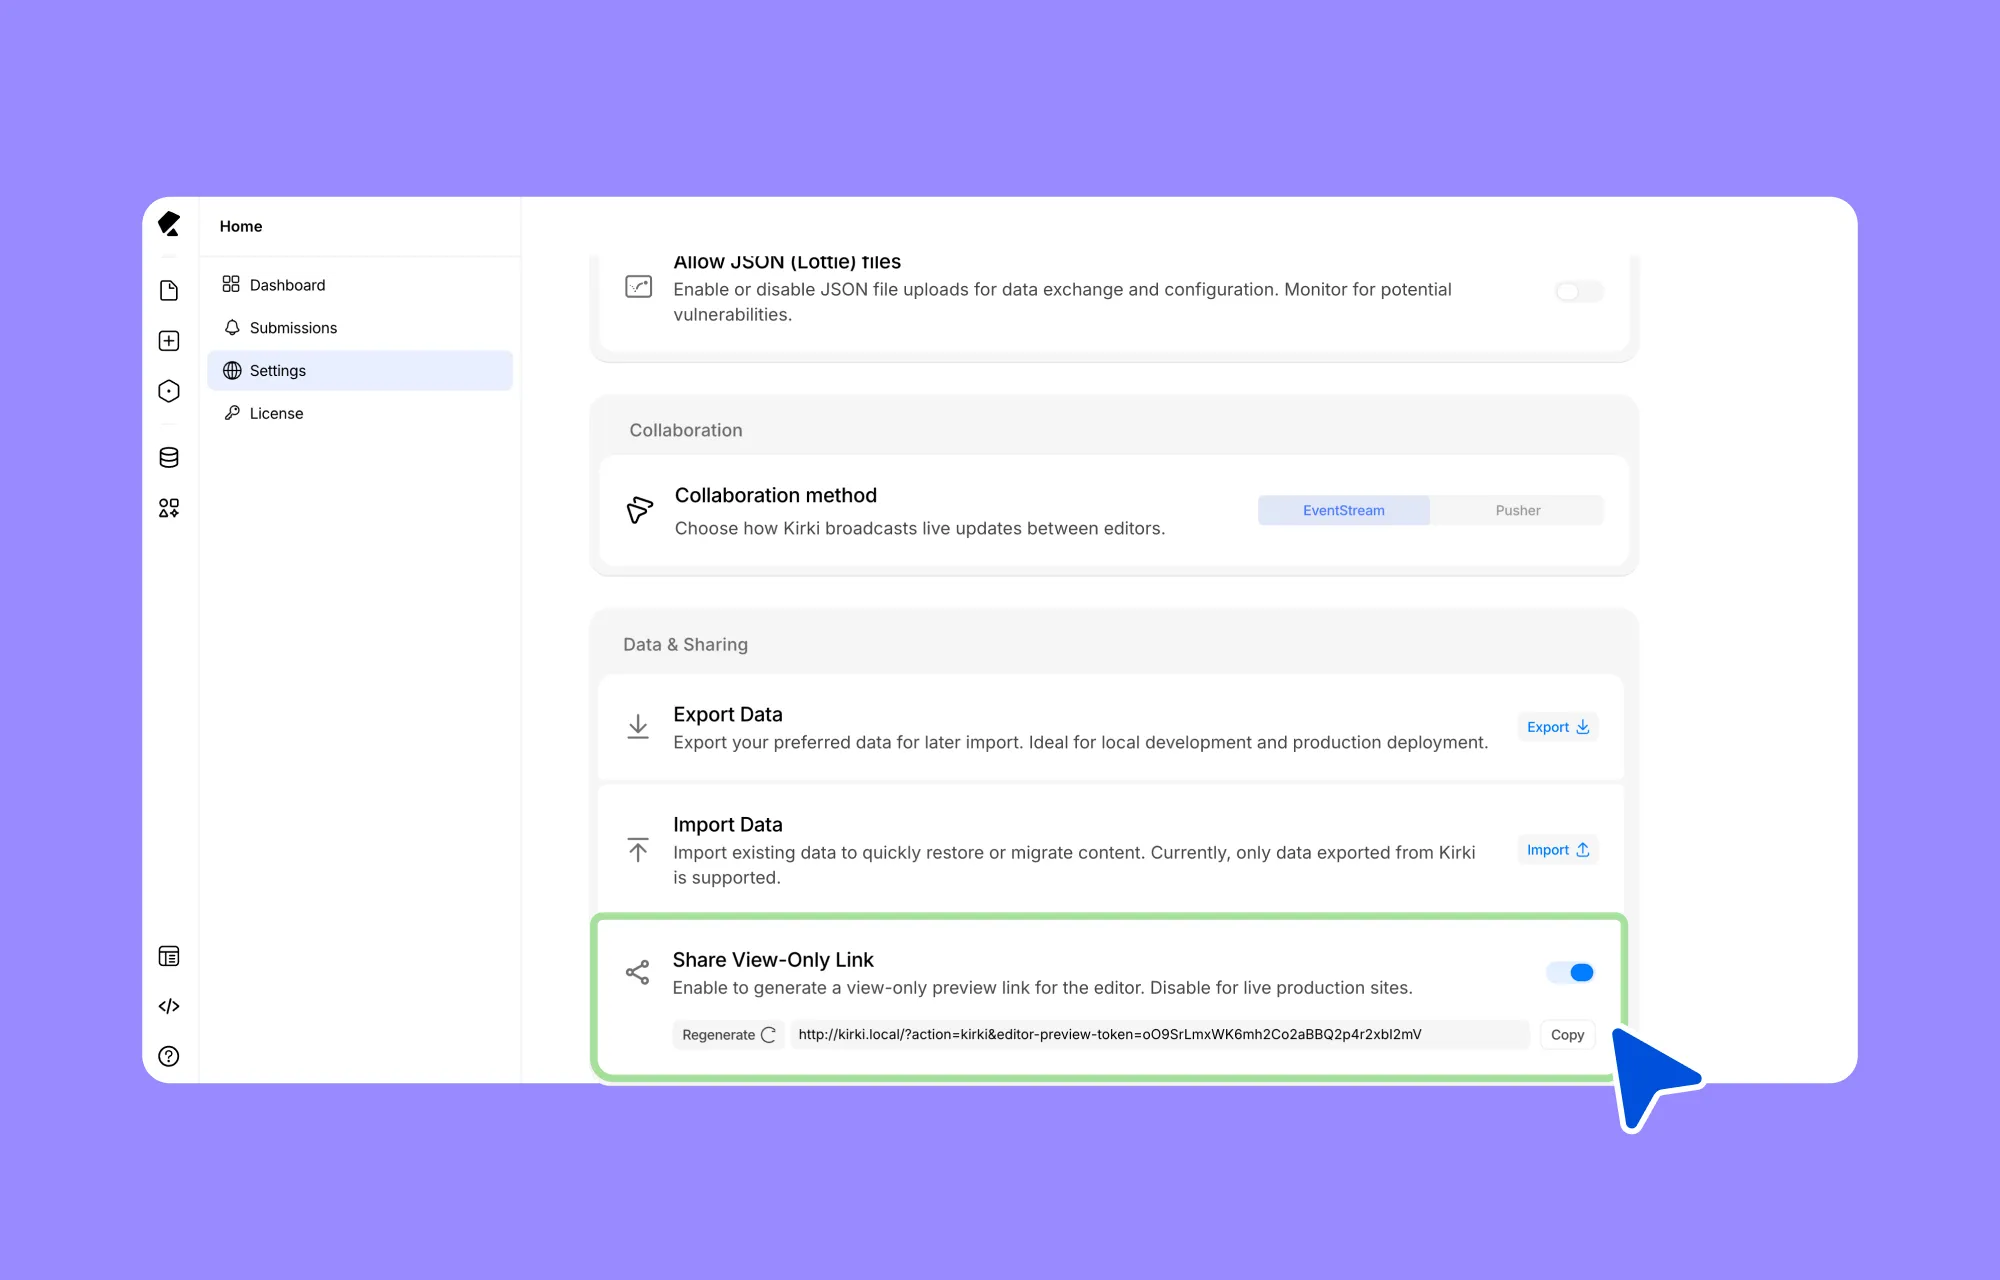
Sometimes a client just wants to see that the project is moving. View-Only Link gives them a no-login, shareable preview without any access to edit or publish.
After the requirements are clear and you have a meaningful first version, go to Settings → Data & Sharing → Share View-Only Link and send the generated link to the client.
Use this when a client wants to see the site but has no account, and you don’t want them changing anything by accident.
It easily provides clients with context before the final handoff, helping them become familiar with the site rather than showing them the finished site for the first time. This also paves the way for clients to give more informed feedback.
Collect Client Feedback in Real Time
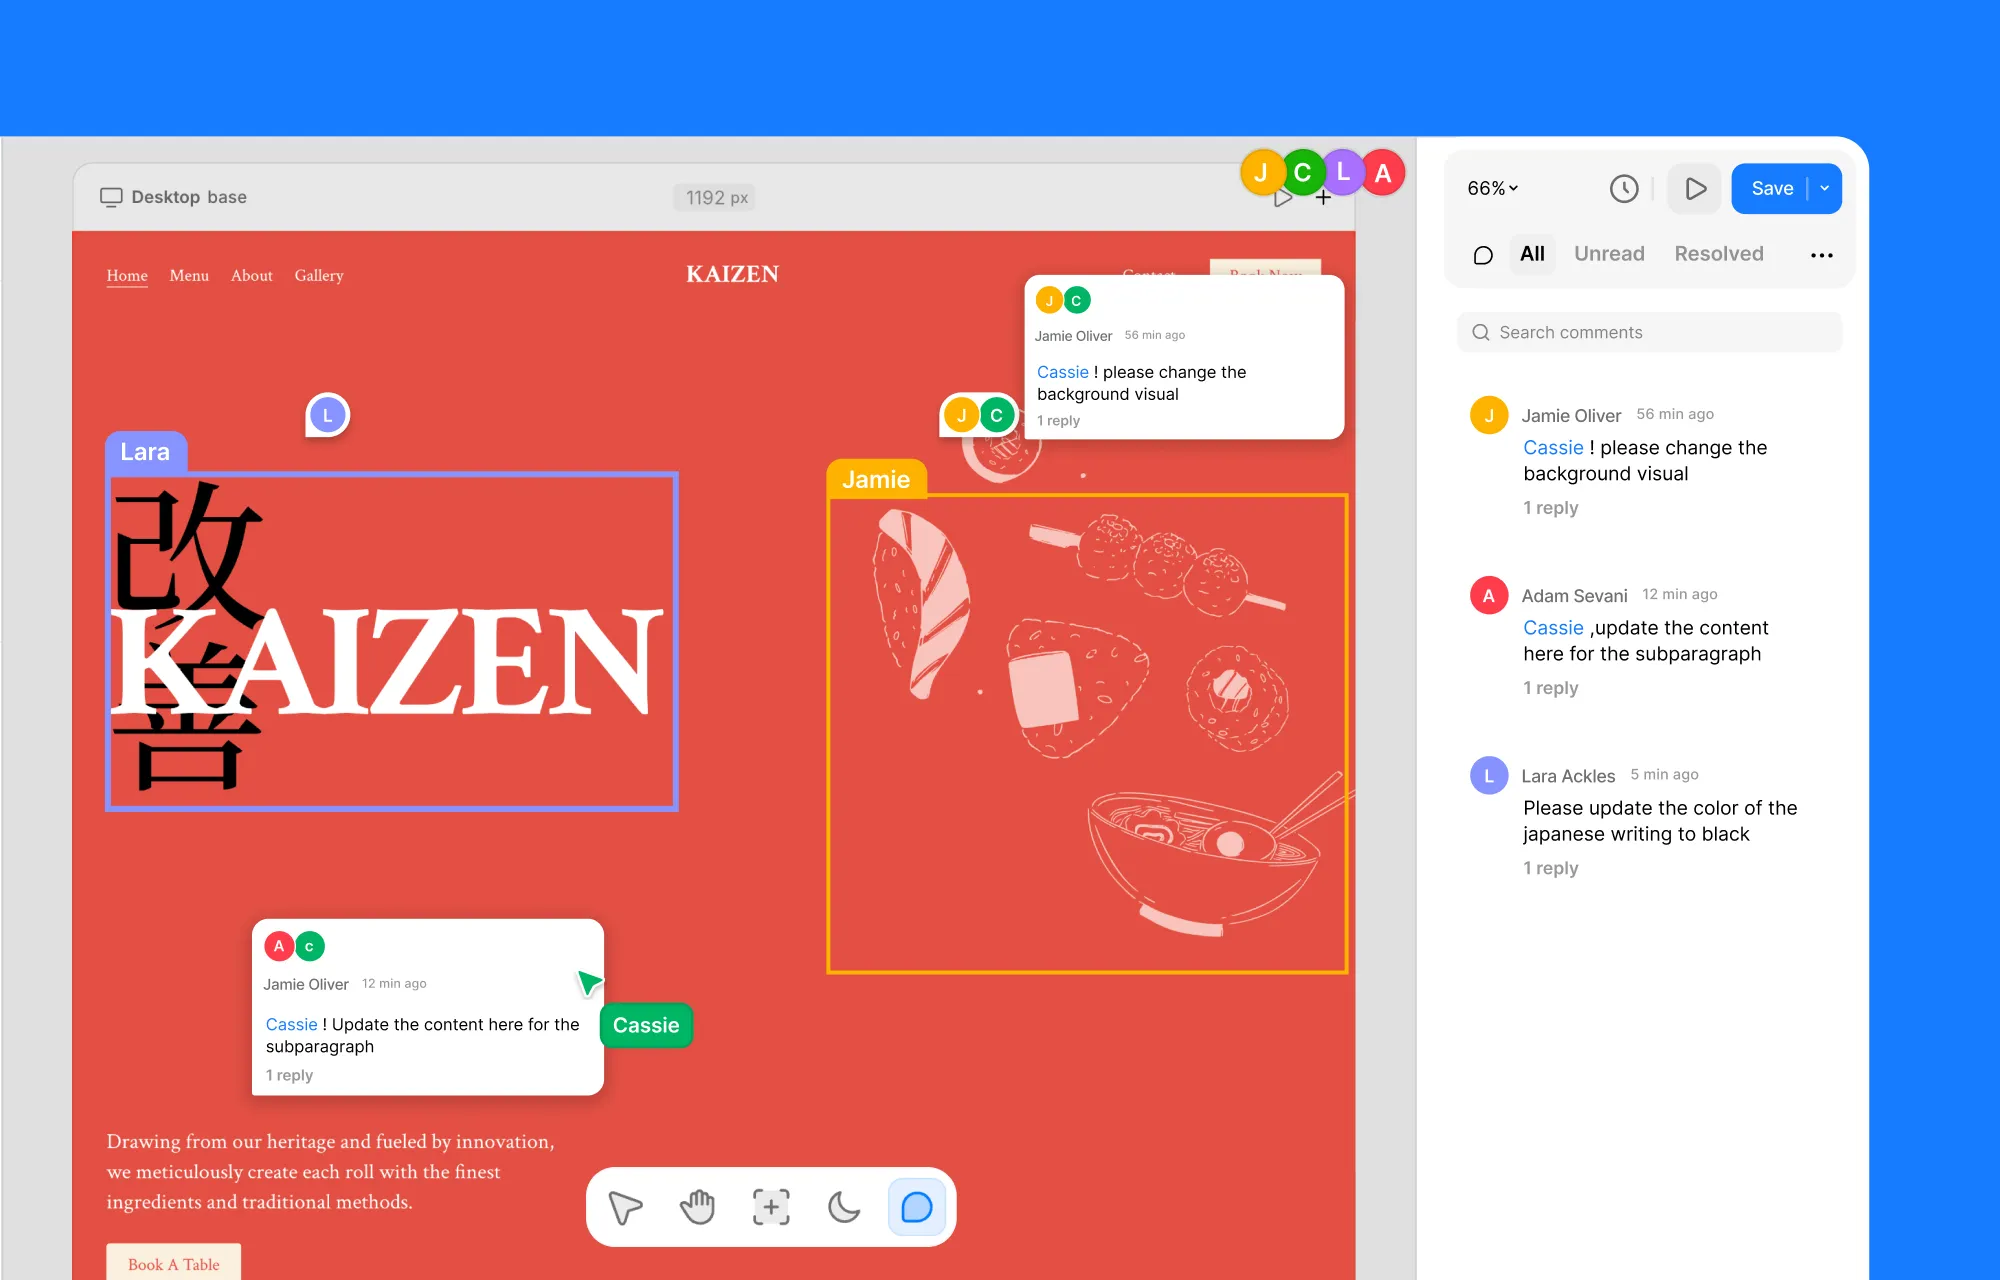
When a client wants to stay involved, context often dissolves while collecting feedback across email or chat threads flooded with screenshots/screen recordings during meetings. But with Kirki’s Real-Time Collaboration and in-canvas Comments, the discussion stays more productive and relevant, all in one place.
You and your client work on a shared canvas, and they leave in-canvas Comments on the page or element they mean, so you see what they’re pointing at without digging for context.
Instead of waiting until the whole website is ready for the client, you can get input from them on smaller decisions as you build. For instance, if you’re working on the homepage, you might finish the hero section first and ask the client to review the headline and image. They can leave their feedback there while you continue working on the rest of the site.
How to Add a Comment
- Turn on Comment mode using the comment icon.
- Click on the page where you want to leave the feedback.
- The comment box will appear.
- Add your feedback.
- @mention a teammate if needed.
- Submit the comment.
Comments can be replied to, teammates can be mentioned, and completed items can be resolved to prevent the thread from becoming a backlog. For more details, see Kirki’s Comments documentation.
Run Audit & Set SEO Details
Client involvement can be flexible from project to project. QA can’t.
Run QA the same way you’re running everything else in this process, continuously, not as one enormous pass at the end.
When you finish a page, check it before you move on. A missing or poor meta description lets search engines pull whatever text they find, and pages that share one copied description show up as identical snippets in search results. Each fix takes a minute while the page is fresh, and far longer across twenty pages at the end.
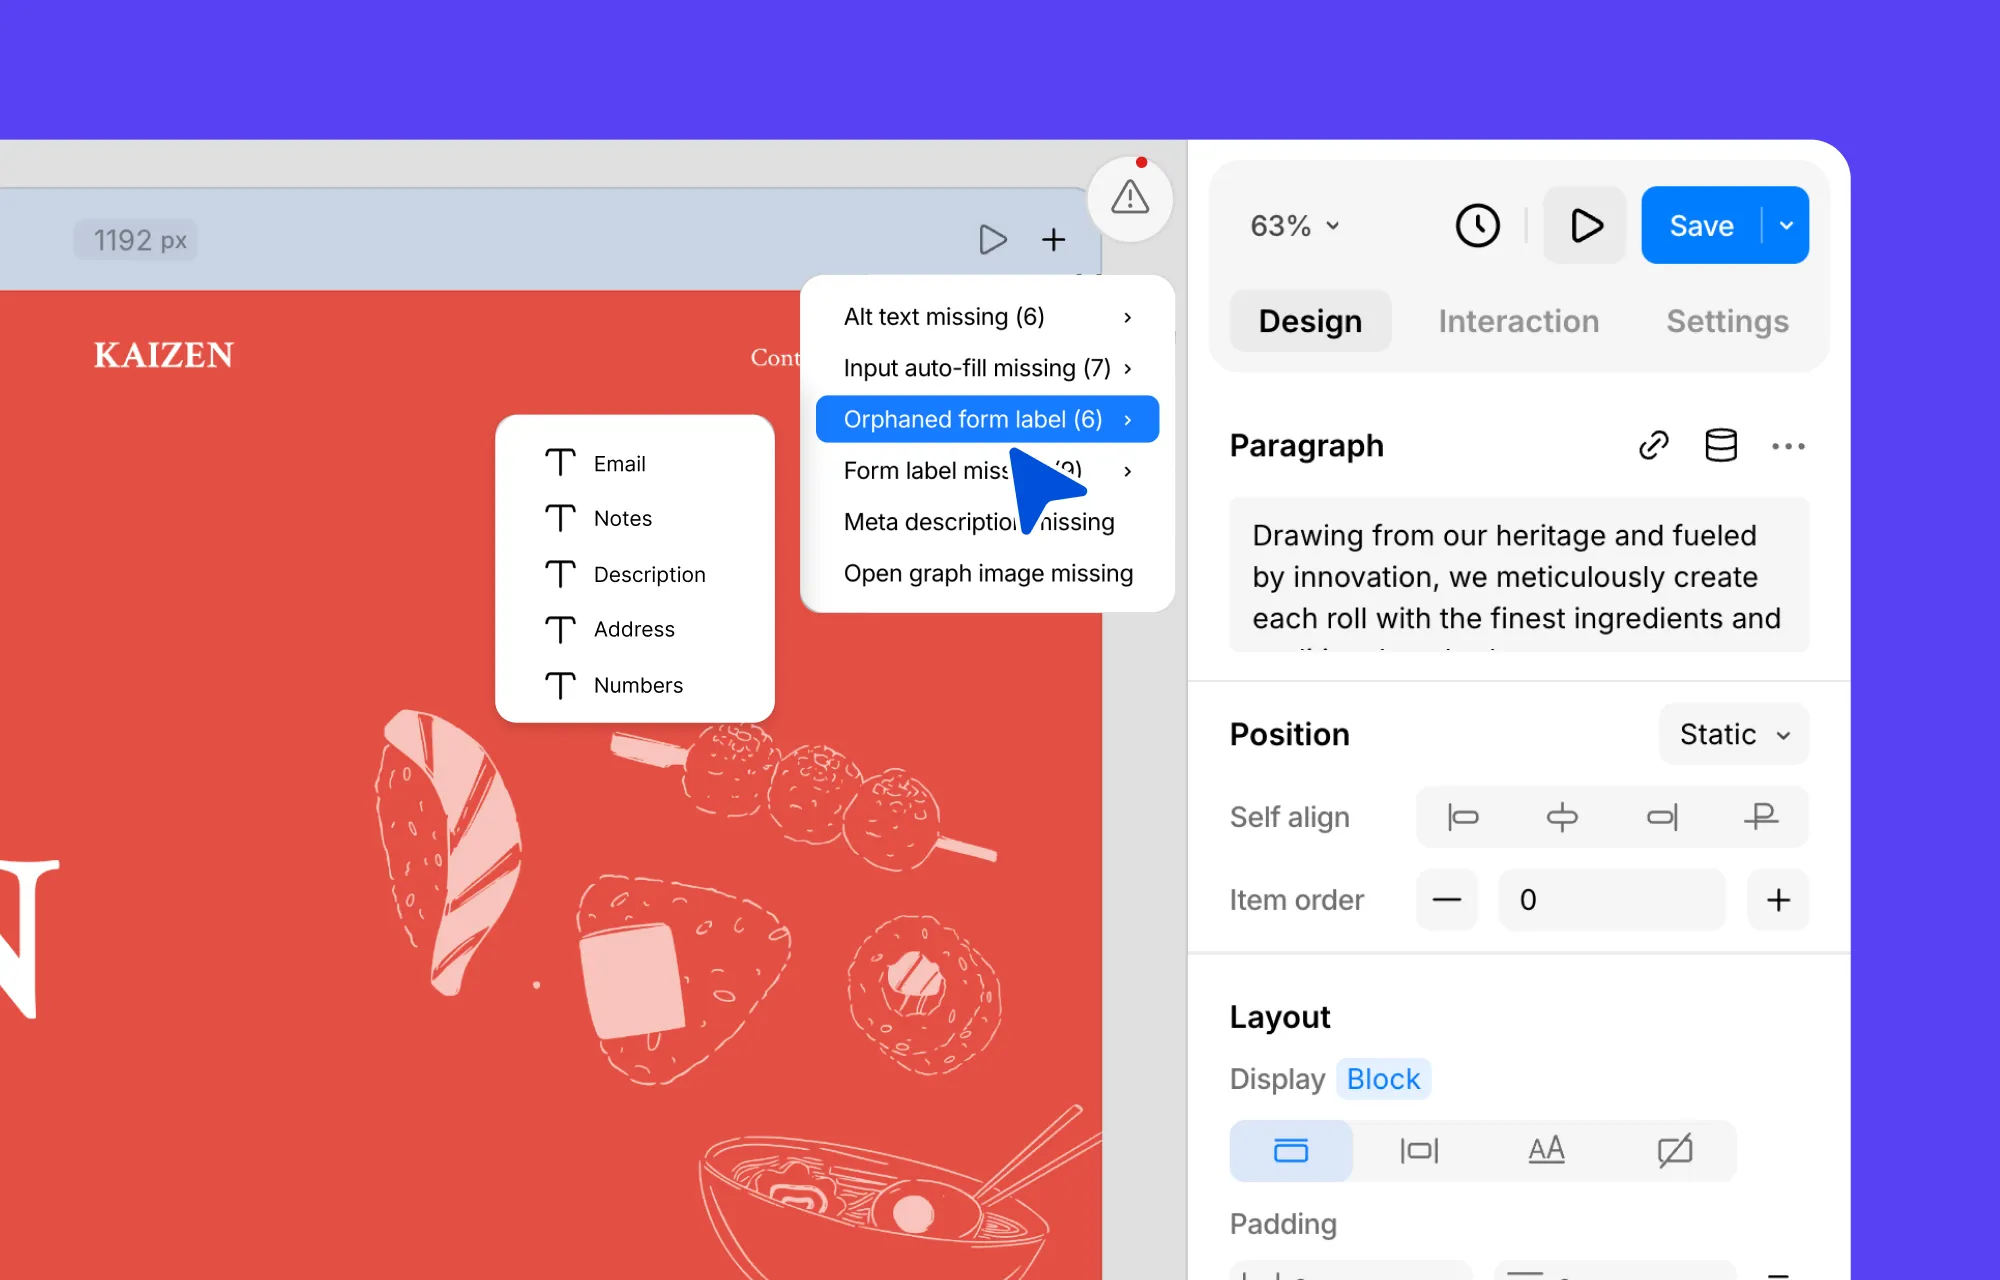
So after you are done with a page, open the Audit panel from the warning icon at the top right of the canvas. It checks the page for accessibility and SEO problems and lists each issue with a count of affected elements. Click the flagged issue to jump to the element on the canvas and fix it on the spot.
Then you can open the SEO tab in the Page Settings panel and fill in details.
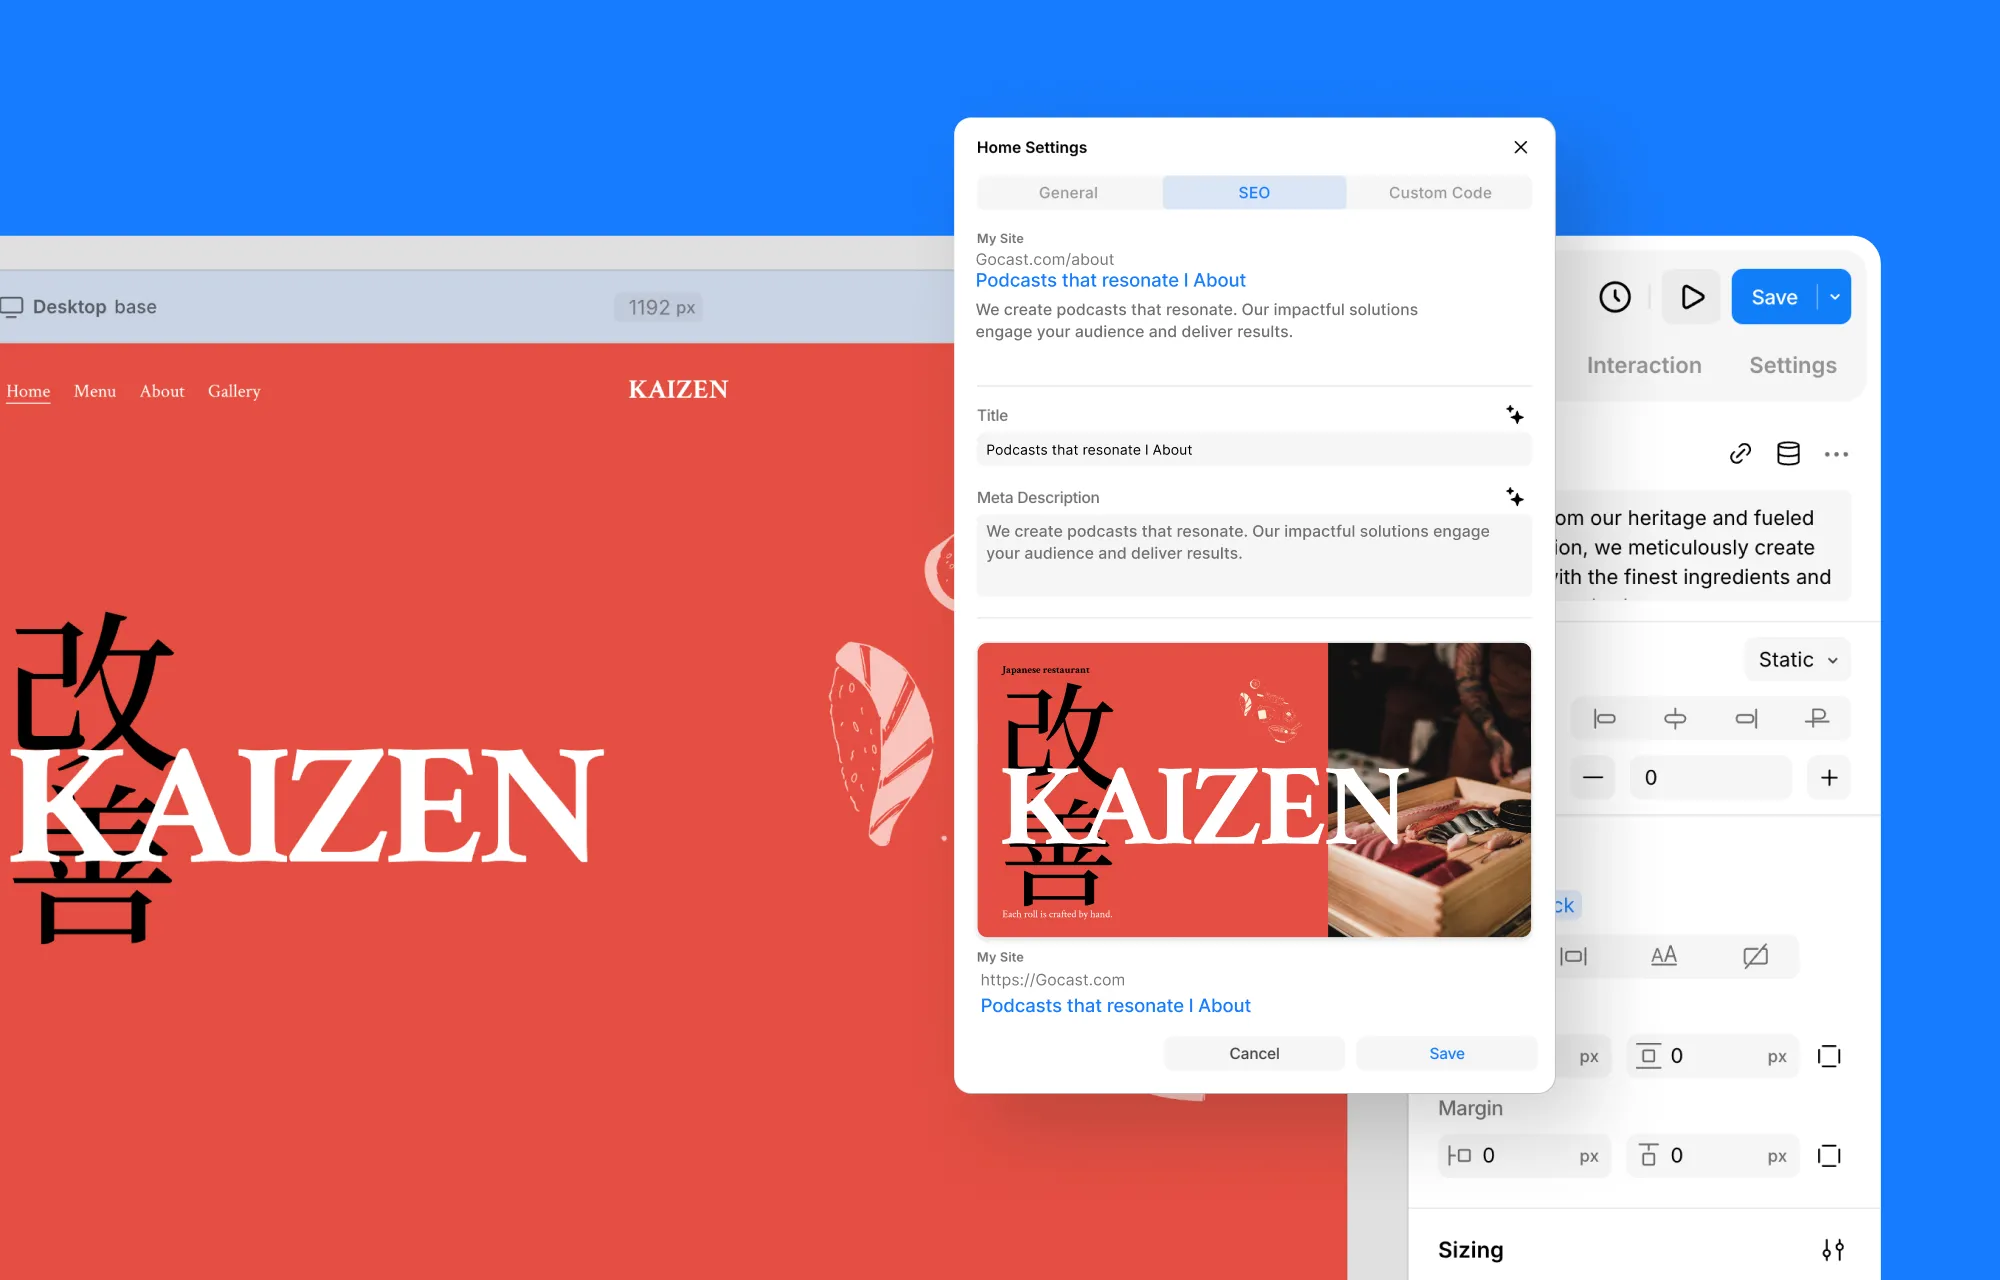
Fill in the Meta Title and Description while checking the live preview at the top, then use Open Graph to set the cover image, title, and description for social shares.
For Template pages, i.e., dynamic item detail pages, connected to a collection, SEO fields can be populated dynamically in Kirki, using data from the collection. Dynamic fields give every item its own meta title and description instead of one shared setting, and Open Graph can also work the same way, including a cover image pulled from the collection’s Image field if it has one.
Learn more about handling SEO in Kirki in the SEO & Open Graph settings documentation.
Audit isn’t a substitute for manual QA. You still need to click through the site as a visitor would – test forms, check that confirmation emails are being sent, and view every section across breakpoints.
The advantage of running these checks in parallel is that launch week becomes a confirmation that the site is clean, rather than the first time anyone discovers what’s broken.
Move WordPress Site From Staging to Live
Once the build is ready, moving from staging to production should be a breeze with Kirki.
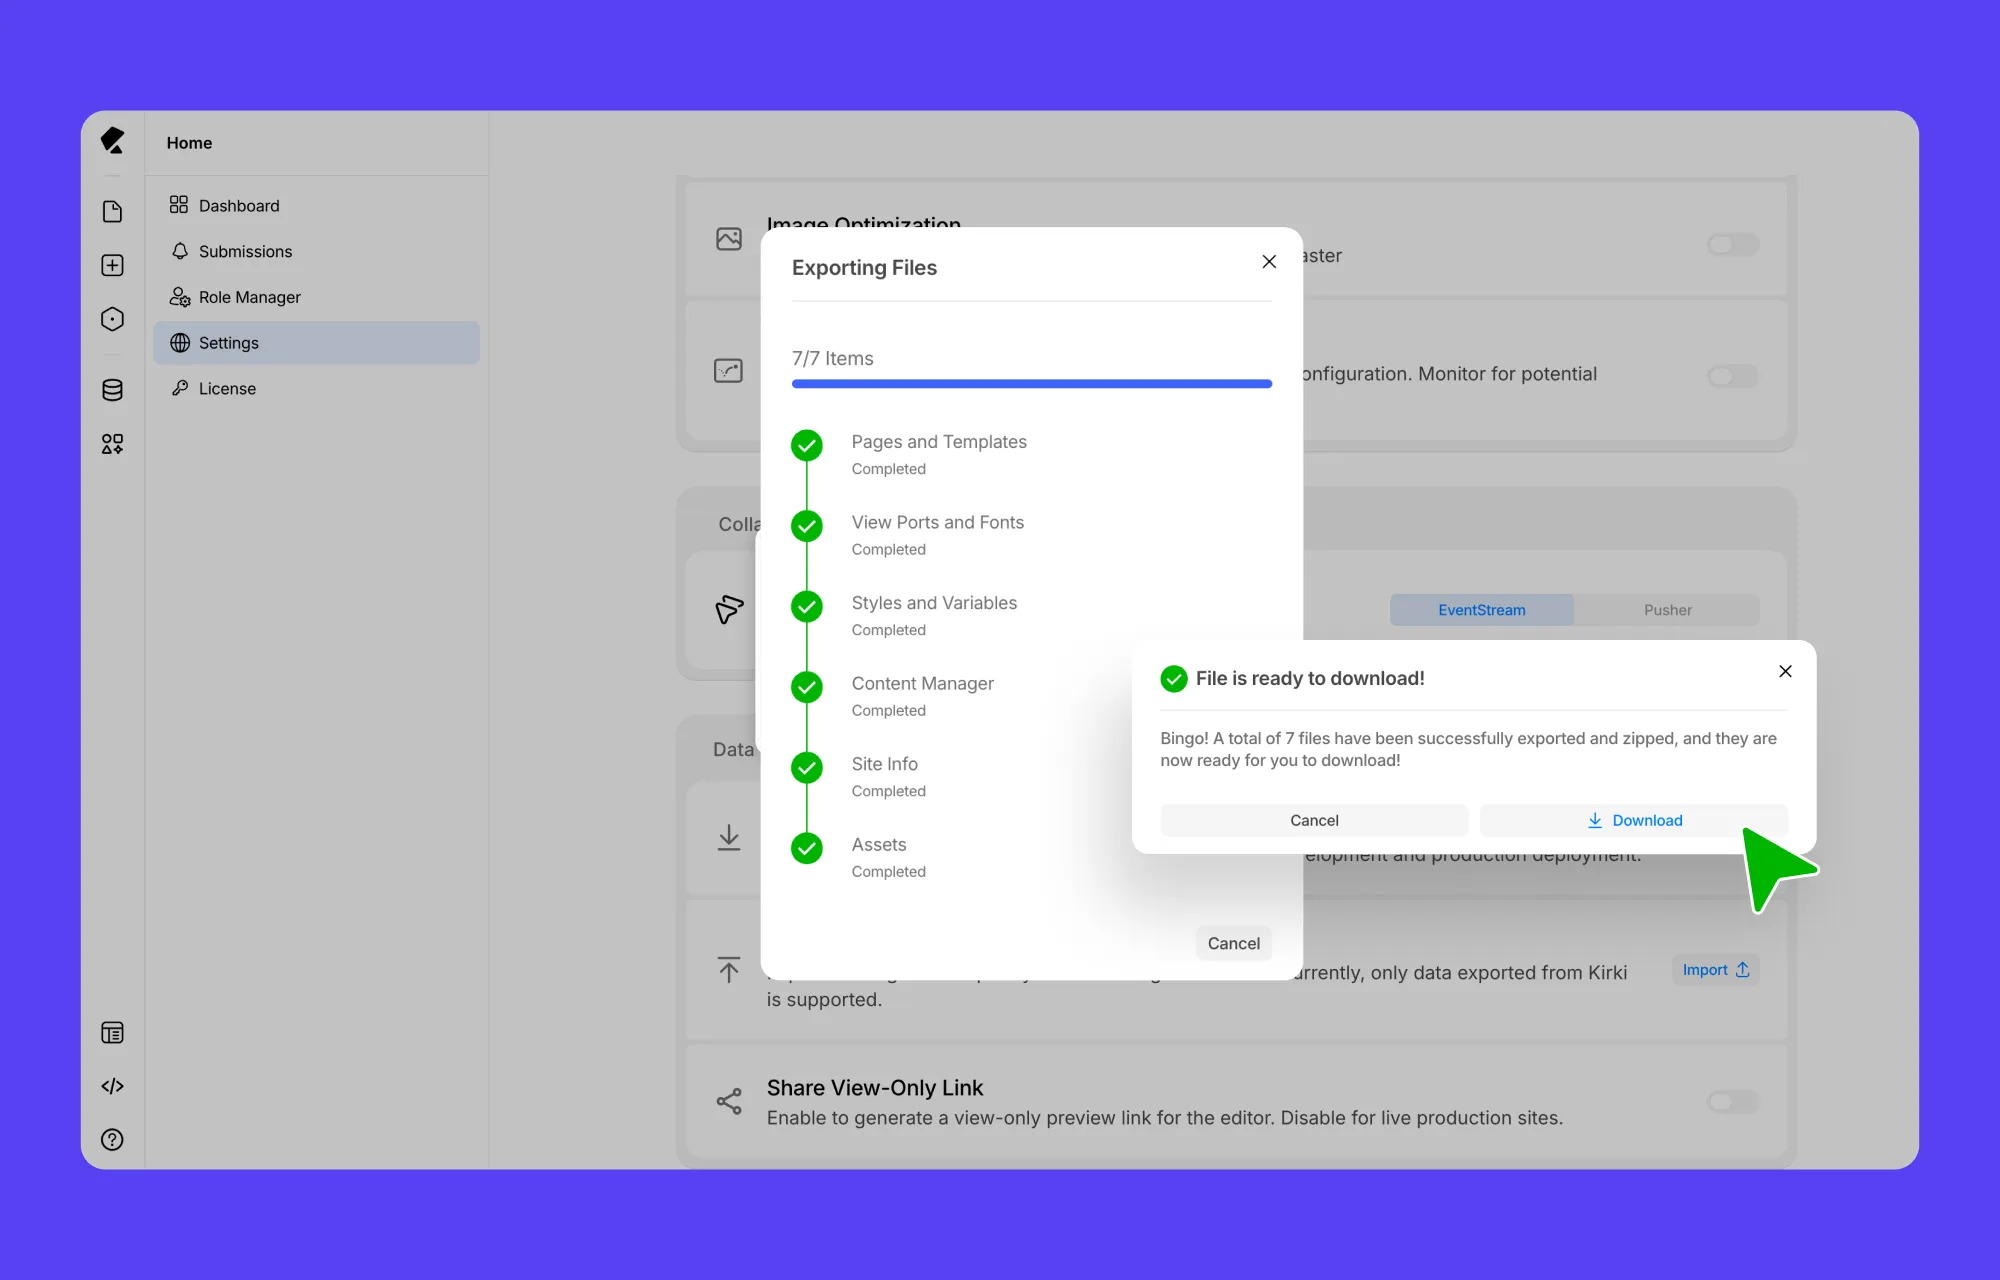
Kirki’s Export and Import functionality can move the project data between environments.
On the staging site:
- Go to Dashboard → Settings.
- Under Data & Sharing, click Export.
- Enable Download with Media.
- Download the exported Kirki data file.
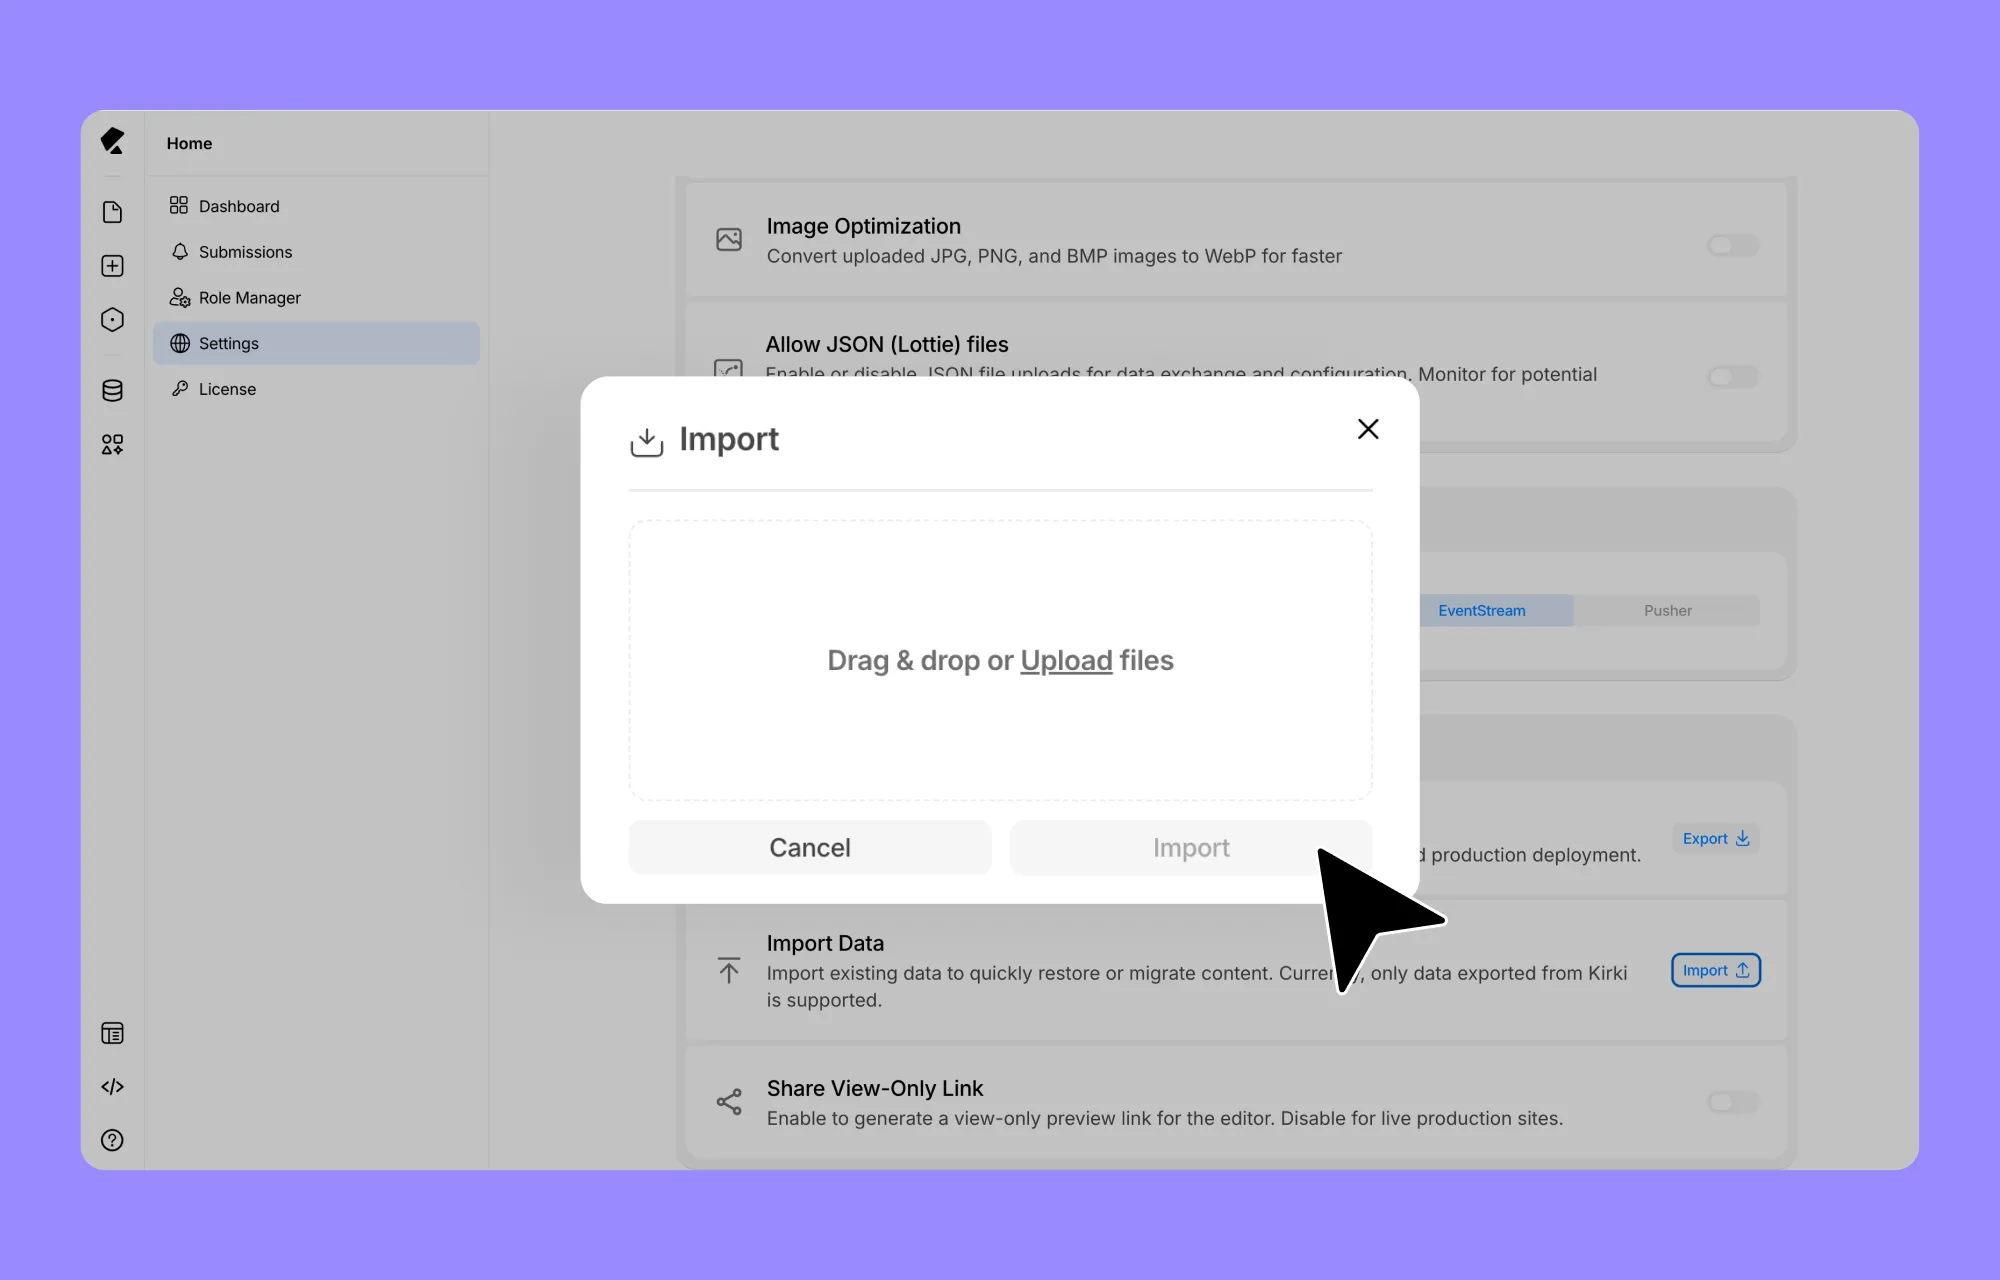
On the live site:
- Go to Dashboard → Settings.
- Under Data & Sharing, click Import.
- Select the exported Kirki data file.
- Confirm the import.
With Download with Media enabled, the export can include pages, templates, viewports, fonts, styles, content data, and assets.
Note: At any stage of your development, you can use this Export functionality to create a full backup of your website, but Kirki is even better! To automate this whole backup process, Kirki also supports Smart Versioning of your work.
For the exact staging-to-live sequence, see Kirki’s staging-to-live guide for the Export and Import steps and pre-import checks.
Hand Over the Site
By the final handover, the client already knows the site, has given feedback along the way, and holds the accounts. You hand over the finished site with the handoff document and a written confirmation. The confirmation lists the website URL, date, accounts transferred, what the launch support window covers (say, 14 days), and what falls outside the original scope.
The final meeting with a client who’s been involved from the start won’t have many surprises, and it sets the boundary for what happens next.
Thoughts: Progressive Handoff Adapts to Each Client
Give clients the level of involvement that fits them, not a fixed formula. Clients aren’t all the same.
A client who wants visibility might only need a View-Only Link.
A client who wants to review decisions as you build might benefit from Comments and Real-Time Collaboration.
A client who wants you to handle everything might not need any of that until the site is ready.
You can tailor the workflow to each project, client, and engagement level. Kirki gives you the right pieces for this kind of Progressive Handoff. A handover built this way takes less time than chasing loose ends six months later, and it tends to earn you the next referral.
Try it on your next client project!

