When you think of websites, what’s the most vital element? The media? The interactions?
It’s actually the text! While meaningful visuals and other elements are essential, text is the key to conveying information to your audience. And so, to ensure your text speaks to visitors and pulls them in, we’ve compiled the top text effects to level up your web design game!
How Text Can Impact Websites
Before we check out the top text effects in web design that you need to try, let’s take a look at how text can impact websites and why you need to pay attention to its design:
- Enhances User Experience: Clear, well-designed text improves readability, helping visitors easily understand your content and enhancing their overall user experience.
- Strengthens Brand Identity: Well-designed & consistent text across your website strengthens your visual brand identity, which is crucial for building trust & reliability.
- Captivates Audience: Impactful text can grab attention instantly, helping your content stand out in an information-heavy environment.
- Highlights Key Points: Well-crafted text can help highlight key points in your content, ensuring they capture attention and remain memorable.
- Improves Aesthetics: Visually pleasing text can enhance your website design, giving it a modern appeal.
- Boosts Engagement: Eye-catching or animated text effects that are readable help keep visitors engaged.
- Drives Conversion: Compelling, persuasive, and readable text drives conversions and improves visitor retention.
Top Text Effects to Try on Your Site
Now it’s finally time to explore the top text effects to level up your web design game!
But hold on — how do you actually implement these nifty designs? Imagine needing a separate plugin for each effect or needing to write endless lines of code.
Lucky for you, Kirki has all of these capabilities built-in, making it the best website builder for visually implementing CSS text effects with no code or plugins required.
So, without further ado, let’s dive right in!
Clipping Fun Image Backgrounds To Text
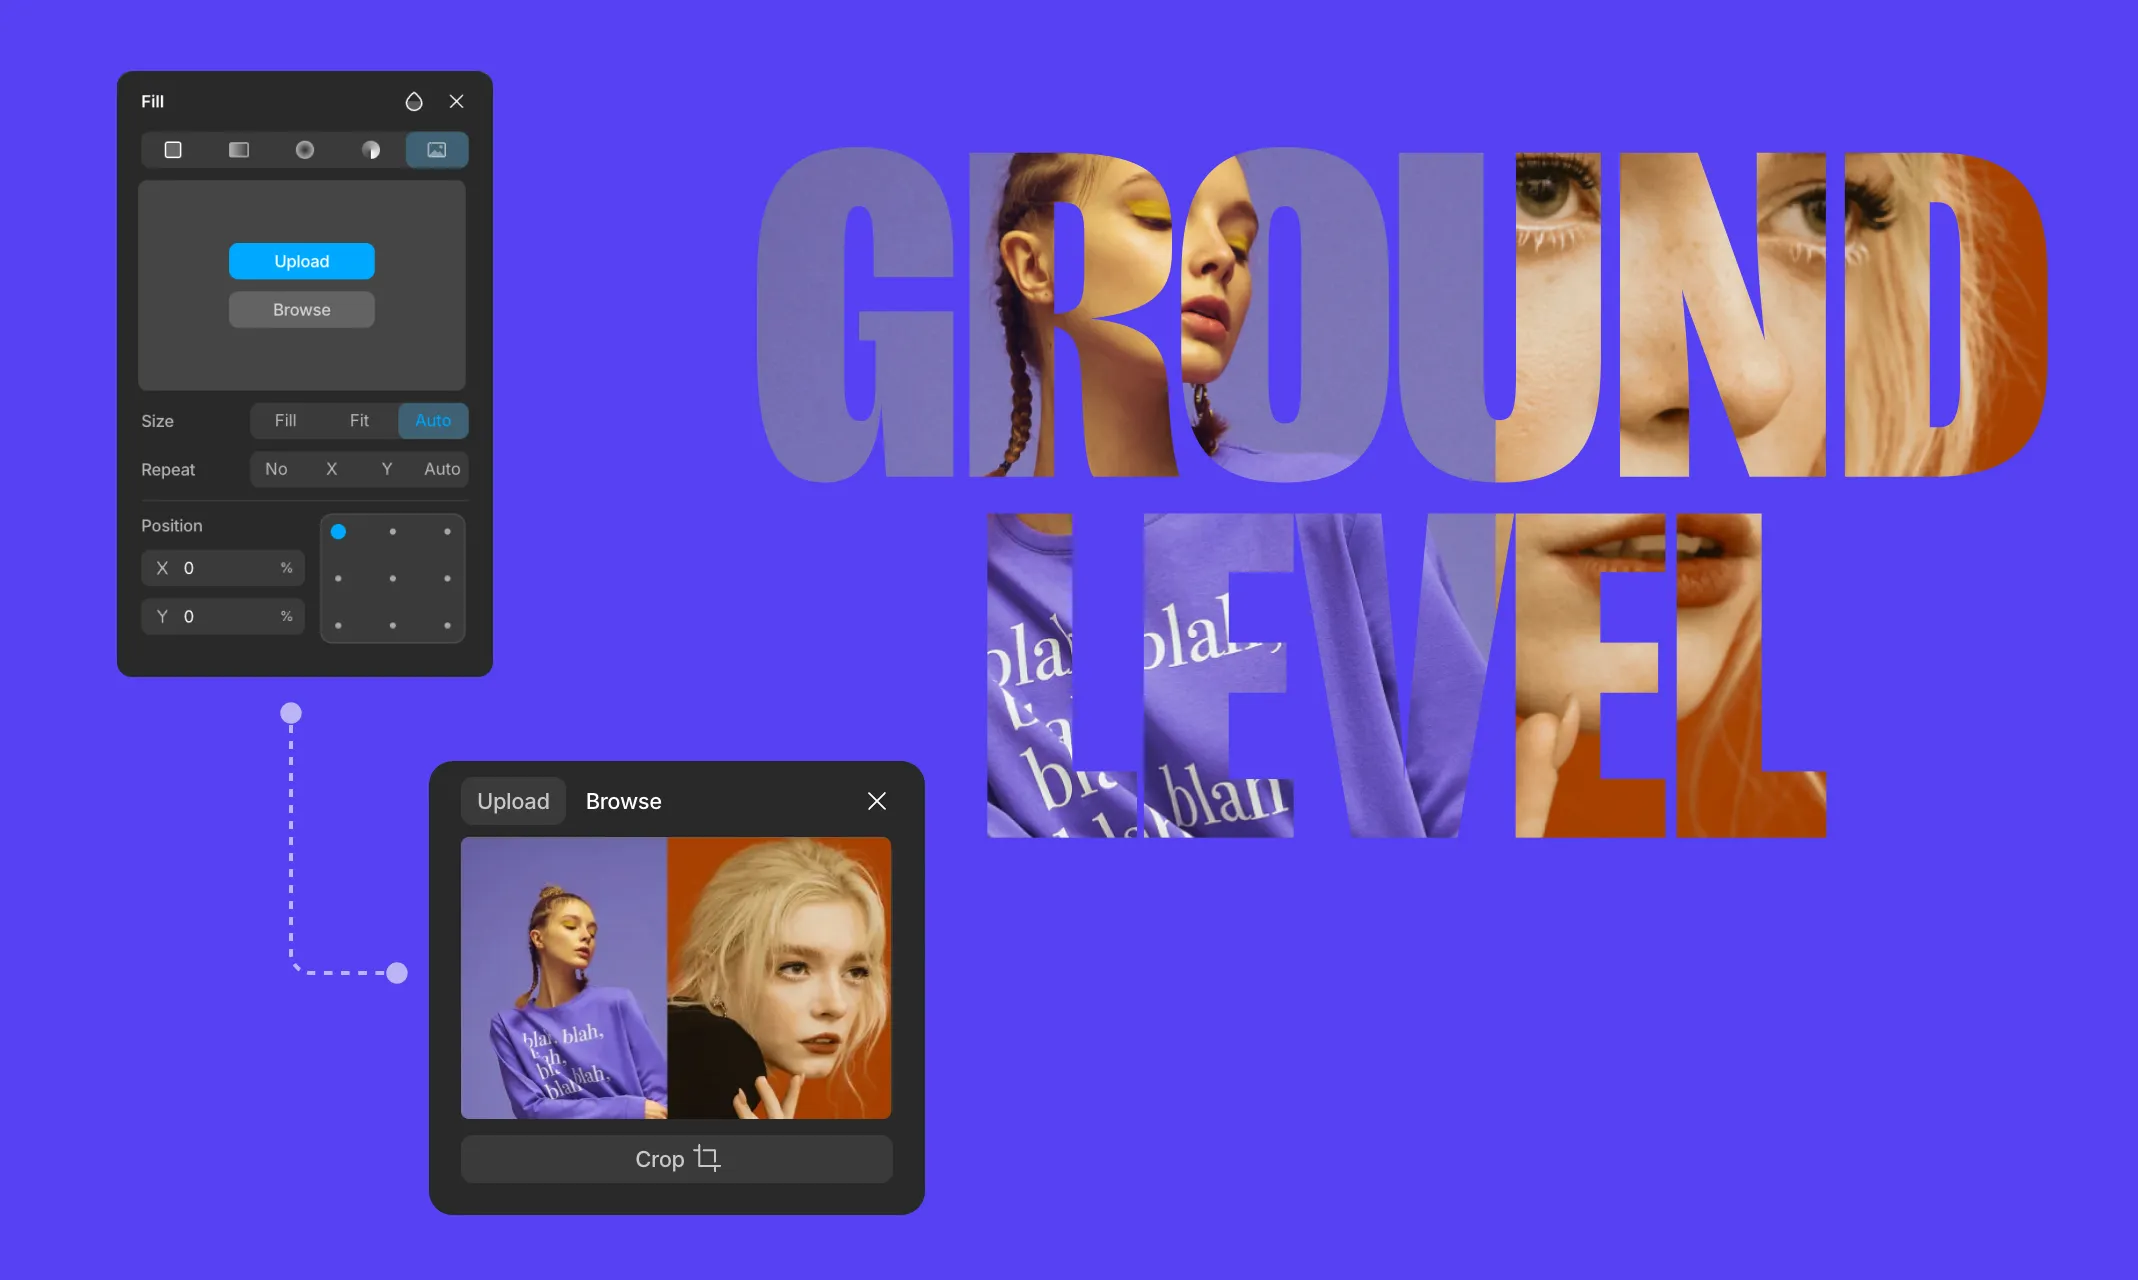
The next trick up our sleeve is clipping fun backgrounds to your typography! After all, why only stick to plain colors when you can use gradients, patterns, photos, and more?
To implement it, do the following:
Step 1: Select your text element and click Add next to Fill in the Style section to open the Fill panel.
Step 2: Select the Image icon (fifth icon) at the top of the Fill panel. Click Upload or Browse to choose your image.
Step 3: Just like with gradients, adding an image background to a text element in Kirki automatically clips it to the text — masking the image within the lettering with no extra steps needed.
With just a few clicks, you can turn plain text into a bold focal point that stops visitors in their tracks.
Experimenting With Text Stroke
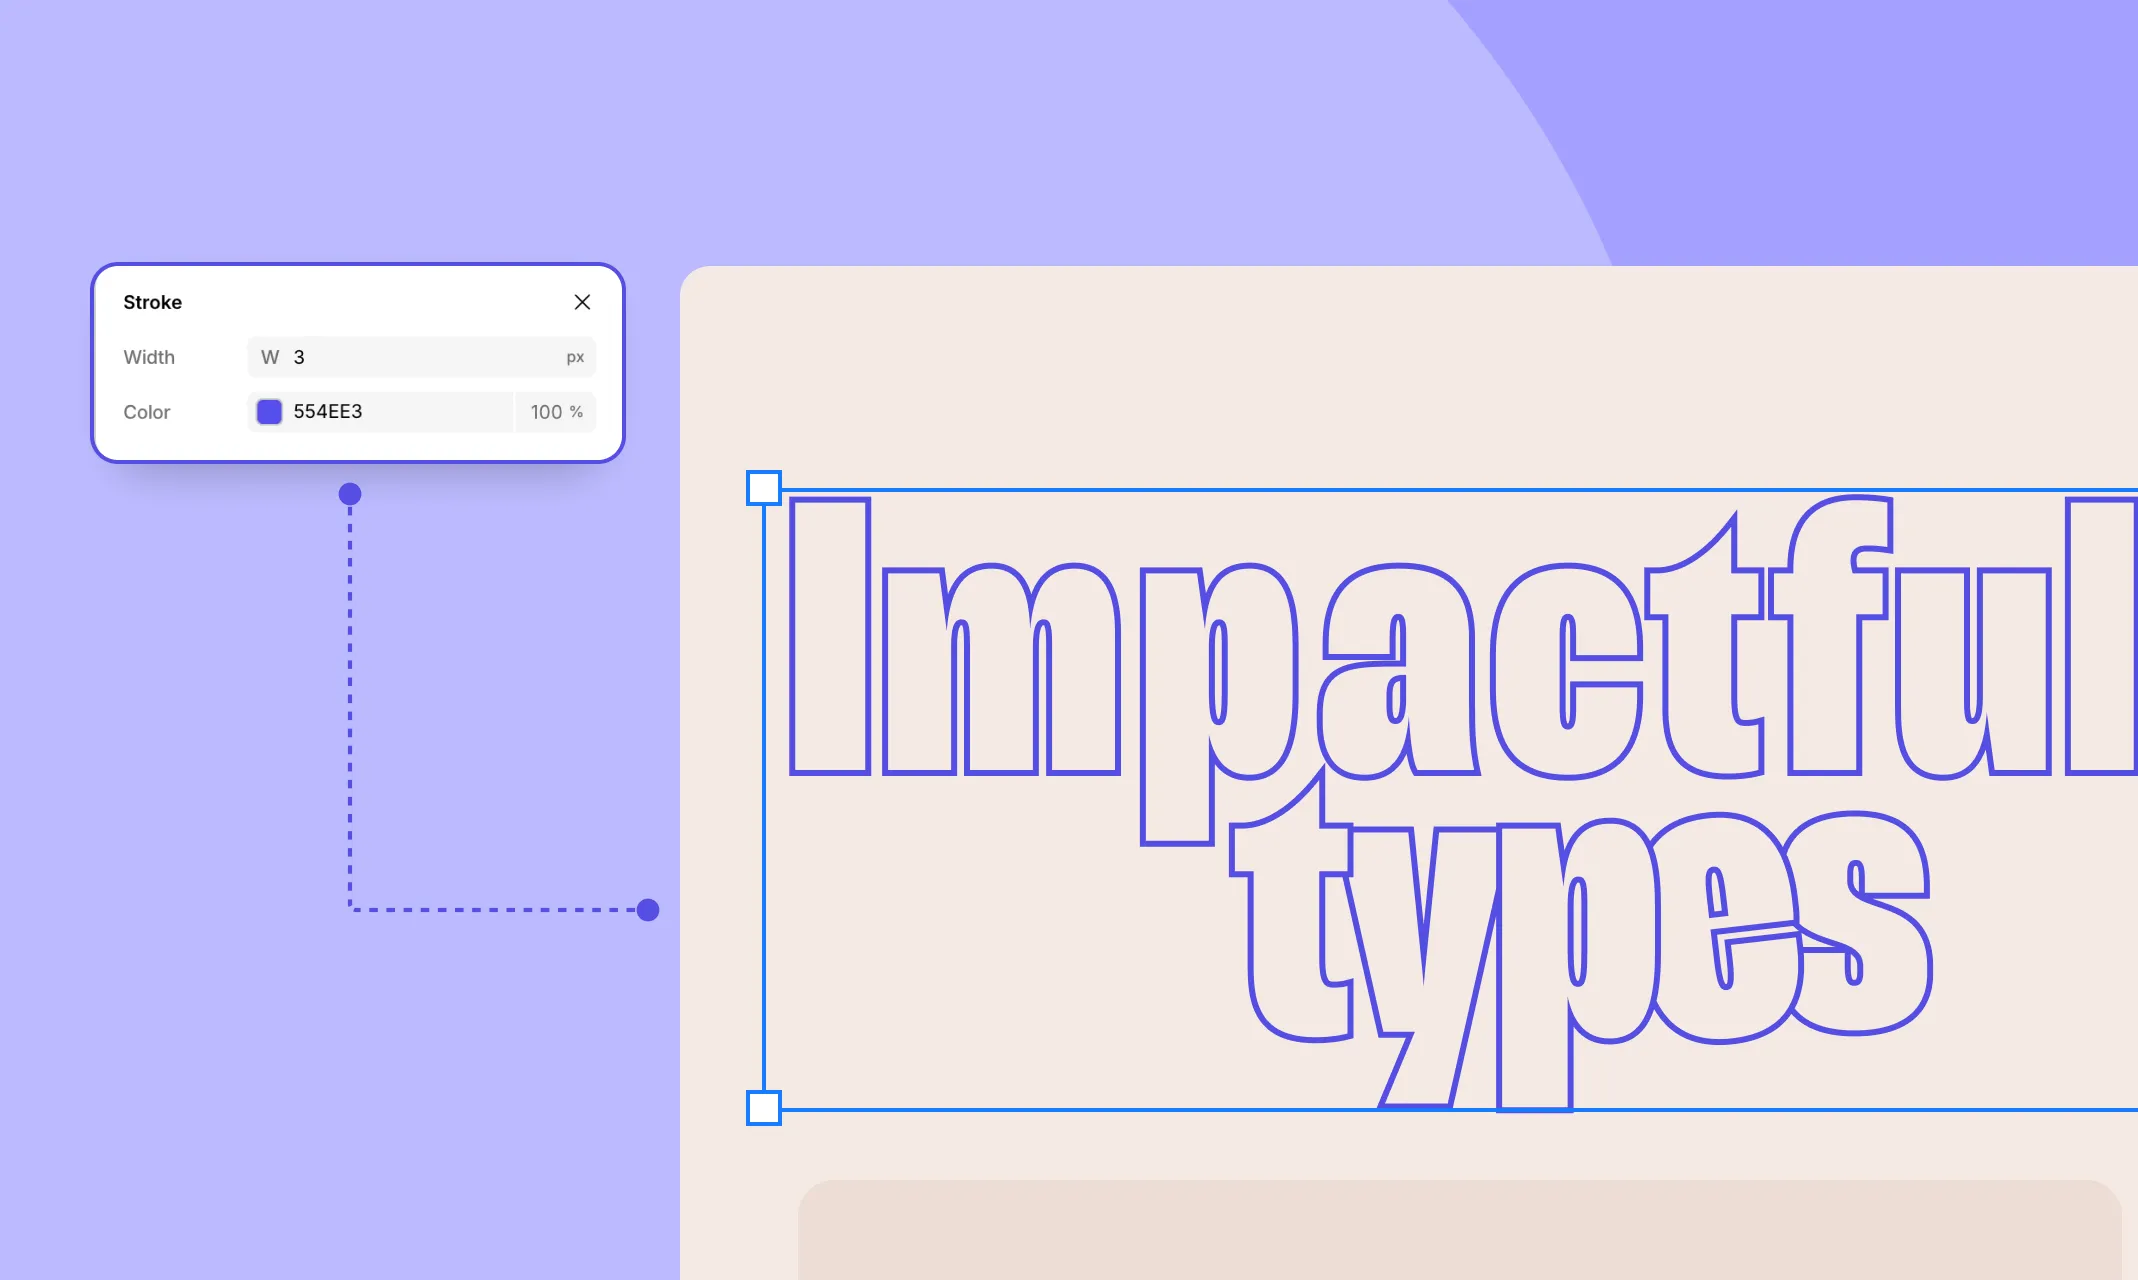
Text Stroke is another simple yet eye-catching text effect for websites you can easily apply with Kirki WordPress. This effect not only adds visual interest but also enhances readability and helps direct user focus!
To create a text stroke effect, follow these steps:
Step 1: Add a text element and type in your desired text.
Step 2: Head to Typography Panel > Advanced Font Editor and set the Text Stroke size, color, and opacity.
Step 3: Finally, adjust the text color and its opacity. For a transparent outline effect, set this opacity to 0%.
And just like that you have your text stroke effect! Now, you can use it as it is or even pair it with other effects to add more interest!
Visually Craft Engaging Text Animations
Now let’s dive into one of the most attention-grabbing effects — Text Animations for websites!
Website interactions, especially text animations, are excellent for capturing audience attention and effectively delivering your message. However, they can often be too complex to create.
Not with the Kirki however!
The Kirki WordPress website builder includes a powerful visual interaction builder that makes crafting creative text animations effortless.
For example, here’s how you can implement Fade-to-Bold Text Animation on Scroll for a Single Line Heading:
Step 1: Add a section & a heading element, style your heading, and add your content.
Step 2: In Layers > Components, find your heading element’s class. Open its CSS Preview and add the property white-space: nowrap.
Step 3: From Effects, set Opacity to 10% and change the Position to Absolute. Your initial faded text is now all set.
Step 4: Duplicate the heading, assign it a new sub-class from Class Manager, and reset Opacity to 100%. This will be your bold text.
Step 5: To keep the bold text hidden initially, set its Width to 0% and Clip Content to Hidden from the Size panel.
Step 6: Now, select the original faded heading and, in the Interactions panel, select the scroll into view trigger under the Element tab.
Step 7: For Scrolled In, select the bold text element from the layers panel and add the Size action. Set its Width to 100%, Duration to 2000ms, and Delay to 100ms. You can also use the Custom Timing Editor to further tailor this transition.
Step 8: Finally, duplicate this to Scrolled Out and reset Width & Delay to 0.
Design With Custom Fonts
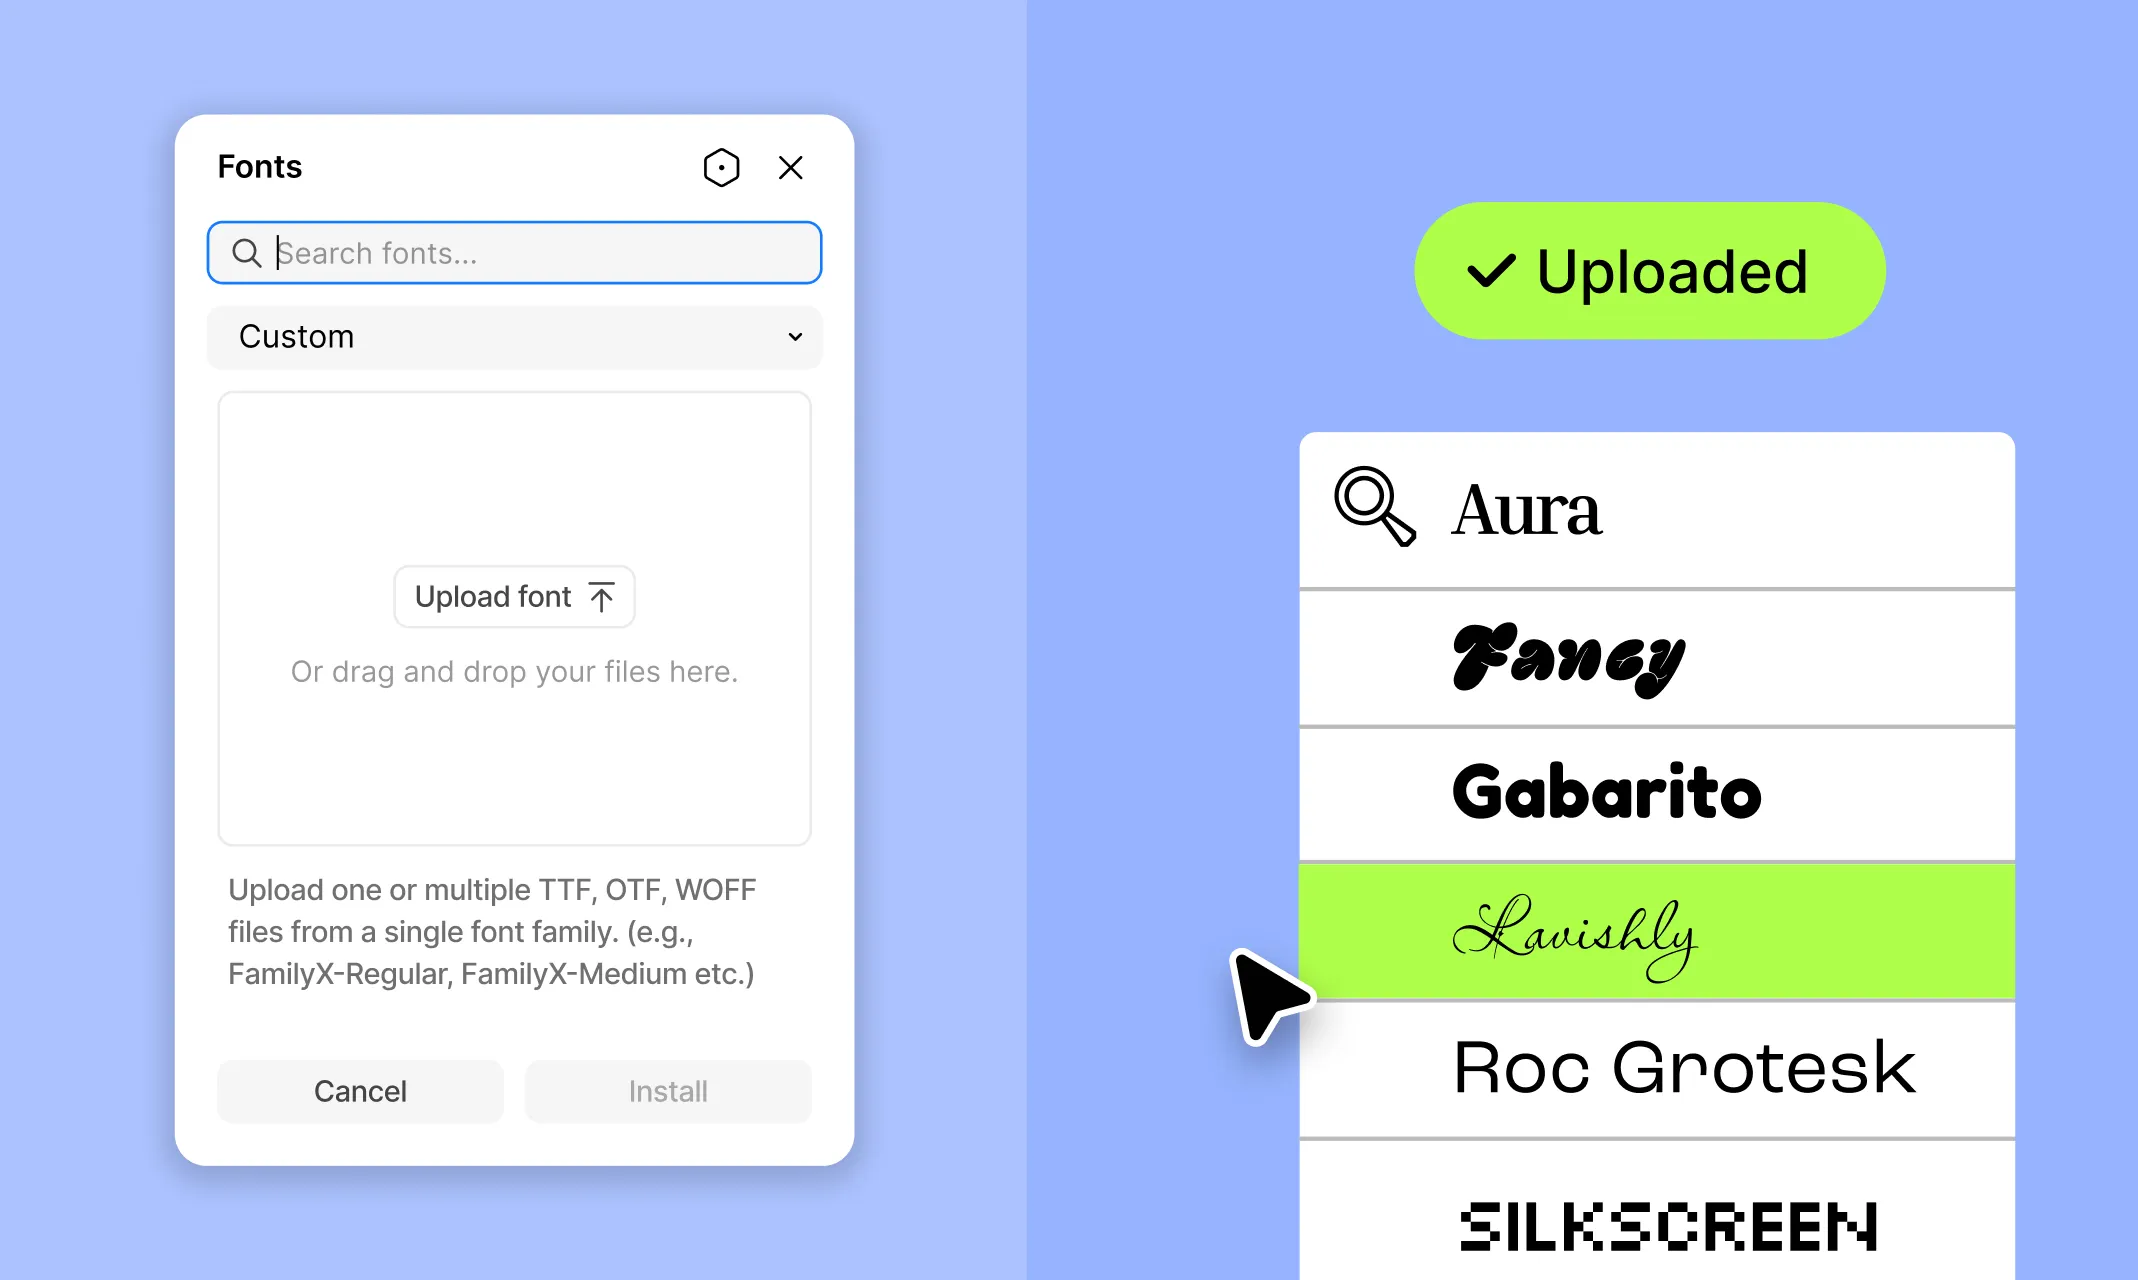
Finally, with Kirki, you can not only choose from a wide range of Google Fonts but also upload your own Custom Fonts to truly craft a unique visual brand identity.
To upload custom fonts, follow these steps:
Step 1: Open the Topbar menu (≡) on the Kirki editor and select the Upload Custom Fonts option.
Step 2: In the panel, navigate to the third tab and upload your custom font in the form of a webfont kit zip file. If your font isn’t in that format, use the provided link to a Webfont Generator, follow the instructions to convert your TTF or OTF font file, and then upload it.
And just like that, you’ve successfully uploaded your custom font!
You can now access these fonts from the Typography panel on Kirki and even use the web page builder’s extensive capabilities to apply any of the CSS text effects we’ve covered and beyond!
Microtips for Improving Readability
Before you go, here are a few tips to keep in mind when it comes to text styling for websites, in order to enhance website readability and overall user experience:
- Balance Frequency of CSS Text Effects: Use CSS text effects strategically across your website to avoid overwhelming your audience and diminishing their impact.
- Choose the Right Font for the Right Effects: Pair fonts with effects that complement their style to ensure good readability and visual appeal.
- Maintain Good Contrast: Ensure there’s sufficient contrast between text and background to improve legibility, especially when using effects.
- Optimize Responsiveness: Make sure your text & text effects are optimized for all screen sizes to ensure a seamless website experience. Luckily, Kirki’s unlimited breakpoints can help you achieve this with ease.
Unlock the Power of Text Effects for Websites
So, that was our take on the top text effects to level up your web design game! But this is just the tip of the iceberg — with Kirki WordPress website builder, you can visually implement any CSS text effects for websites imaginable!
So what are you waiting for? Start crafting captivating and effective websites today with Kirki, the best website builder out there for all your text styling needs!