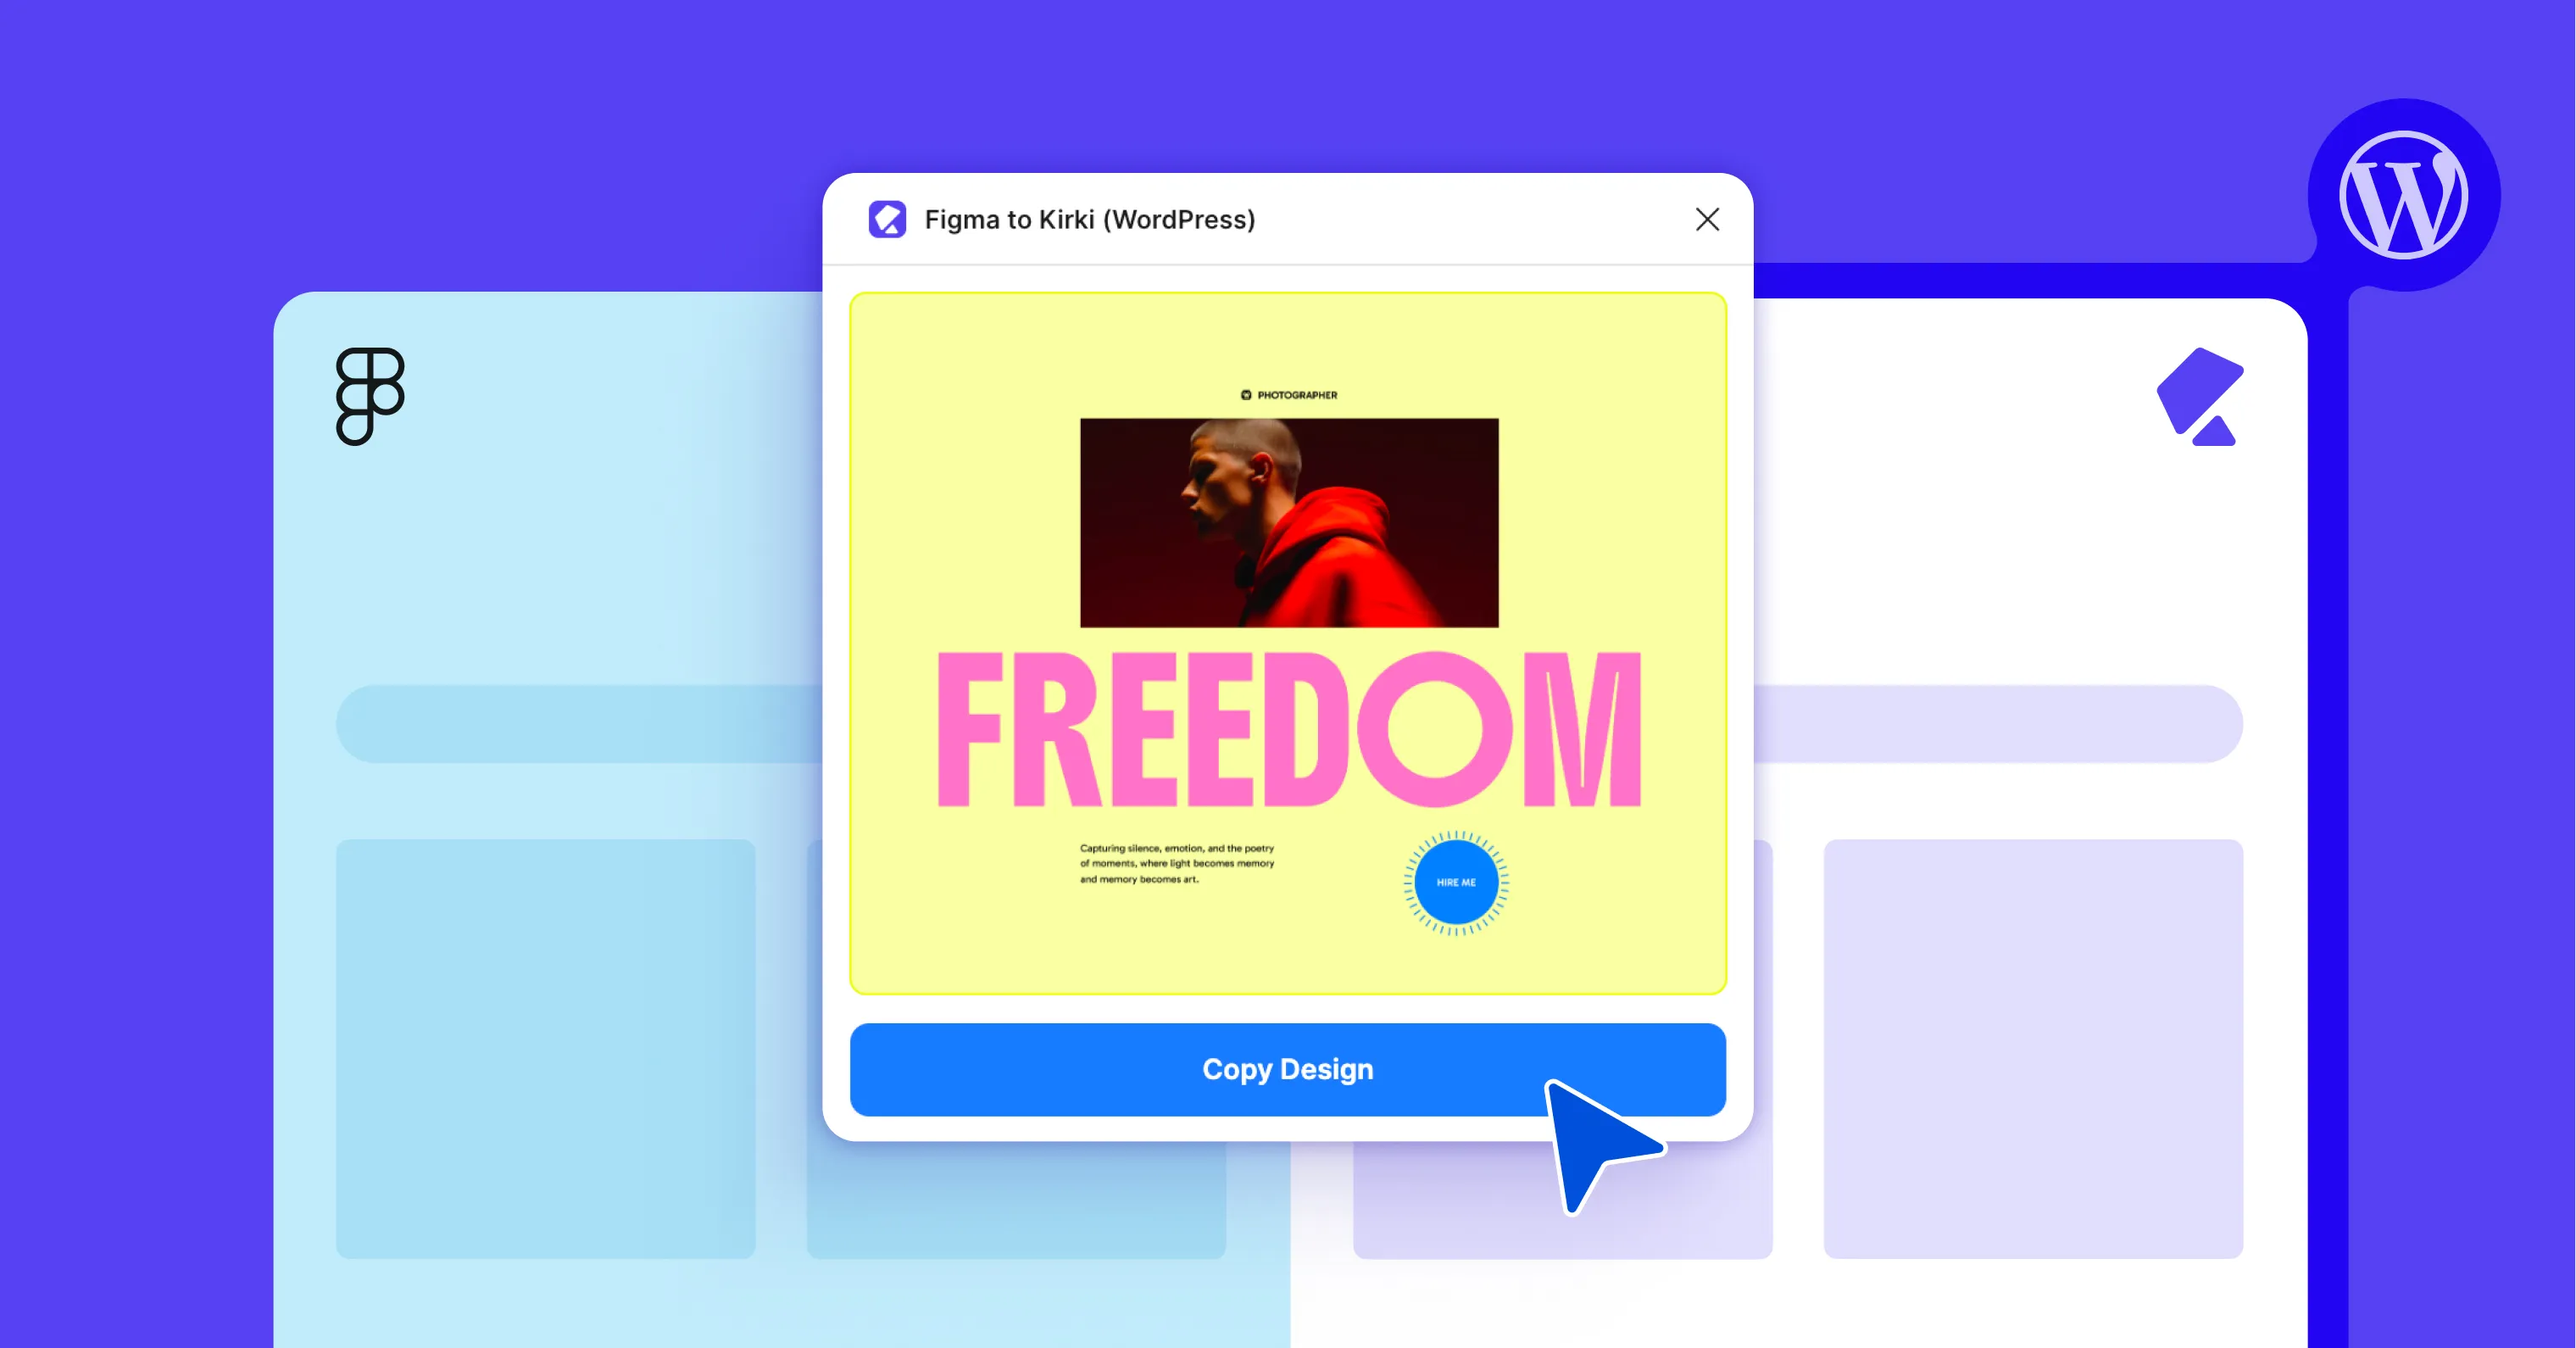
Most design-to-development handoffs go the same way: a finished Figma file gets handed to a developer, who then rebuilds it, pixel by pixel, inside a page builder. It’s slow, tedious, and things get lost in translation.
Kirki closes that gap.
With its Figma to Kirki plugin, you can turn any Figma design into a WordPress website without any manual coding or rebuilding from scratch – it simply reads your Figma layers and turns them into real, functioning elements inside Kirki’s visual canvas, instantly.
It’s free to use, but the quality of your output depends on two things: how well your Figma file is built with Kirki in mind and how well your Kirki project is prepped to receive it.
Get both right, and you’ll get a fast, accurate conversion that’s responsive right out of the box.
What You Need
- A Figma design
- A WordPress website with Kirki
- The Figma to Kirki plugin, installed in Figma
How to Import a Design From Figma to WordPress
Here’s the full process for turning a Figma design into a live WordPress site with Kirki, from prepping your files to publishing.
Step 1: Prep Your Figma Design
This is where most of the magic happens – the step that decides how well Kirki can read the structure of your file. The more clearly that structure is defined, the more accurately it translates.
A few habits make the biggest difference:
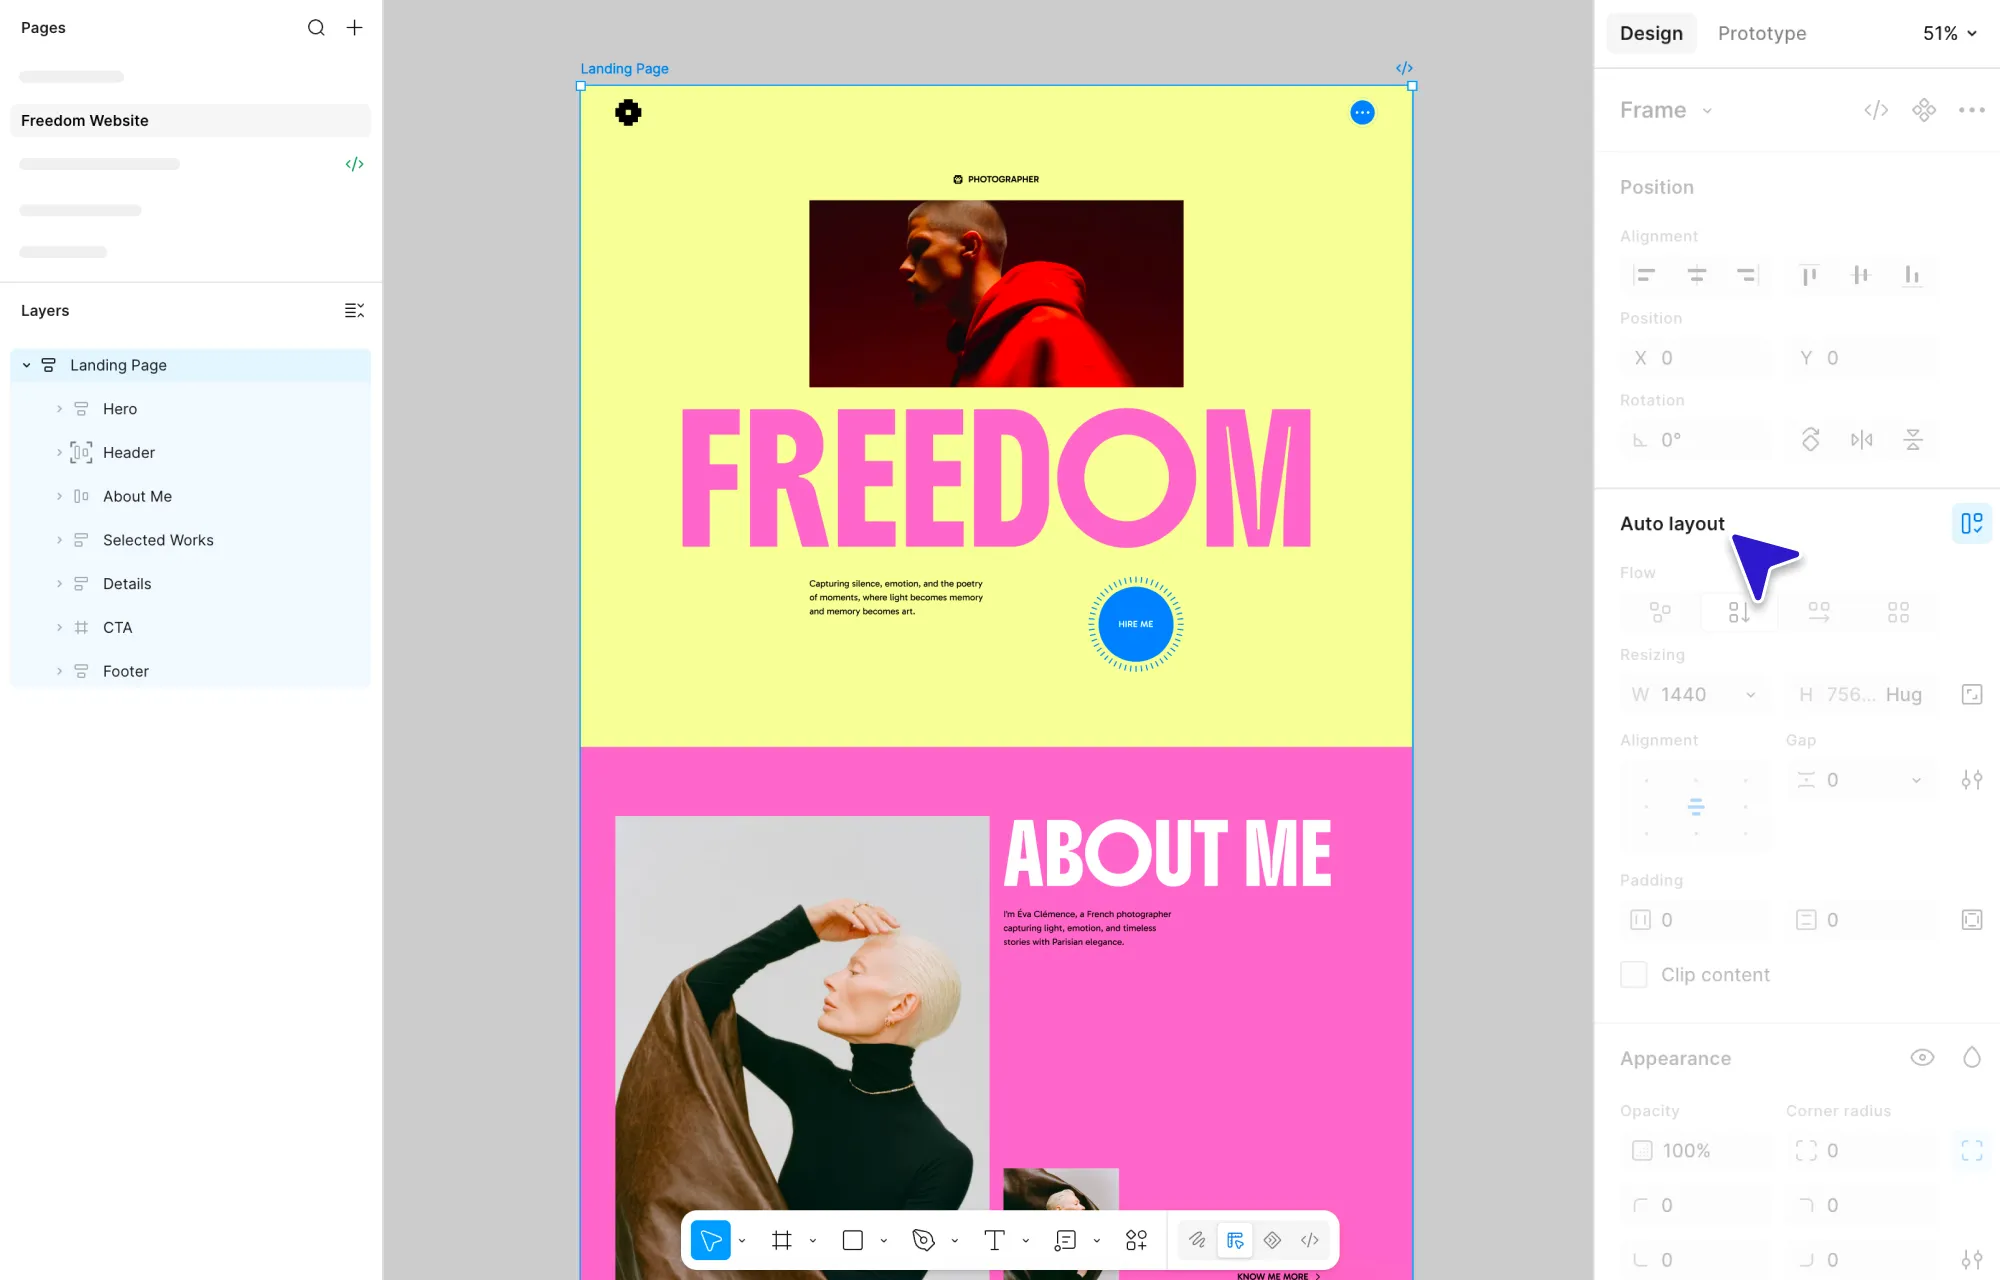
Wrap everything in Auto Layout frames, including the page and all the elements inside it. This is what carries over proper spacing, alignment, and responsiveness.
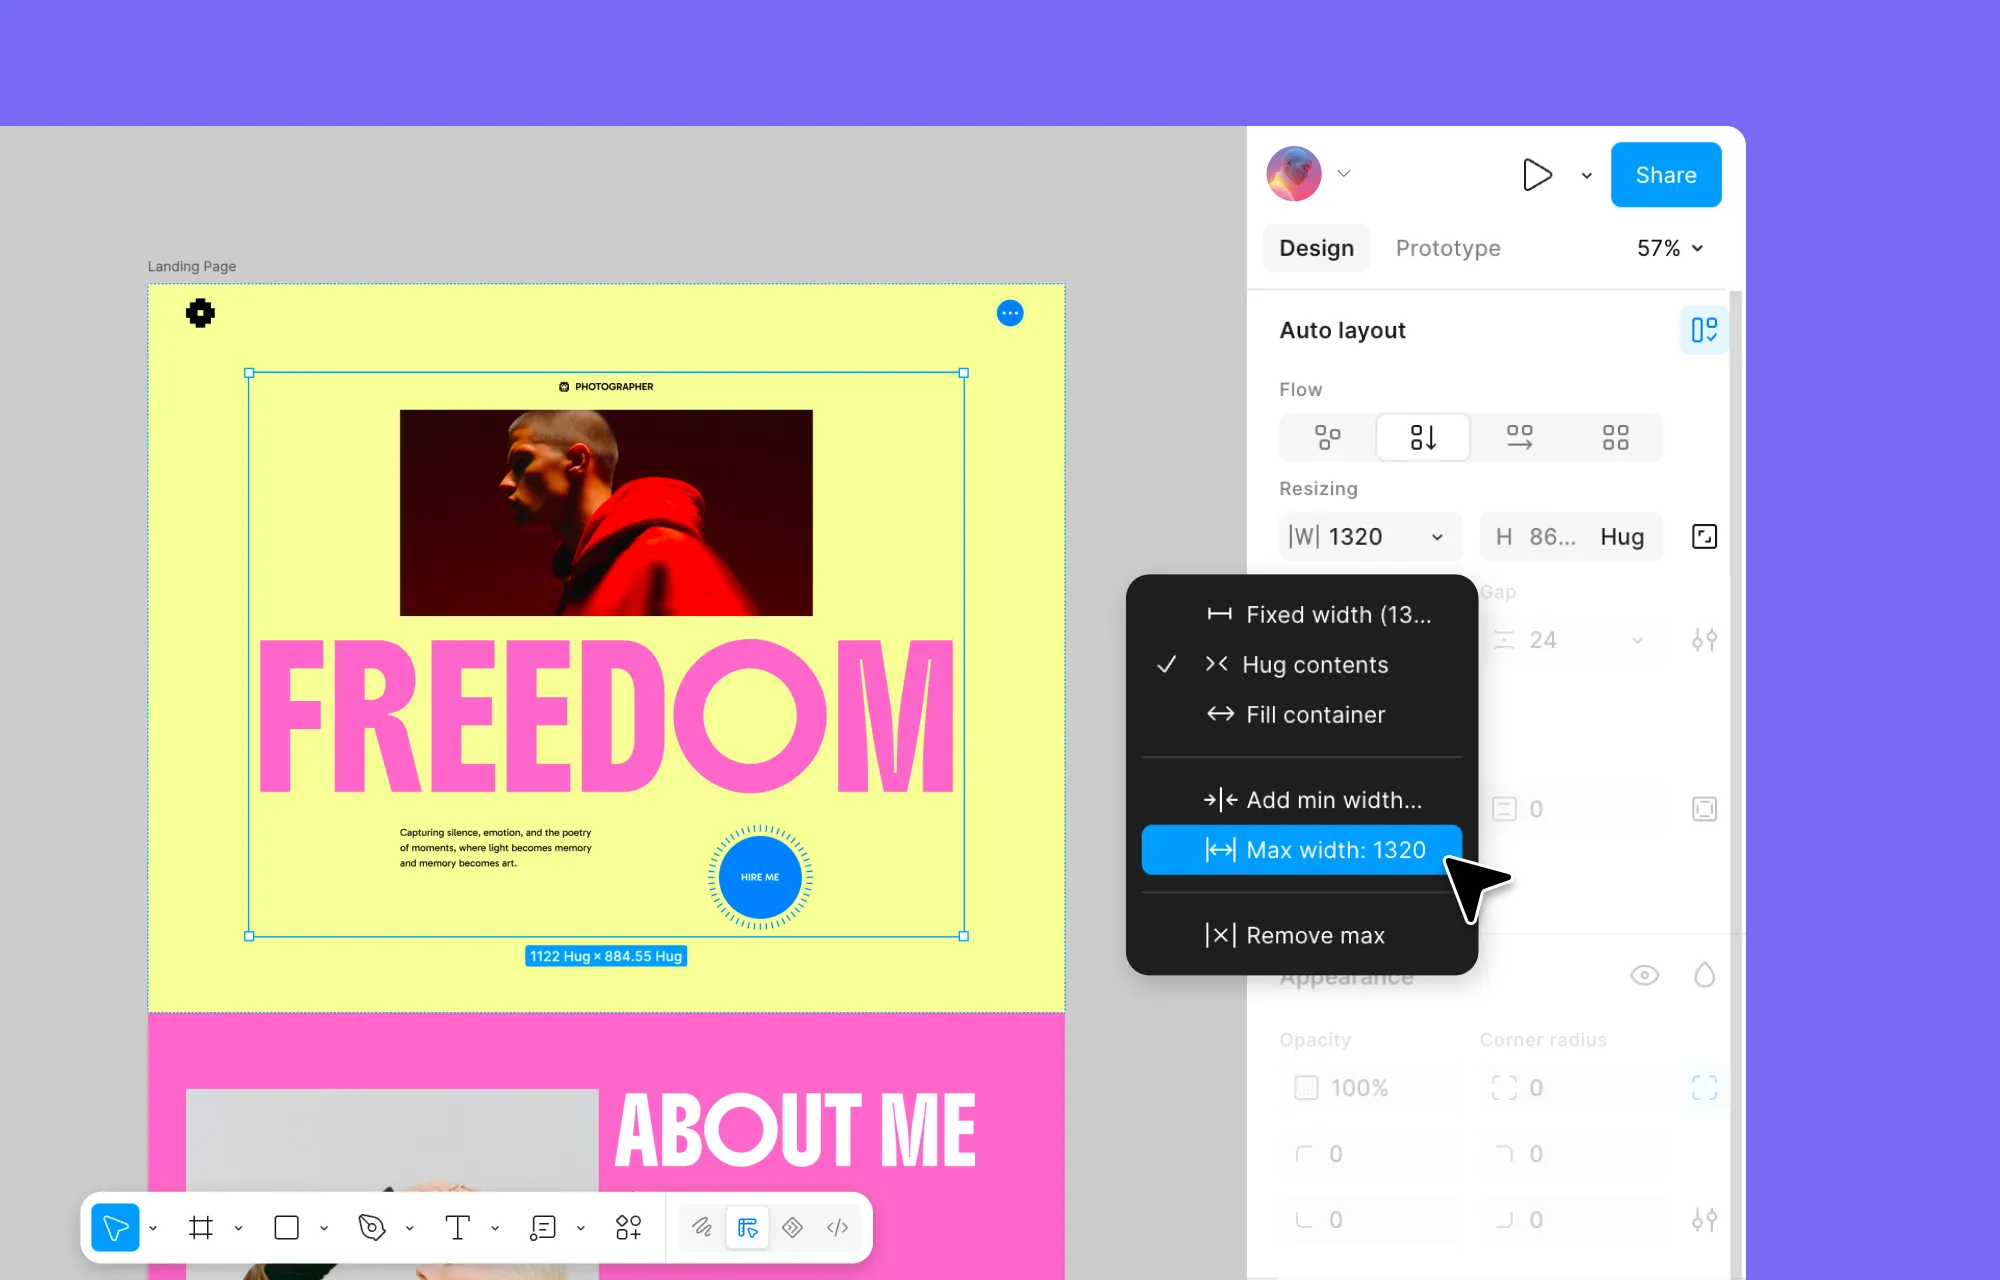
Add min/max constraints to any frame that needs to scale across screen sizes.
Group and name elements by what they are, using Kirki’s recognized keywords (Button, Form, Input, Textarea, Section, Container) so they come in as real, functional elements instead of static shapes.
Flatten complex vectors and icons so they don’t break or bloat the design.
Step 2: Prep Your Kirki Project
With your Figma file ready, switch over to Kirki and get the receiving end set up too.
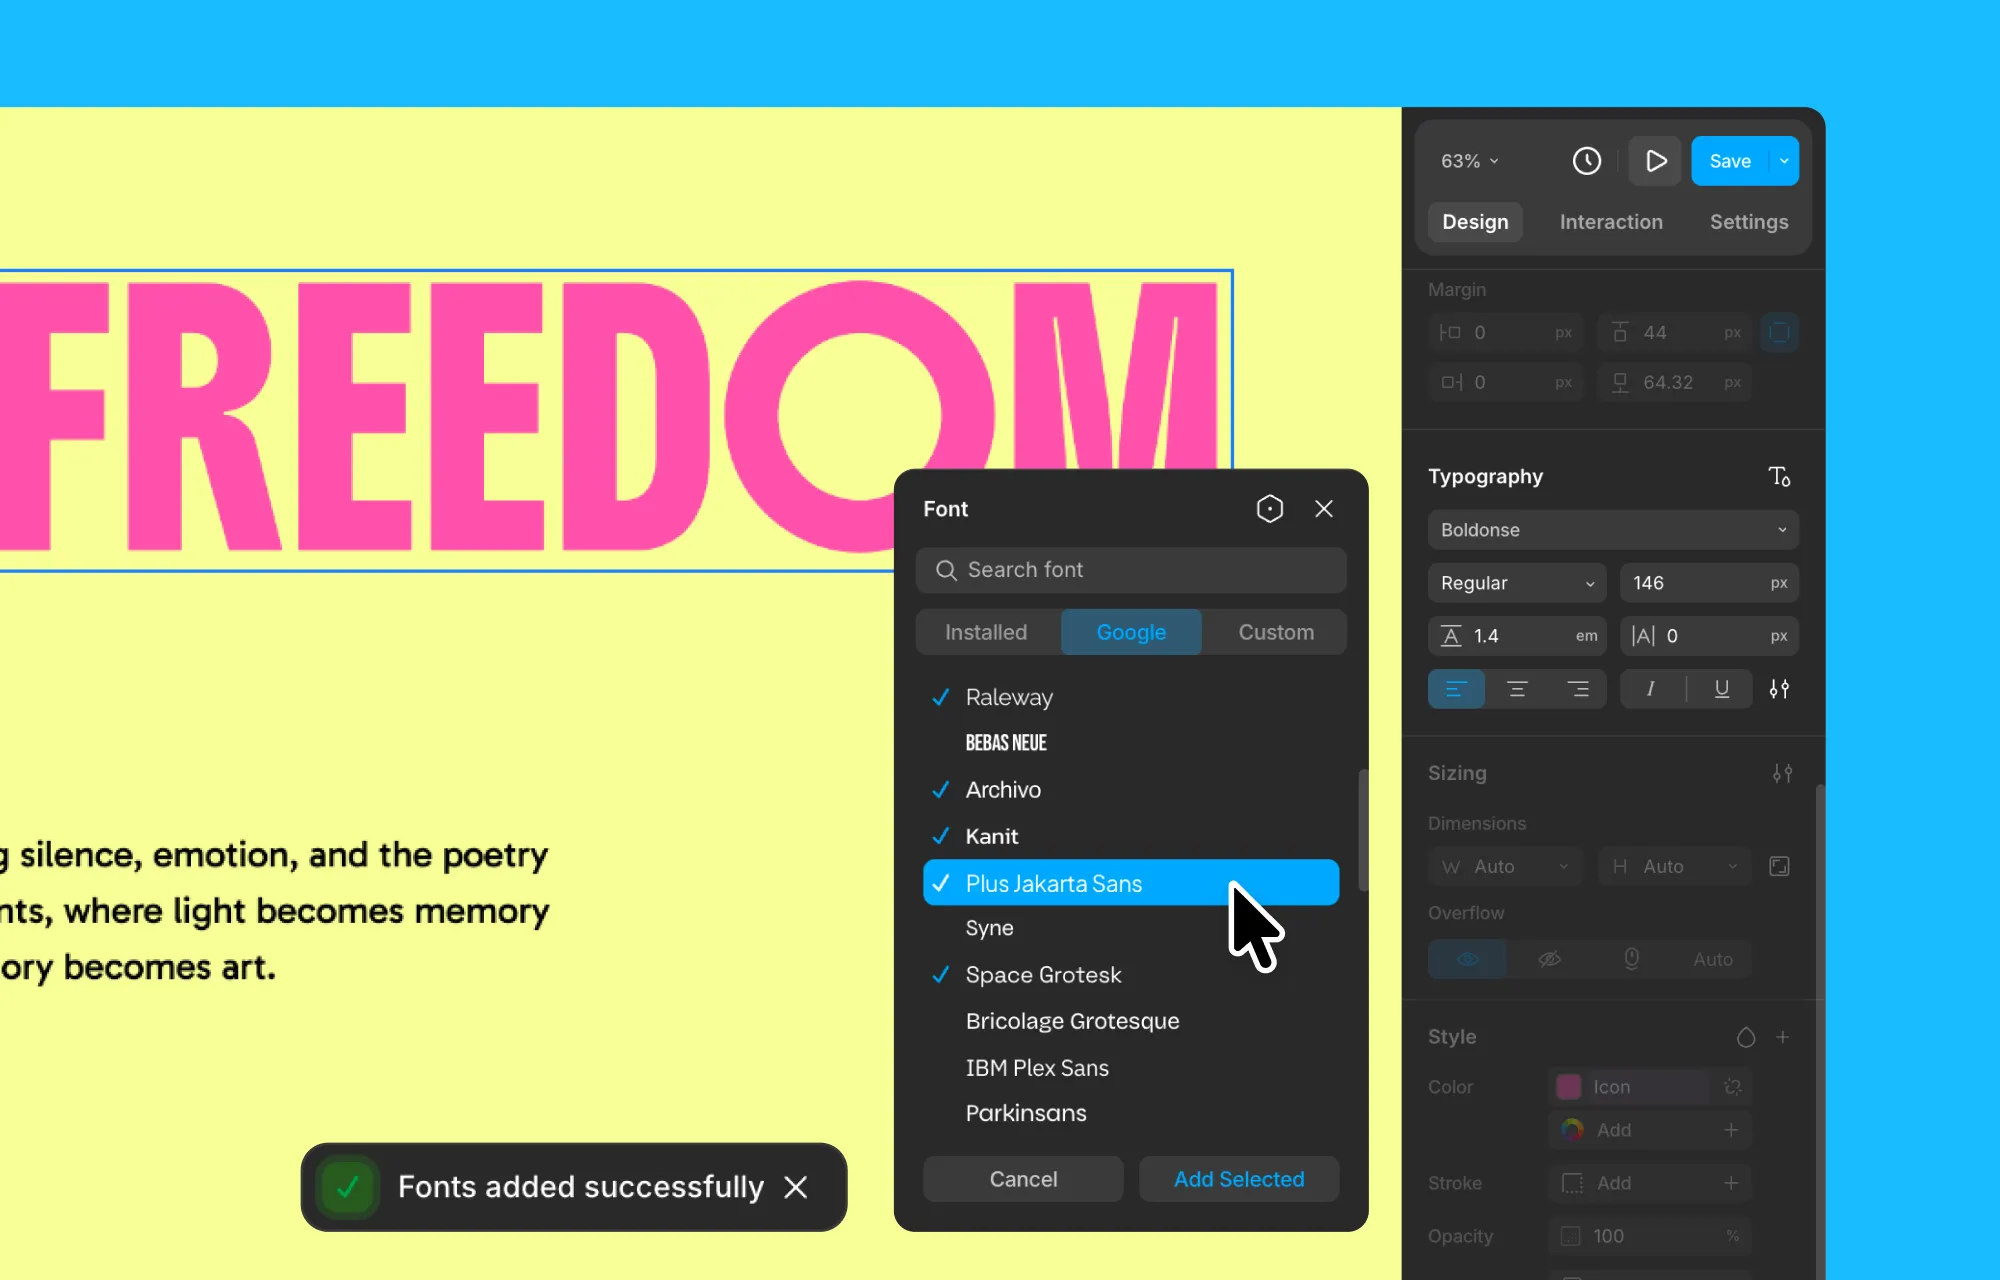
Start with fonts. Install any Google Fonts or Custom Fonts you used in your Figma design – Kirki supports both natively, so this is easy. Skip it, and your site quietly falls back to a default, undoing the typography work you put in.
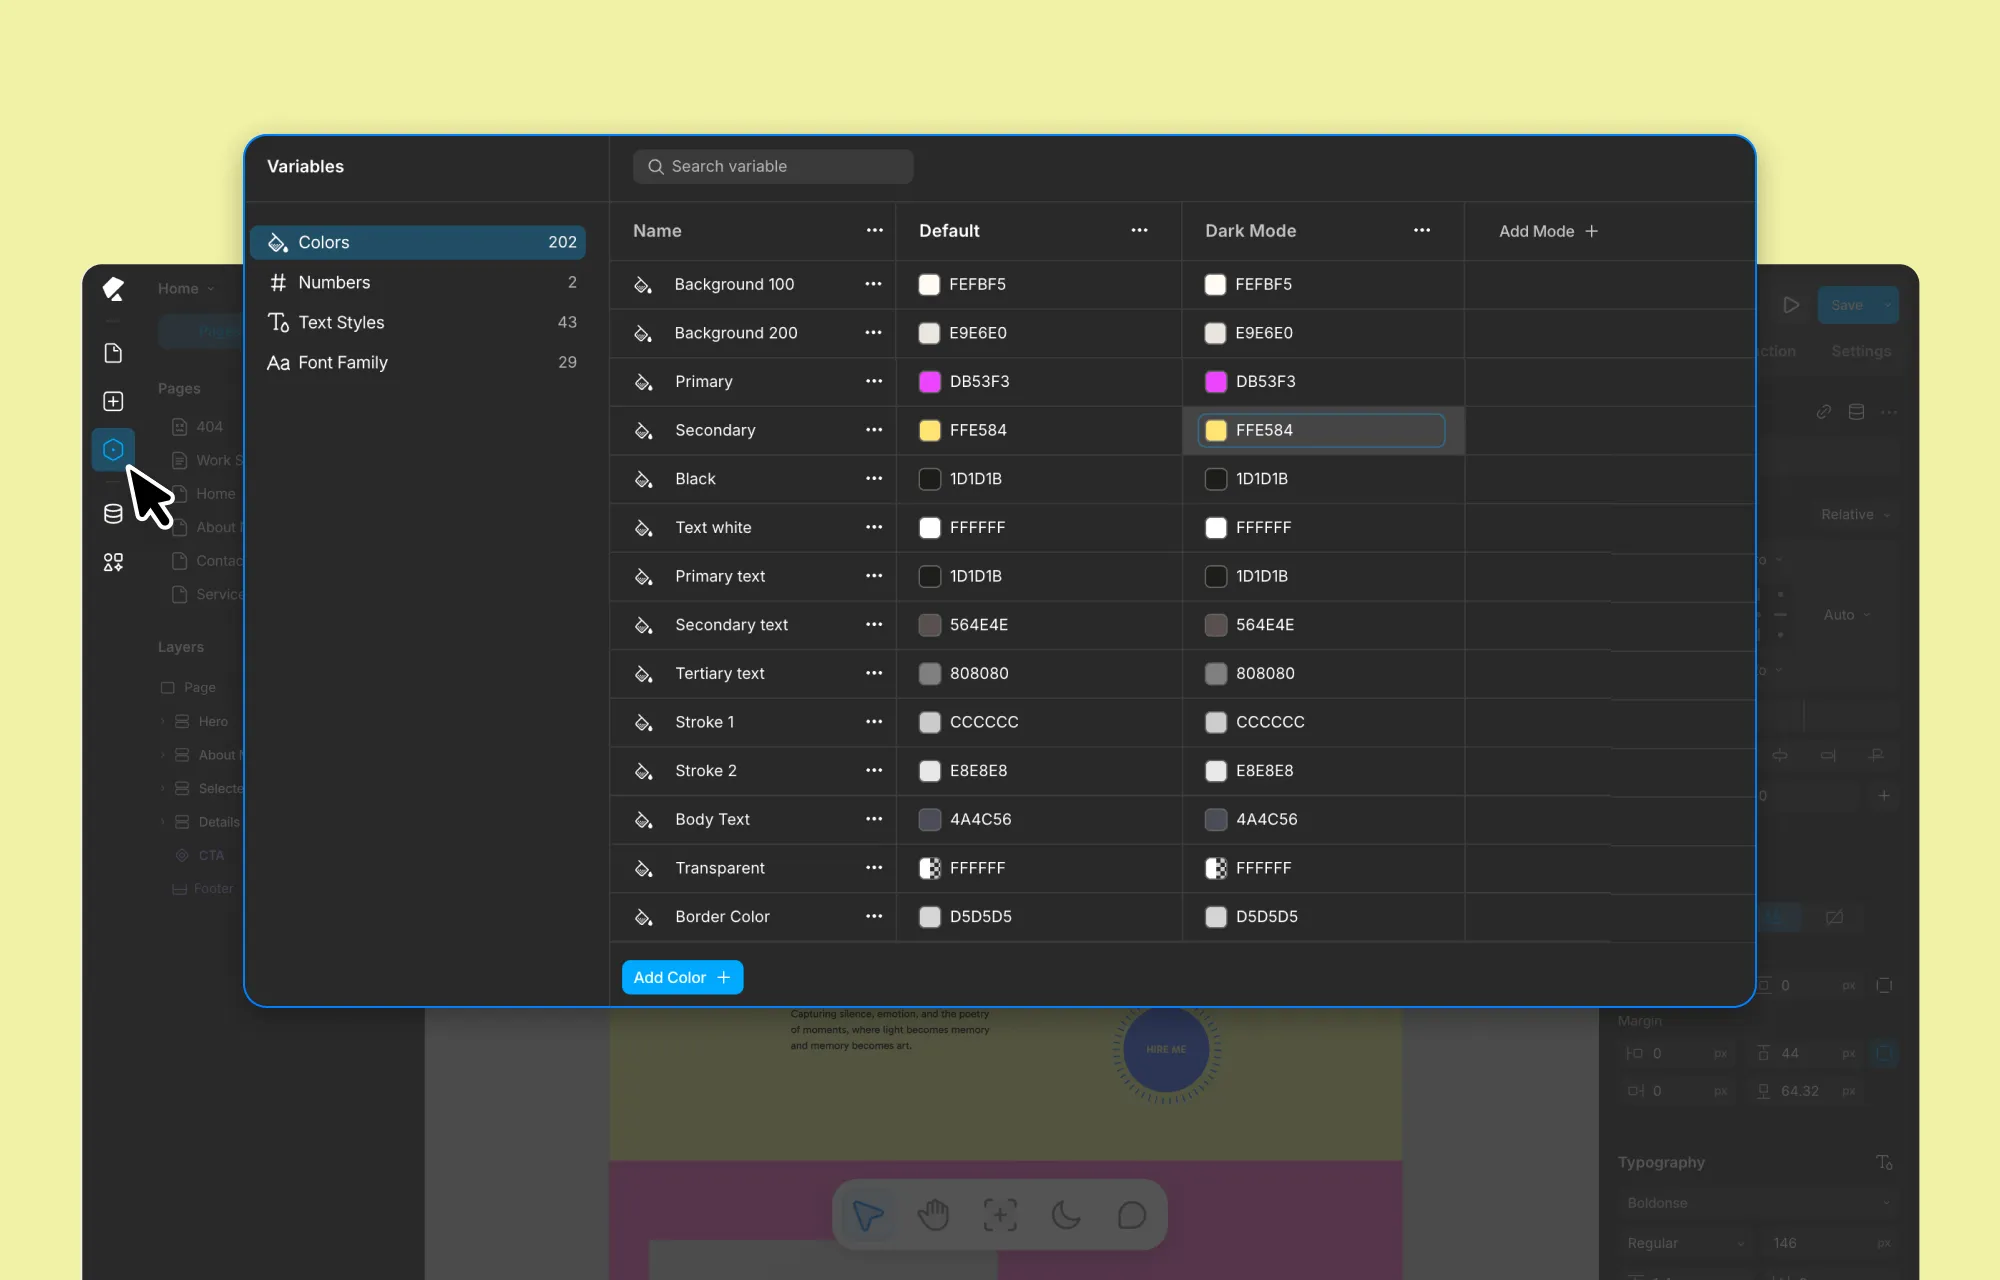
From there, set up your global styles using Variables in Kirki. Save your fonts, text styles, colors, and sizing, and connect them to your design so updates stay in sync and consistent across the site.
Last, if your design includes any repeated content – projects, team members, recipes, and the like – set it up as a Collection in the Dynamic Content Manager. Once your design is imported, you can connect it to that data, making your site easier to update and scale over time.
Step 3: Install Figma to Kirki Plugin
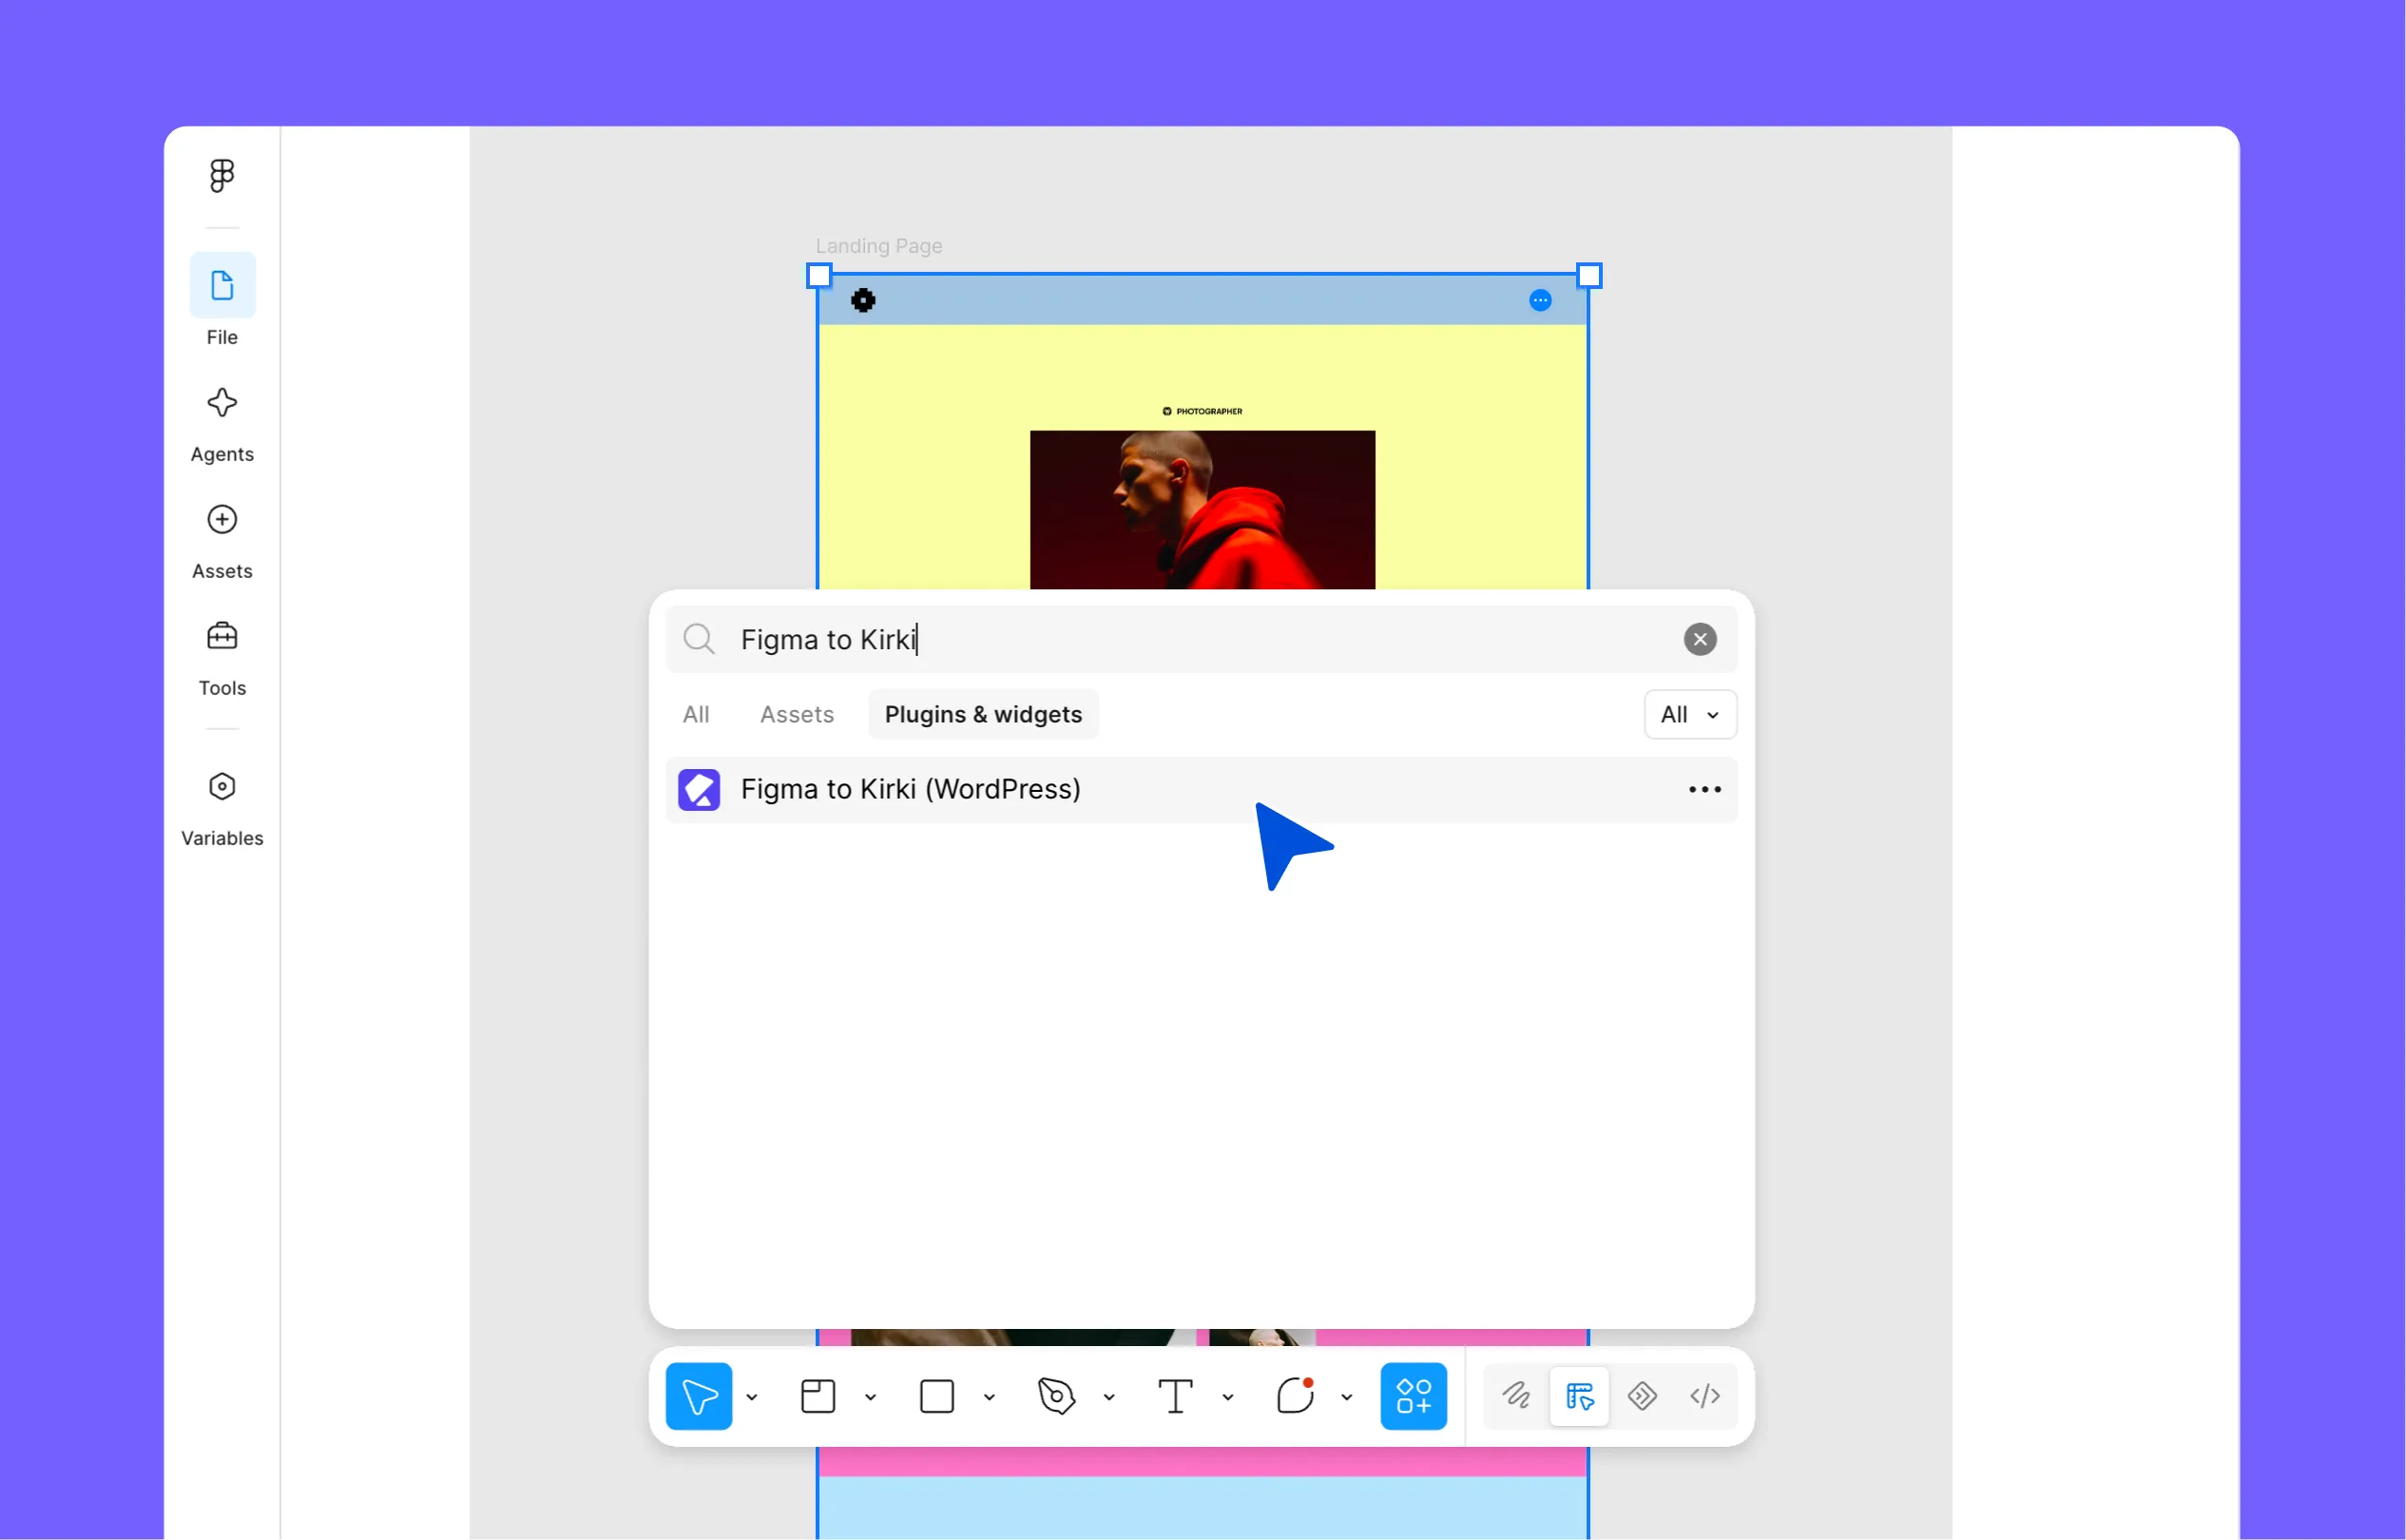
The Figma to Kirki plugin is available to install inside Figma, so head over to your Figma design and:
- Click the Actions icon in the bottom toolbar.
- Go to Plugins & widgets and search “Figma to Kirki”.
- Select Figma to Kirki (WordPress) and select Run.
Step 4: Generate & Copy Your Figma Design
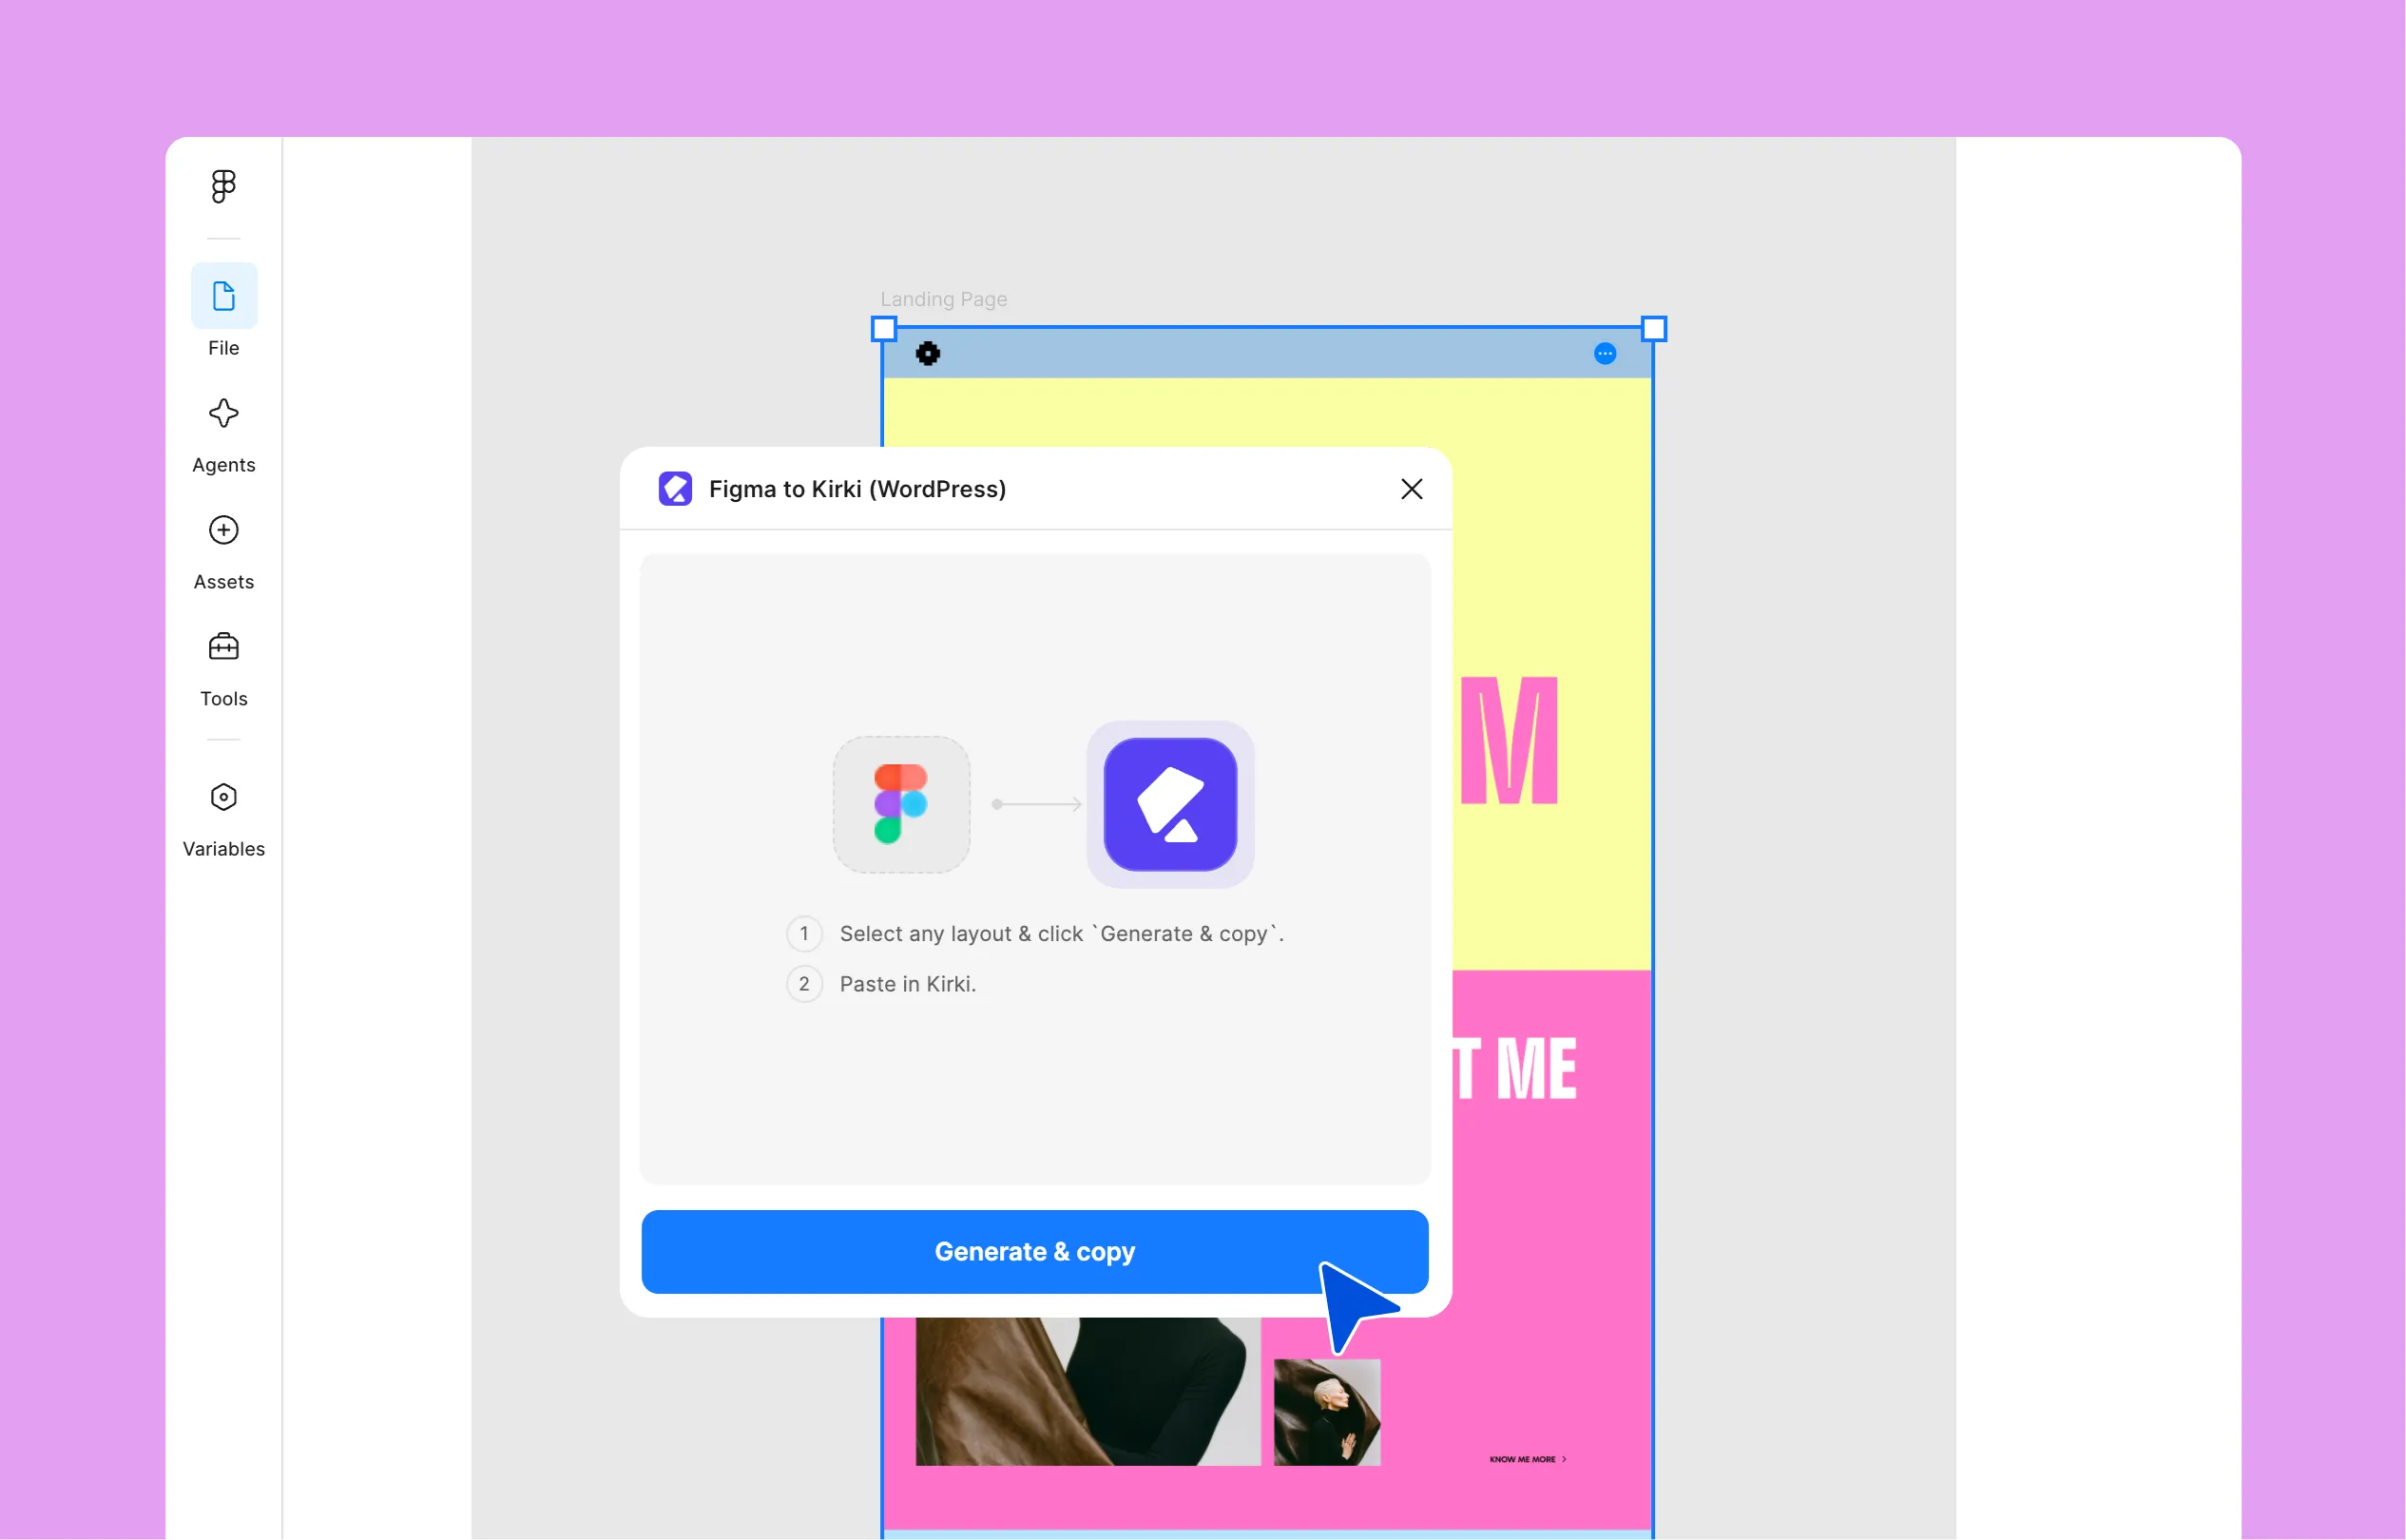
With the plugin installed, you’re ready to bring your design over. It only takes two clicks:
- Select the frame you want to convert.
- Click Generate & copy in the plugin panel.
You don’t have to convert the whole page in one shot, either – working section by section gives you more room to review as you go and ensures more accurate conversion.
Step 5: Paste Your Figma Design in Kirki
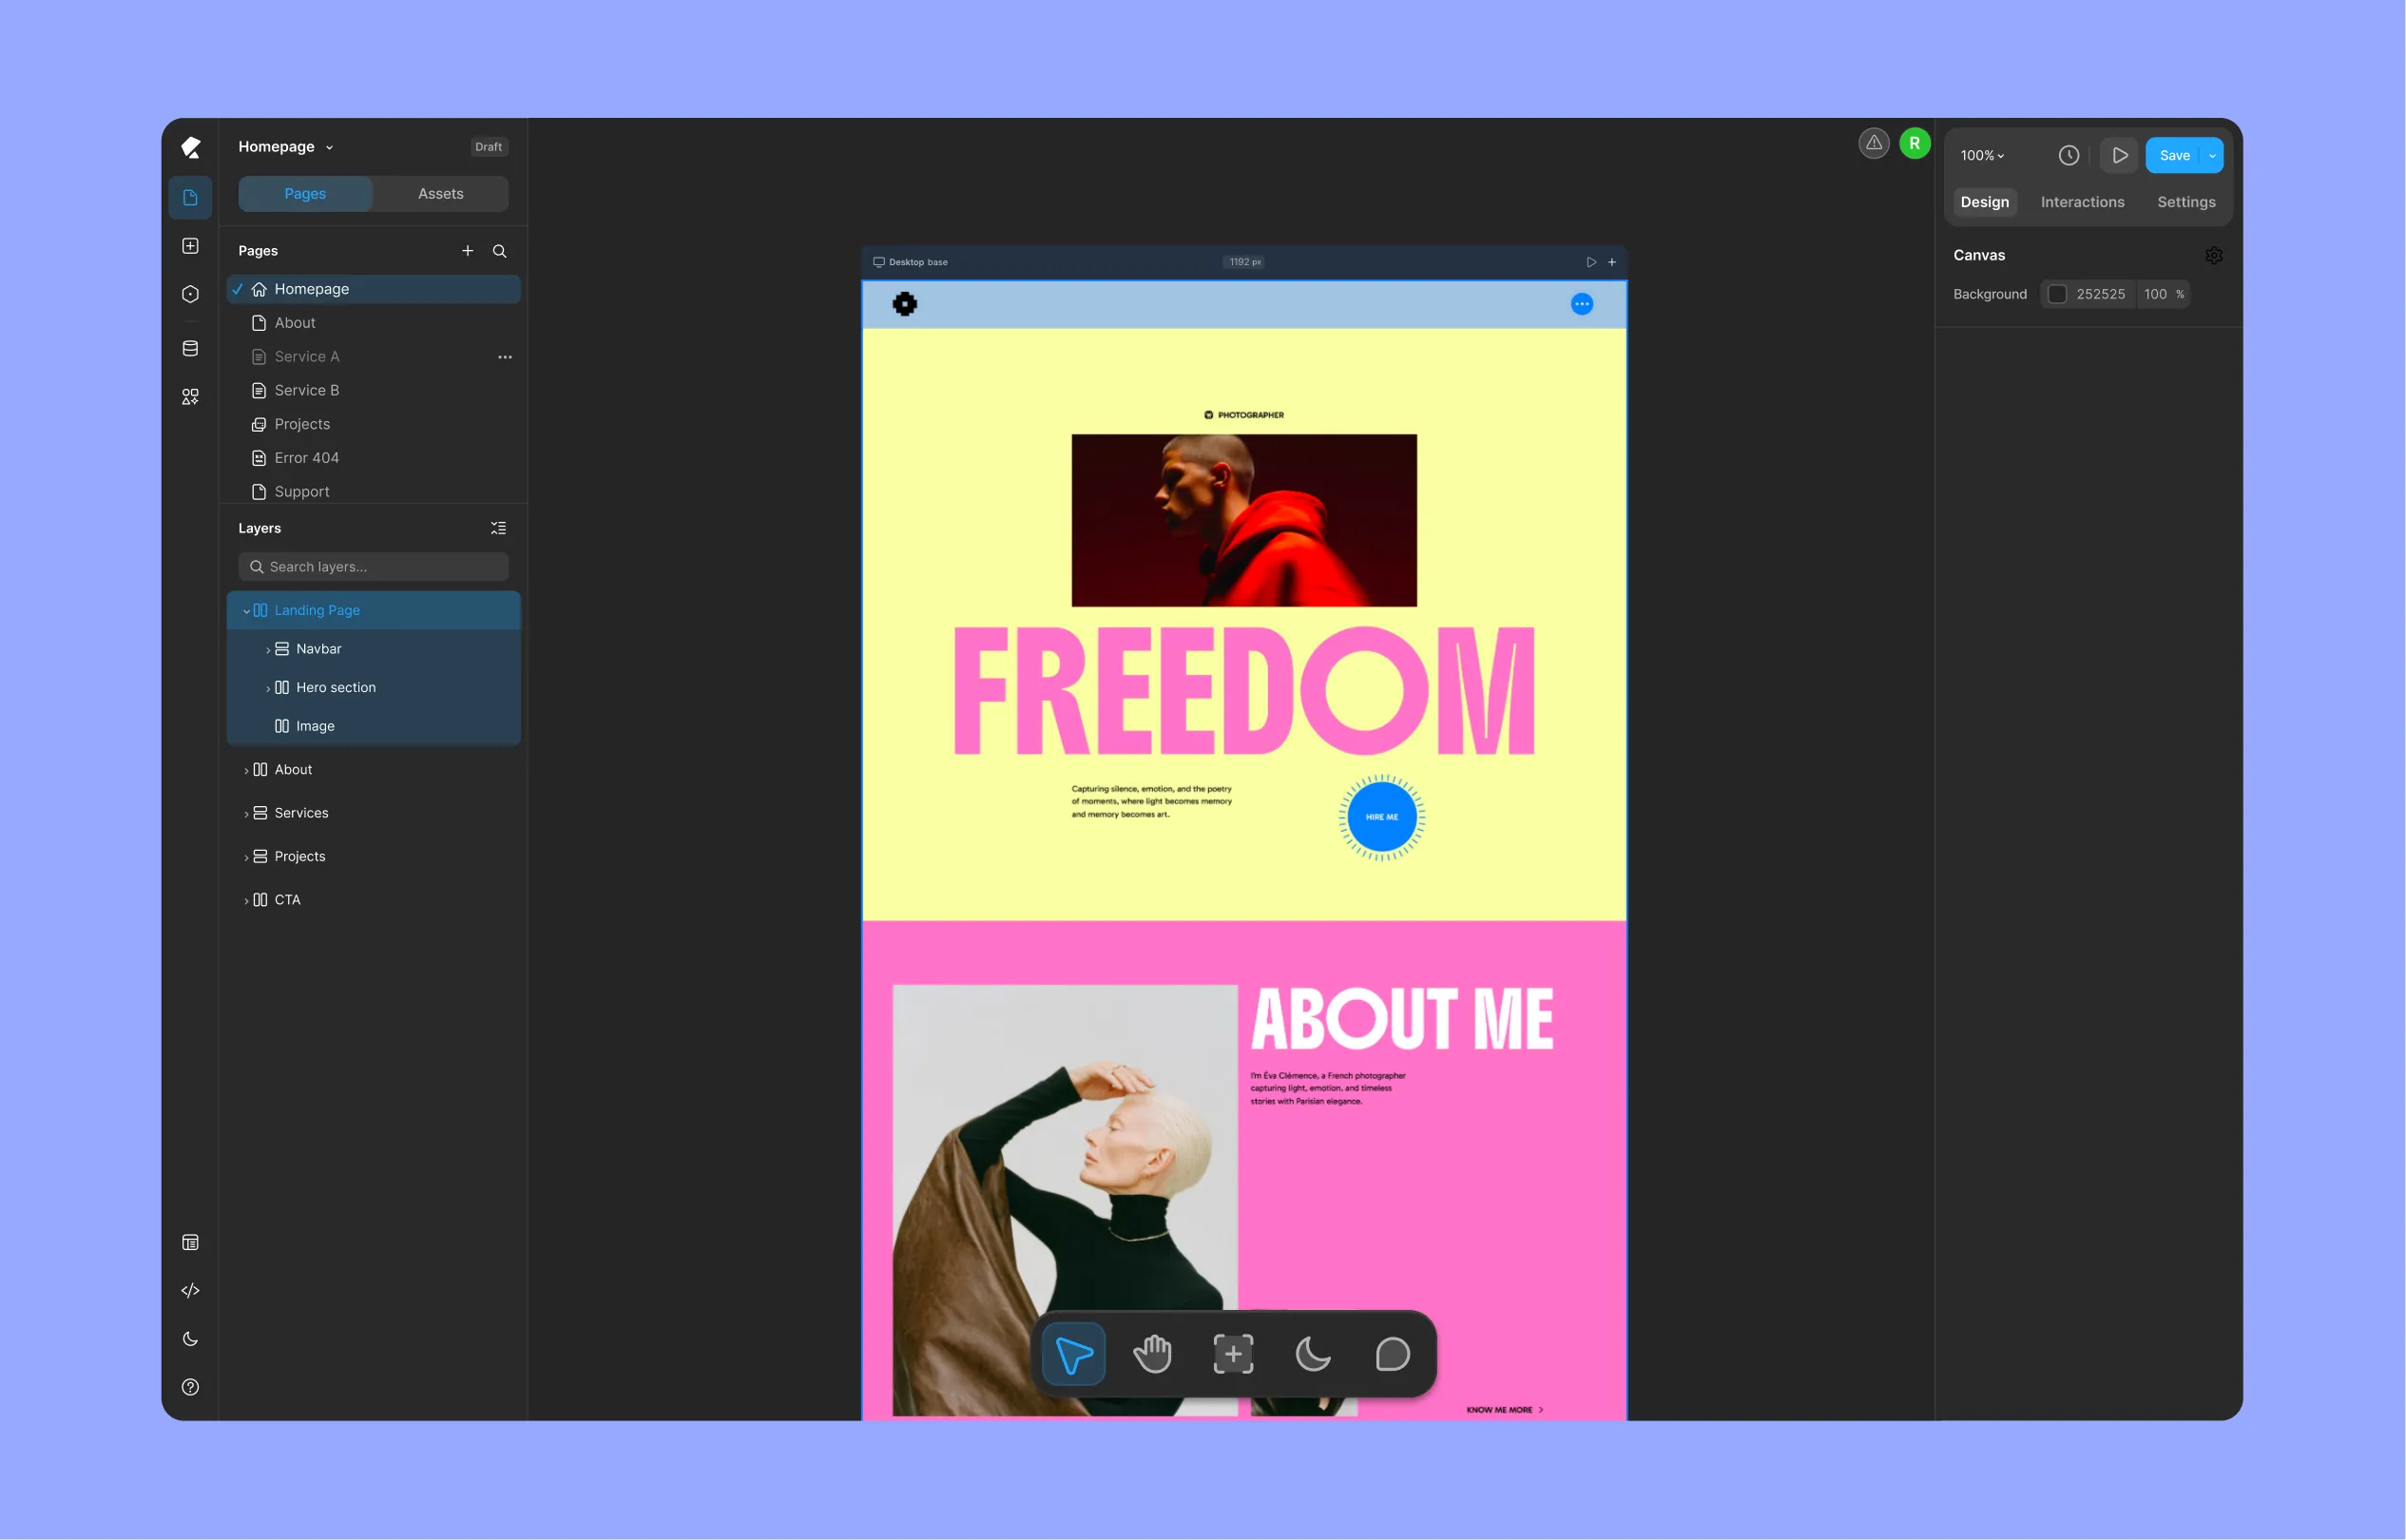
From here, it’s just a matter of getting your design into Kirki’s workspace:
- Open a page in Kirki, new or existing.
- Paste with Cmd + V.
And that’s it – your layout, styling, and spacing land exactly as they were in Figma. If you copied section by section, paste each one in turn until the full page is in place.
Step 6: Refine Your Site
This is where the design turns into a real, working site. What you just pasted in is still static without the functionality, so it’s time to connect it to Kirki’s tools:
- Link your fonts, colors, and sizes to the global variables you set up earlier.
- Swap static sections for Dynamic Collections wherever content repeats.
- Add quick effects, transitions, and scroll animations through the Interaction Library, and for something more complex, animate using the Interaction Response Editor.
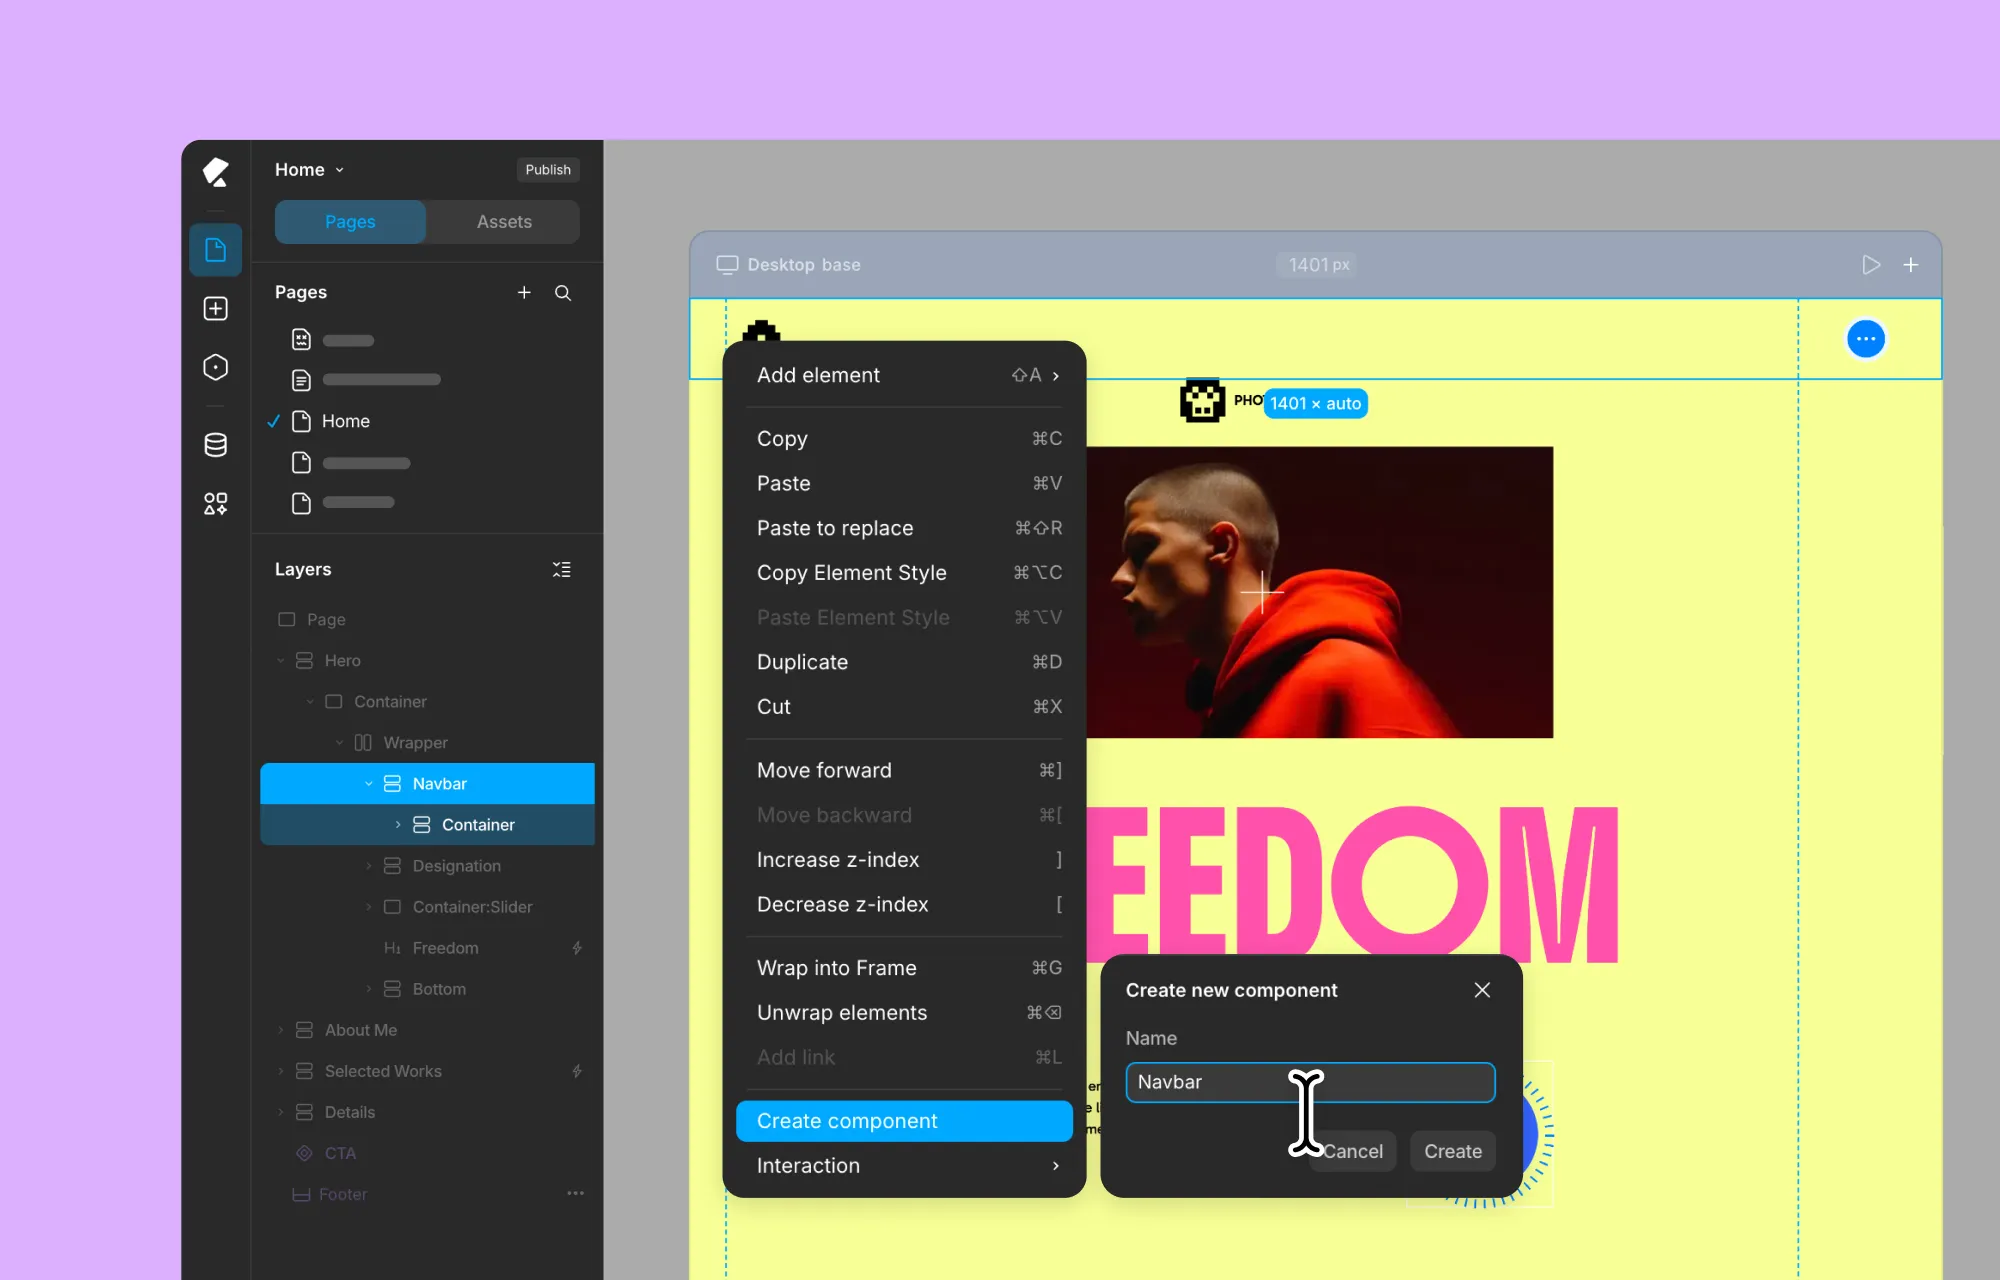
- Turn your header and footer sections into Header and Footer Components so they show up automatically across every page.
- Make any imported forms functional using the Form Builder settings, so submissions actually go somewhere.
- Build out any pop-ups from your design using the Popup Builder.
- Connect additional tools and functionality through Kirki Apps.
Step 7: Preview and Publish
Once everything’s connected, give the site a look across breakpoints to make sure it holds up on every screen size. You can also use the Audit tool to make sure you don’t have any missing links, alt text, etc.
When you’re happy with it, go ahead and publish – and just like that, your Figma design is officially a live WordPress site.
Frequently Asked Questions
Yes, the Figma to Kirki plugin is free to use.
No, it works on Figma’s free plan.
No. The plugin converts your Figma layers into functional elements automatically.
Yes, if you follow all the recommended best practices – Auto Layout framing in Figma, proper naming of things using Kirki keywords, installing the fonts used in Kirki, etc.
Yes. Once imported, everything becomes a real, editable element inside Kirki’s canvas – not a static screenshot – so you can keep adjusting fonts, colors, spacing, and content after the fact.
Yes. Select any individual frame and click Generate & copy to bring in one section at a time. And while there’s no hard limit on import size, working in smaller sections is recommended for the best results.
Yes, images and icons carry over as part of the import.
Final Thoughts
Design and development don’t have to be two separate stages that slow each other down. With Figma to Kirki, the file you’ve already built becomes the foundation for your live site – no handoff, no rebuilding, and no waiting on a developer to translate your work into code.
Spend a little time getting your Figma file and Kirki project set up right, and the rest of the process takes minutes. And from there, it’s just a matter of refining, previewing, and hitting publish.
Want to test the Figma to Kirki import before trying it on your own file? Try it out with this sample Figma file.

