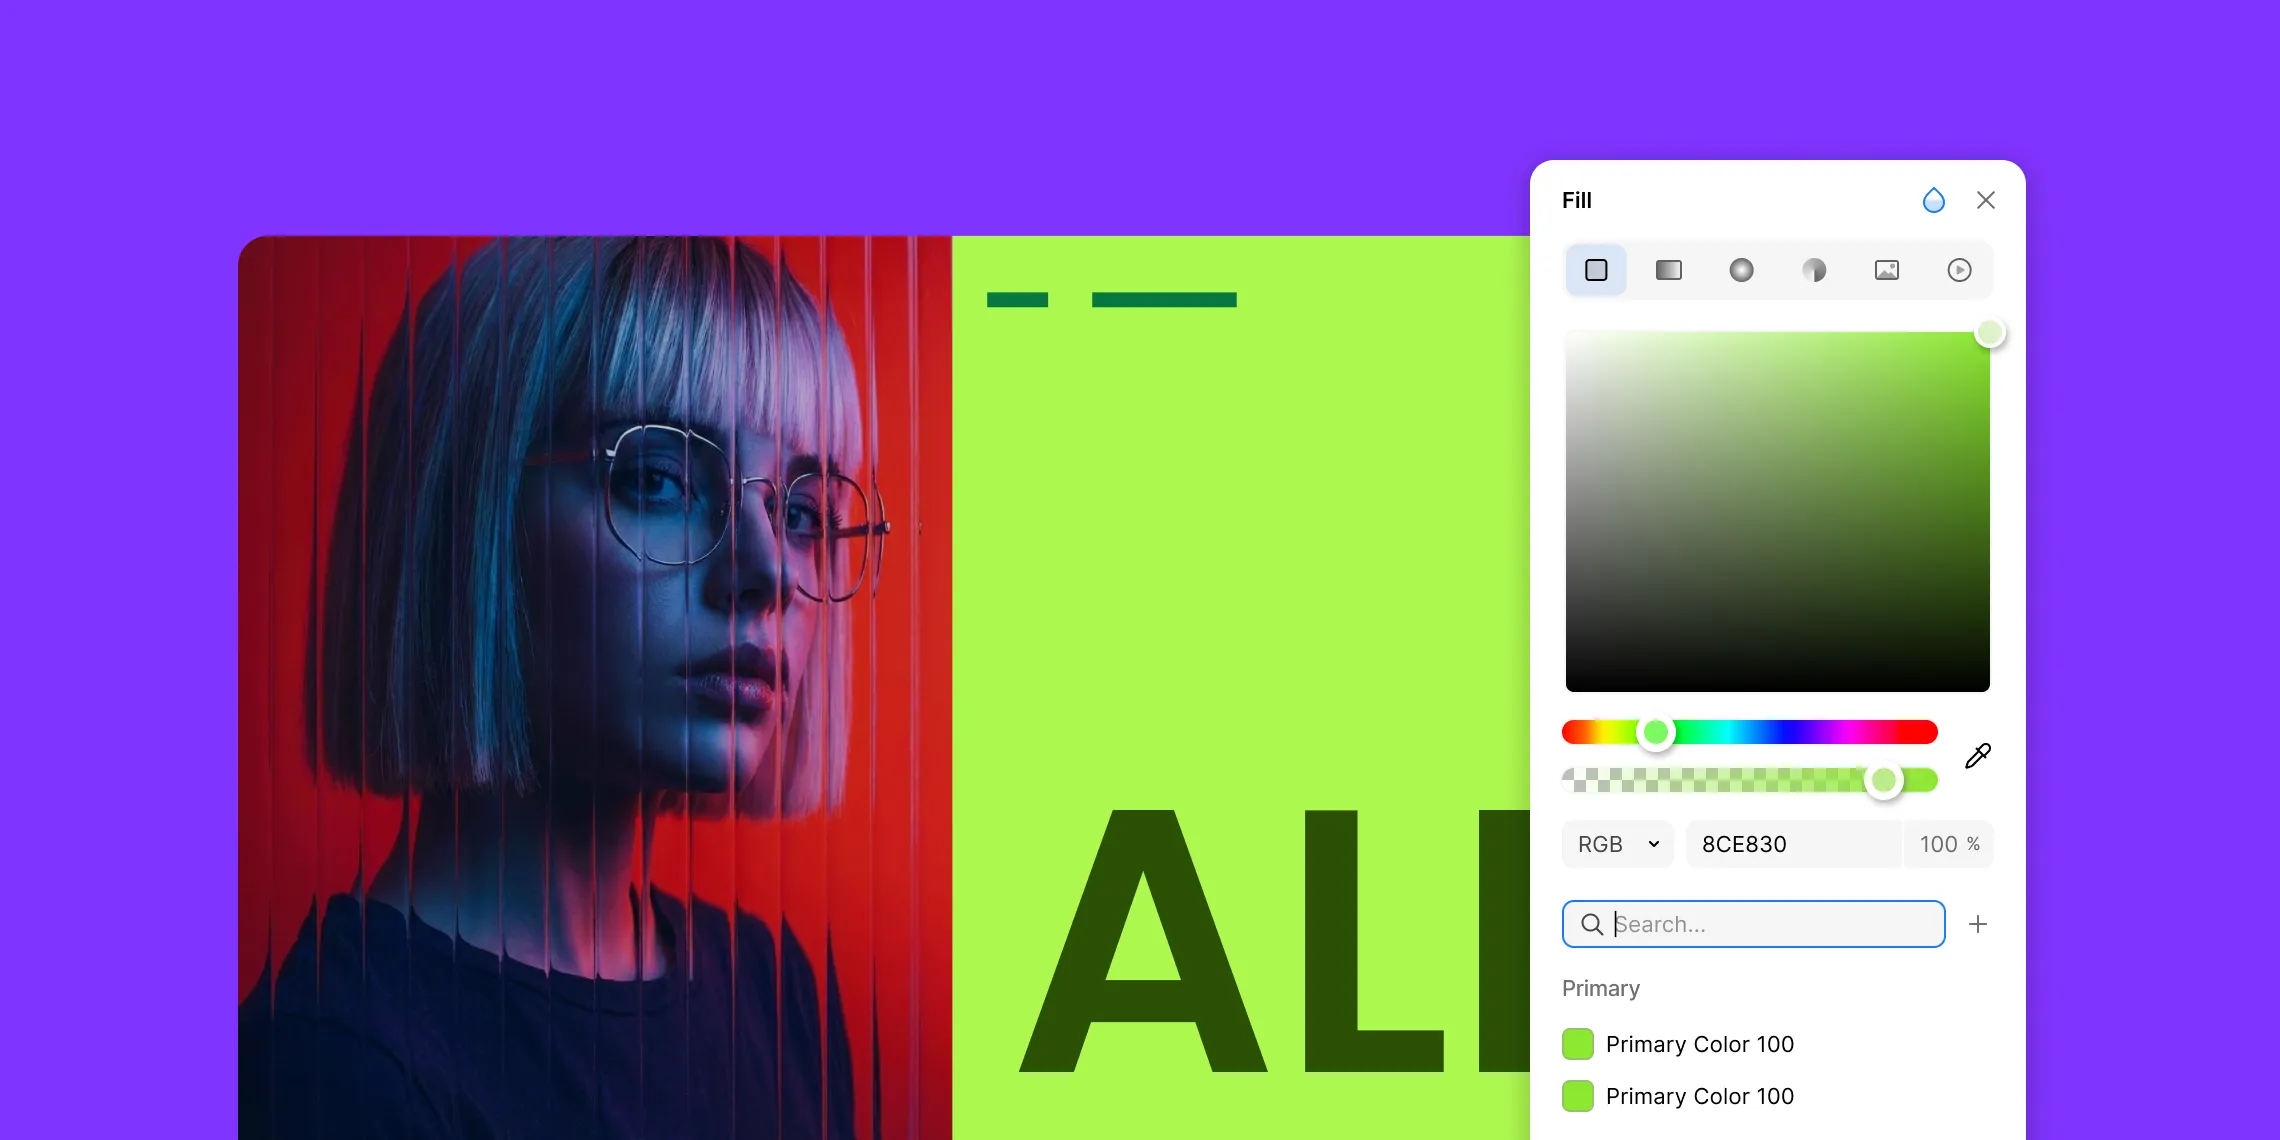
Your ultimate guide awaits — explore our expansive list of top website background ideas to elevate your WordPress site to the next level!
You might be wondering, what’s so special about website backgrounds? Well, they’re actually a powerful tool, pivotal to a site’s success.
The right background can make your website more visually striking, highlight key sections, and even reinforce your brand identity.
So, without further ado, let’s dive right in!
Website Background Ideas You Need to Try
Listed below we have some of the top website background ideas to elevate your WordPress site!
Solid Color Website Background

Starting with an oldie but a goodie — the Solid Color website background.
Under this category, you can either go for the timeless classic that is the White website background or go bold with any color of your choice!
Solid backgrounds, especially white backgrounds, ensure a clean and minimalistic look.
A white background is the perfect choice to make if you want your content to stand out while keeping the focus where belongs.
On the other hand, a well-chosen solid color background can be just as effective, while also helping you set the tone of your website brand without overwhelming the design.
Gradient Website Background
Next up are Gradient website backgrounds — an effortless way to add depth and draw attention to any section of your website while still keeping the overall design minimal!
By transitioning between stunning color combinations, you can easily create an effect that stands out against the competition. However, if your page is on the longer side, it’s best to use gradients sparingly to maintain a smooth user experience.
Now, gradients come in a few different types and each gives your design a different vibe as you’ll see below:
Linear Gradient Background
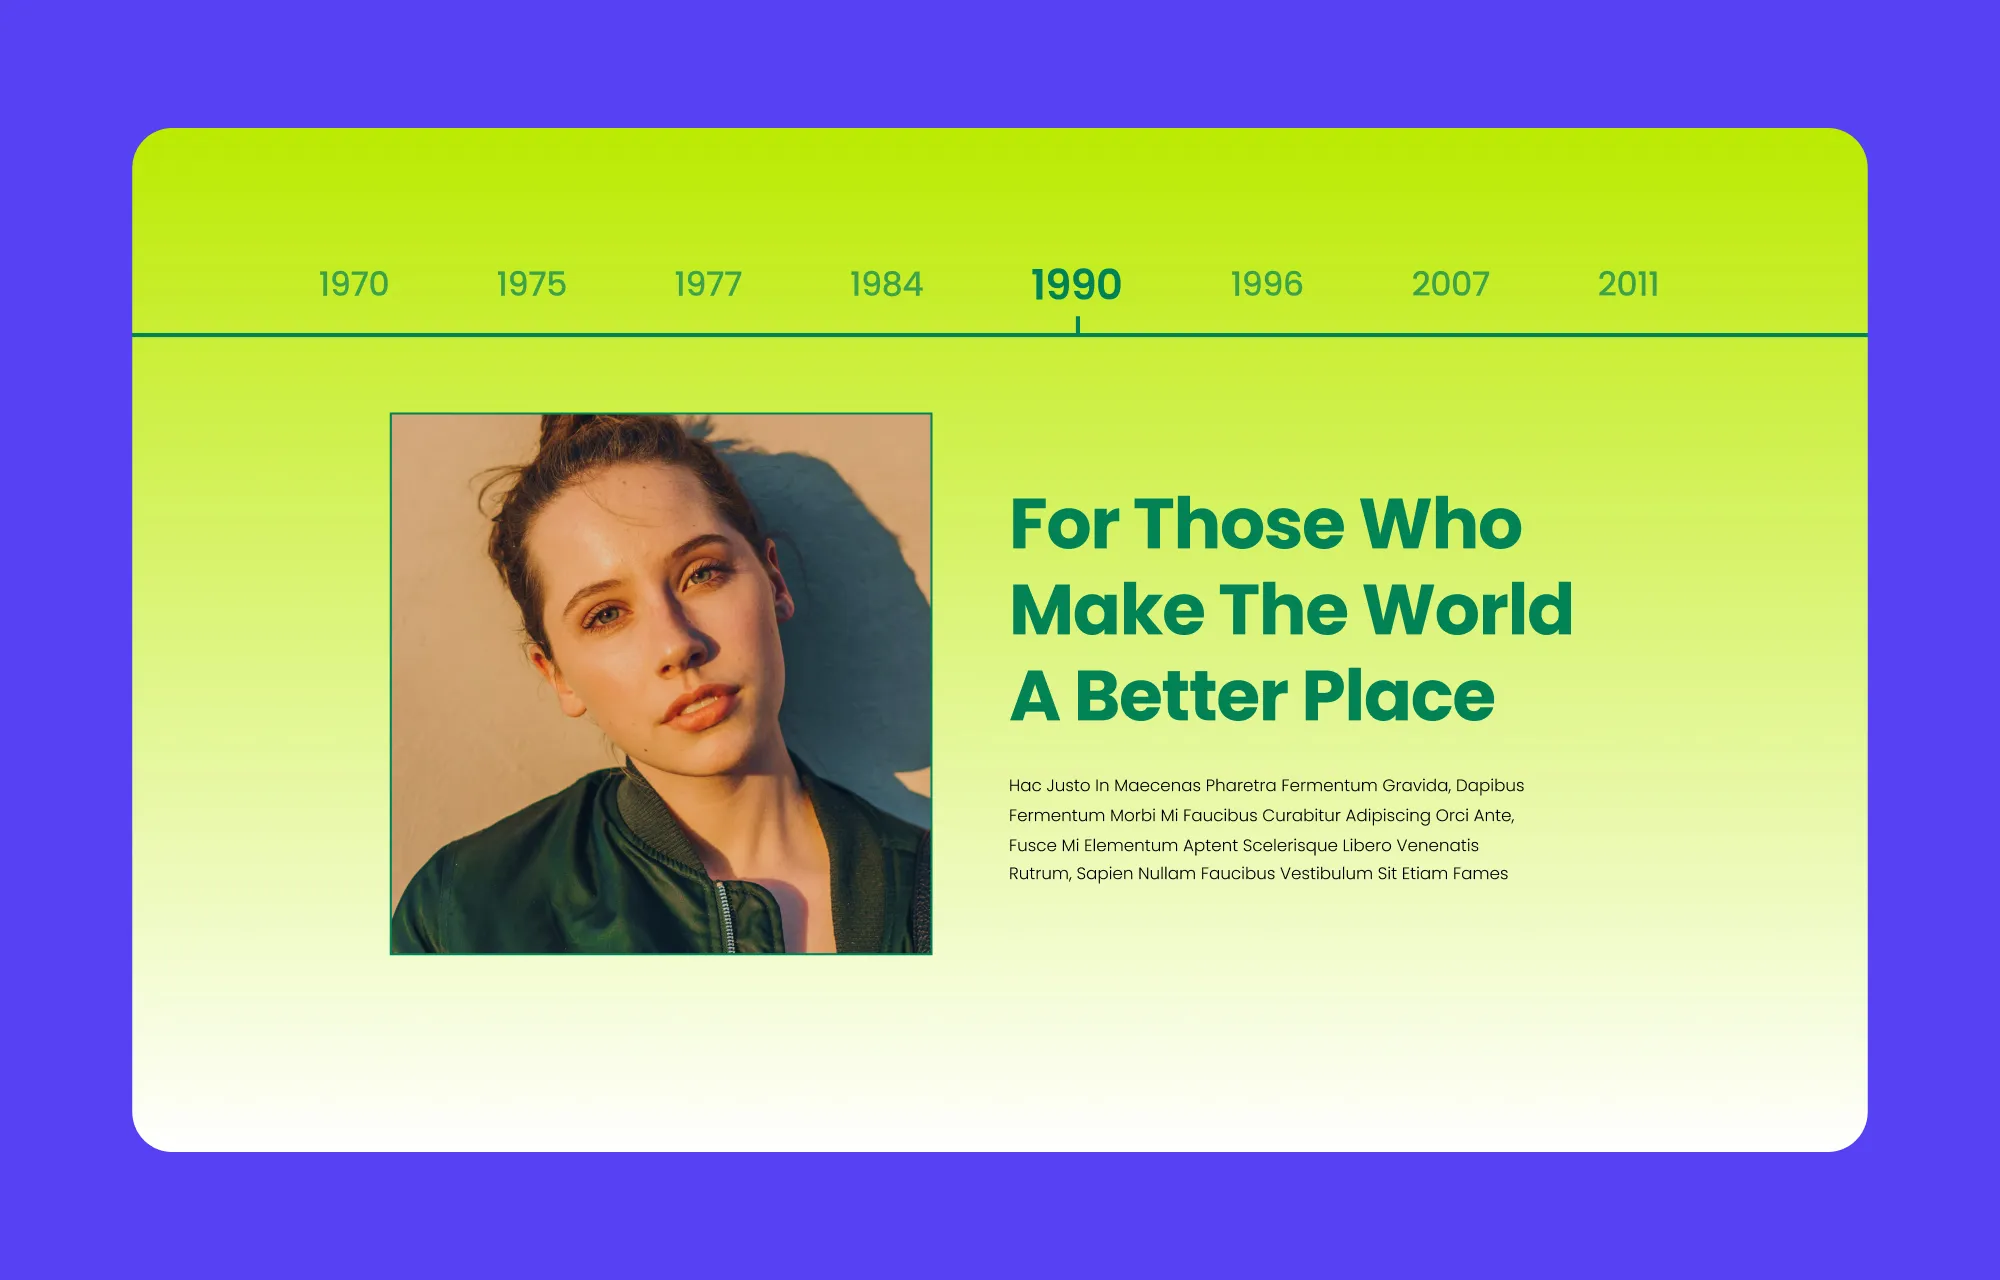
Starting off, we have the Linear Gradient background, which transitions colors in any one direction.
This type of gradient creates a smooth, seamless shift from one color to another, making it perfect to add subtle depth and direction to your website’s design.
Radial Gradient Background
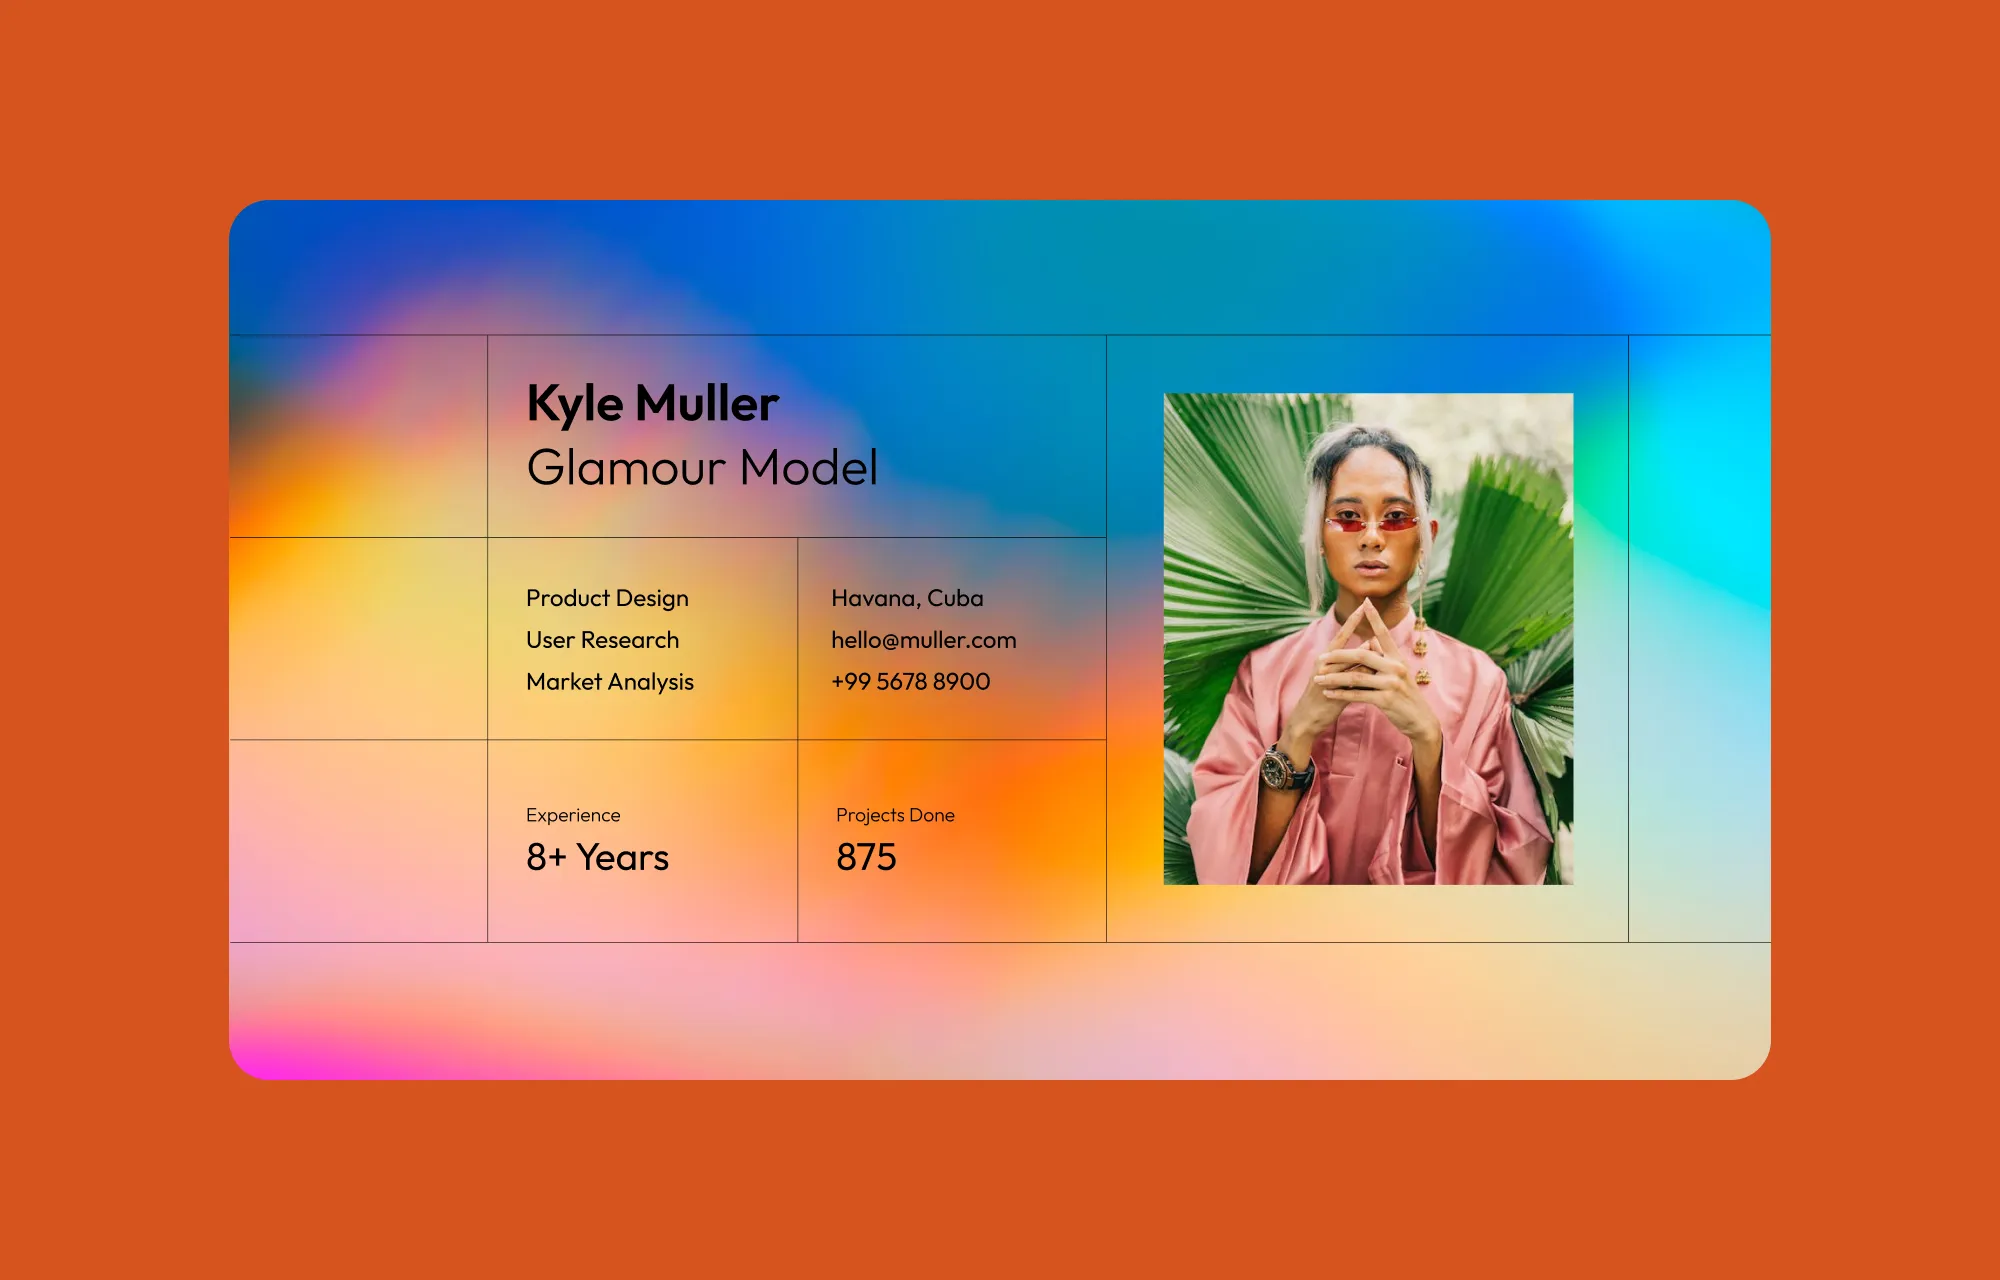
Next, we have the Radial Gradient background, which transitions colors outward from a central point, creating a circular effect. This gradient is ideal for drawing attention to a focal point or giving your design a soft, centered look.
Conic Gradient Background

Finally, there’s the Conic Gradient background, where colors transition around a central point, in a clock-like motion. This style is more unique and visually eye-catching, perfect for websites that want to add a modern twist to their background design.
Image Website Background
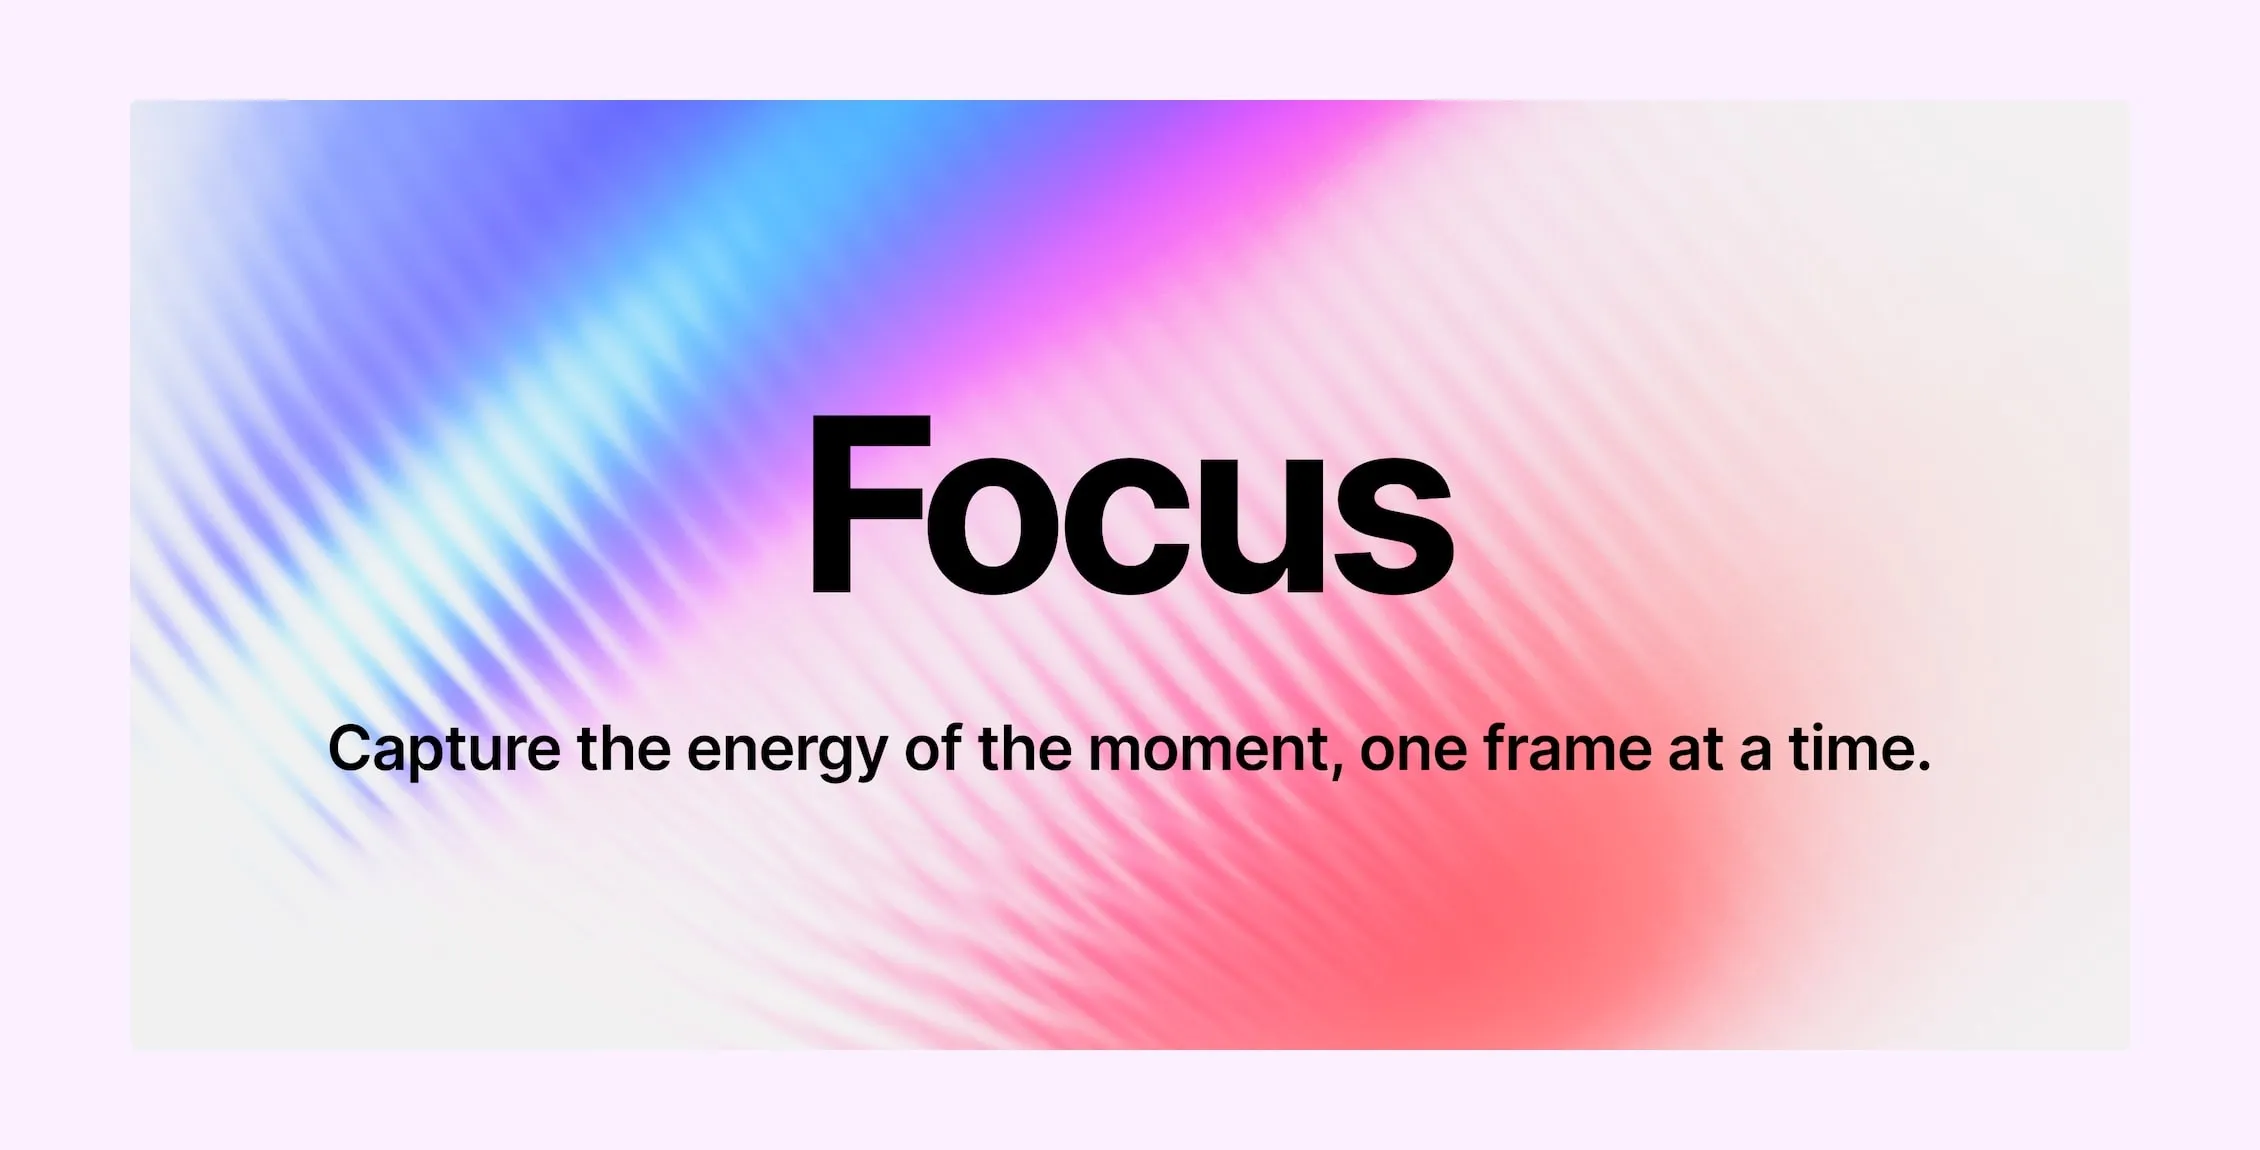
Now, Image website backgrounds are an incredibly versatile way to add visual appeal to your site, giving it character and uniqueness effortlessly.
Any type of image can be your background but it mostly boils down to two most popular choices:
Photographic Website Background
High-quality Photographic website background images can instantly make your site feel more relatable and authentic.
Whether it’s a product shot, a scenic landscape, or anything that captures the essence of your brand, a well-chosen photograph can tell the story of a thousand words, leaving a lasting impression on visitors.
Textured Website Background
Textured website backgrounds are typically images that mimic physical materials or feature subtle patterns that add depth and character to your website.
By using textured website background images, you can subtly set the tone and also introduce visual interest without taking away from the original focus of the design.
Video Website Background
Similar to photographic backgrounds, with Video website backgrounds, you’re able to tell your story to your audience visually.
But unlike the former, video backgrounds introduce motion and allow you to demonstrate so much more of the story. It makes for an immersive experience for the audience, even captivating visitors unknowingly.
Website Backgrounds With Parallax Effects
A parallax scrolling effect creates an illusion by keeping the background static while the content moves over it as you scroll.
This technique results in a three-dimensional visual experience that captivates the audience and encourages them to explore further.
How to Add Website Backgrounds in WordPress With Kirki
Now that you have all these exciting ideas, the question is: how do you bring them to life? That’s where Kirki comes in, the all-in-one freeform WordPress website builder with an extensive Background options that makes adding any type of background effortless.
In Kirki, all background options are managed through the Fill panel, accessible from the Style section in the Design tab.
At the top of the Fill panel you’ll find five background type icons: Solid, Linear, Radial, Conic, and Image, letting you switch between them instantly.
How to Add a Solid Color Background
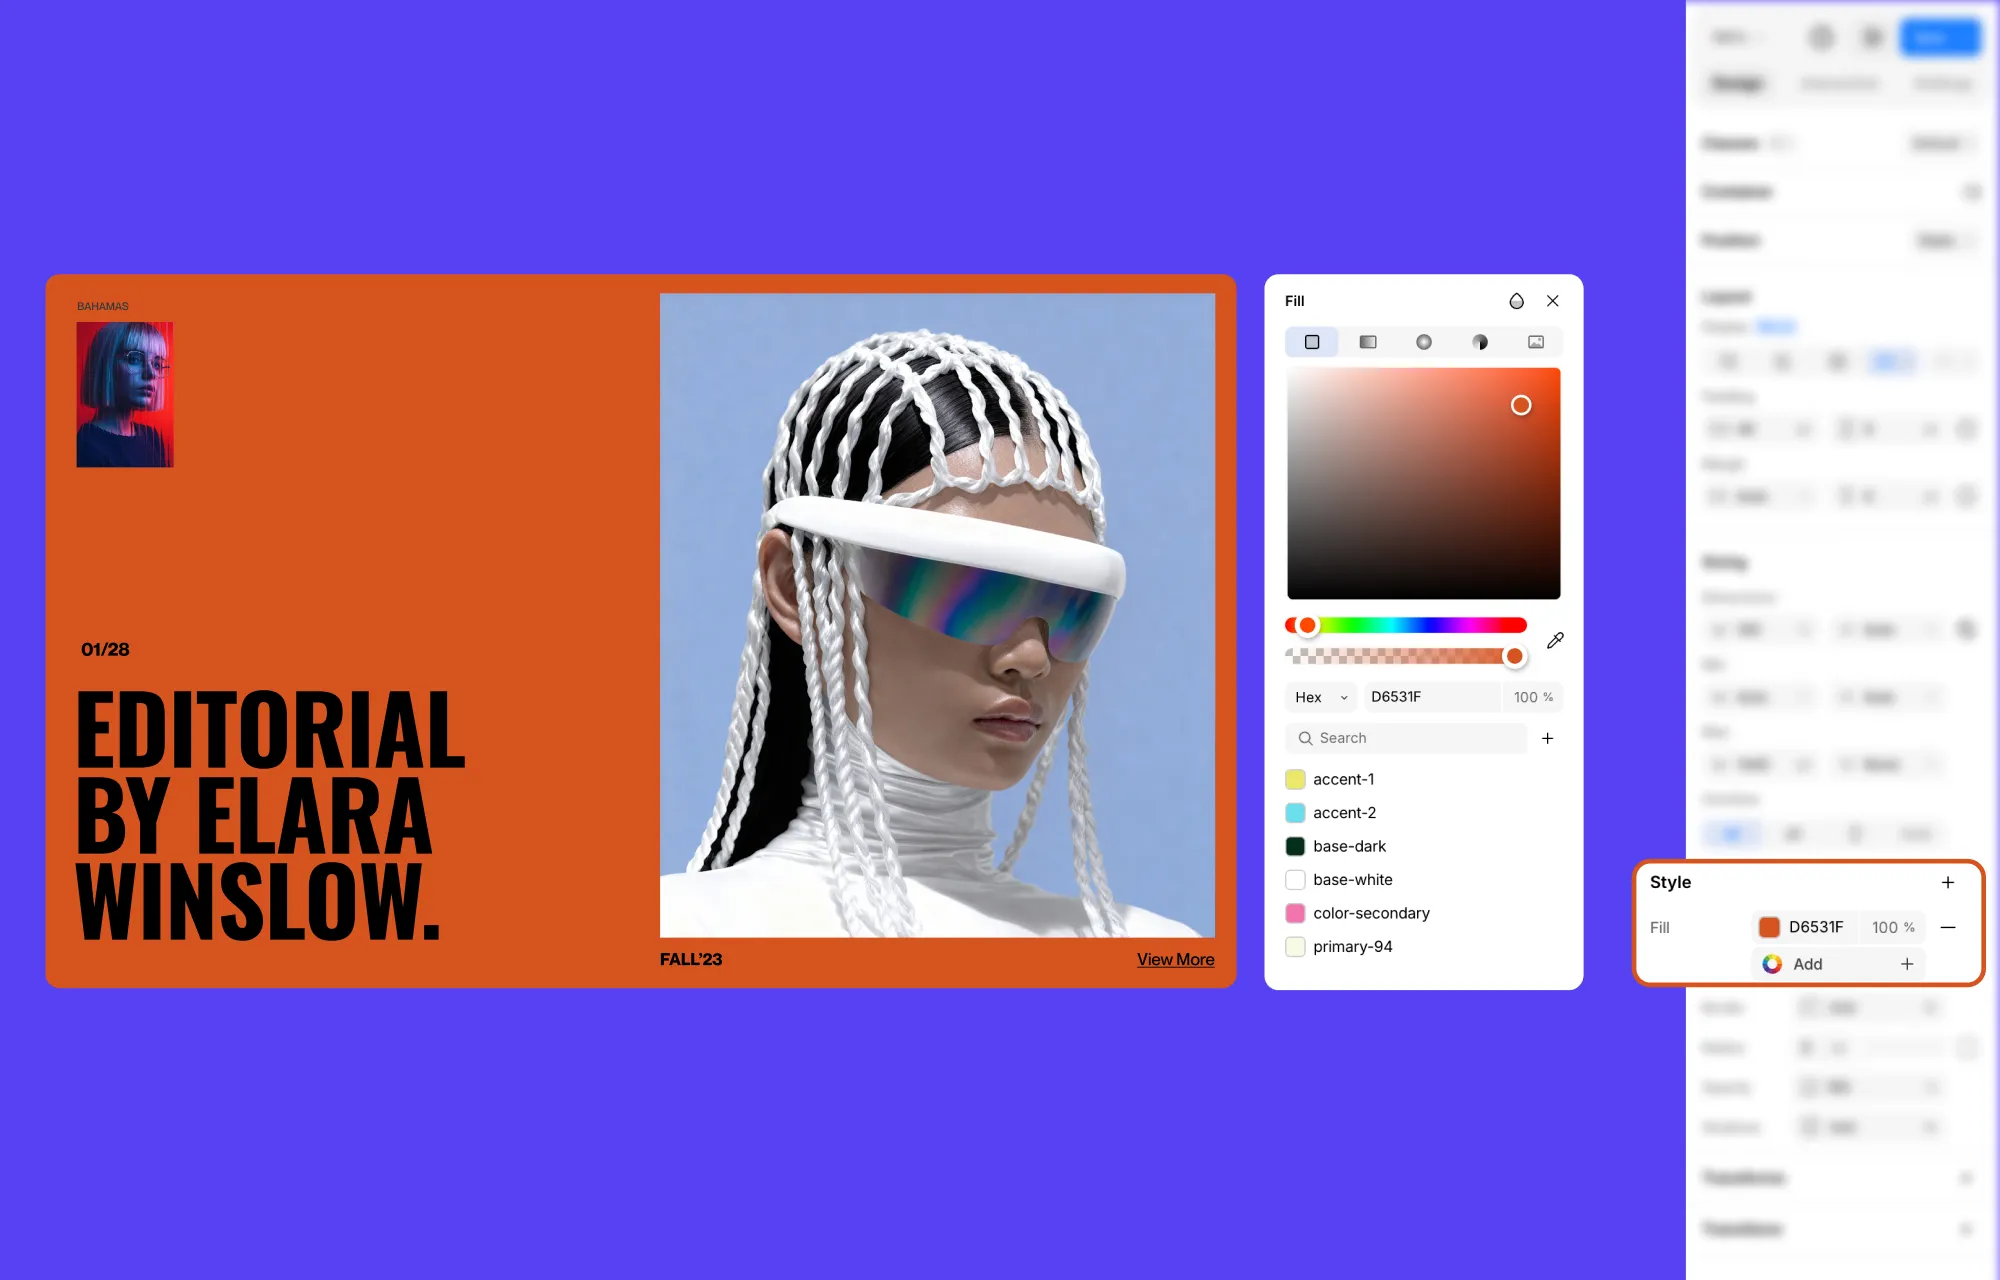
Step 1: Select your element and in the Design tab, click Add next to Fill under the Style section to open the Fill panel.
Step 2: Select the first icon, Solid, at the top of the Fill panel.
Step 3: Use the color picker to choose your color. You can enter a Hex value directly, adjust opacity, or pick from your saved brand colors listed below the picker.
How to Add a Linear Gradient Background
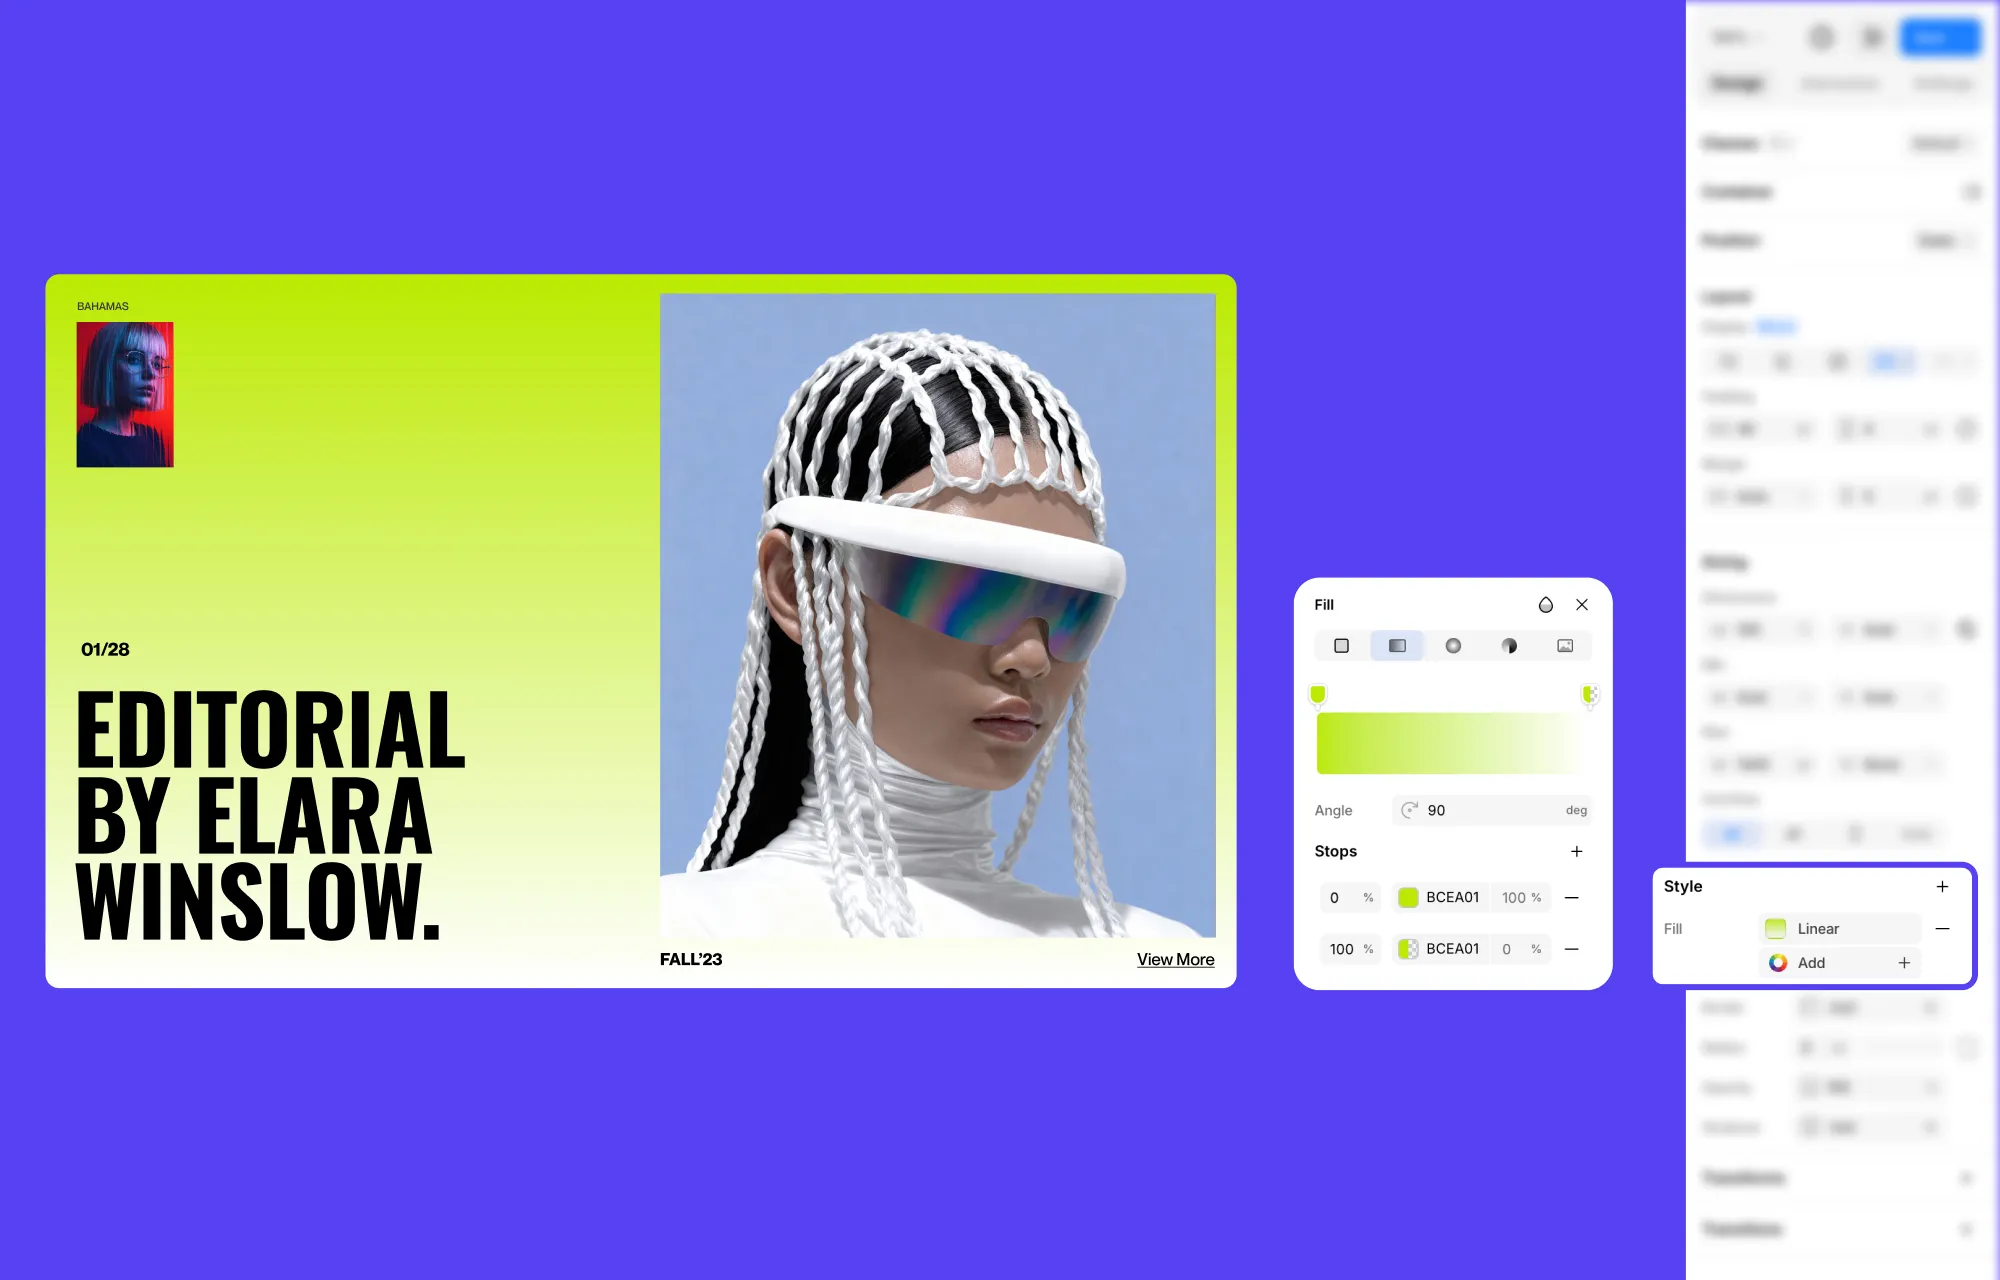
Step 1: Open the Fill panel as before and select the Linear icon (second icon) at the top.
Step 2: A gradient preview bar appears with two Stops listed below — each stop has a position (%), color, and opacity value. Click on a stop to select it and adjust its color and opacity. Or drag the handles on the canvas to adjust the angle and direction of the gradient.
Step 3: To add more color stops, click the “+” next to Stops.
Step 4: Adjust the Angle value to control the direction of the gradient transition. The default is 0 degrees (horizontal).
How to Add a Radial Gradient Background
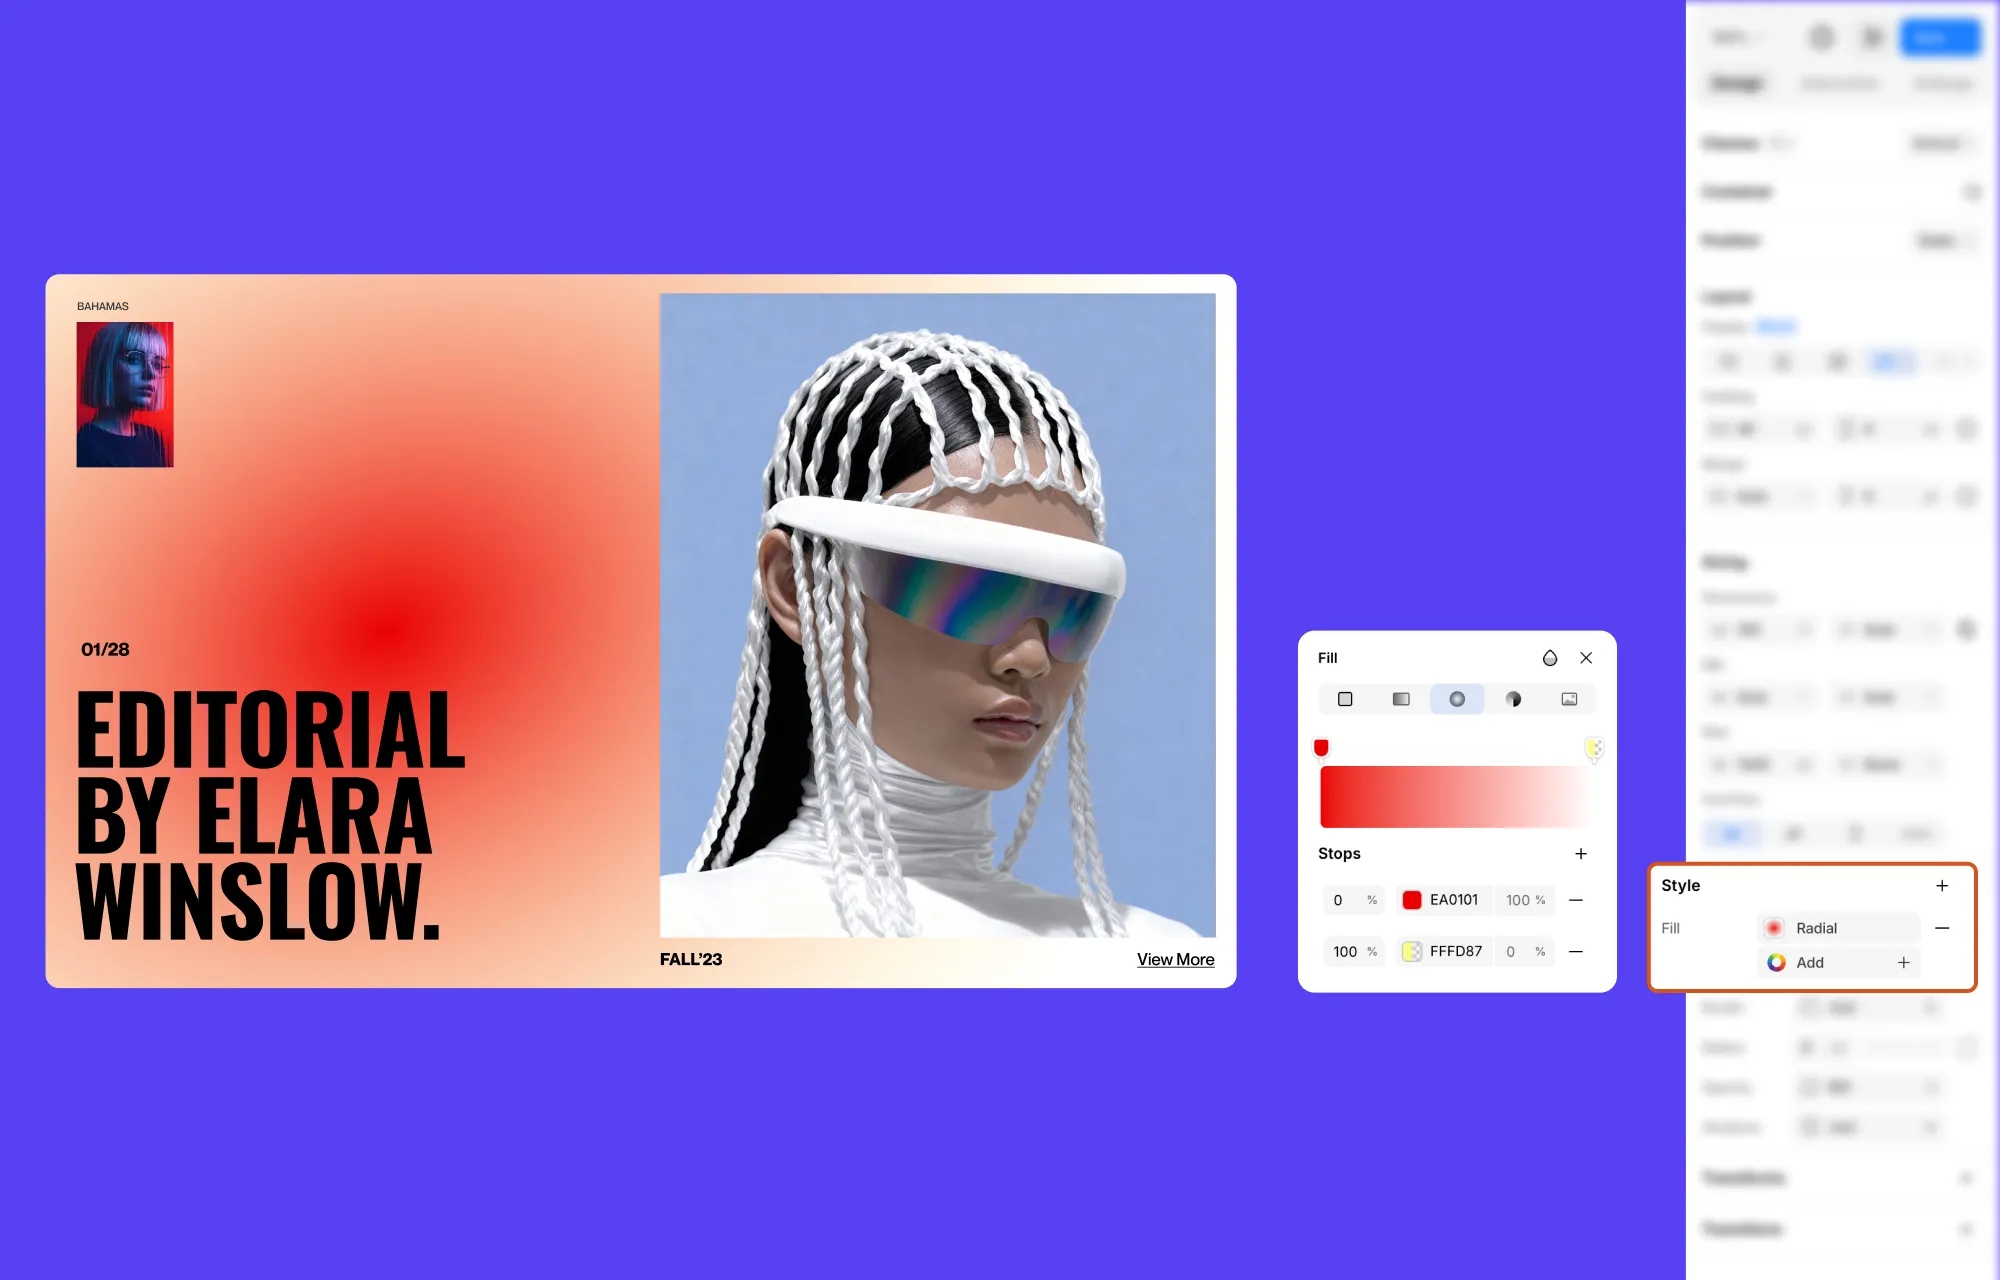
Step 1: Open the Fill panel and select the Radial icon (third icon) at the top.
Step 2: A circular gradient preview appears on the canvas with a draggable center point. Drag this center point to reposition the gradient’s starting position on your element.
Step 3: In the Fill panel, adjust your Stops — each stop has a position (%), color, and opacity. Click “+” to add more stops.
Step 4: Drag the stop positions to control how far colors spread outward from the center.
How to Add a Conic Gradient Background
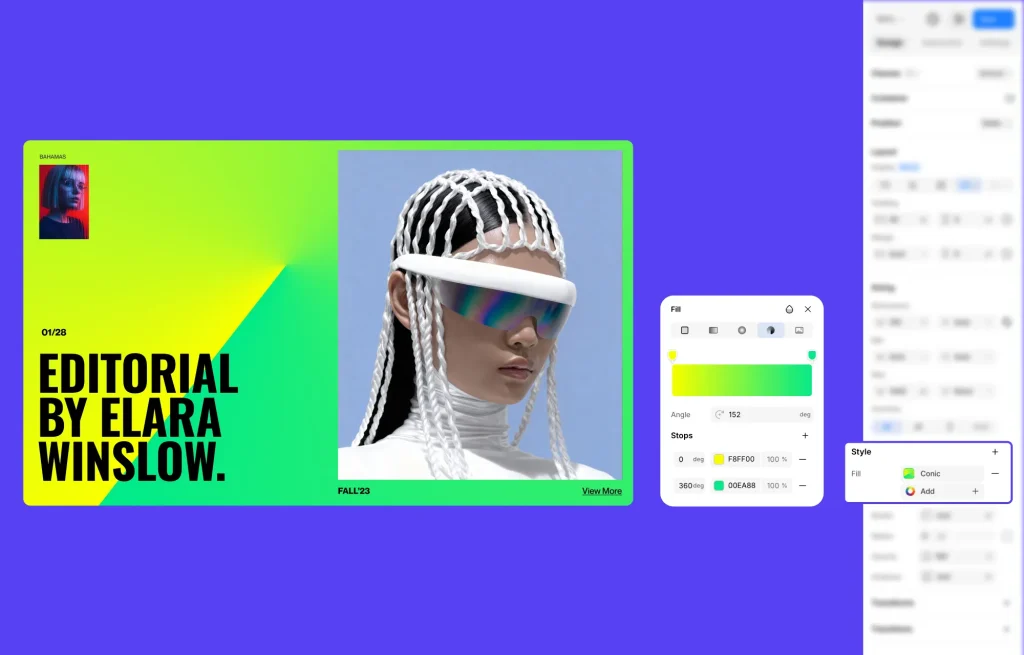
Step 1: Open the Fill panel and select the Conic icon (fourth icon) at the top.
Step 2: A conic gradient preview appears on the canvas with a draggable center point. Drag it to adjust the gradient’s starting position.
Step 3: Adjust the Angle value to rotate the gradient around the center point.
Step 4: In the Stops section, each stop uses degrees (instead of %) to define its position around the center. Adjust colors, opacity, and positions, and click “+” to add more stops.
How to Add an Image Background
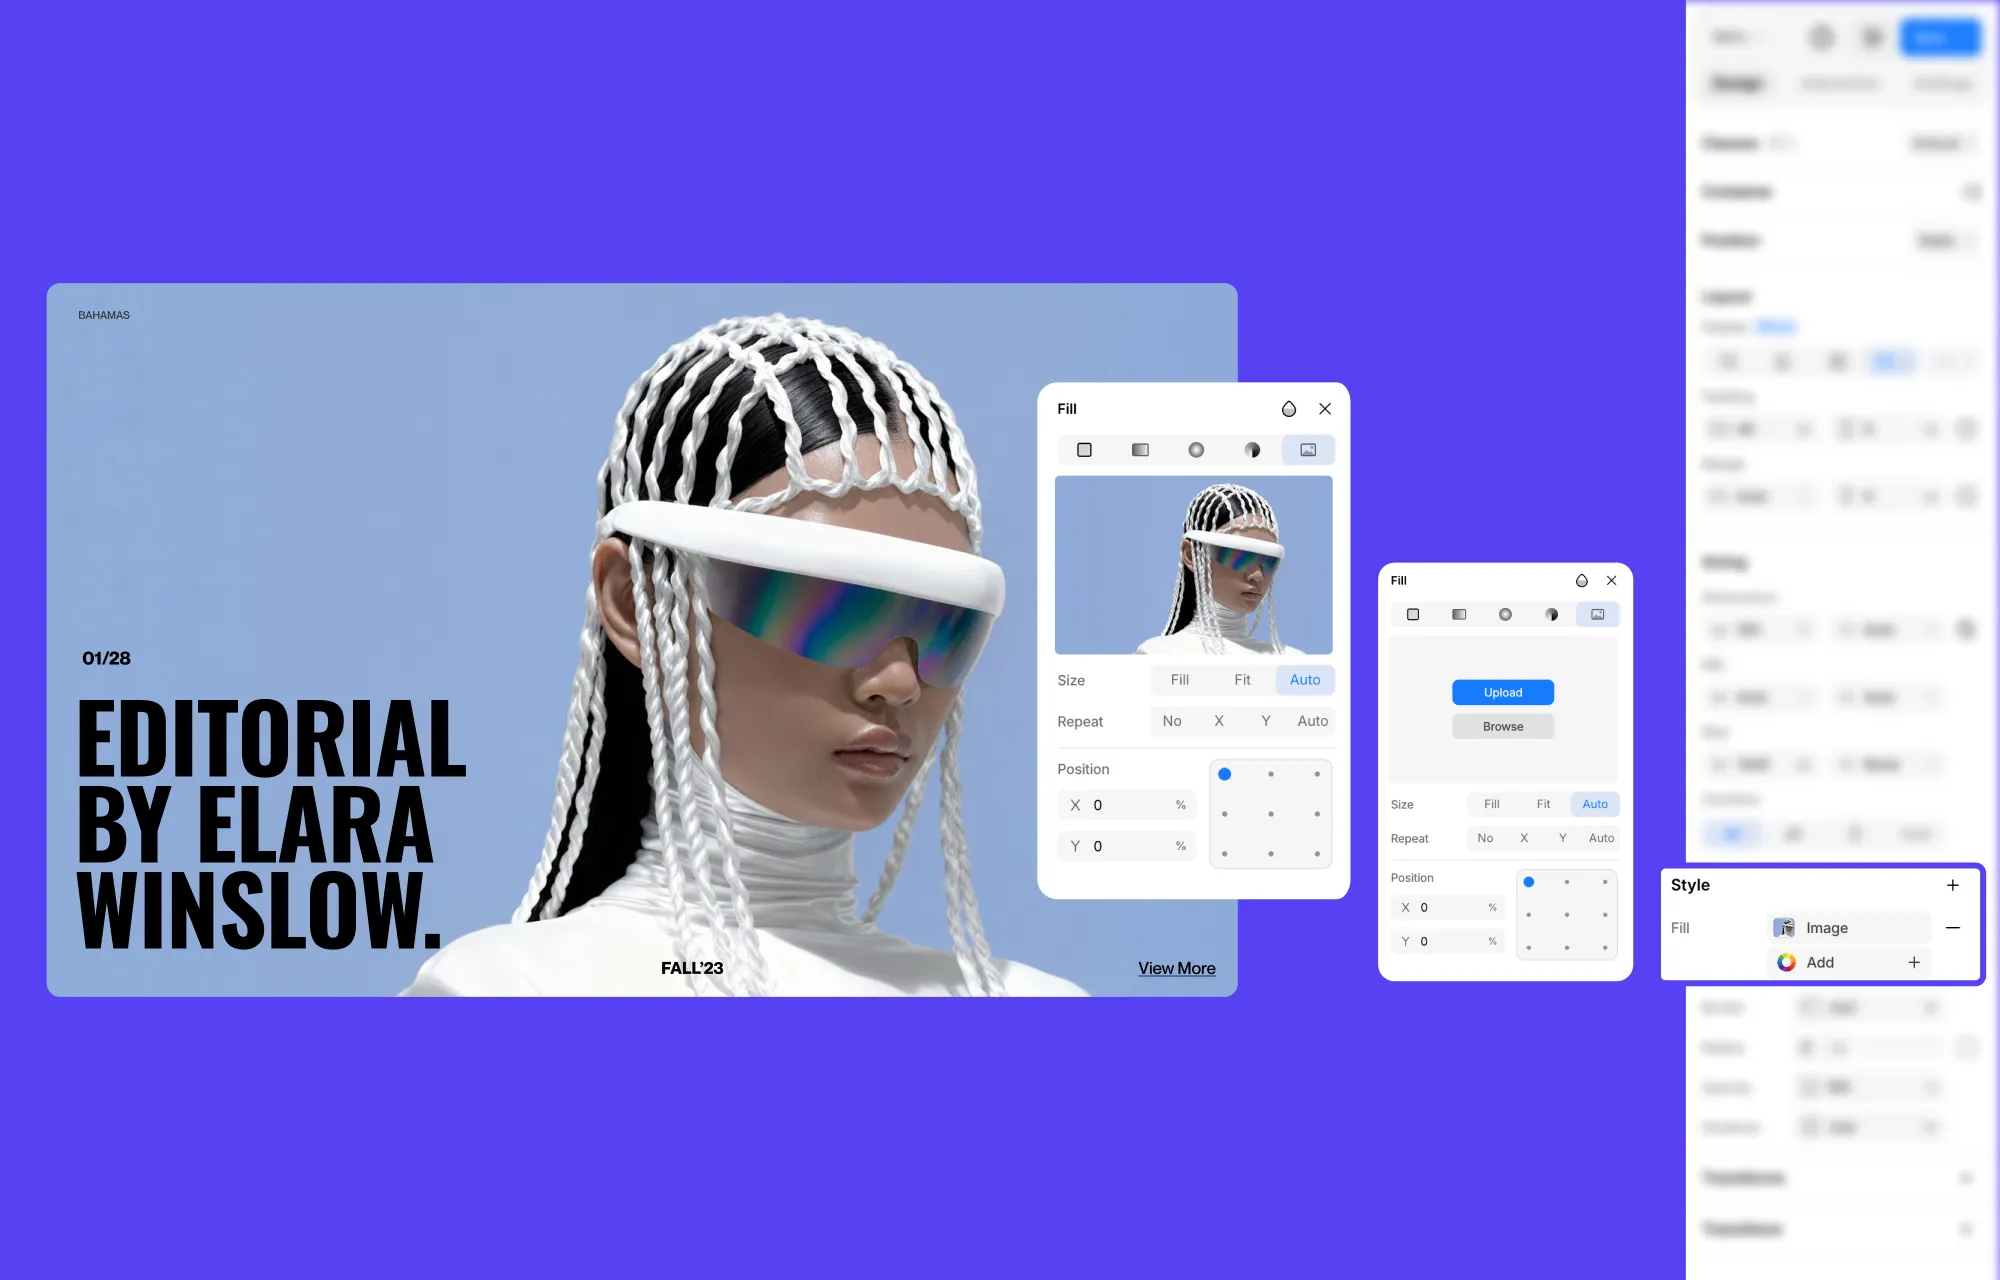
Step 1: Open the Fill panel and select the Image icon (fifth icon) at the top.
Step 2: Click Upload to upload an image directly, or click Browse to select one from your media library.
Step 3: Once your image is set, adjust the following options directly in the Fill panel:
- Size — choose between Fill, Fit, or Auto
- Repeat — set to No, X, Y, or Auto
- Position — use the grid of position points or enter X and Y values manually
How to Add a Video Background
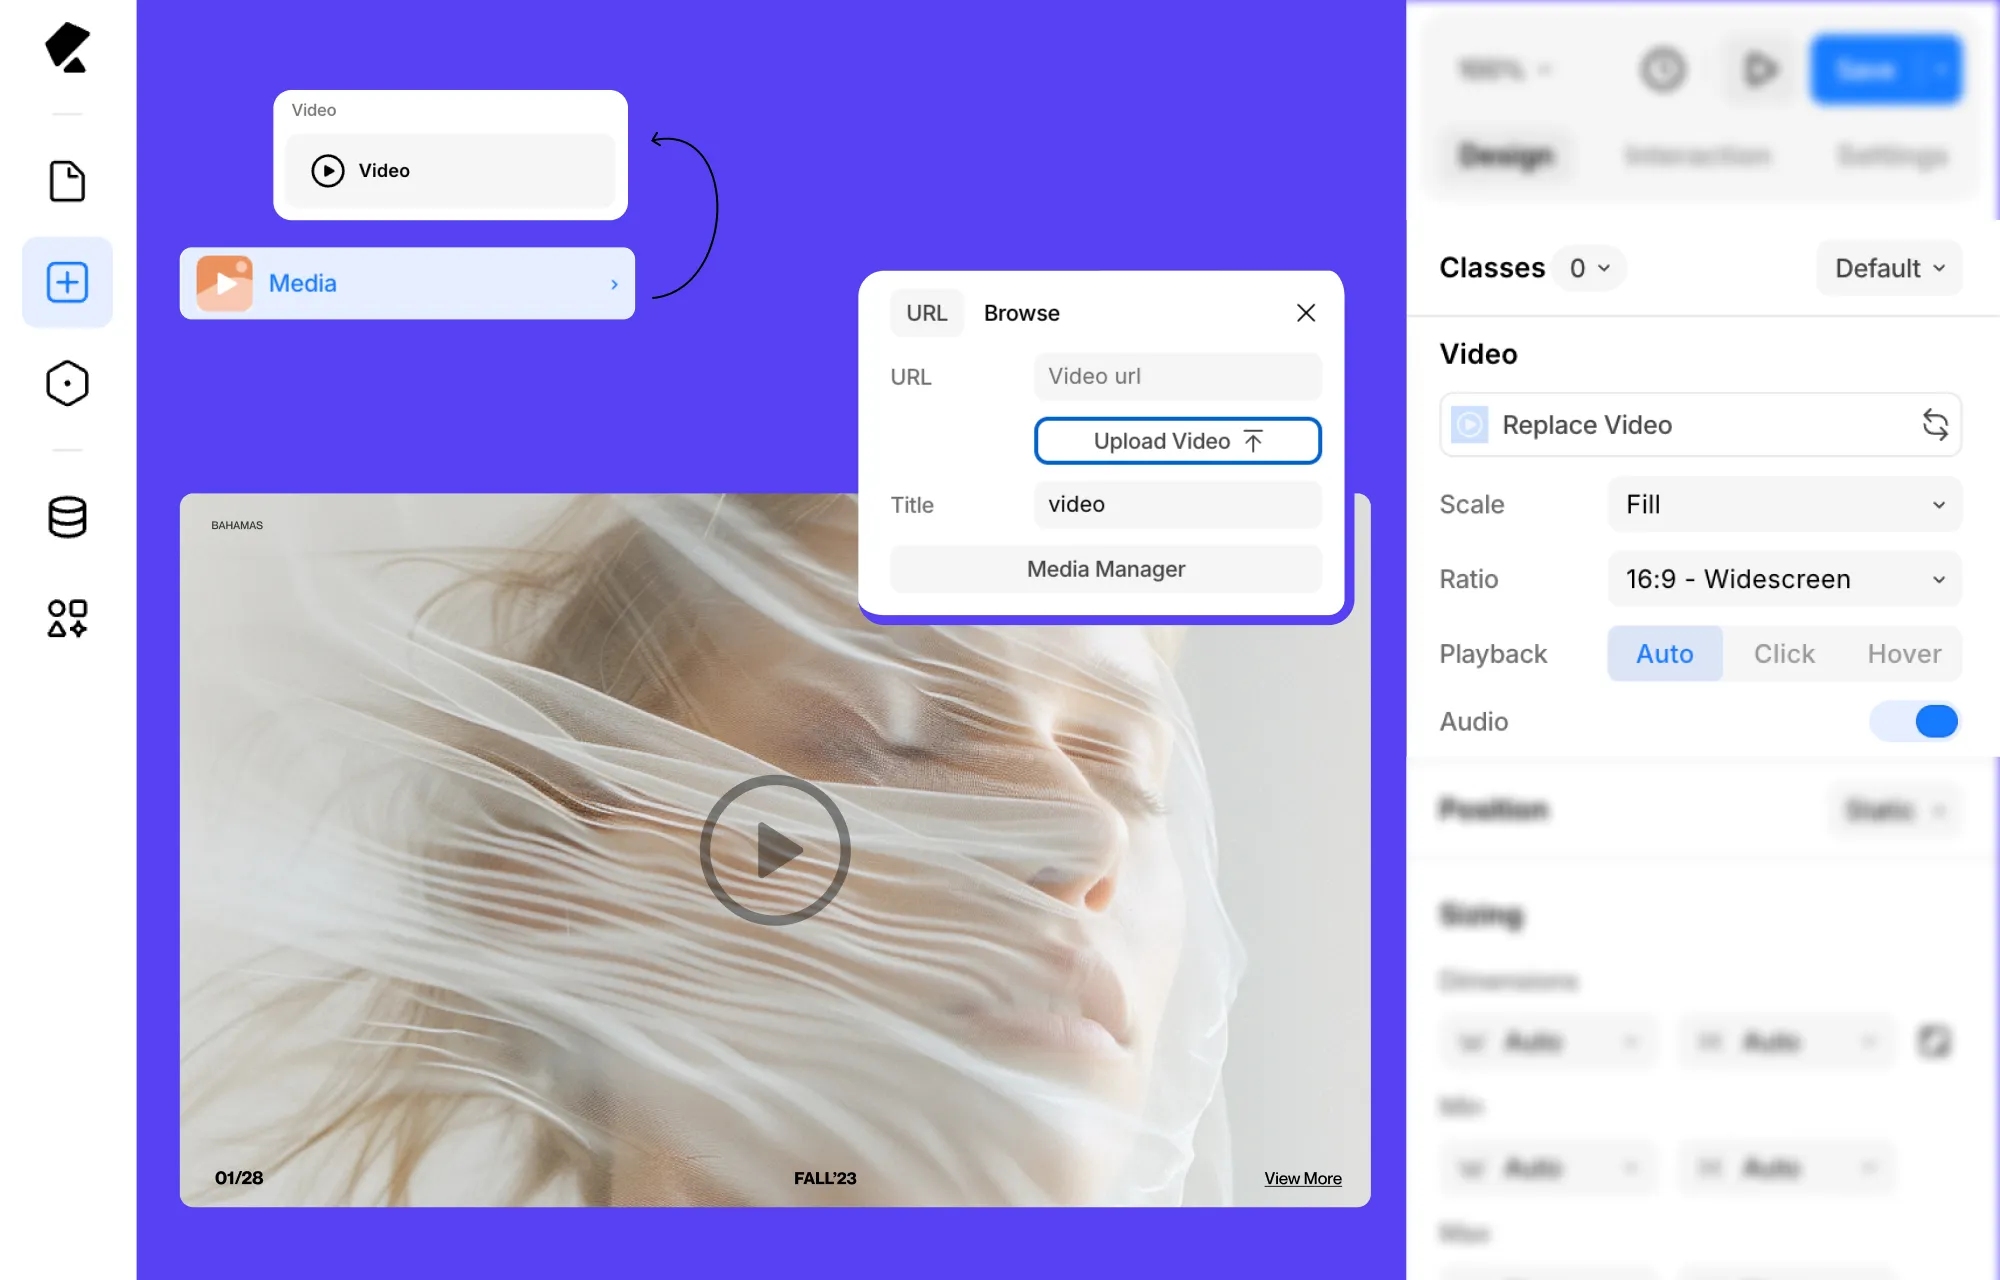
Step 1: Add a Video element to your canvas from the Insert panel and set its width to 100% in the Design tab.
Step 2: With the Video element selected, click More Options in the Design tab to open Video Options. Upload your video file or select it from your media library.
Step 3: In the Video Options panel, configure the following:
- Enable Looping to make the video loop continuously
- Disable Controls so playback controls are hidden from visitors
- Disable Audio for a silent background
- Use the Timeline scrubber to trim your video by setting the Start and End time directly in the panel
Step 4: In the Design tab, set the Video element’s Position to Absolute and give it a Z-index of -100 so all other elements stack on top of it.
Layered Backgrounds & Blend Modes
In Kirki, you can stack multiple backgrounds on the same element to create stunning layered visual effects. Each time you click Add next to Fill in the Style section, you add a new background layer on top of the existing one.
Each layer can be independently configured with its own type, color, gradient, or image. You can also reorder layers and apply blend modes to control how each layer interacts with the one below it, giving you endless creative possibilities for unique, multi-dimensional backgrounds.
Wrapping Up
Those were some of the top website background ideas to elevate your WordPress site — and how to implement every single one of them using Kirki!With Kirki’s intuitive Fill panel, the possibilities are truly endless. Get Kirki today and start bringing your background ideas to life!

