
Tired of building identical sections of your website over and over? Or maybe you’re frustrated because keeping them consistent across your site is a challenge on its own.
Well, that’s as sure a sign as any that it’s time to explore why you should use reusable blocks in WordPress and how. Sit tight and discover your solution to achieving truly efficient website building!
Why Use Reusable Blocks in WordPress Website Building
It’s clear that using reusable blocks eliminates the need to create the same sections on your website repeatedly. But it’s more than just that. Here are all the reasons why you should use reusable blocks in WordPress website building:
Efficient Website Building: Save time and effort by turning repetitive sections into reusable blocks, paving the way for a more efficient website building experience overall.
Ensure Design Consistency: Keep your repetitive sections consistent more easily across every page of your WordPress website using reusable blocks.
Simplify Making Changes: With synchronous reusable blocks, edit any change once and have it automatically updated across your entire site instantly.
Improve Collaboration and Streamline Workflow: Facilitate teamwork by allowing multiple contributors to use the same blocks, making it easier to collaborate and enhancing overall workflow efficiency. And with Kirki’s built-in real-time collaboration and comments feature, your team can work on the same project simultaneously and leave contextual feedback directly on the canvas, taking collaborative website building to a whole new level.
Improve Website Scalability: Easily scale and expand your WordPress website without having to repeatedly create the same sections over and over as your content grows.
Popular Use Cases of Reusable Blocks in WordPress
You might not notice it while browsing websites, but reusable blocks are everywhere! Here are some of the most popular use cases:
Website Headers
A website header, which typically includes elements like the site logo, navigation menu, search bar, and more, usually remains identical across all pages to ensure smooth navigation. Since it’s a fixed component of every page, turning it into a reusable block enhances design efficiency and ensures uniformity with ease.
Hero Sections and Banners
To solidify your visual brand identity, keeping your hero sections and banners consistent is a smart move since they’re focal points of your website. Reusable blocks make this effortless to maintain.
Call-to-Action Buttons
Call-to-action buttons are another popular choice for reusable blocks as they’re used throughout a website, and ensuring their consistency plays a significant role in cohesive website building. Keep in mind that you can create as many reusable blocks as needed. If you want to differentiate CTAs based on their purpose, you can define a few different ones as separate reusable blocks.
Testimonials or Cards
Information displayed through multiple cards or reviews showcased using testimonials can be overwhelming when inconsistent, which is why maintaining cohesiveness is crucial for enhancing readability. With reusable blocks, you can easily maintain a consistent design across all of them.
Website Footers
Like website headers, website footers typically appear on every page and remain identical. Consisting of various elements such as the site logo, copyright notice, additional links to the FAQ page, terms of service, social links, and more, creating footers repeatedly can be time-consuming and challenging, hence the need to turn them into reusable blocks.
And More!
The possibilities are endless with reusable blocks! From pricing tables and FAQs to listings, you can incorporate anything as a reusable block if you believe it will enhance your WordPress website-building process.
How to Create Reusable Blocks in WordPress With Kirki
So, how do you actually create reusable blocks in WordPress without relying on its limited native block editor or themes?
The answer is the Kirki WordPress website builder and its powerful reusable block functionality called Components. Unlike WordPress’ native capabilities, Kirki offers granular control and extensive customizability, empowering you to efficiently craft websites through Components exactly as you envisioned.
All your Components live in the Assets tab in the left panel under the Components section, where you can view, search, and manage every reusable block on your site from one central place.
Now, let’s explore how to create and use Components in Kirki!
Convert Any Element to a Reusable Block
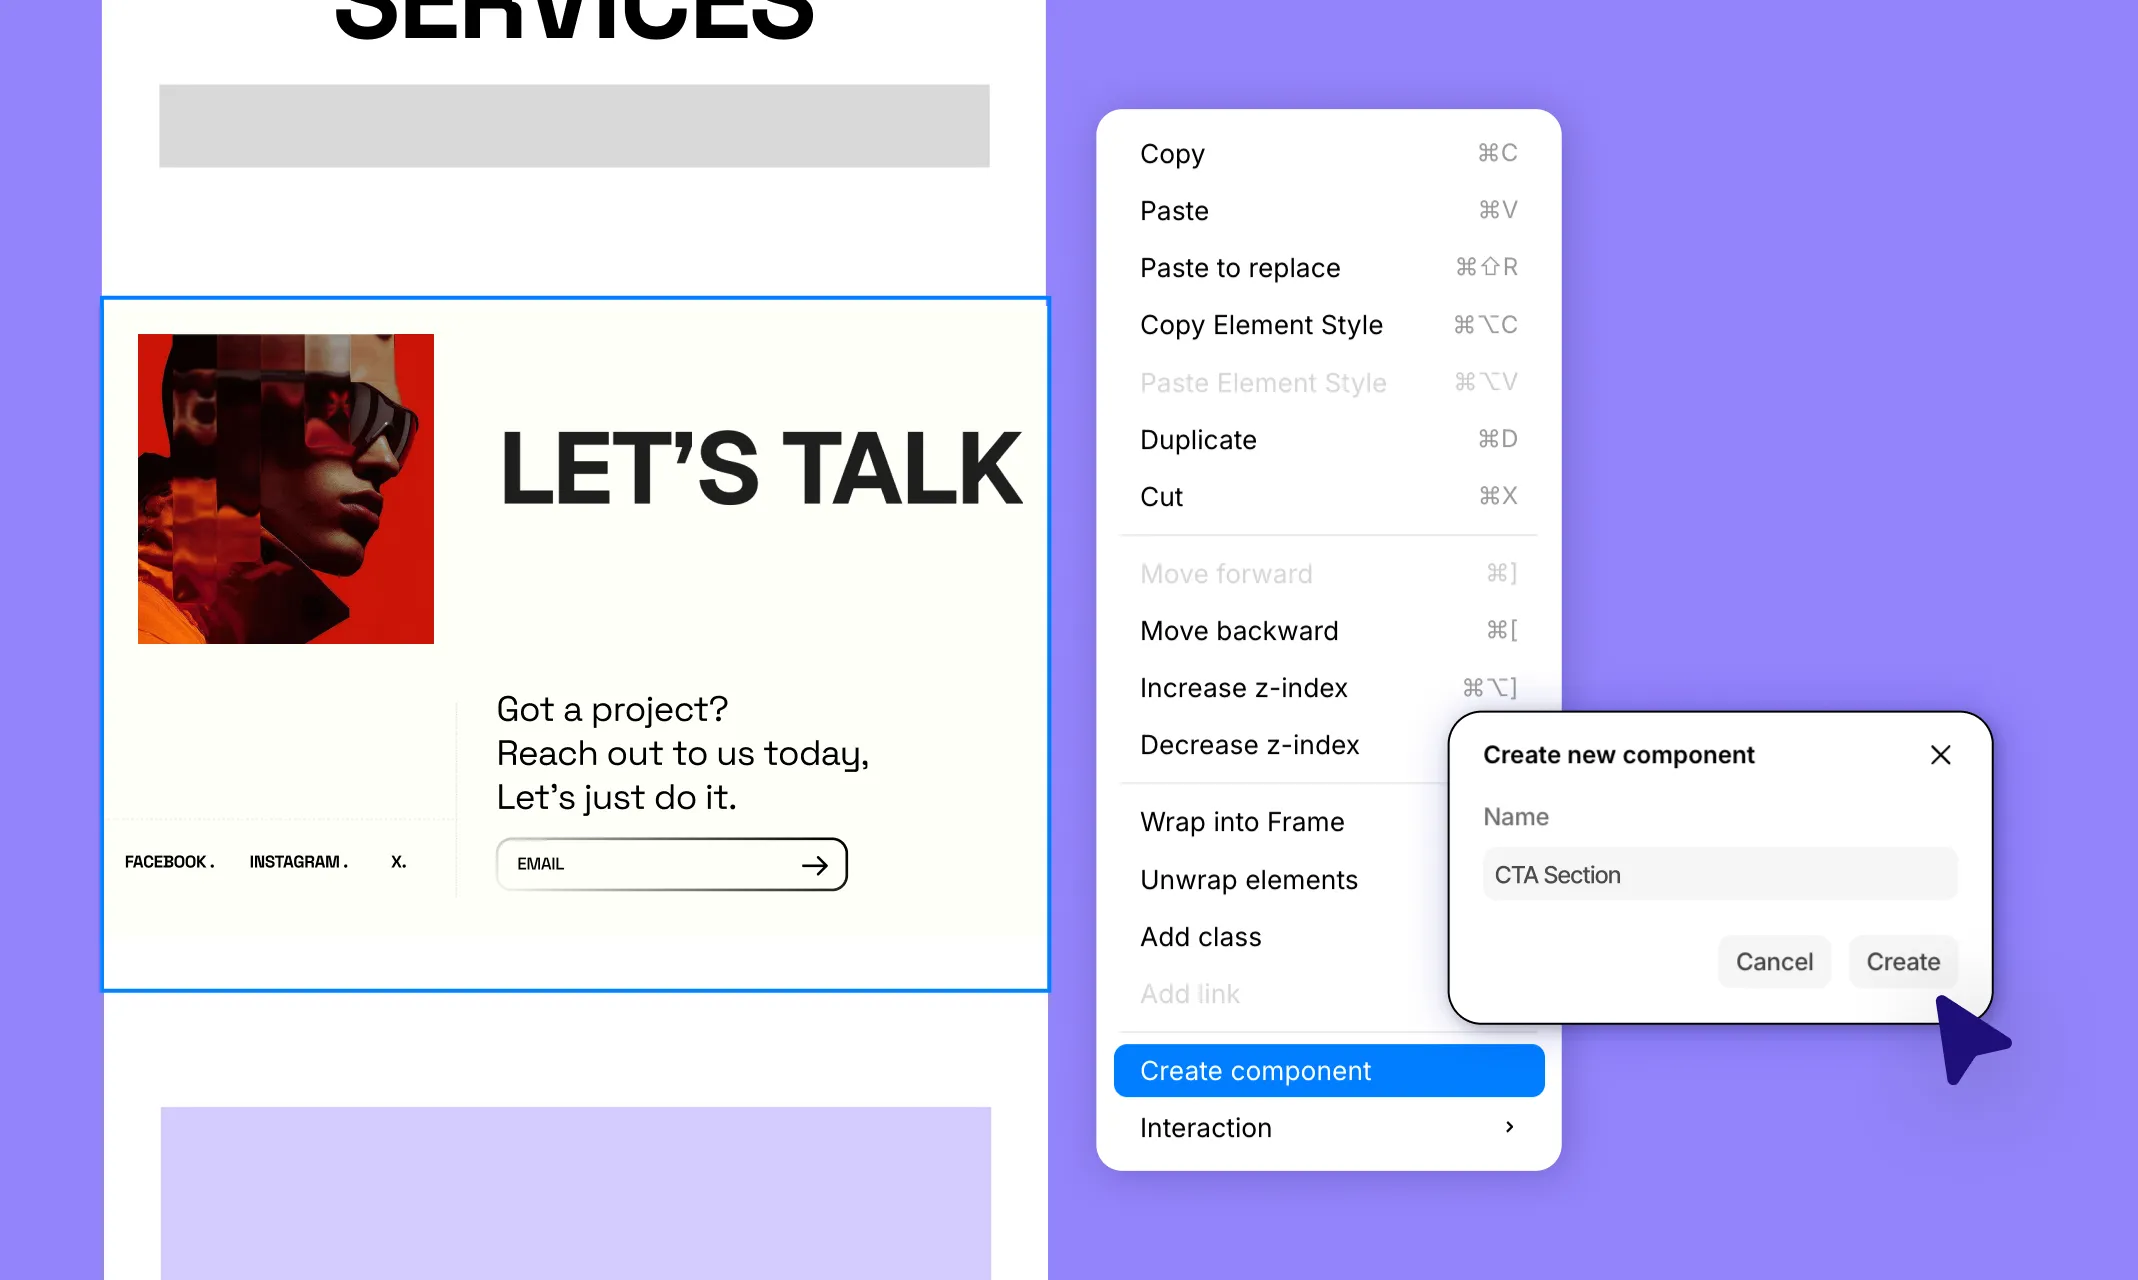
To turn any element into a reusable Component in Kirki, simply right-click the element on your canvas to open the context menu. Select “Create component” from the bottom of the menu.
A “Create new component” modal will appear, asking you to give your component a name. Enter a meaningful name and click Create.
Your reusable block is now saved and ready to be used on any page of your WordPress website!
Once created, you can find your new Component in the Assets tab under Components. Click the “…” next to it to access additional options, including Rename, Set As, Edit, and Delete.
To designate a component as your site’s header or footer, click “Set As…” and choose either Header or Footer. Kirki will treat it accordingly across your site.
Convert Figma Sections to Reusable Blocks
Did you know you can seamlessly import designs from Figma into WordPress and convert them into reusable Components in Kirki?
With Kirki’s built-in Figma to Kirki tool, this transition is easier than ever. Here’s how:
Open your Figma design and select the section you want to import. From the Figma to Kirki tool, click Generate. Copy the generated section from the tool and paste it directly onto your Kirki canvas.
Once imported, convert it into a Component by right-clicking it and selecting “Create component” just like you would with any other element!
Edit Your Reusable Blocks Synchronously
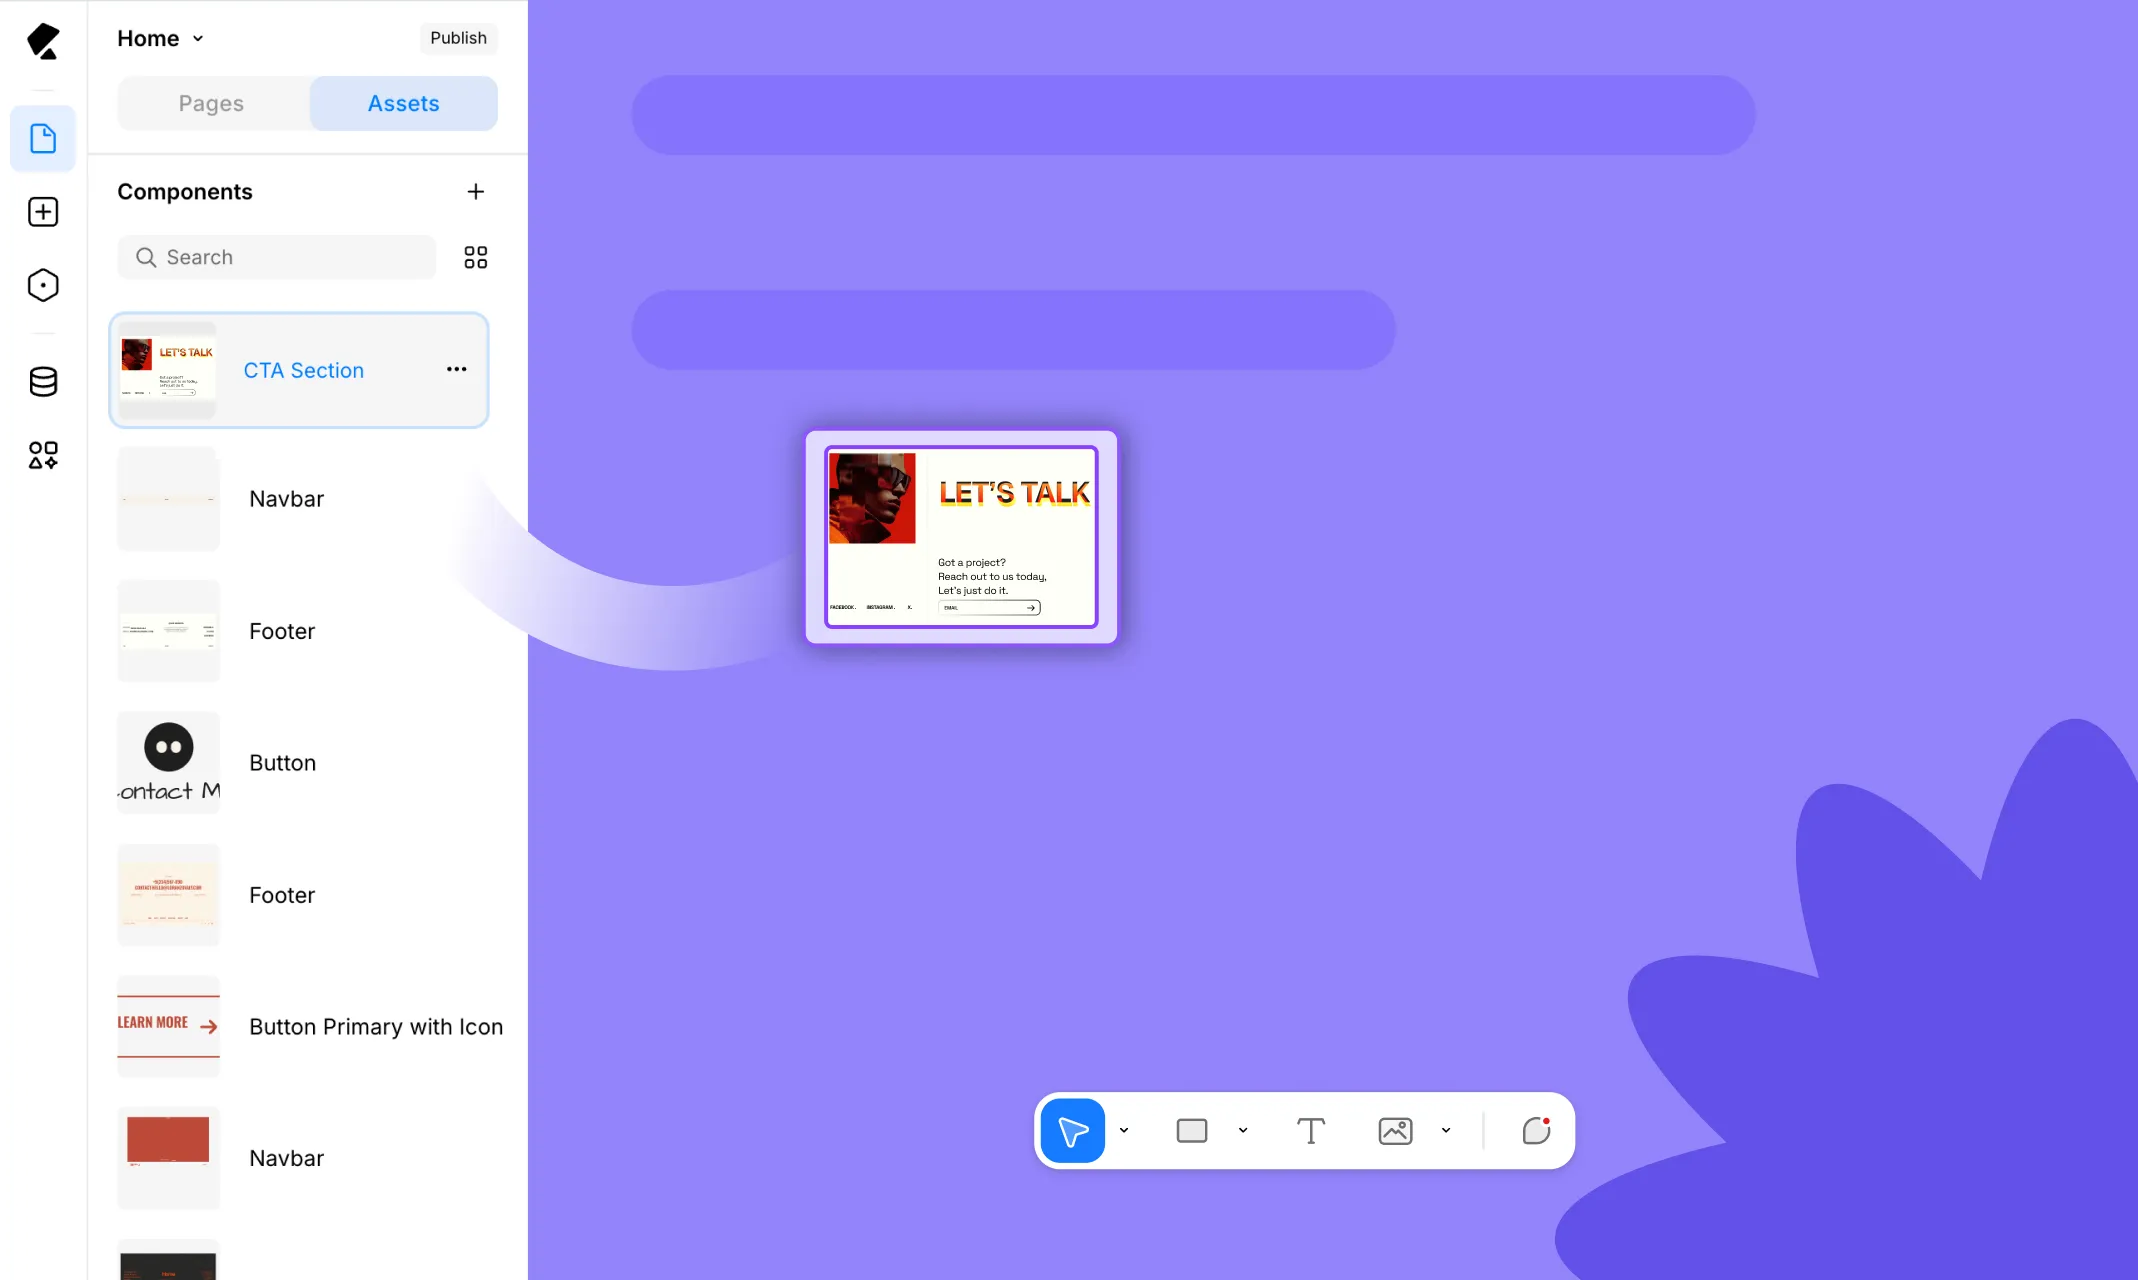
The true power of Components in Kirki shines when you go to edit them. With just one edit to the main instance, your changes are automatically applied across your entire WordPress website.
To edit a Component, go to the Assets tab, find your Component, click the “…” next to it, and select Edit.
Kirki will enter Symbol Edit mode, clearly indicated at the top of the canvas. Make your changes as you normally would in the editor. When you’re done, click Save from the banner at the bottom of the canvas that reads “Changes will be applied to all instances.” Your updates will instantly reflect across every instance of that Component sitewide.
If you want to edit only one specific instance of a Component without affecting the others, simply right-click that instance on the canvas and select Detach from the context menu. Once detached, you can edit it just like any regular section while still benefiting from it as a starting point.
WordPress Website Building Made Efficient
Start your efficient WordPress website-building journey through reusable blocks using the Kirki WordPress website builder!
Enjoy the power of truly customizable, no-code website building with Kirki and save time, maintain consistency, and streamline your workflow using Kirki Components.

