You’ve been putting off building your website for weeks – not because you don’t know what you want it to look like, you do. But every time you start researching, you hit a hefty price tag or a tutorial that requires code.
This guide avoids both. Here’s how to build a WordPress website for free – without spending a cent or sacrificing functionality.
What “Free” Actually Means With WordPress
If you search “free WordPress website”, you’ll get fifteen different answers. Some will say it’s completely free. Others will say you’ll need to pay eventually. And some will still say it depends.
They are all right – which is exactly what makes it confusing.
So here’s a breakdown:
WordPress itself is free.
The software costs nothing to download, install, or use. But a website isn’t just software – it needs somewhere to live, and that’s usually where the costs come in.
WordPress.com vs WordPress.org
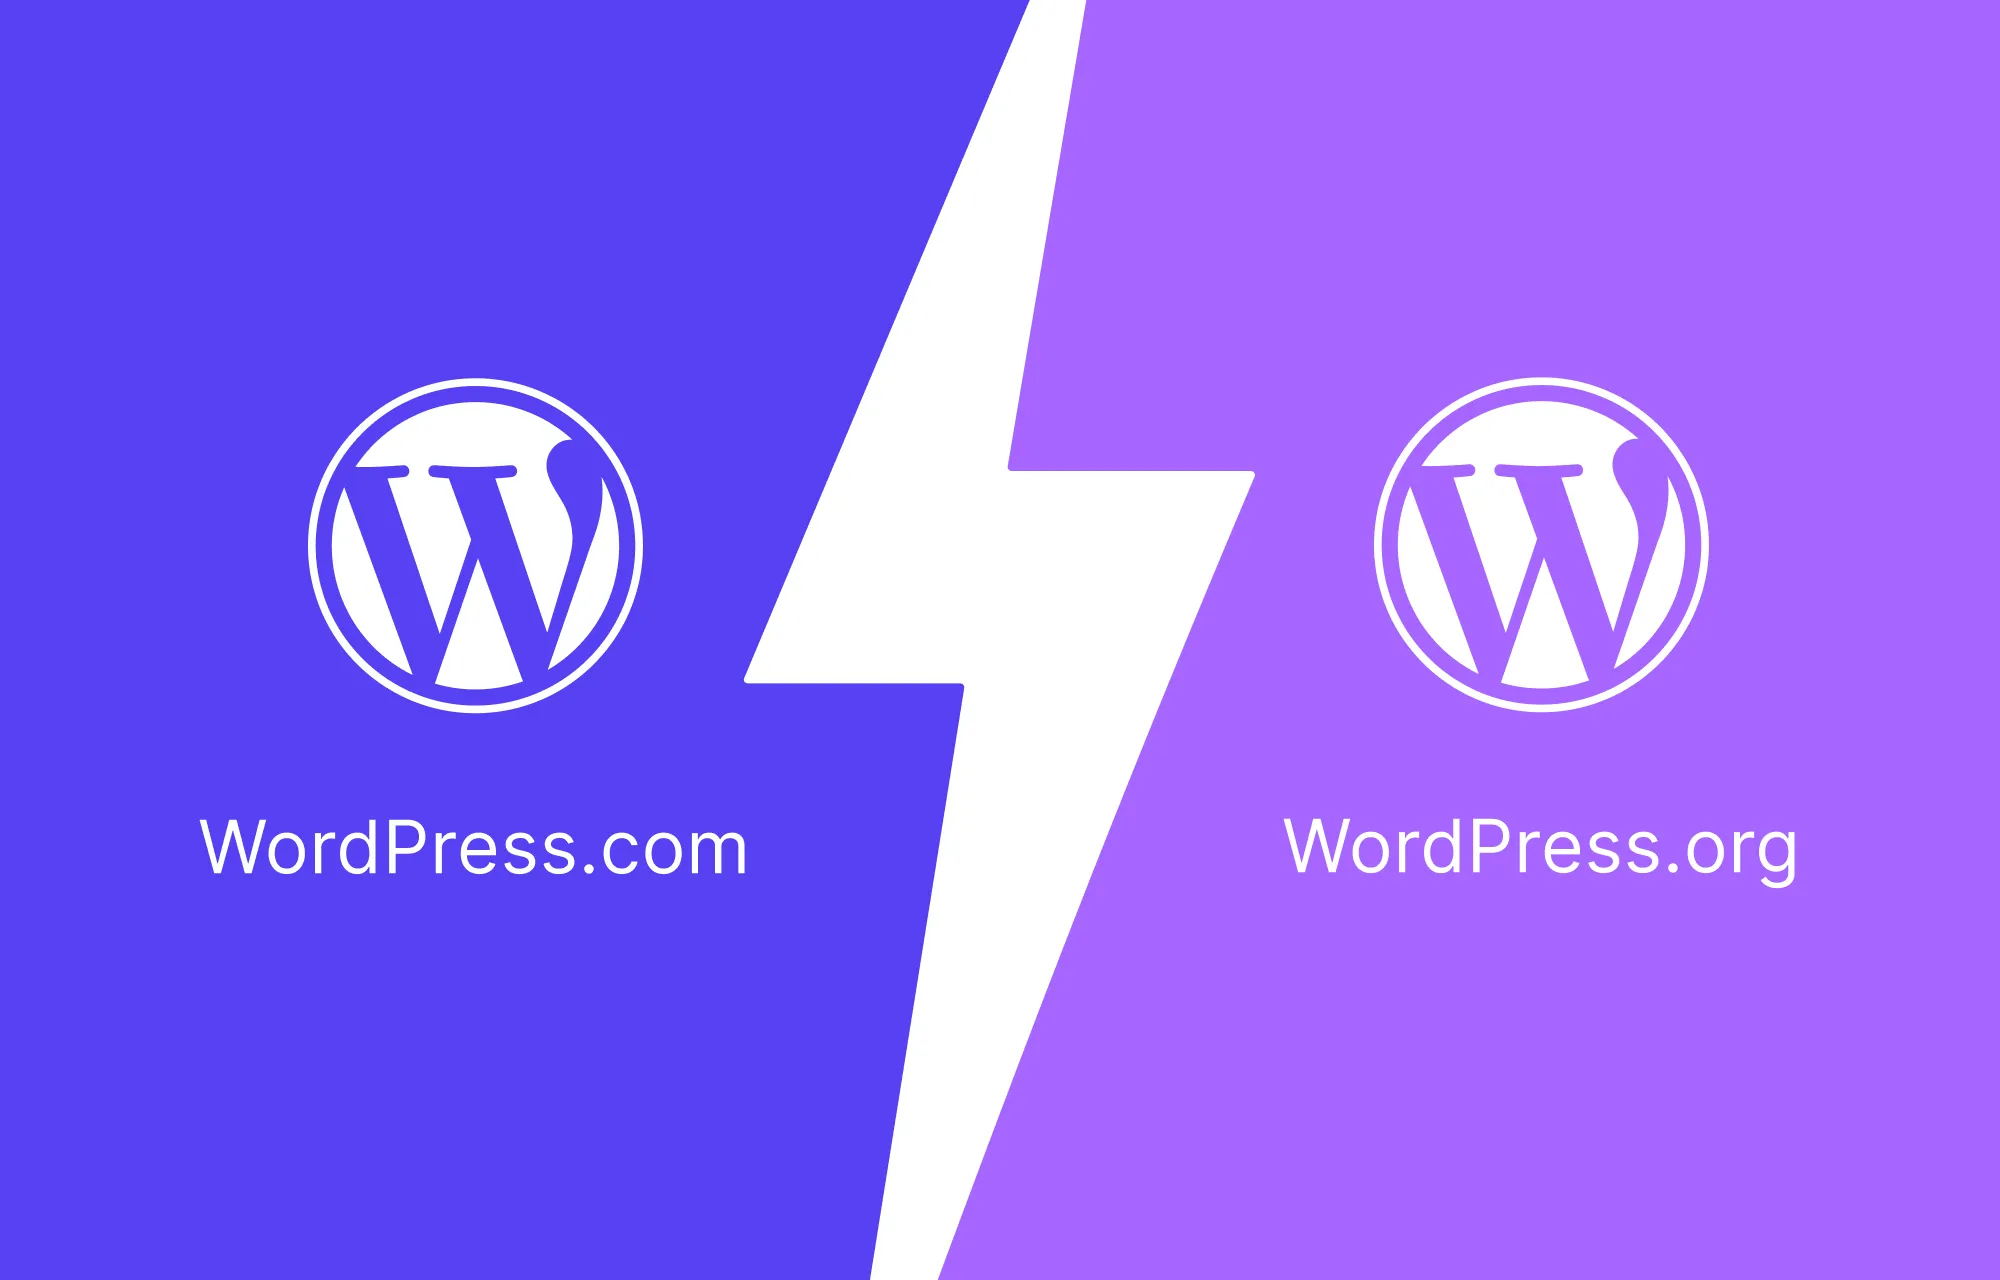
Before you install anything, you’ll hit a choice that looks like a minor detail but will shape everything: WordPress.com vs WordPress.org.
WordPress.com is a hosted service. You sign up, pick a plan, and WordPress handles the rest. And one of those plans is free – but not without limitations: WordPress branding on your site & domain, limited access to the plugin ecosystem, and limited design control. To remove them, you pay.
WordPress.org, on the flipside, is just the software – you bring your own hosting and domain. Both have free options to get you started, and affordable ones when you’re ready to commit. In return, you get a website with no mandatory branding, no plugin restrictions, and no design ceiling.
What You’ll Need to Pay for Eventually (And What You Won’t)
Here’s the honest version: Some things are genuinely free while others are free-until-you-grow.
You won’t need to pay for:
- WordPress itself
- A WordPress website builder with full features (more on this later)
- Basic SEO setup
- A contact form
You’ll likely pay for eventually:
- A custom domain – Free custom domains are either limited, only free for a time, or simply unreliable.
- Hosting – Similarly, most reputable hosts charge after the first year or, if free, come with caveats.
Step 1 – Get Your Hosting and Domain

Your website needs somewhere to live, and a name people can find it by. This is the one step where “free” has the most asterisks – so here’s everything you need to know before you get locked into something you regret.
Hosting
For hosting, you could technically go the fully free route. It’ll get a site live, but you’ll be trading reliability for the price tag – think slower load times, less support, and limits that show up right when your site starts getting traction.
If you want something that won’t fail you the moment real visitors show up, a reliable hosting like Cloudways is worth the small spend. It’s not free, but it’s built for people who want managed, scalable hosting with free caching, SSL, 24/7 support, and more.
Whatever you choose, look for:
- One-click WordPress installation.
- At least 5GB of storage.
- No forced ads on your pages.
- An easy upgrade path or a straightforward way to export your site if you switch.
Domain
For your domain, various hosts offer free subdomains – something like yourname.great-site.com, which is fine for testing purposes but not long-term. Because free subdomains are a bad idea. You don’t own the root domain, and this hurts your credibility, leaves your site vulnerable to being flagged as spam, and limits your SEO potential from the get-go.
And here’s the thing: your site identity and SEO are built around whatever domain you launch on. Switch it later, and you’re dealing with redirects, lost rankings, and visitors who can’t find you.
If a custom domain is anywhere in your plans, get it now. Many reliable domain registrars make this simple and affordable, typically running around $10-15/year, and it’s yours to keep regardless of where you host.
Step 2 – Install WordPress
The next step is to install WordPress. Most hosting providers make this a single click. If yours doesn’t, you’re probably using the wrong host.
Look for an auto-installer button like Softaculous and launch that. From there, it’s three quick steps to a working WordPress site:
- Select WordPress.
- Fill in your site name and admin credentials.
- Hit install.
And like that, you’ve got a working WordPress site in under five minutes.
Once it’s installed, go to yourdomain.com/wp-admin and log in. You’ll land on the WordPress dashboard – the control center for everything you’re about to build.
A few things to do immediately after logging in:
- Make sure your SSL certificate is activated – your site will load as https:// and not http:// (that little “s” tells visitors your site is secure). If not, check your hosting dashboard: many hosts offer a free one, and while some auto-install it, others require you to enable it manually.
- Go to Settings → General and set your Site Title and Tagline.
- Go to Settings → Permalinks and switch to Post Name – this gives you cleaner URLs.
- Delete the sample page and “Hello World” post that WordPress creates by default.
That’s it. WordPress is ready.
Step 3 – Install a Website Builder
WordPress, out of the box, doesn’t offer much in the way of creative control. Its default block editor is workable but limited in terms of modern design.
What you need is a free WordPress website builder. But this is where most users hit a roadblock.
Yes, there are free options to choose from – several, in fact – but not all are without limitations.
The Problem With Traditional WordPress Builders
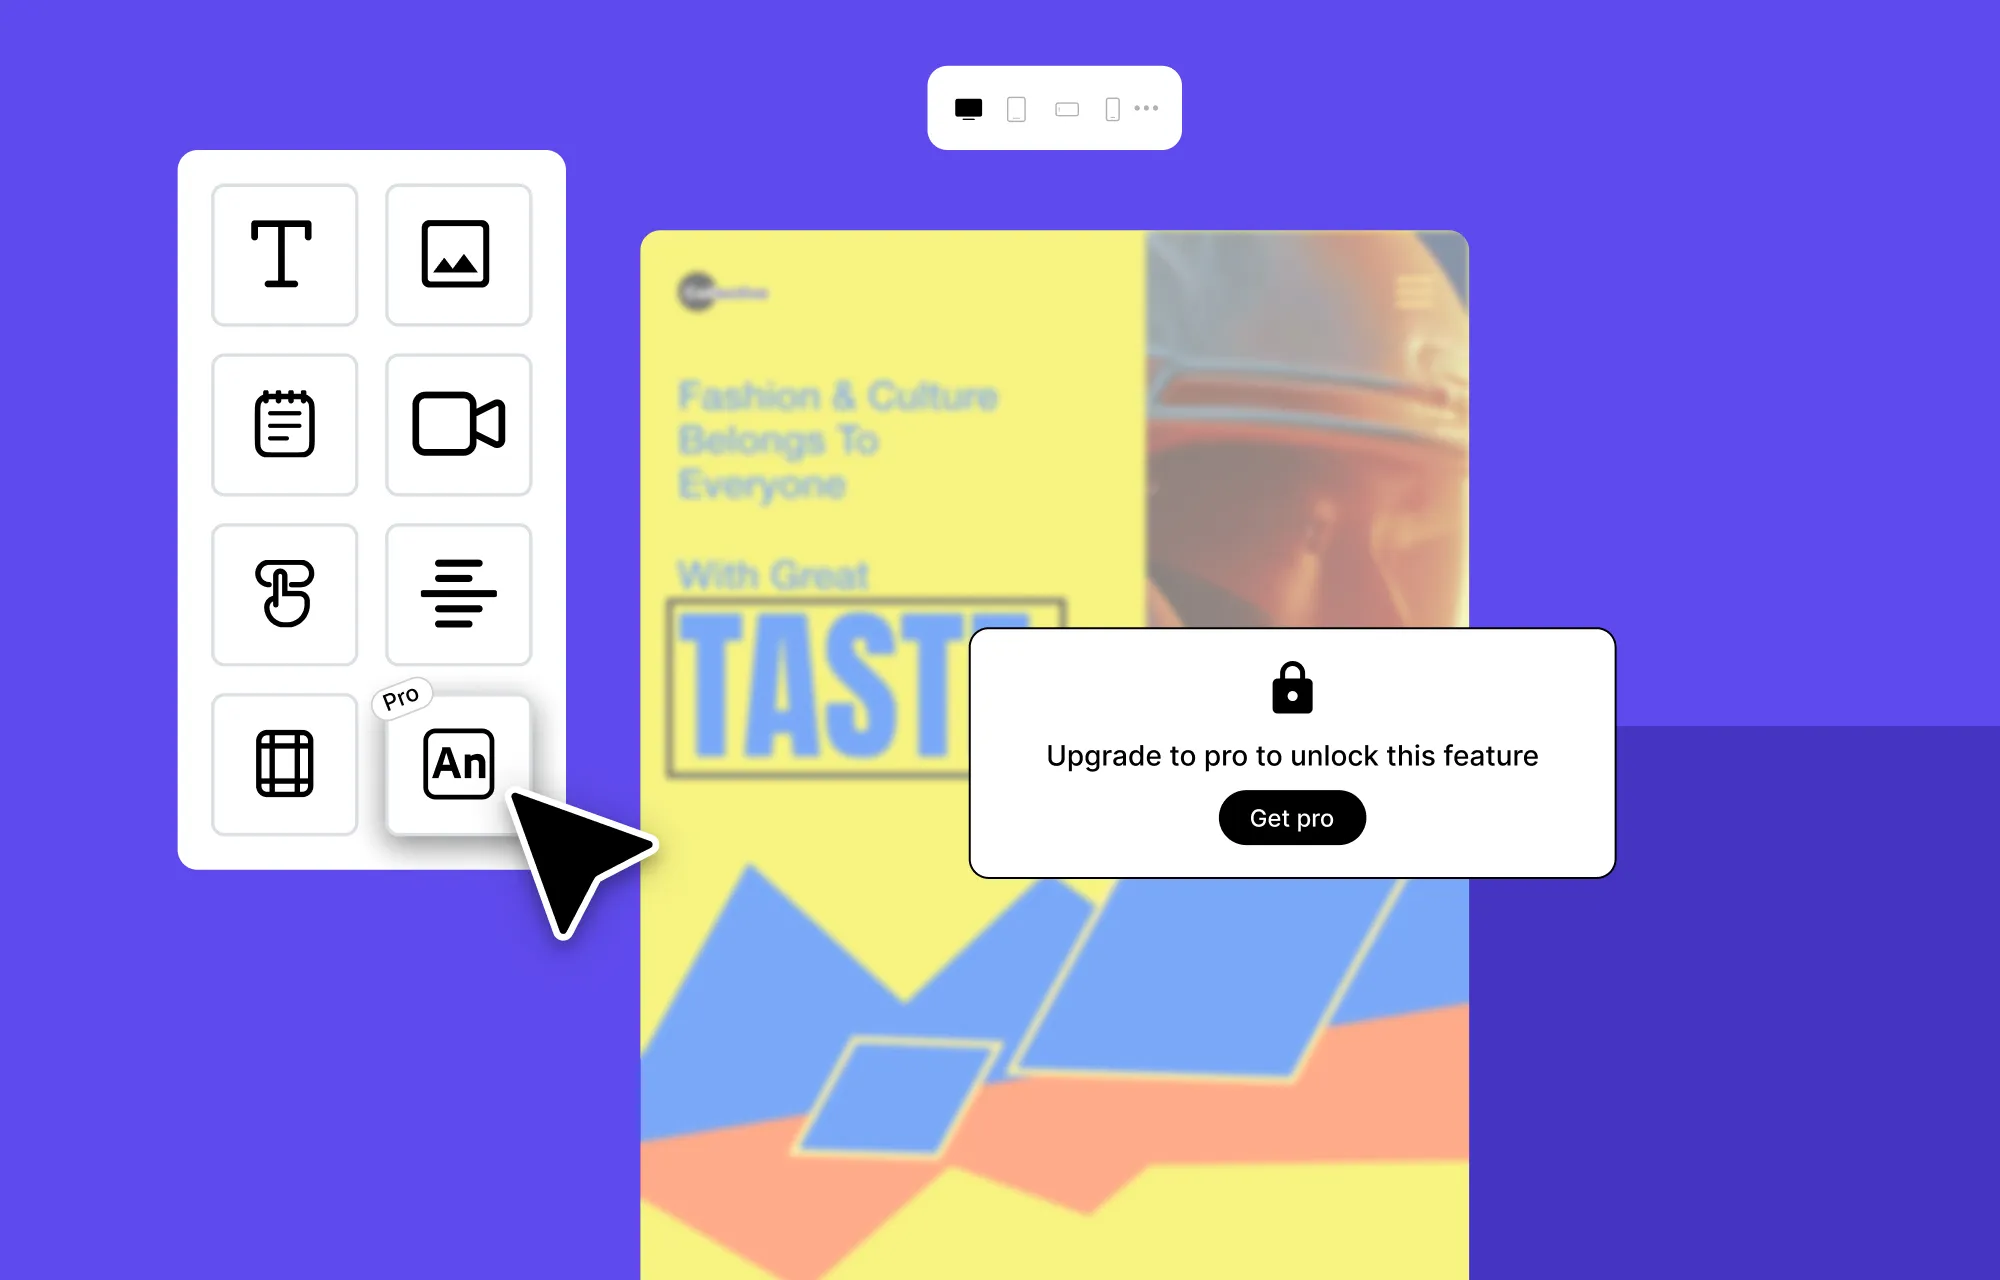
Many traditional WordPress builders offer free plans or trials.
So you install a free version, and it works – until you want to do the thing you actually downloaded it for. That feature is Pro. So is that one. And that one too.
Unless you pay a hefty price, you can’t even finish the site that you’ve spent hours building.
So you try to work around it. But hit wall after wall – quite literally.
Because the canvas is finite. Elements come with styling baked in and only a handful of controls exposed to override that. The editor itself is limited – there’s no real way to build the modern site you pictured: elements breaking out of their boxes, media tilted at unexpected angles, motion that makes the page feel alive.
Why Kirki Is Different
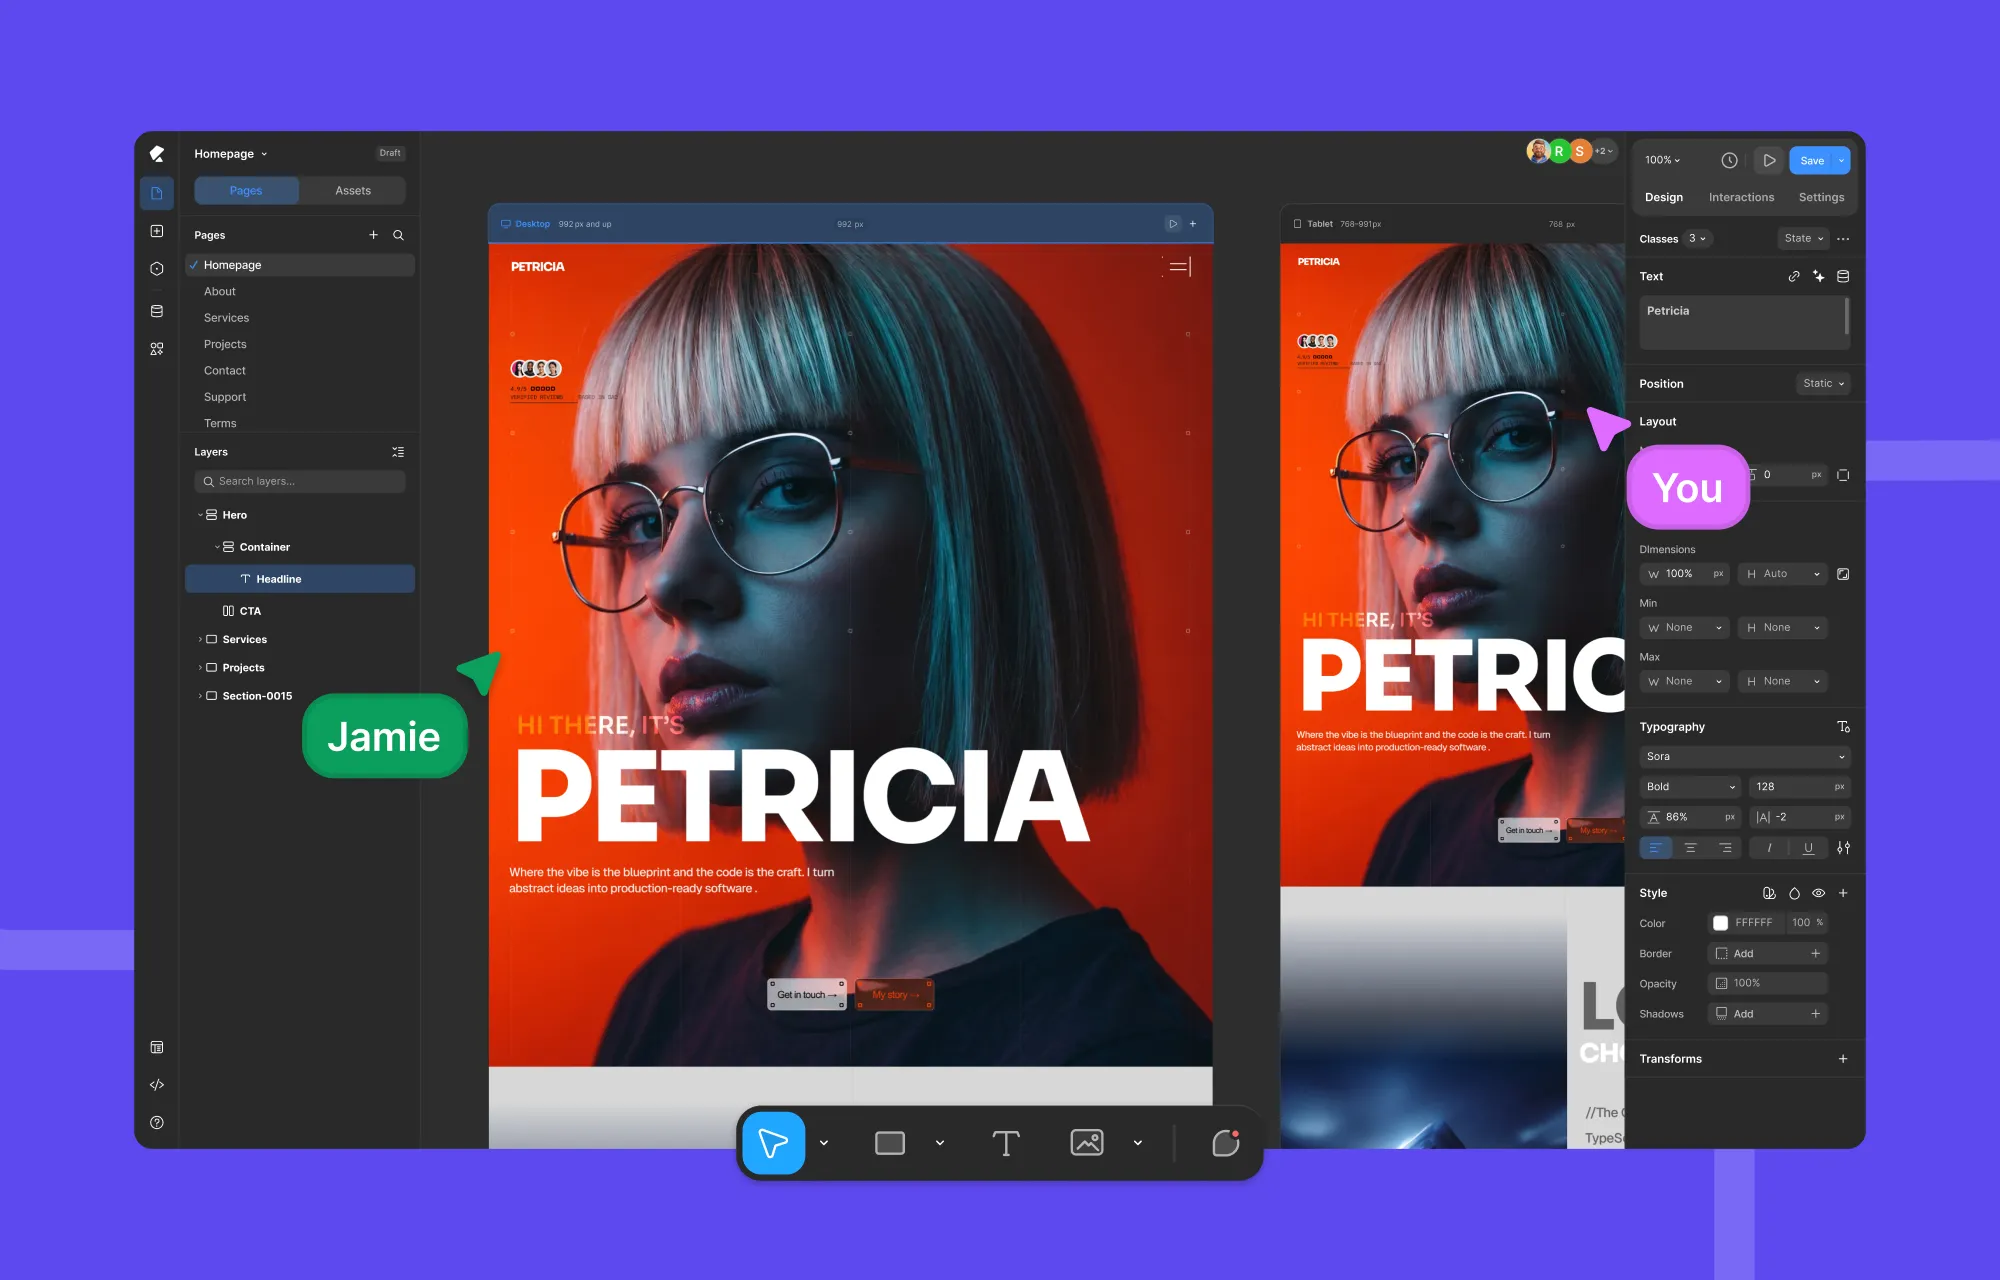
But we built the Kirki WordPress Website Builder differently. Its free version gives you everything you need to build a complete website – no feature walls, no add-on packs.
The page box still exists. But it shines where traditional WordPress builders fall short: no page box holds your pov hostage, no pre-baked styling fights against your vision, and granular controls let you sweat the smallest detail. Just a powerful, infinite canvas, free for you to rule.
Zoom out for a bird’s eye view of your entire work, zoom in when you need to obsess over a detail. With side-by-side breakpoint views, pan left and right to check how your site looks across devices – no tab switching, no losing context, no guesswork on responsiveness until you publish.
As your site grows – along with your budget – that’s when Pro starts to make sense: a dynamic content manager to scale seamlessly, deeper app integrations, an interaction timeline editor for complex, modern animations, and more.
But that’s for later. Right now, what you have for free is enough to build, launch, and impress.
The free version isn’t a teaser. It’s the real thing.
Installing Kirki
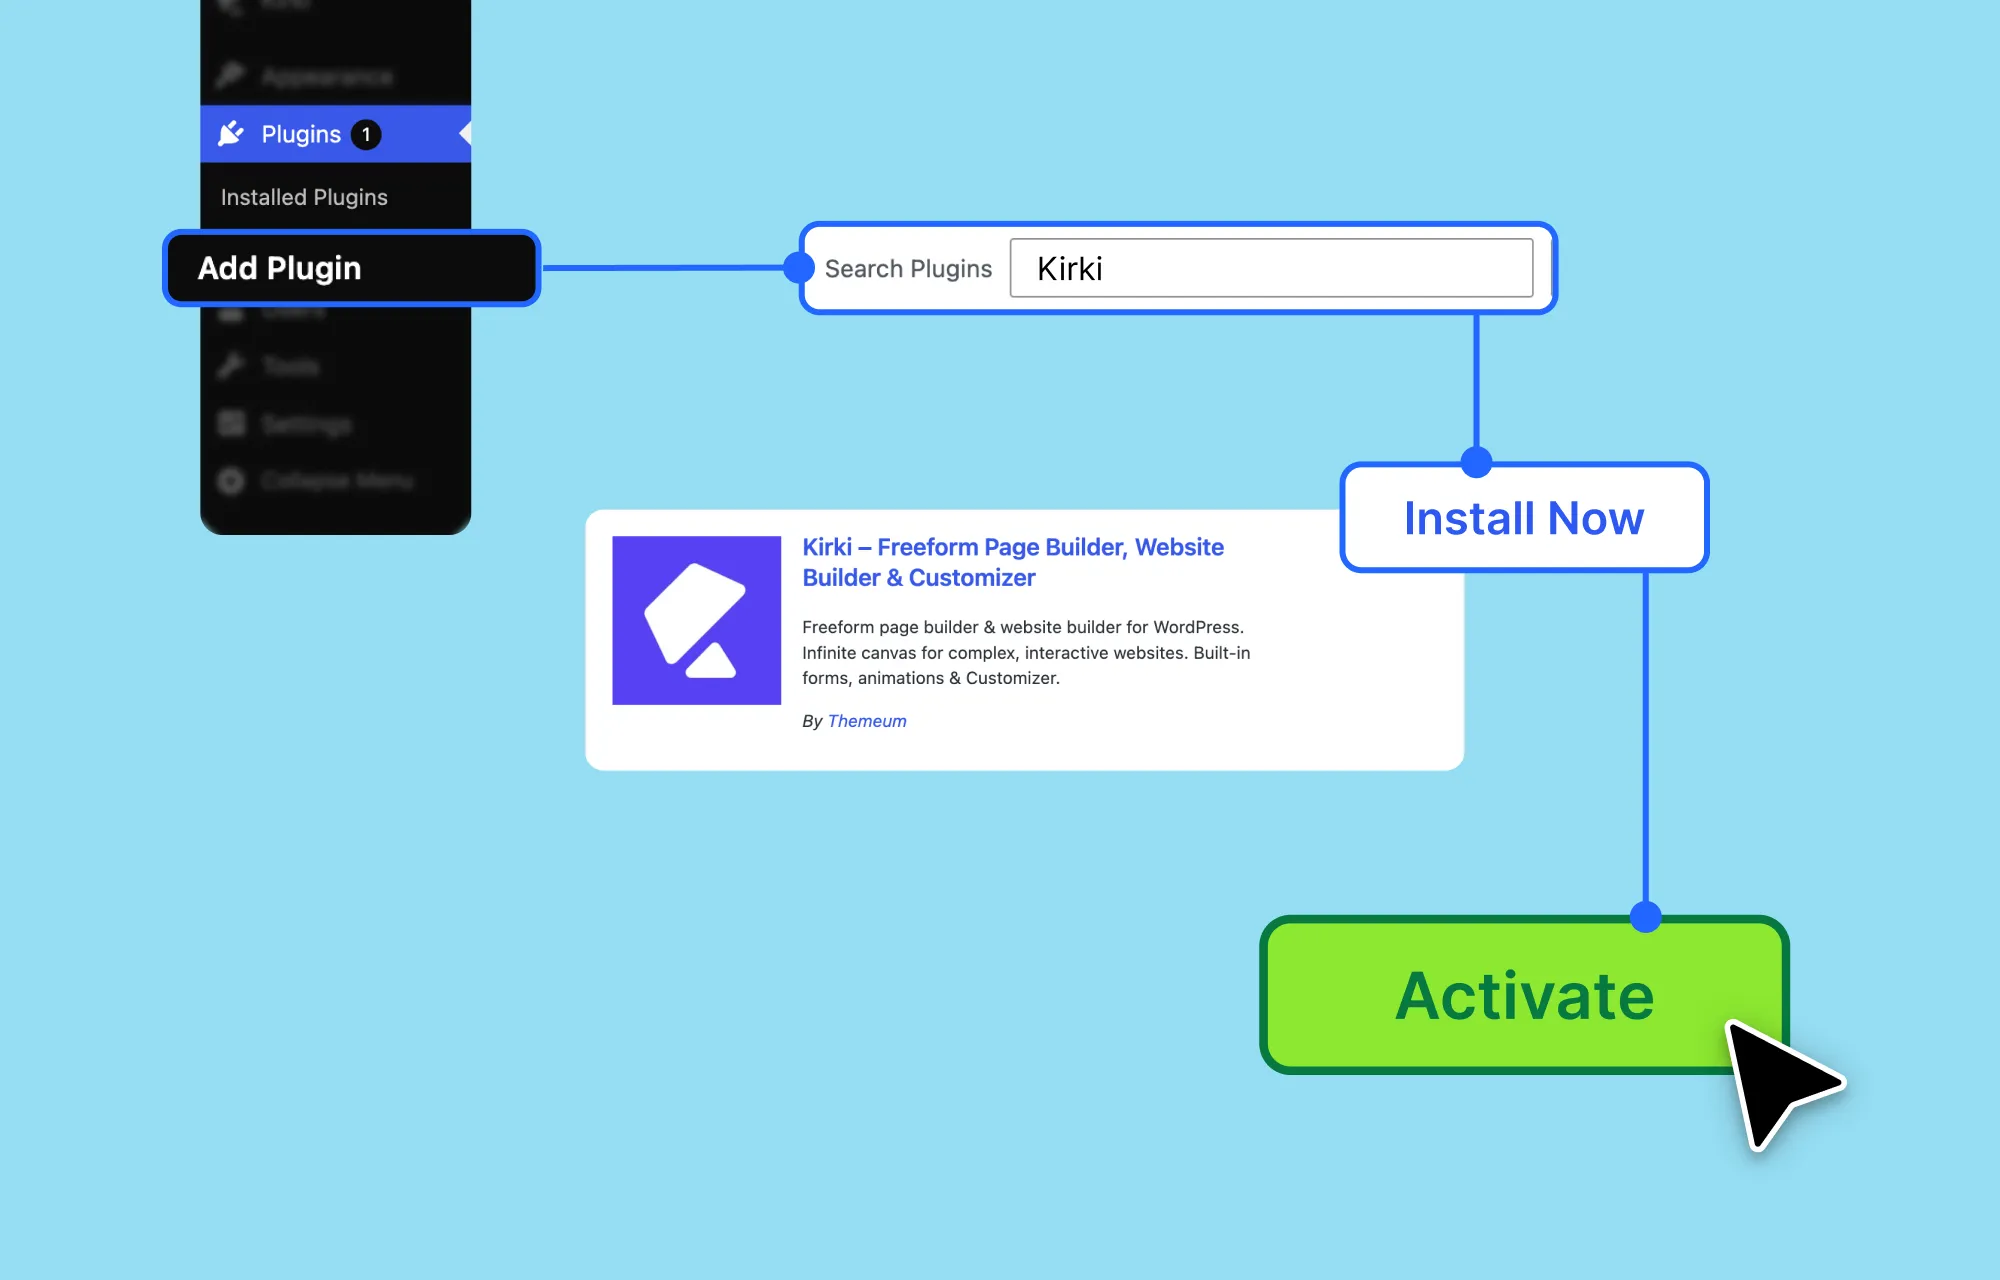
- Go to Plugins → Add New from your site’s WordPress dashboard.
- Search for Kirki.
- Click Install, then Activate.
Once it’s active, click Kirki on the left sidebar to access the Dashboard. From there, you can create a new page, browse free templates, and more.
Step 4 – Choose a Theme
With Kirki installed, the next step is picking a theme. But when you open the WordPress theme library, you immediately feel overwhelmed. Thousands of options, but you have no idea which one to choose.
Here’s what you need to know: WordPress requires an active theme to function – usually defining the foundational structure, styling, header, footer, and more. Every WordPress installation comes with a default theme, but you’ll want to choose one that works with how you plan to build.
Kirki is designed to be compatible with any WordPress theme, but not all of them are worth your time. Since you’re using Kirki to visually design your site, a theme with heavy built-in styling will fight your builder at every turn – and lock you into decisions you’ll struggle to undo later.
The rule of thumb: Choose a theme that’s minimal, with extra no frills, so you have what you need without starting from scratch, but it’s also not in the way of your vision.
Alternatively, if you want an option built specifically for the builder, Kirki Base Theme is a dedicated theme designed to work seamlessly with Kirki Pro.
Step 5 – Build Your Key Pages
This is the part you’ve been waiting for. Your hosting is set up, WordPress is installed, and your builder is ready. Now you actually get to build something.
Identify Your Key Pages
A website is made up of pages – here are the key ones your website needs:
- Homepage – gives visitors their first impression and acts as a hub for them to land on.
- Services / Products – showcases what you’re offering.
- Projects / Portfolio – showcases past work you’ve done. This one’s often paired with the Services page.
- Blog / Resources – optional, but worth adding if content is part of your strategy.
- About – explains who you are, what you do, and why it matters.
- Contact – how visitors can reach you.
Choose How to Build Your Pages
If you’re using Kirki, start by creating a new page from the Kirki Dashboard. From there, you have three routes to build each page:
- Use a free WordPress template – Kirki offers 10 free templates (and the rest unlocked with Kirki Pro) you can easily import, customize, and scale in minutes. Ideal if you’re short on time or want a head start without designing from zero.
- Use premade pages and components: Mix and match presets, from entire pages (Homepage, About, Contact, and more) to individual sections (heroes, testimonials, pricing blocks, etc). A solid middle ground if you want more creative freedom than a template, but don’t want to start from scratch.
- Build from scratch: Start with a blank canvas and design every section yourself, with complete creative control from the ground up.
Set Up Your Navigation
Once you start building your pages, you’ll want to design a navigation menu tying it all together first. Here’s how:
- Add a navigation menu: Customize a prebuilt navigation section, or build one from scratch using the navigation element.
- Convert it into a component: Save it as a component so it’s reusable across your pages.
- Set it as your header: Assign the component as your header, and it’ll automatically appear on every page. (Don’t want it on a specific page? You can disable it individually for those pages.)
You can also set up your footer in the same way.
Step 6 – Customize Your Pages
Once you’ve laid out your basic elements, customize your pages to make them feel finished, polished, and unmistakably yours.
Set Global Styles With Variables
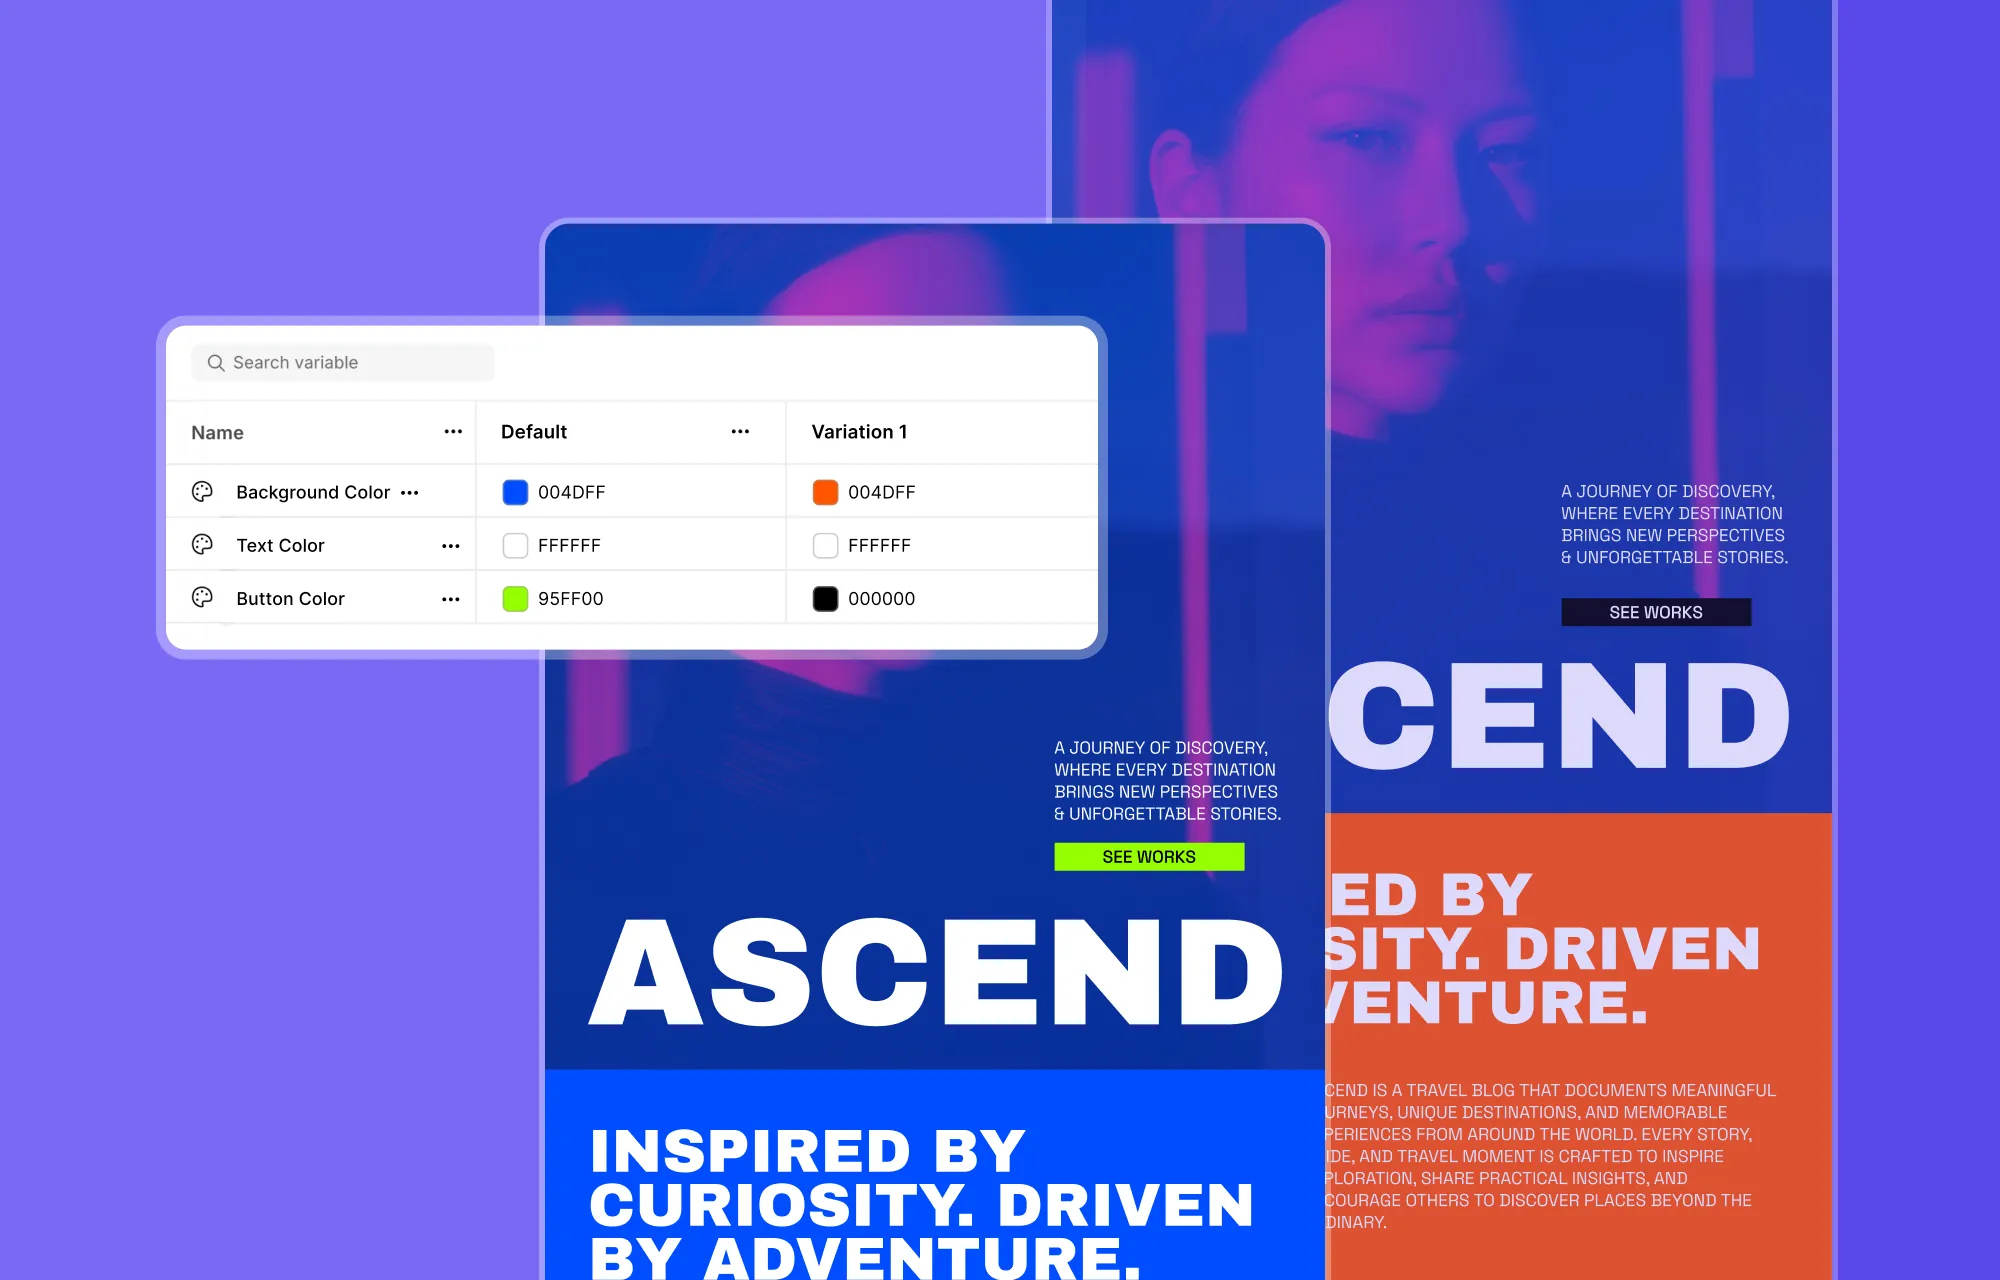
When building a page with Kirki, you can set up your global colors and styles using variables – a cohesive design system that’s fast, since you never have to hunt for a font name or color hex code, and easy to maintain, since changing a variable’s value updates it everywhere it’s applied.
Customize Elements From The Right Panel
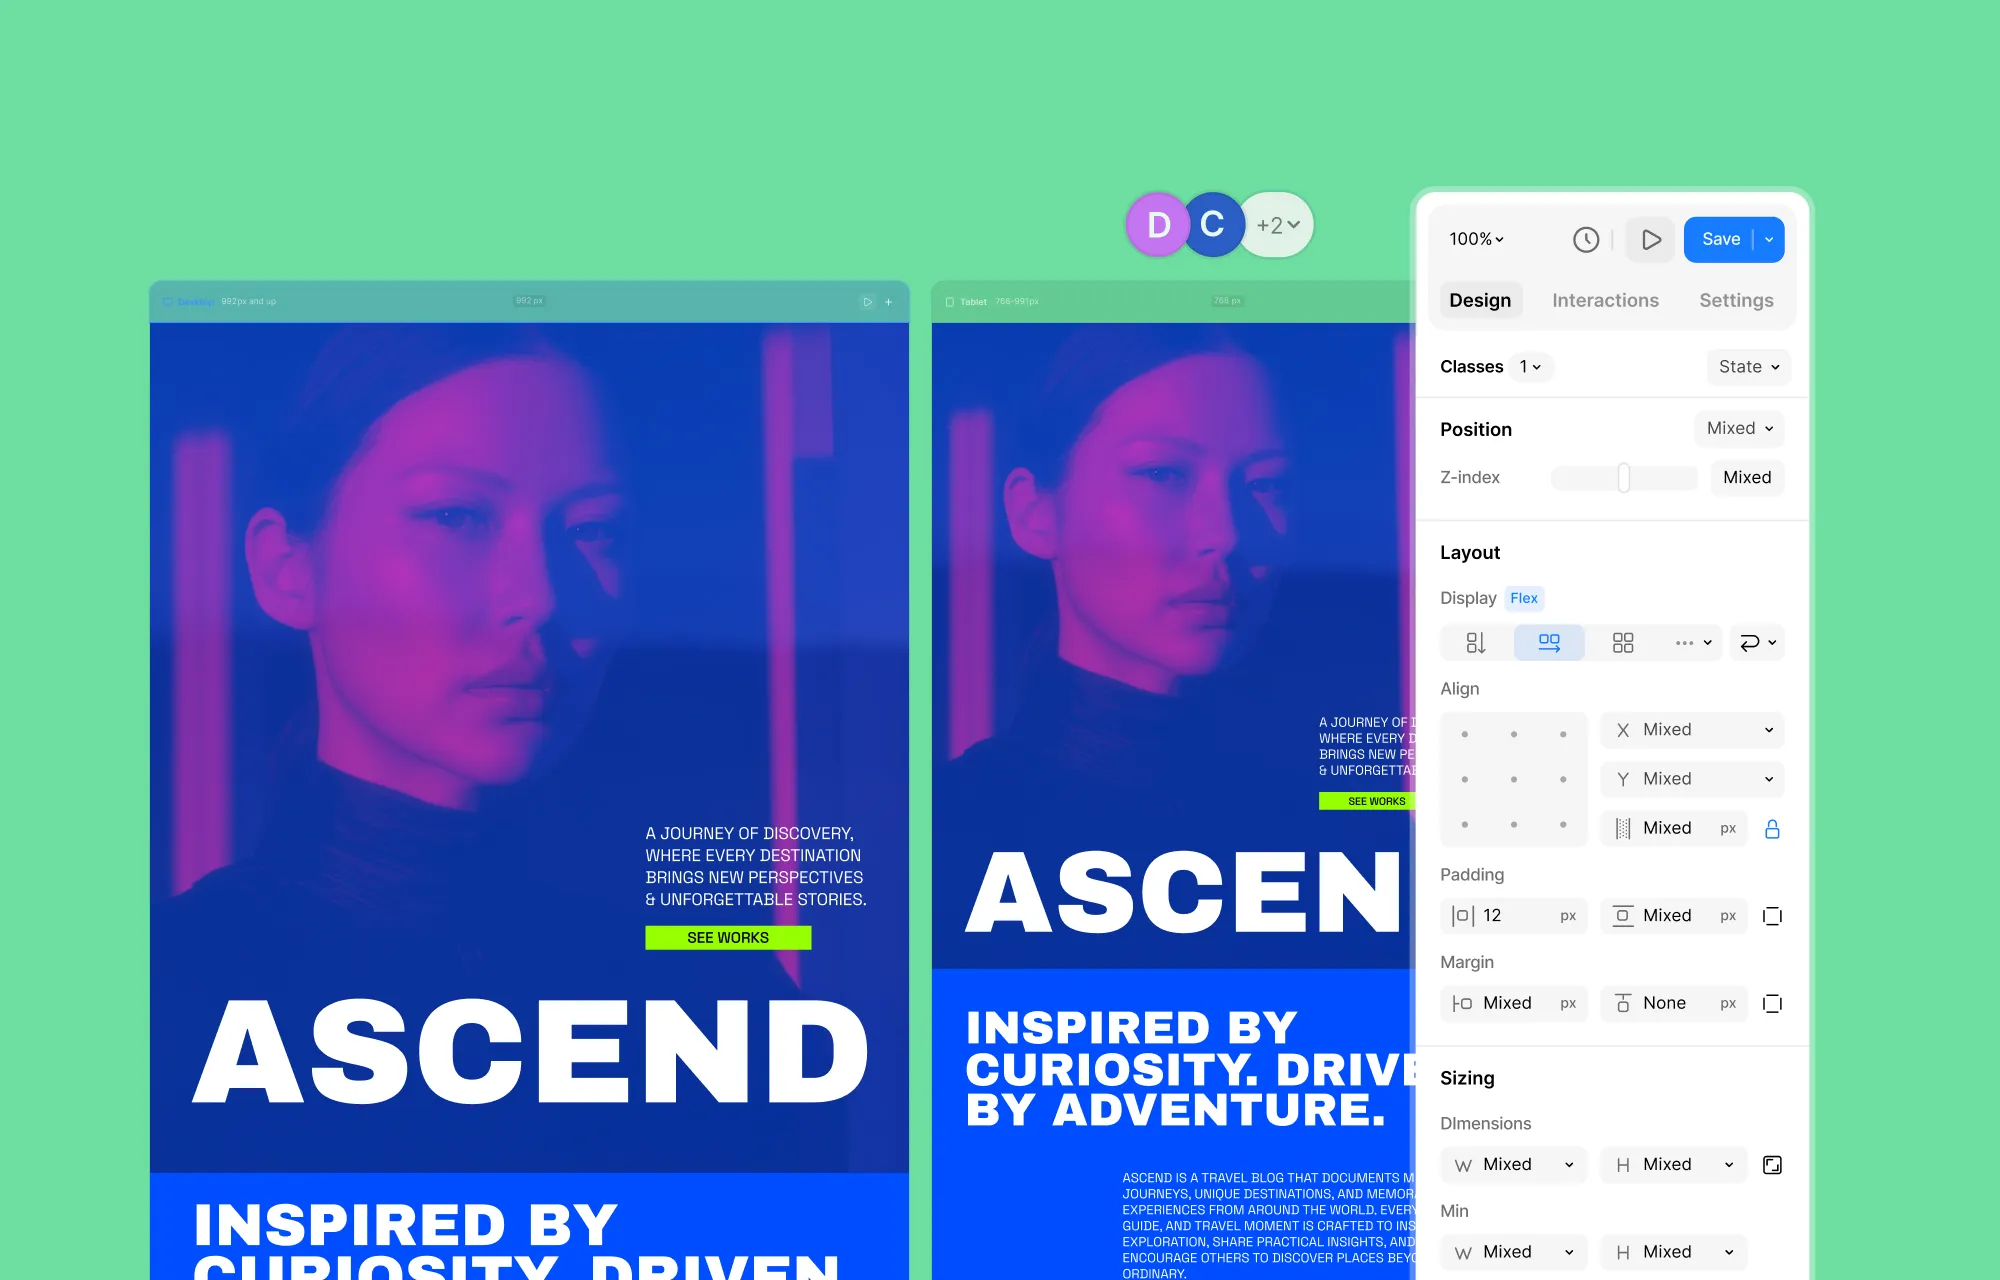
Kirki gives you granular control. From the context-aware right panel, you can easily find all your customization options under the Design tab – from editing content structure to the finer visual details.
Position, Layout, & Size: Bleed elements out of boxes, overlay them on top of one another, or let flex and grid handle the heavy lifting for layouts that are both structured and fluid. Set spacing, alignment, and sizing down to each pixel.
Typography: Adjust font style, weight, line height, letter spacing, and more.
Style & Effects: Add colors, shadows, filters, glass effects – the details that make a design feel considered rather than assembled.
And more: Hover effects, transitions, transformations, and beyond – customize every detail the design calls for.
Design Responsively Across Side-by-Side Breakpoint Views
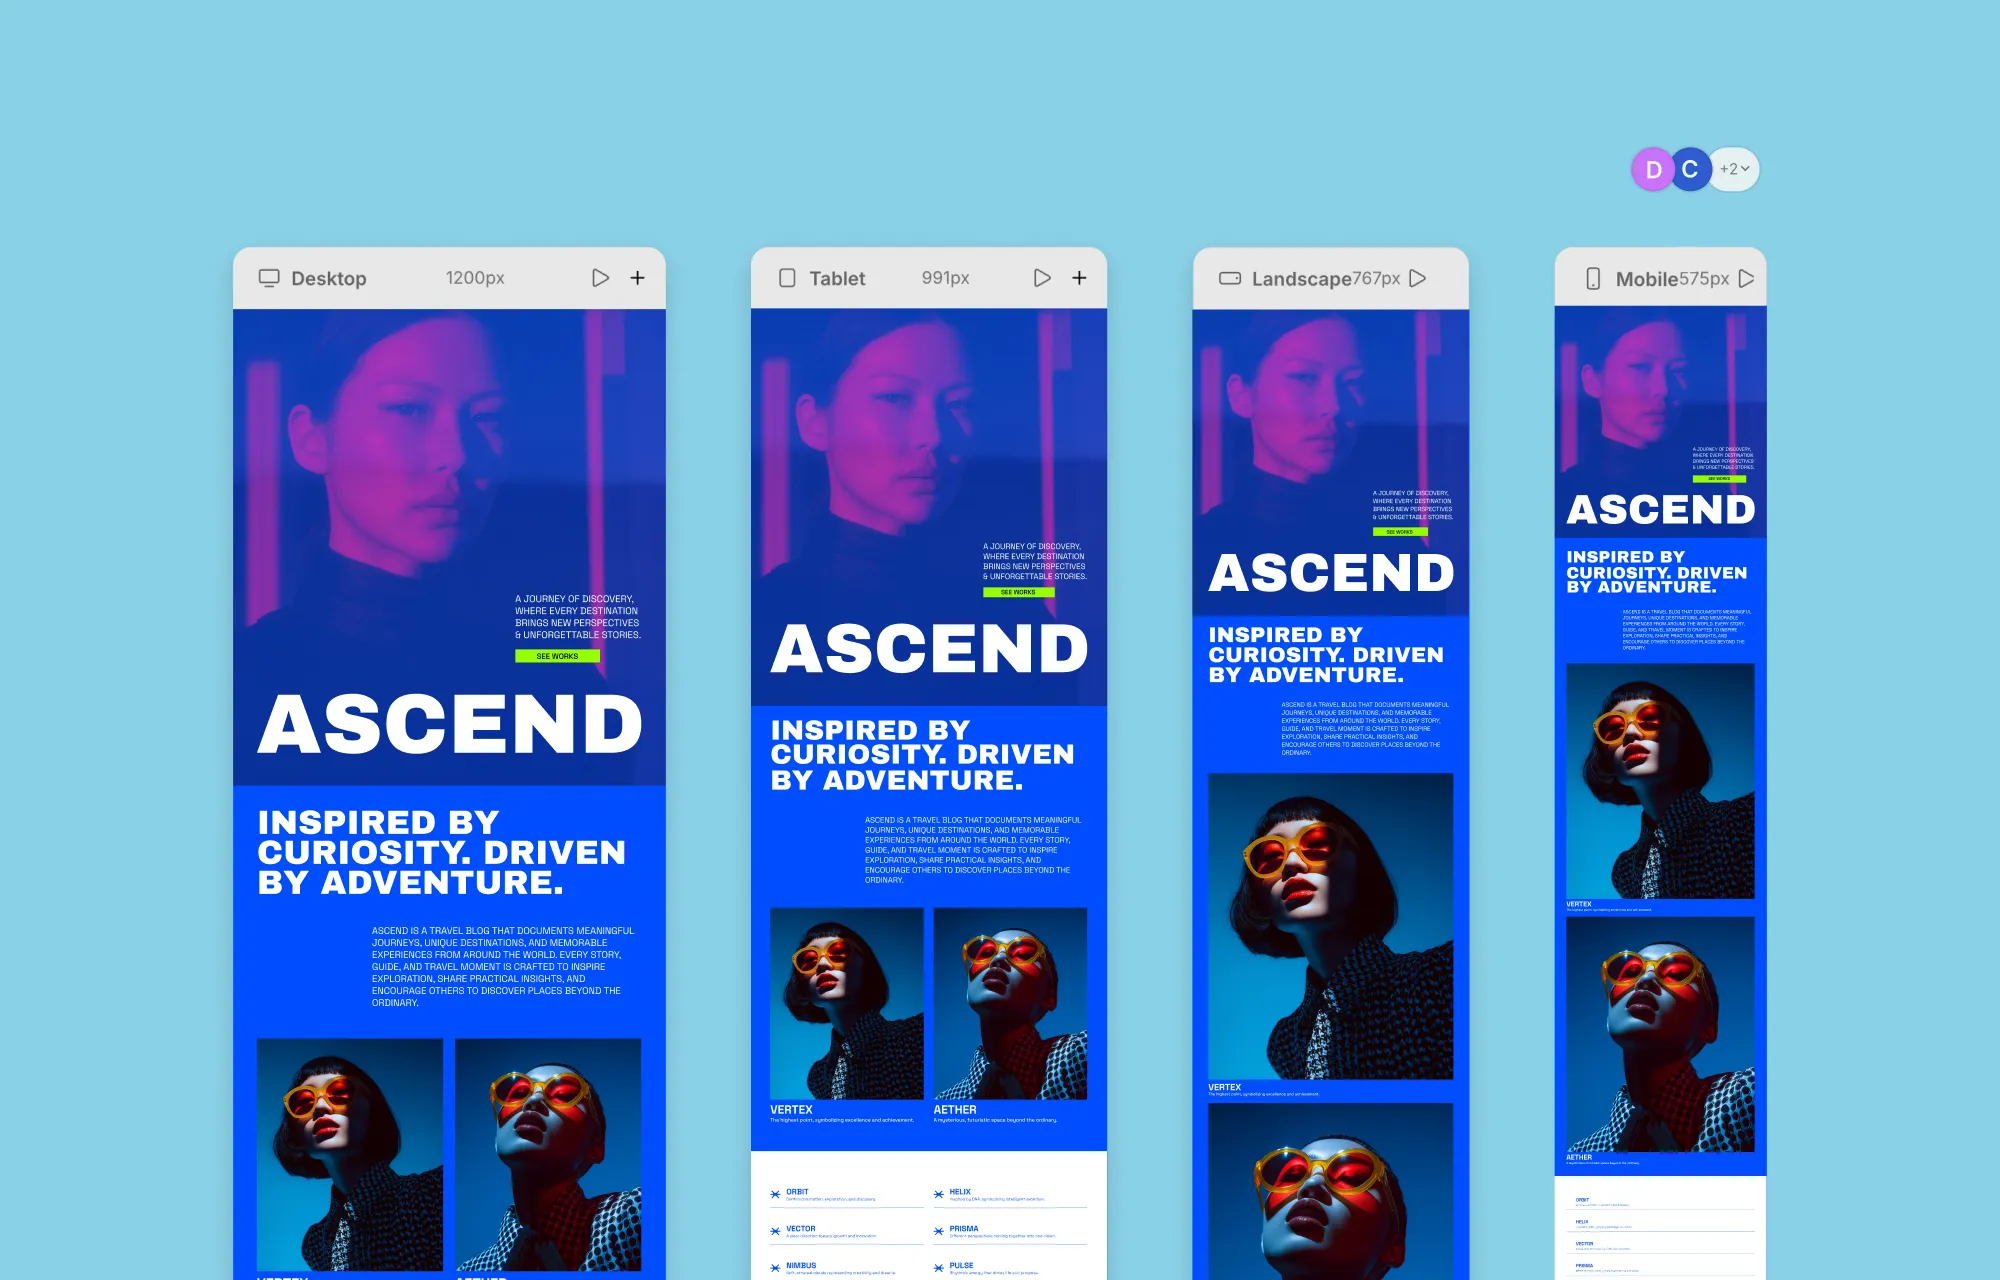
When it comes to responsive design, styling in Kirki cascades from desktop to all devices – so you’re not rebuilding your layout from scratch for every screen size. And with side-by-side breakpoint views, you pan left and right to fine-tune each device without losing your place or guessing how it’ll look until you publish.
Add Basic Interactions
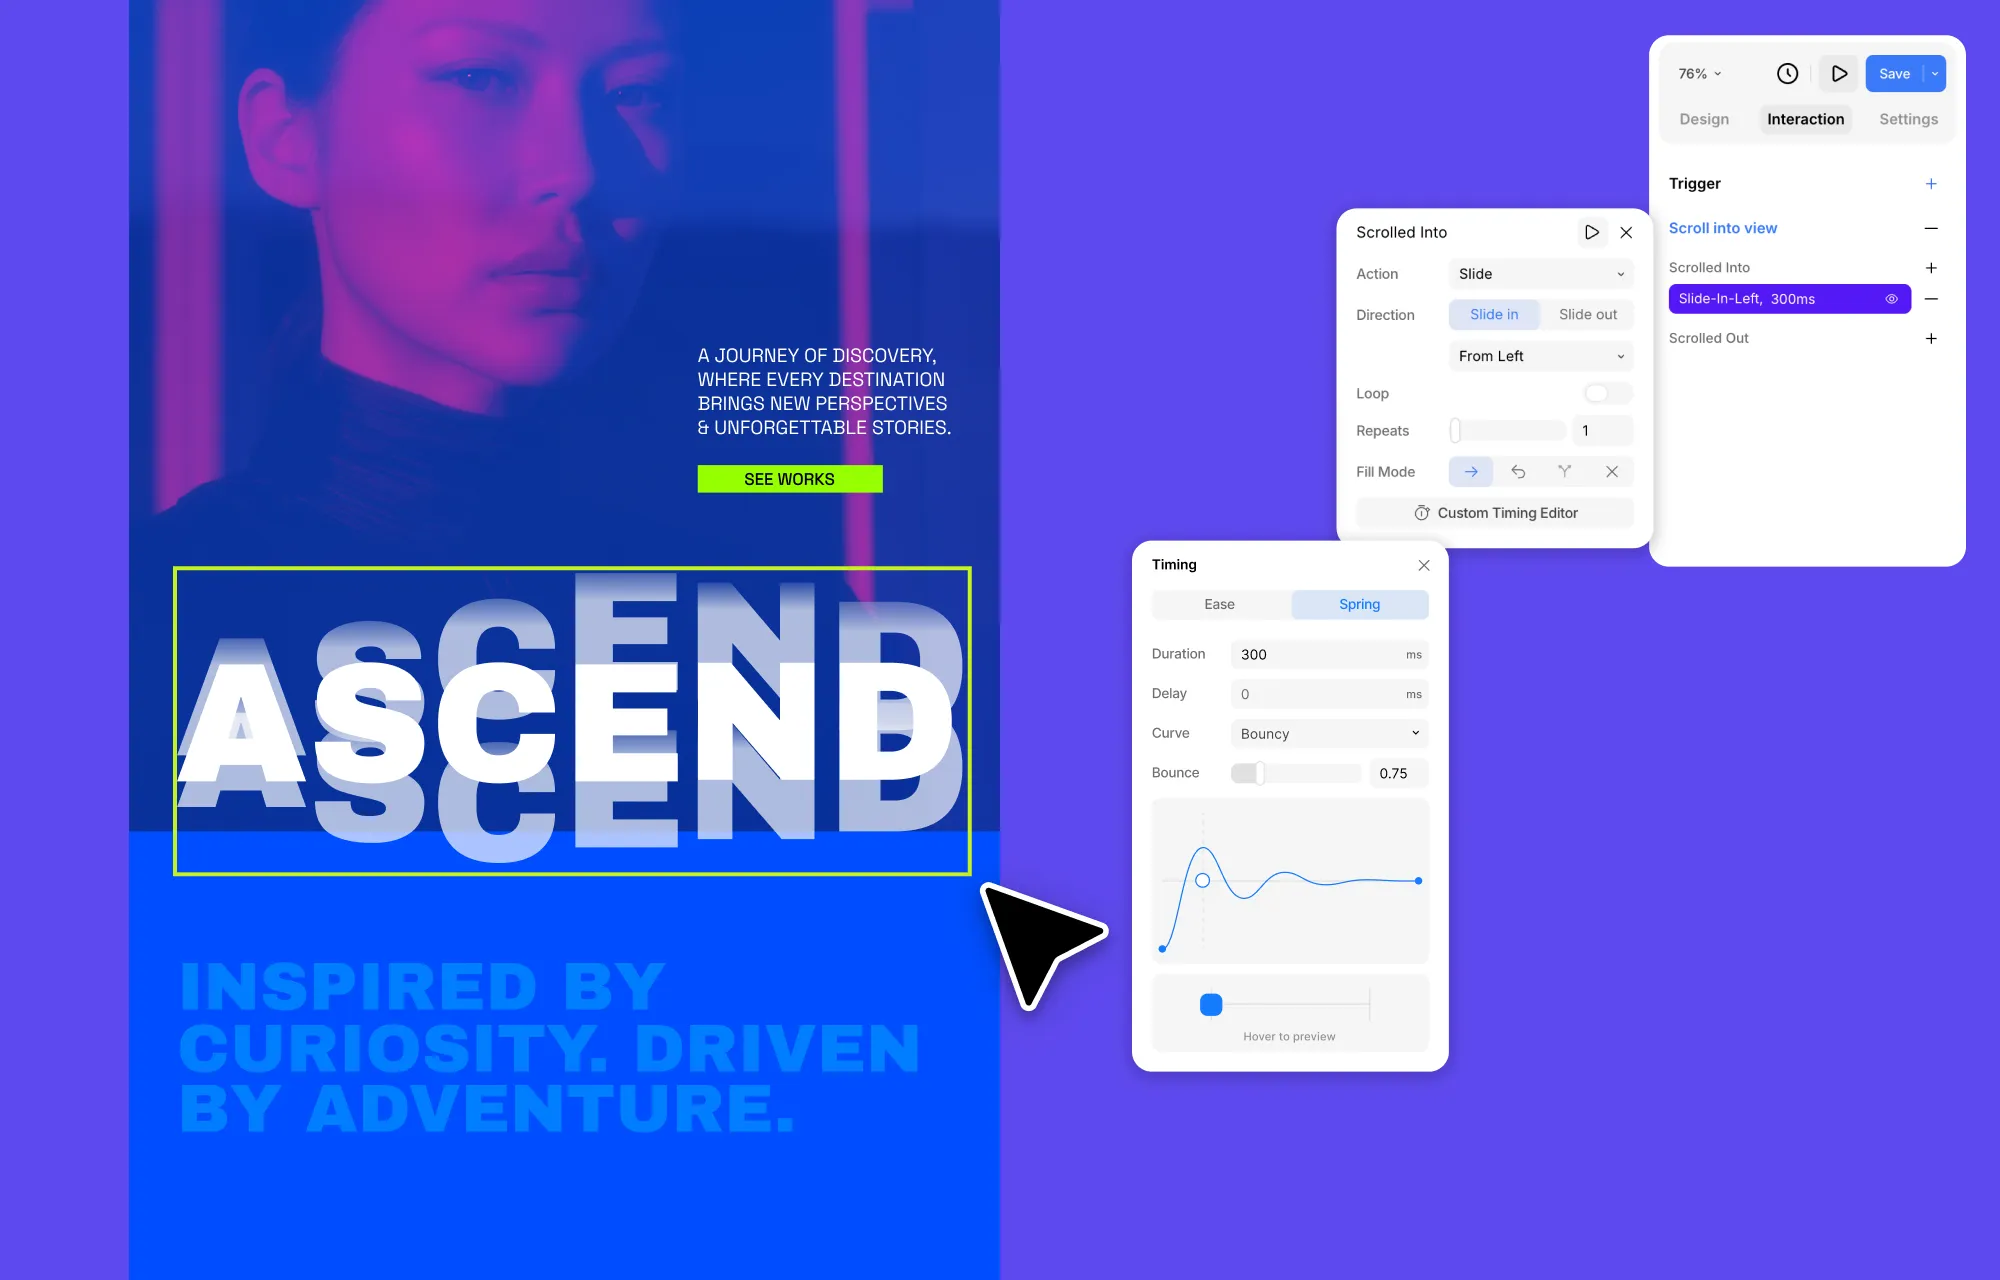
When you want movement, dip into the animation presets or add spring effects to bring elements to life.
Repeat the process for all pages – until you’re ready to pull it all together.
Step 7 – Finishing Touches
Your page looks good in the editor. But before you call it done, a few quick things will save you from an embarrassing first impression.
Homepage Settings
Right now, WordPress might be showing your blog posts as the front page instead of the page you just built.
Fix this by going to the WordPress Dashboard → Settings → Reading and setting Your Homepage Displays to A static page, then selecting the page you created from the dropdown.
SEO & OpenGraph
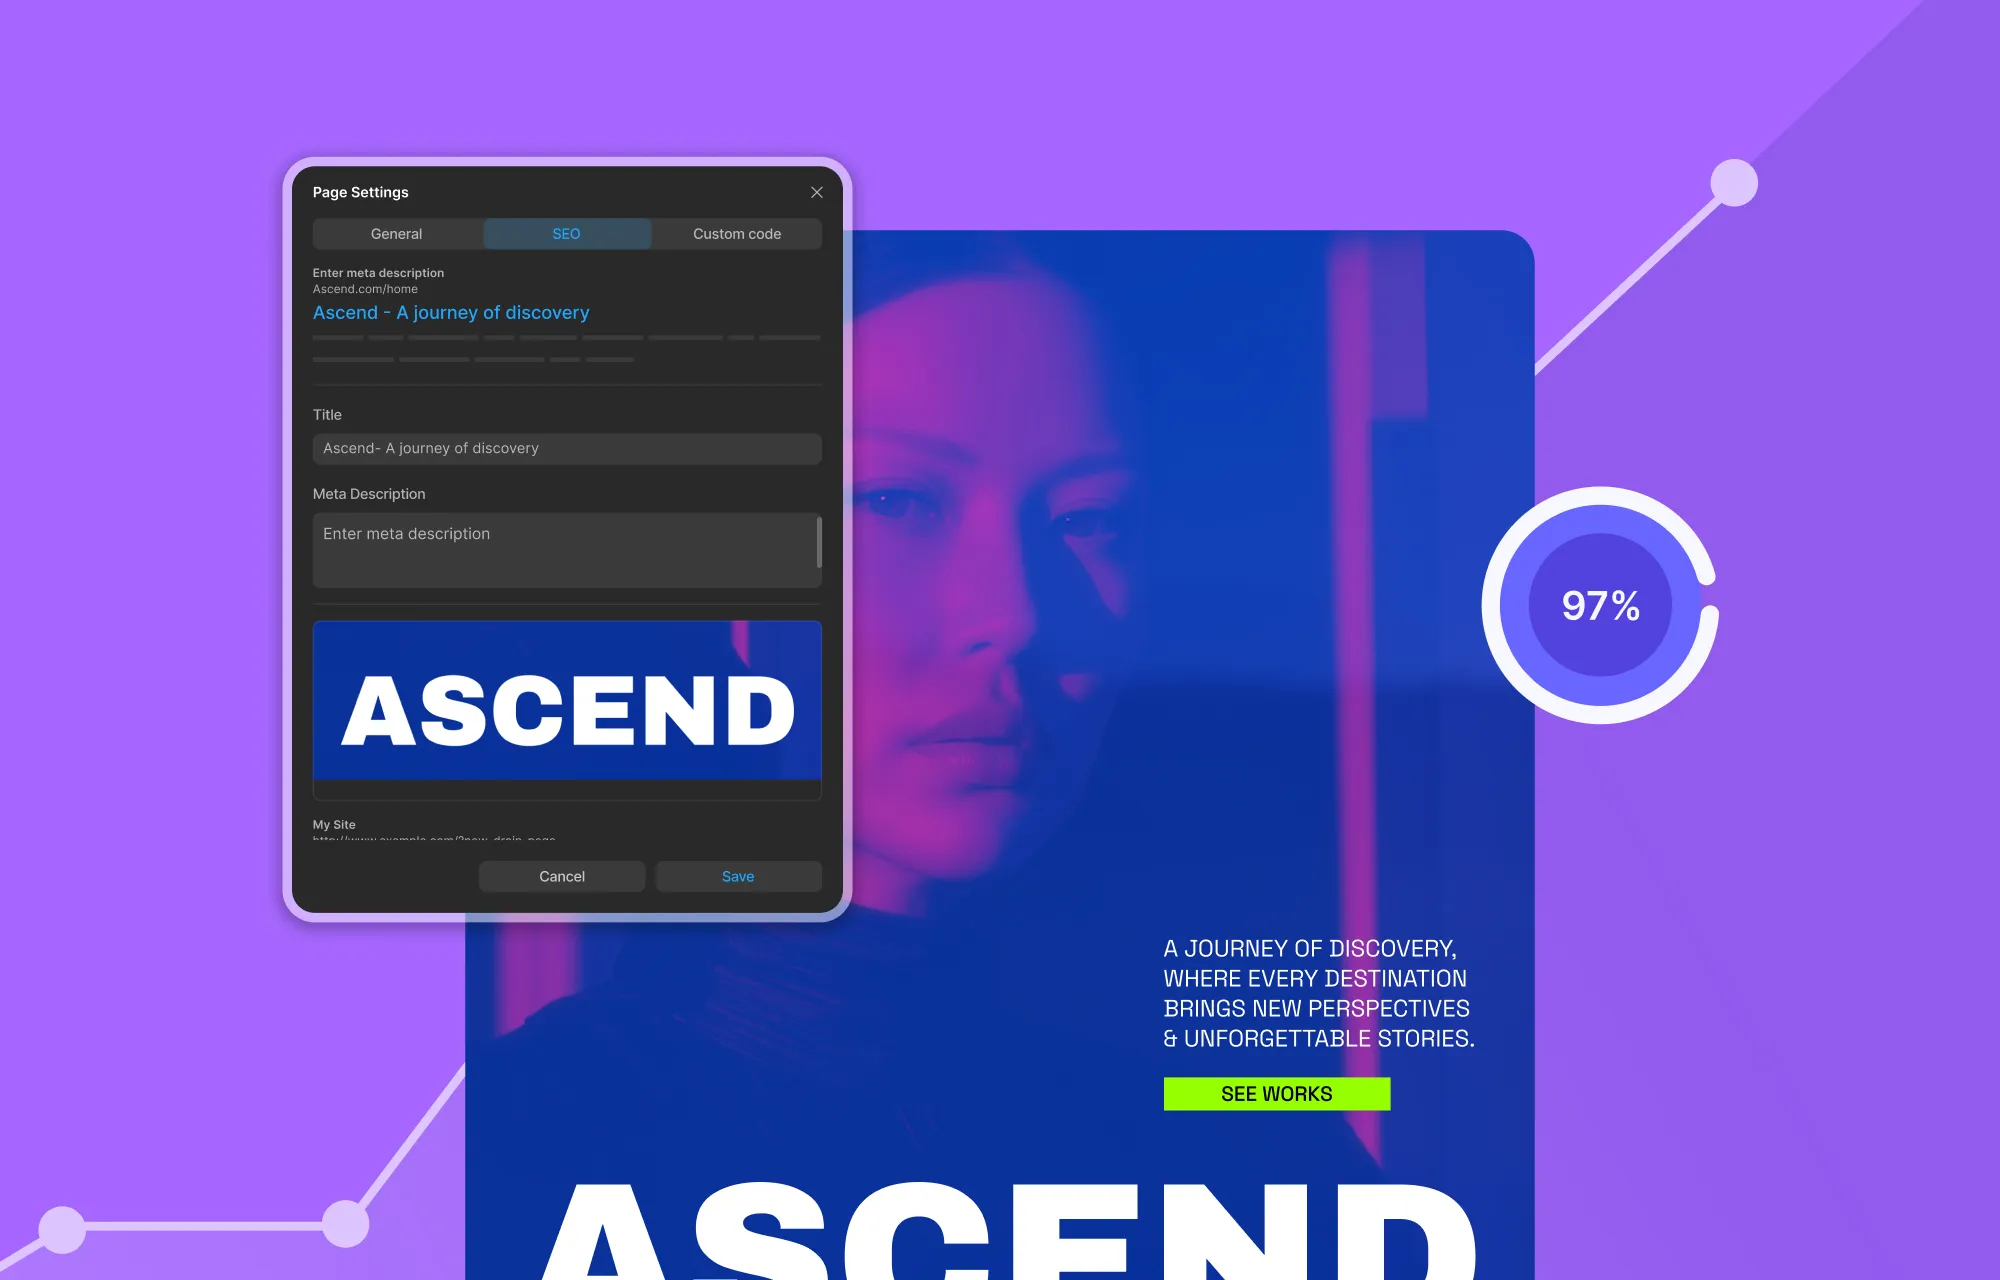
Kirki has basic SEO and OpenGraph built in – no plugin needed.
Set your meta title and description – these are what show up when your page appears in search results. Then set your OpenGraph title, description, and image – what people see when your link gets shared on social.
For images, add alt text and enable auto compression. For all media, including videos, switch on lazy loading. Small things, but they quietly add up – for better speed, accessibility, and SEO.
Contact Form
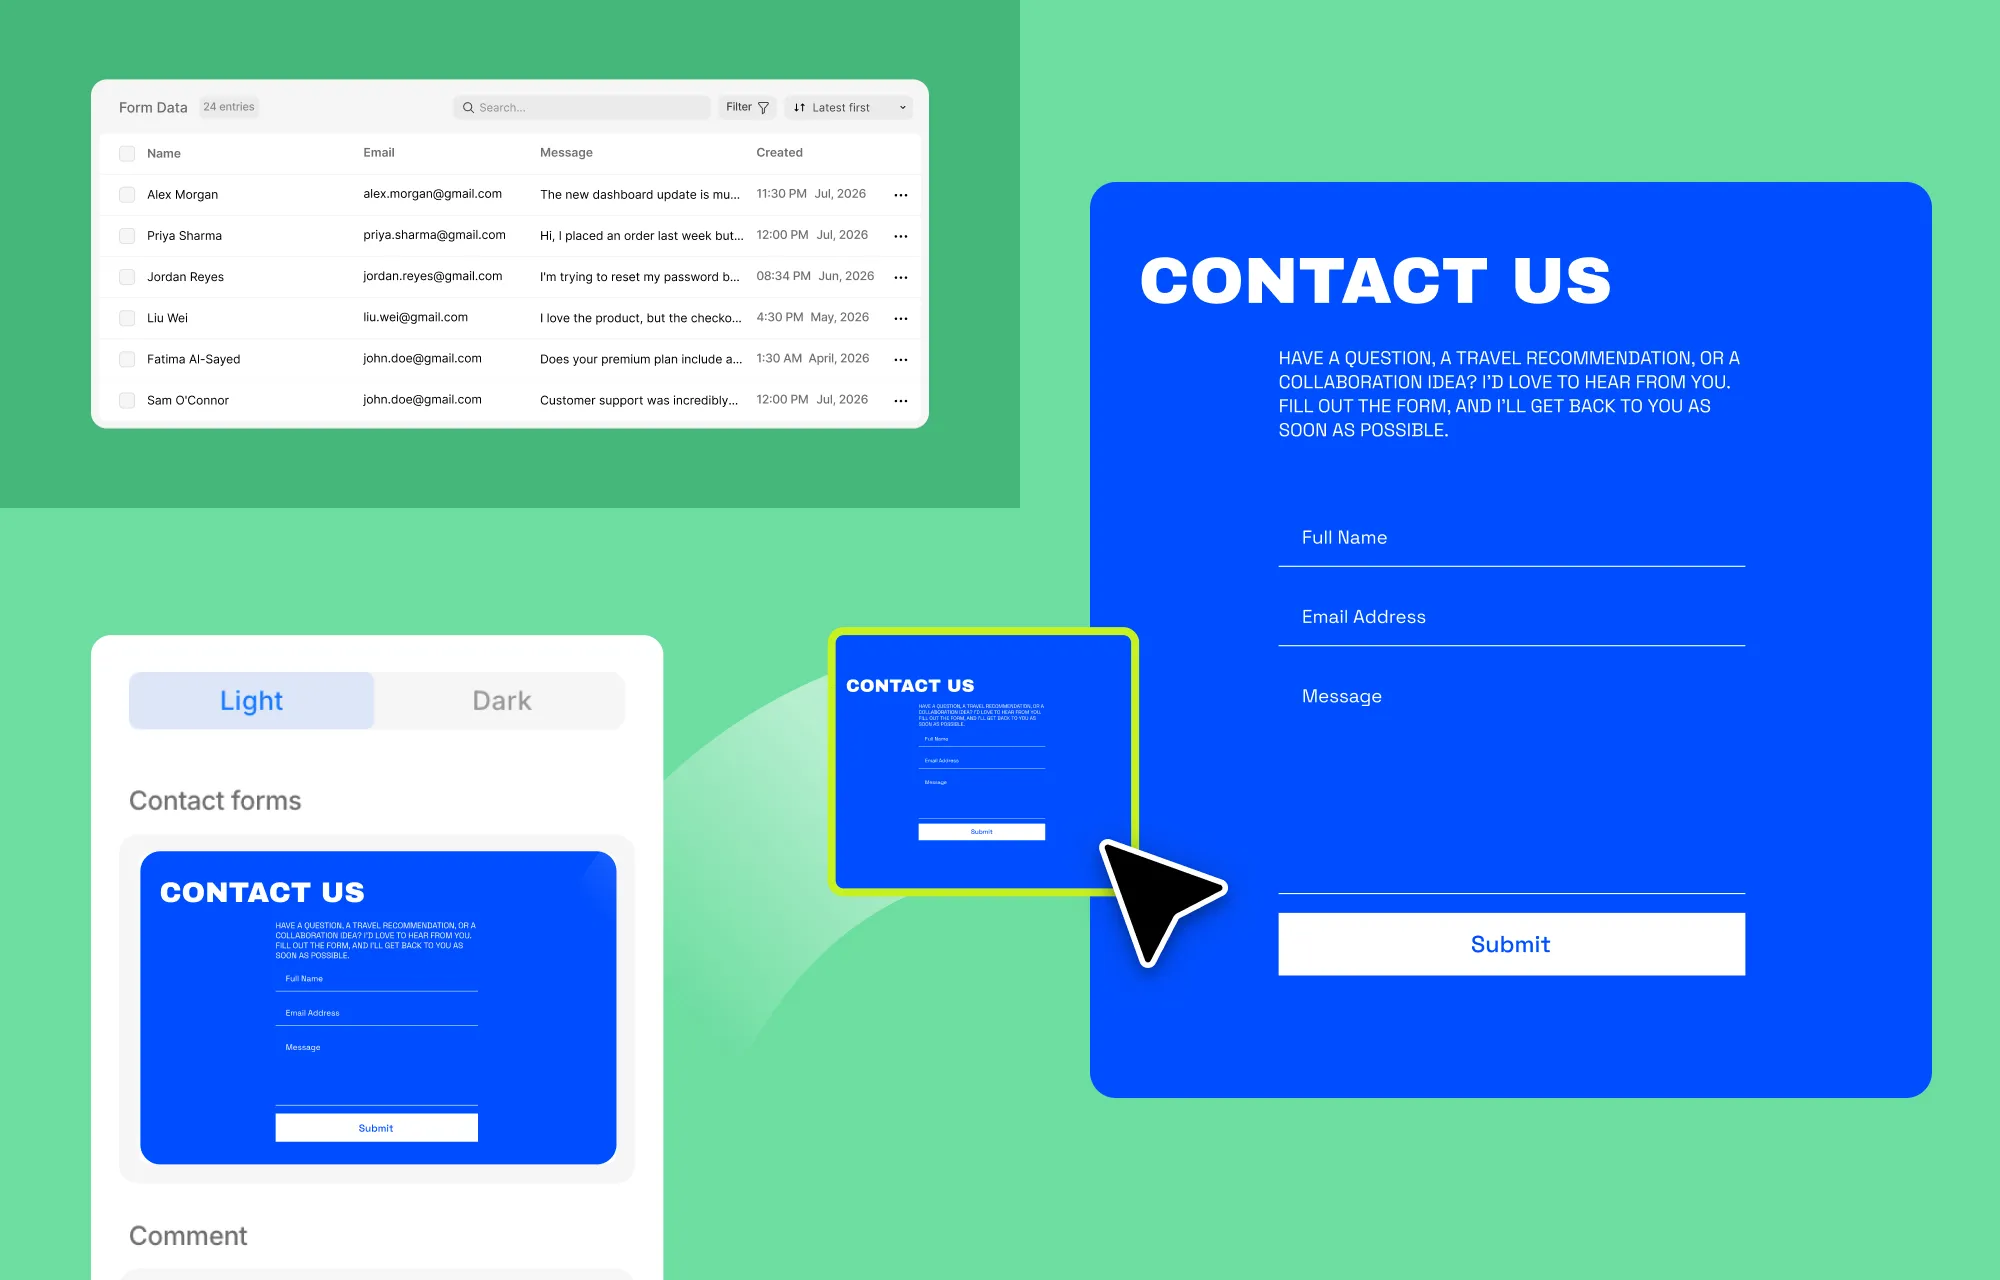
Every platform needs a way for visitors to get back to you – and forms are your best bet. No hunting down an email address or social handle; they can reach you directly from the site itself.
Using Kirki’s built-in form builder, you can create functional, frictionless forms using a range of fields. And submissions are collected and managed in Kirki’s form data manager – so no third-party plugin, no extra setup is required.
Step 8 – Review & Publish
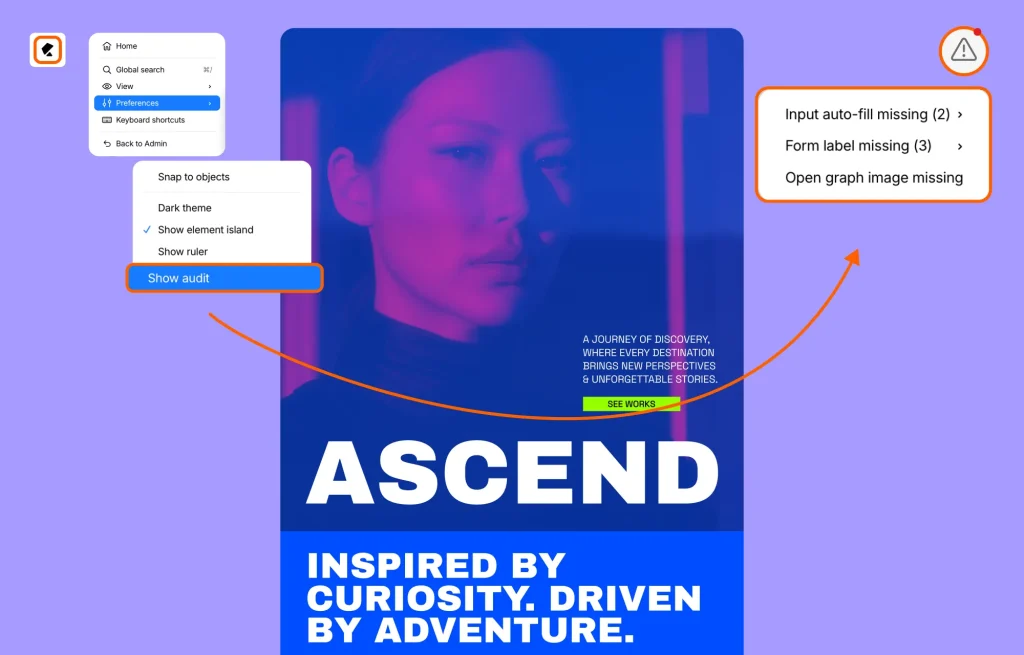
Finally, before you go live, run Kirki’s built-in audit feature. Enable it from the main menu, and it’ll flag anything worth fixing before your visitors find it first: missing links, alt text, and more.
Then use the preview option to check how your site looks across various screen sizes.
Finally, run through this list:
- All placeholder text is replaced with real content.
- Your contact form works – send yourself a test message.
- No unresolved audit flags.
- Page loads fast — there are several free tools online you can use to test this.
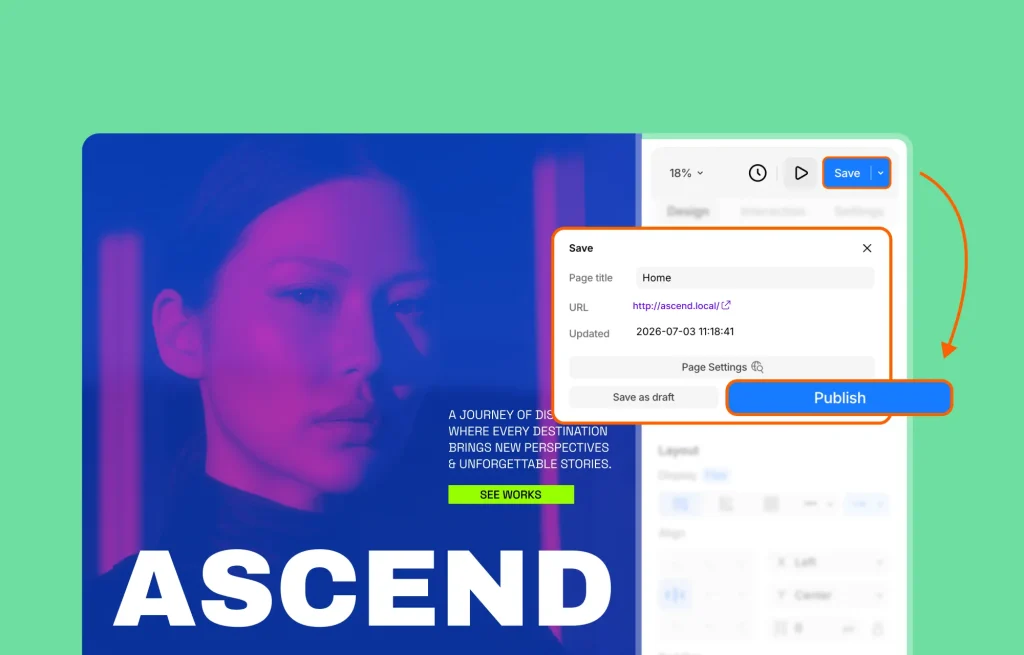
If it all checks out, hit publish.
Your Free WordPress Website Is One Choice Away
You now know exactly how to build a WordPress website for free – from hosting to domain, to a fully designed, published page.
But the setup is only as good as the builder at the center of it. Most will get you started, then hit you with a roadblock the moment you try to do something worth doing. Kirki doesn’t. A blank infinite canvas, built-in SEO, forms, audit, unlimited breakpoints, animation – all of it, free, from the moment you install it.
So you don’t need to compromise on what your website looks like just because you’re not paying for it. With Kirki, free looks exactly like you imagined it.

