Classes in Kirki give you a centralized way to manage shared styling.
In essence, a Class is a reusable style group: a set of style attributes you define once and apply to any element that needs it. Style the class, then bind it to elements. Update the class, and every element linked to it updates too.
While multi-select editing covers quick, one-off changes across elements, classes are for styling that should stay linked and update everywhere at once, even after you’ve moved on to something else.
Create a Class
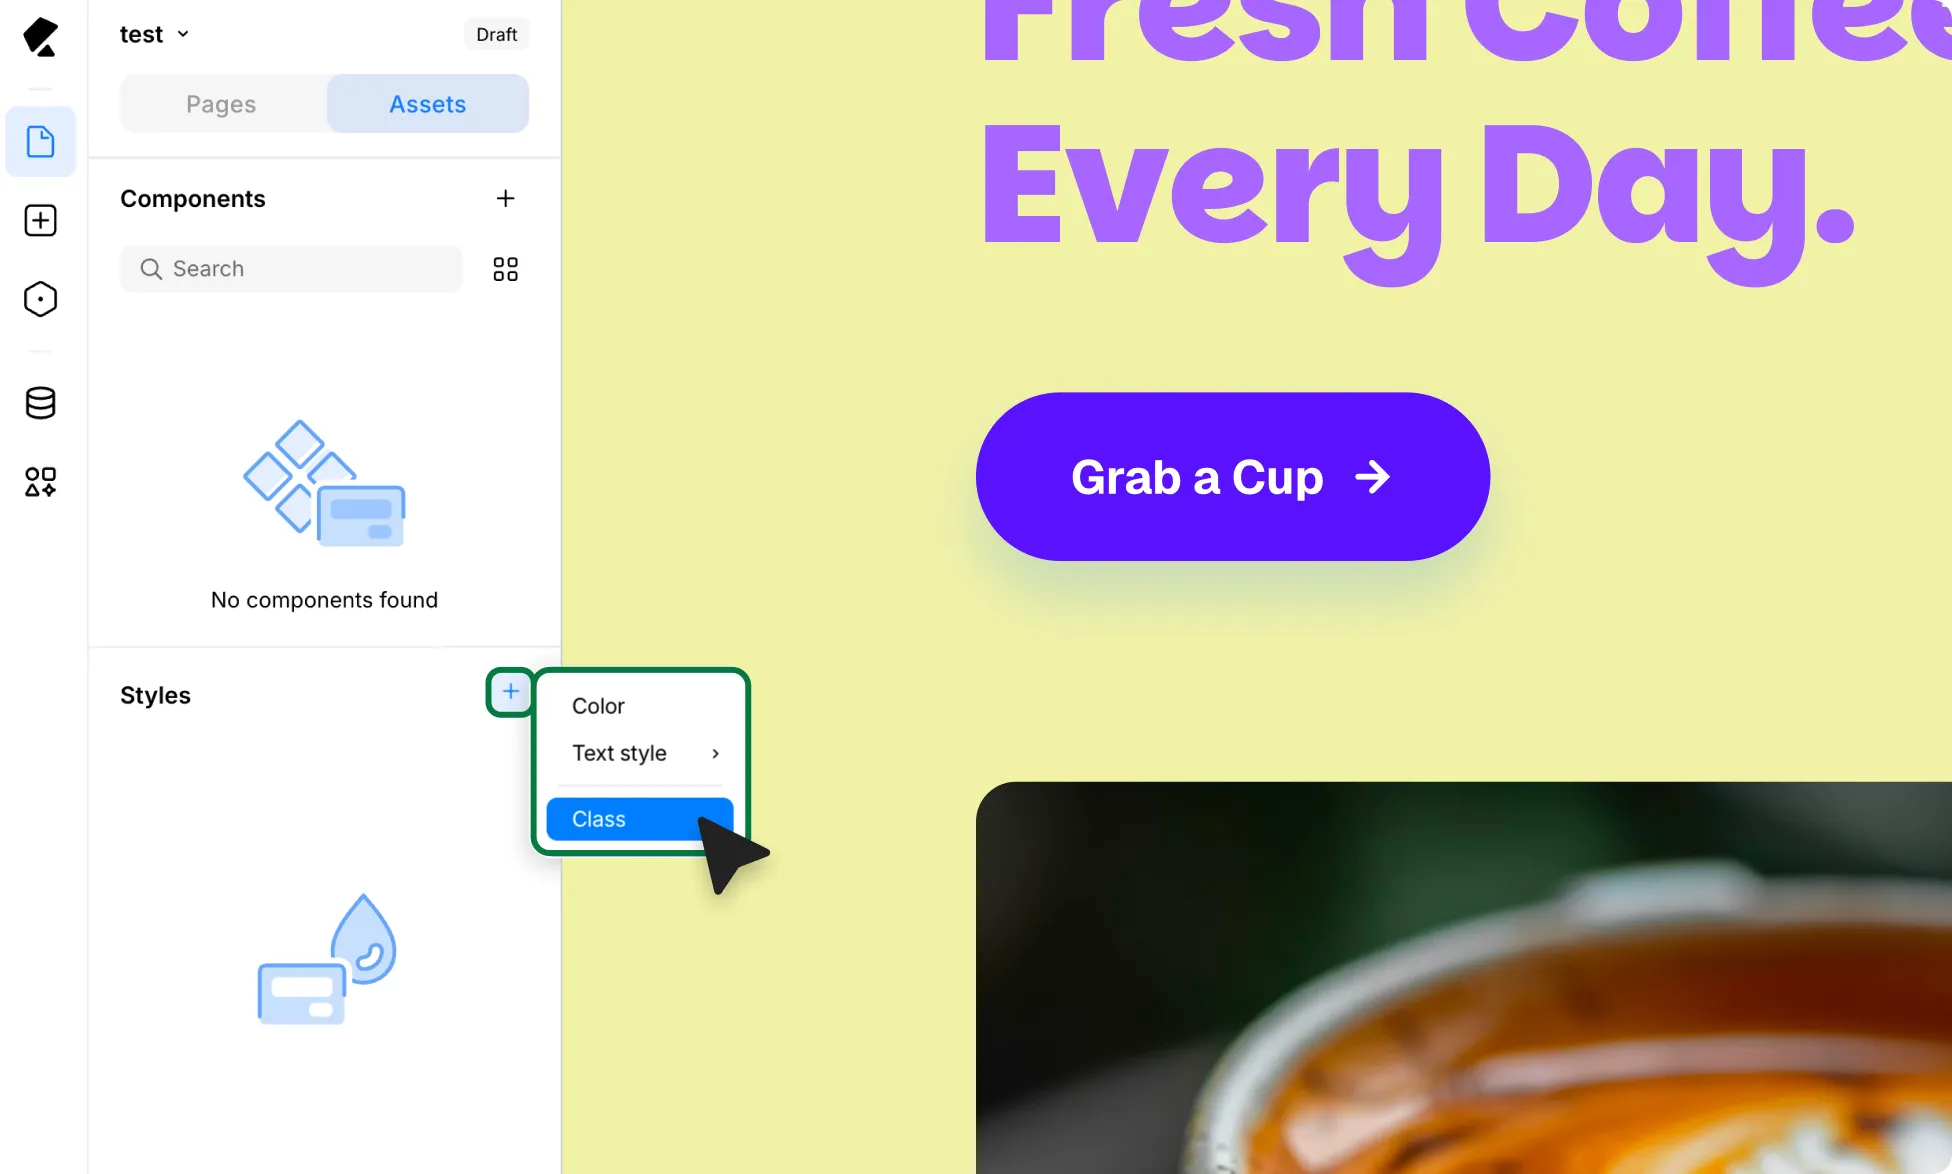
To create a class:
- In the Kirki editor, go to Pages → Assets on the Left Panel.
- Scroll down to Styles and click the plus (+) icon.
- Select Class from the menu.
- Name your class. It will appear under Styles → Classes.
Style a Class
Because classes are styled before they’re linked, you can fully work out a button’s, a div’s, or any other element’s style before that element is even on the page.
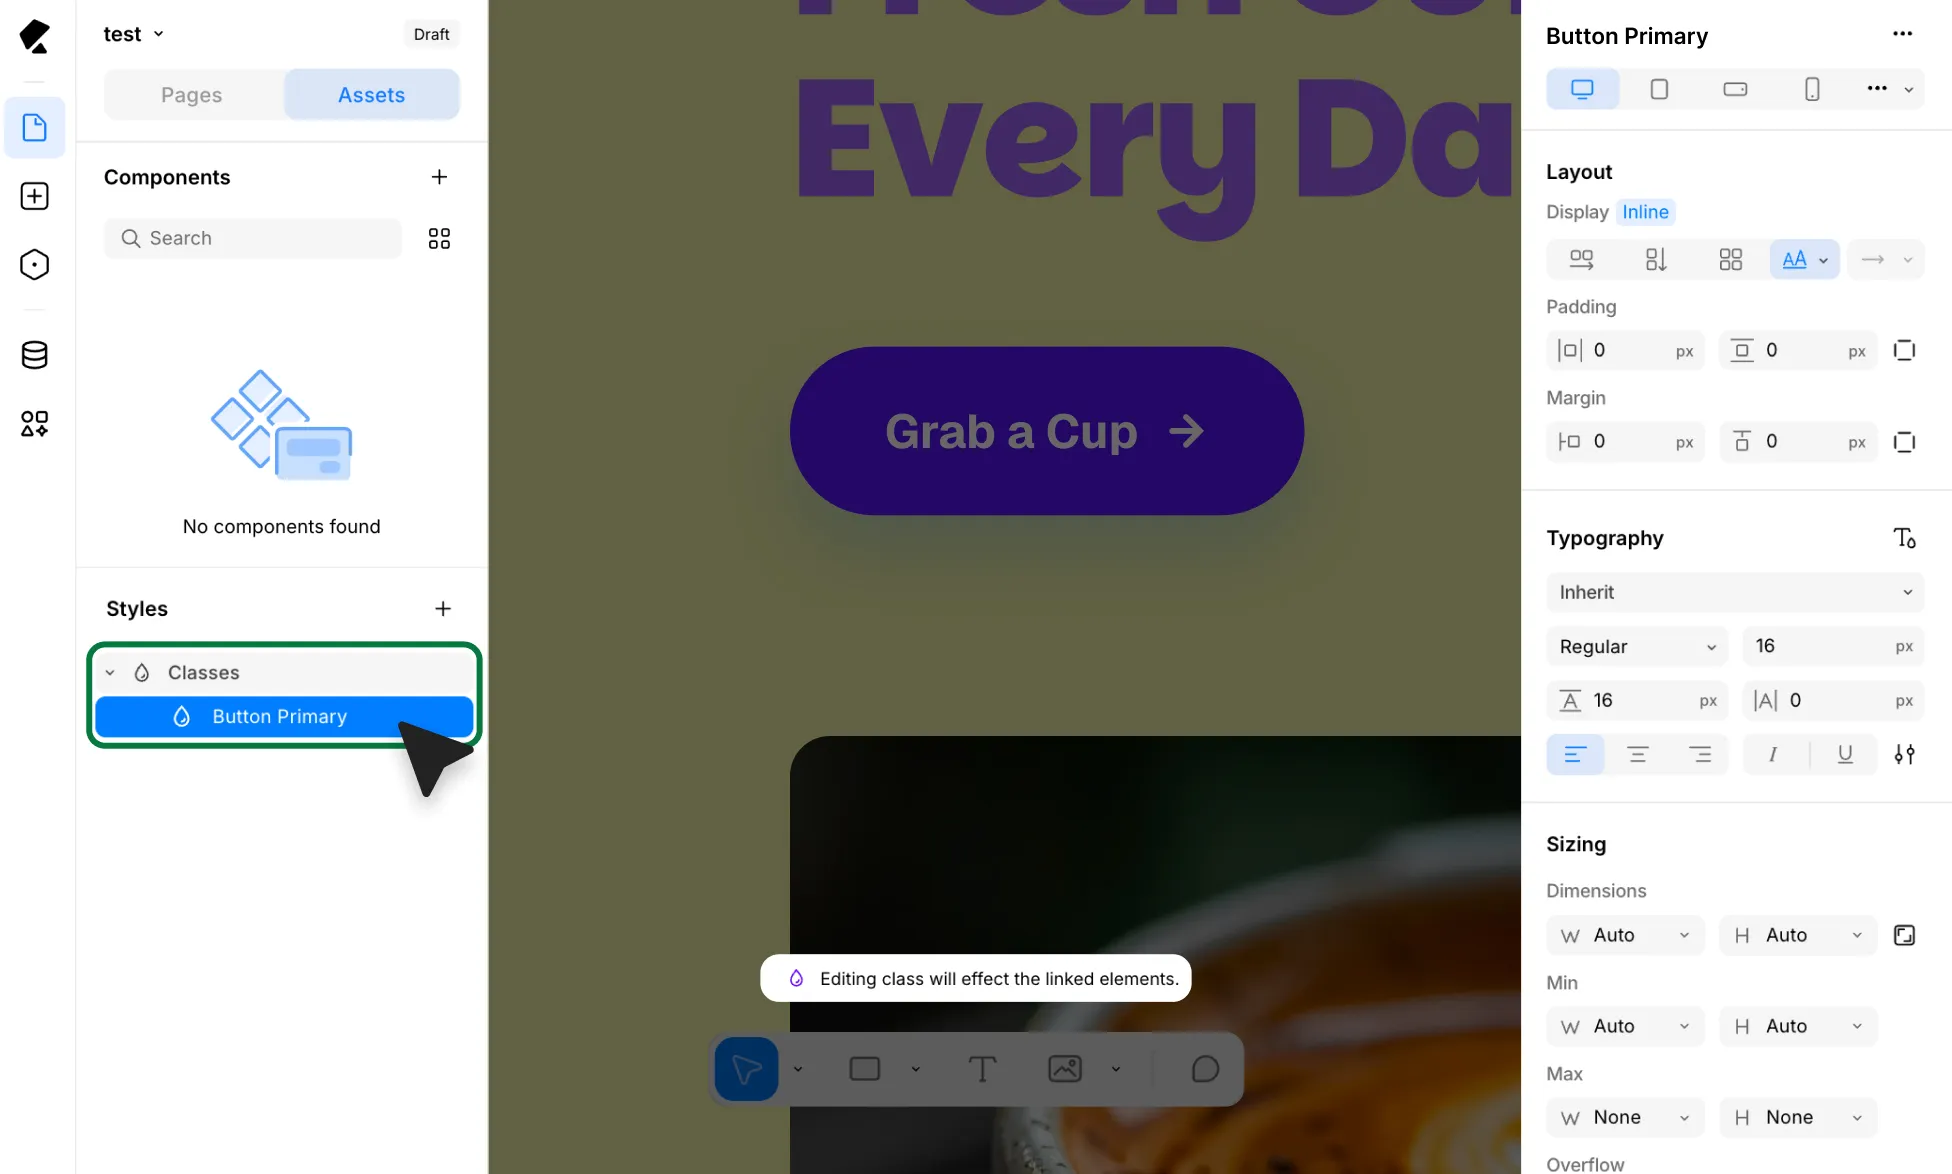
To style a class:
- In the Left Panel, go to Pages and select the class you want to style from Assets → Styles → Classes.
- This switches you into class editing mode. From the Design tab in the Right Panel, set Typography, Sizing, Style, and more – any changes are saved directly to the class.
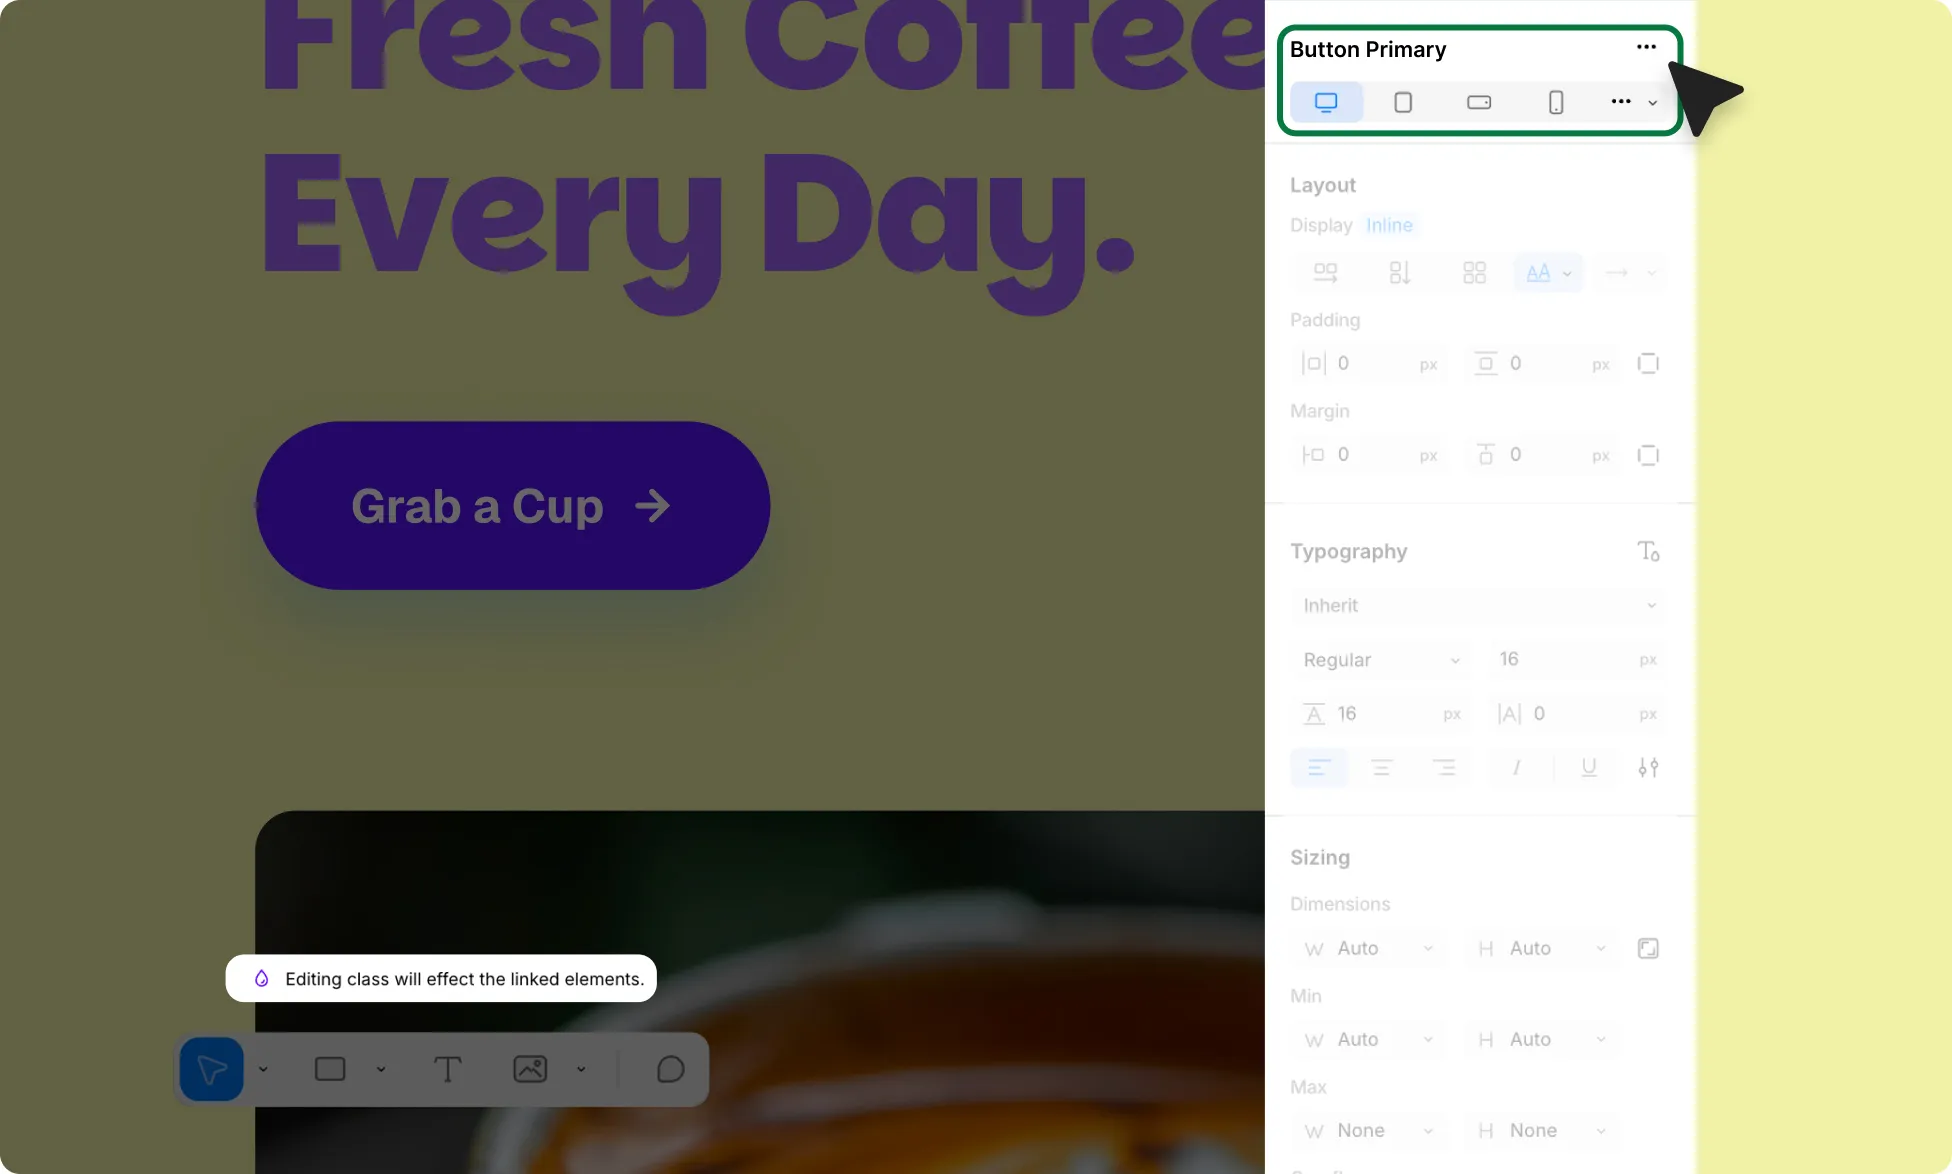
- Classes are also responsive. Define alternate values per device at the top of the Right Panel, and those breakpoint values will apply to all elements linked to the class.
- Once you’ve made your changes, click the dimmed canvas to exit class editing mode.
Add a Class to an Element
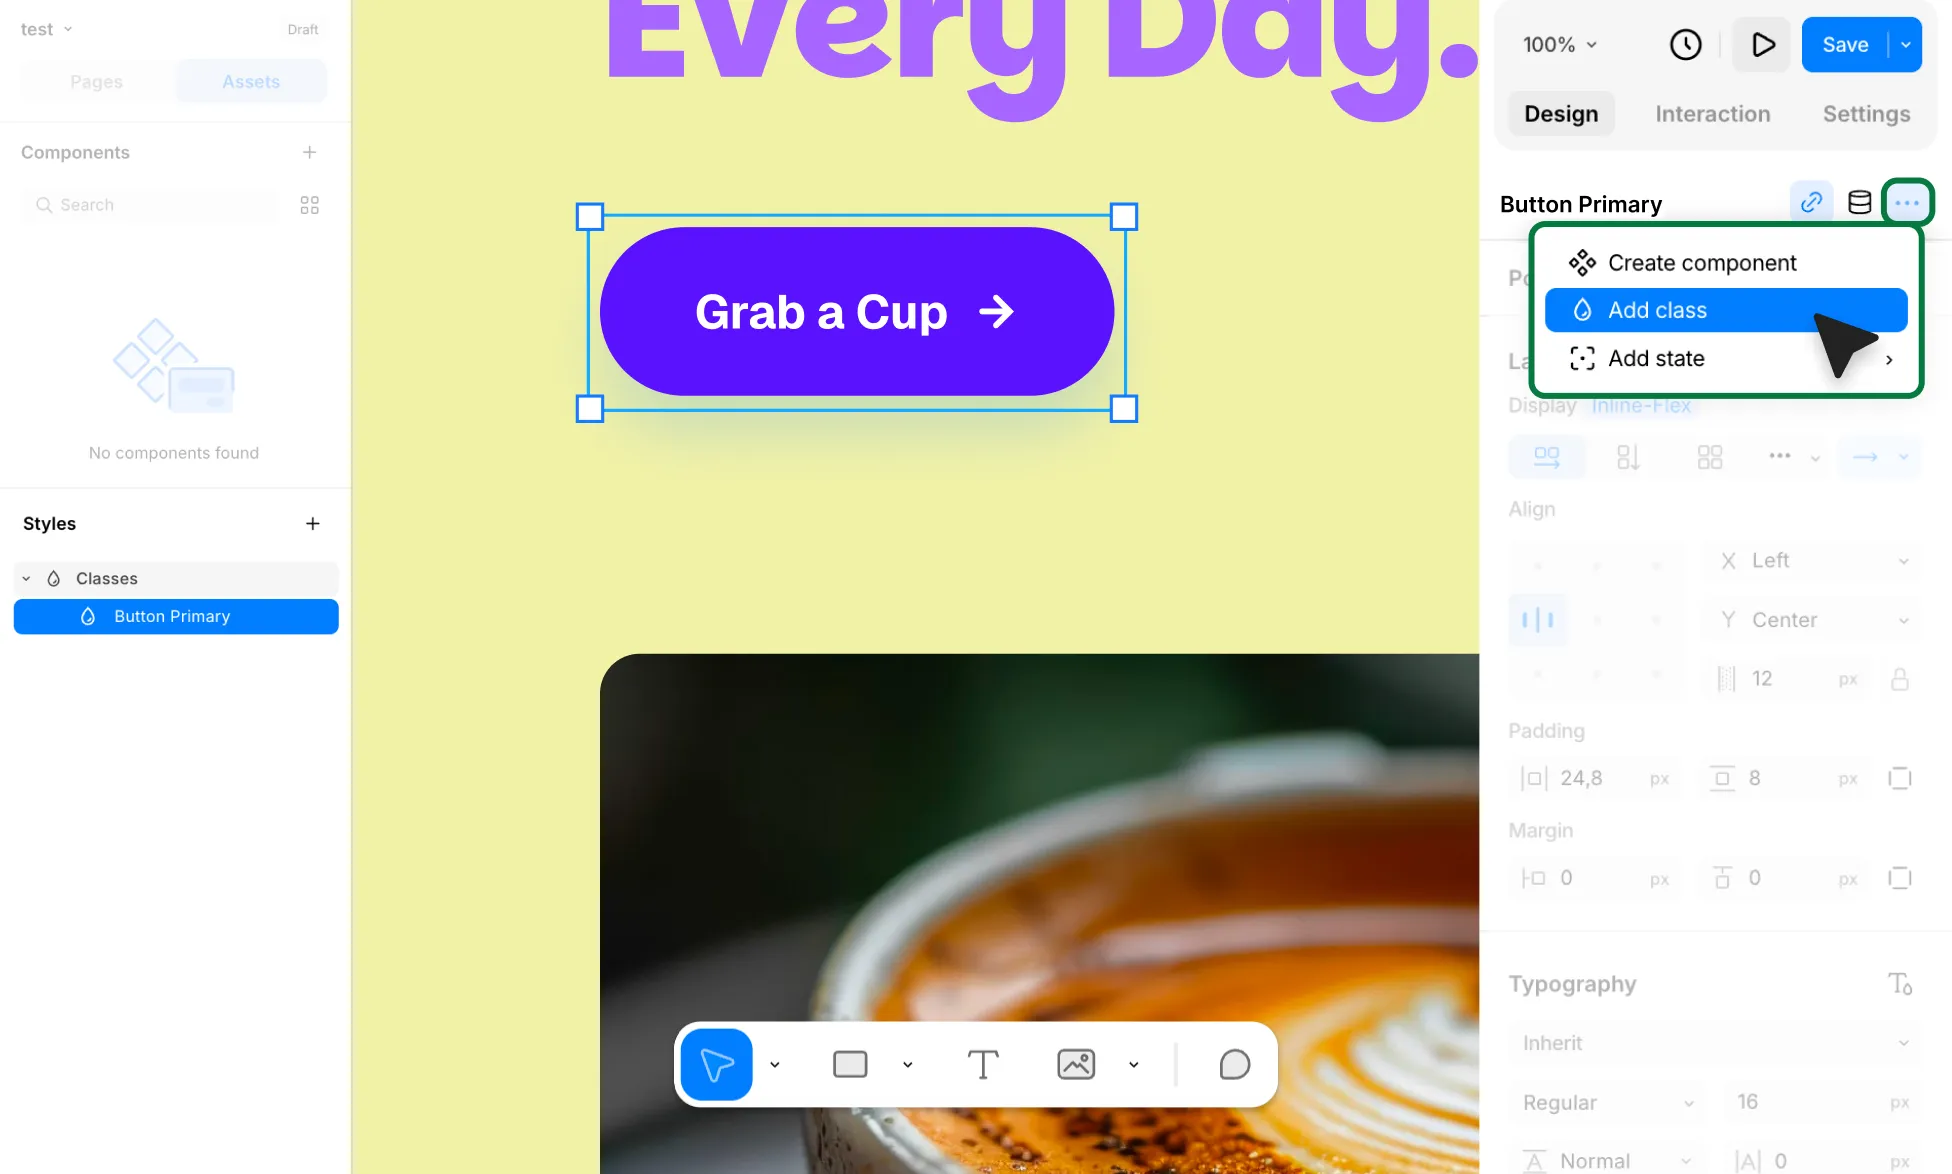
To assign a class to an element:
- Select an element on the page.
- In the Right Panel, click the ellipsis icon (…) next to the element name.
- Select Add Class.
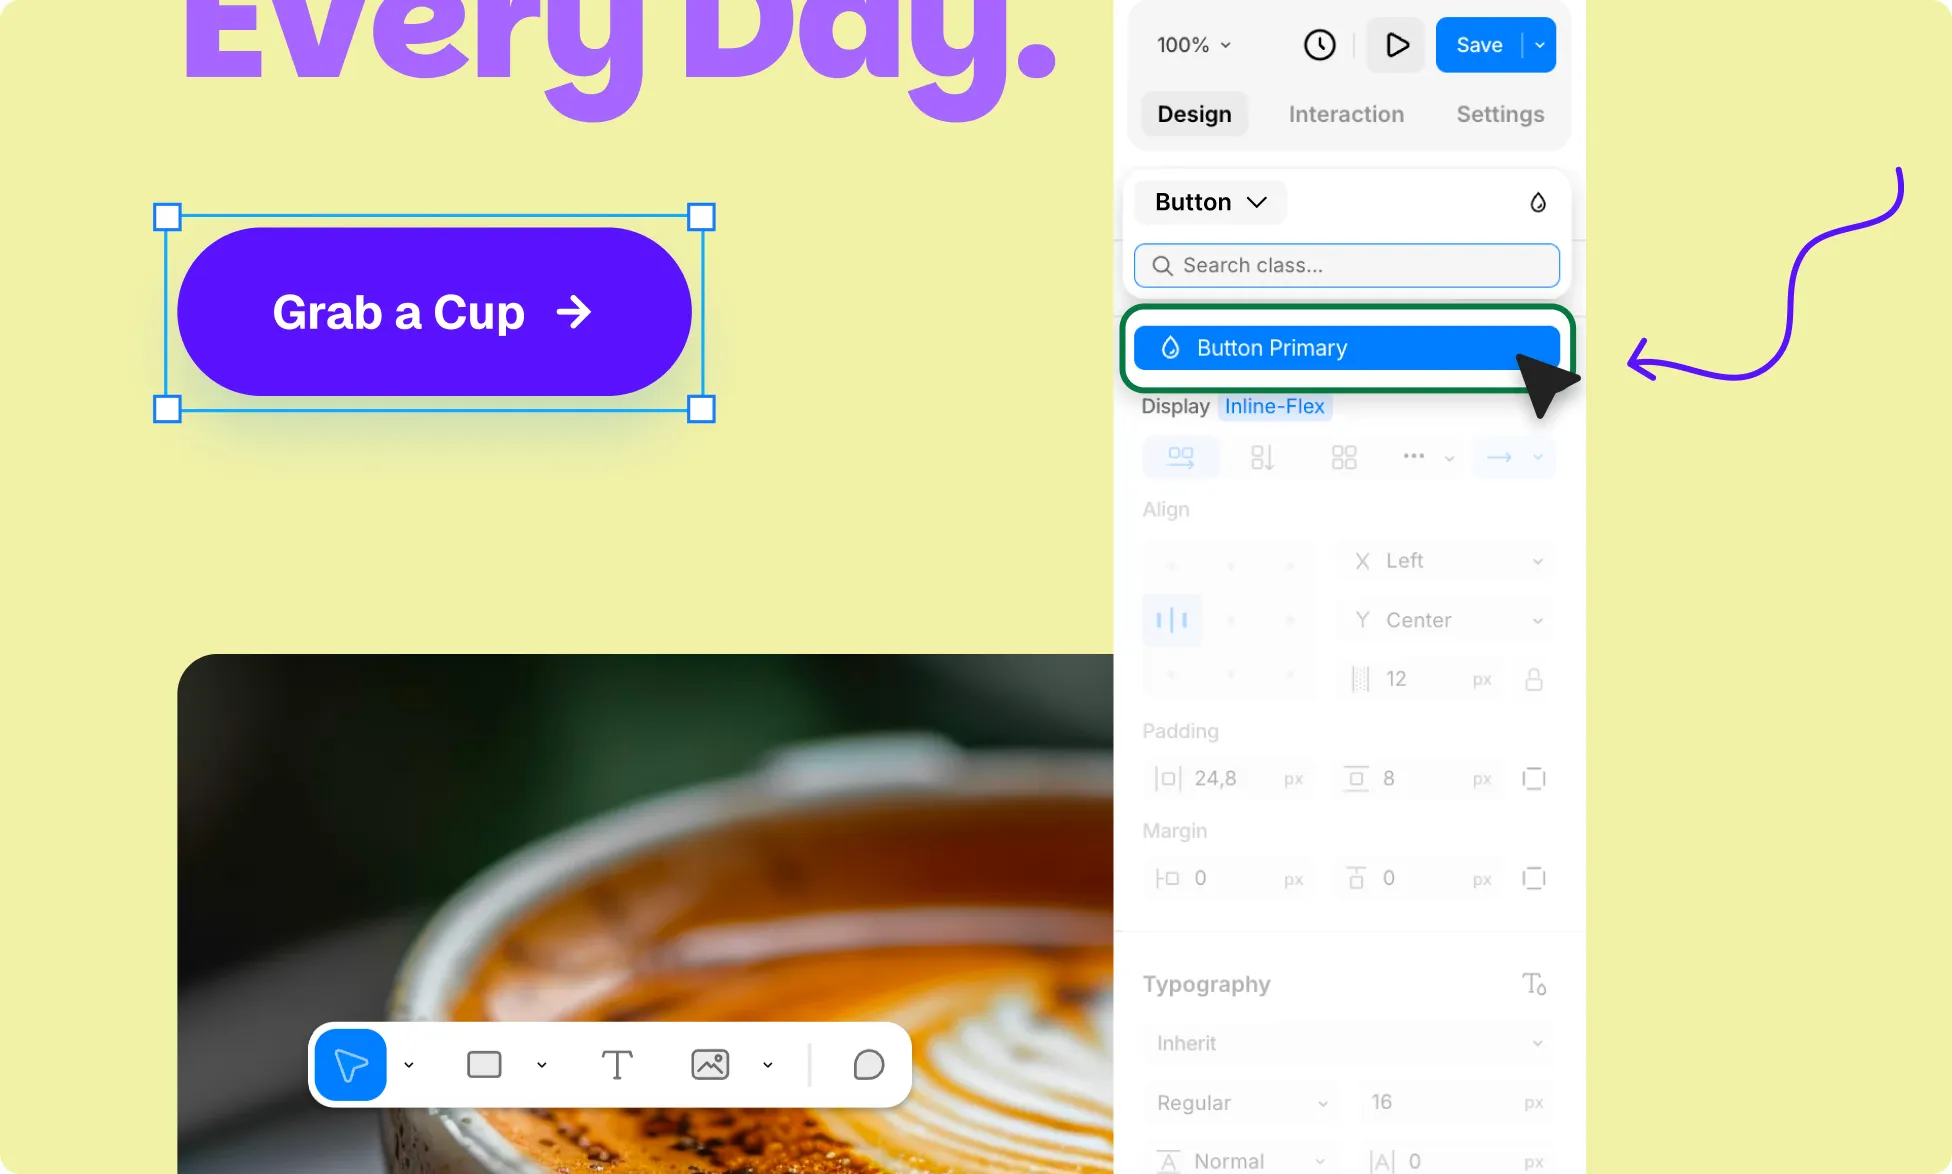
- Search for and select the class you want. Once added to the element’s Classes list, the styling applies immediately.
An element can have more than one class linked to it.
If two linked classes share the same attribute, whichever one comes later takes priority over the one before it.
That said, direct changes to the element always come first. If you style the element itself, that change stays with the element – and it won’t get saved back to any class.
To have the element pick up the class’s style again, unlink the class and relink it. Just keep in mind that this clears any direct styling you’d added to the element in the meantime.
Edit a Class
You can edit a class in two ways:
From the Left Panel
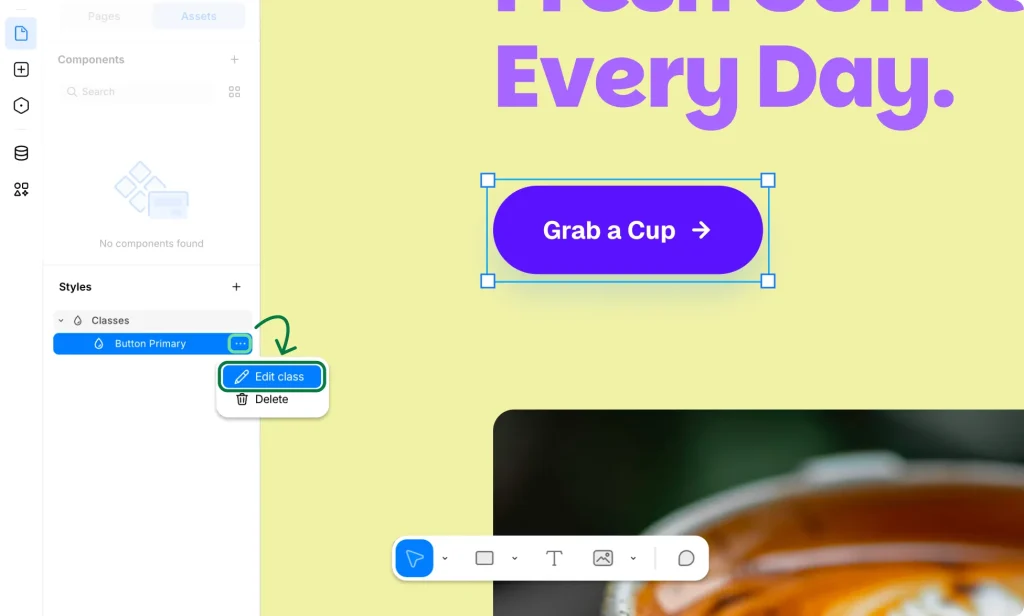
- In the Left Panel, go to Pages and select the class you want to style from Assets → Styles → Classes.
- Click the ellipsis (…) icon next to the class and select Edit Class – or just click the class directly.
- Make your changes using the options in the Right Panel.
From the Right Panel (In Case of Linked Classes)
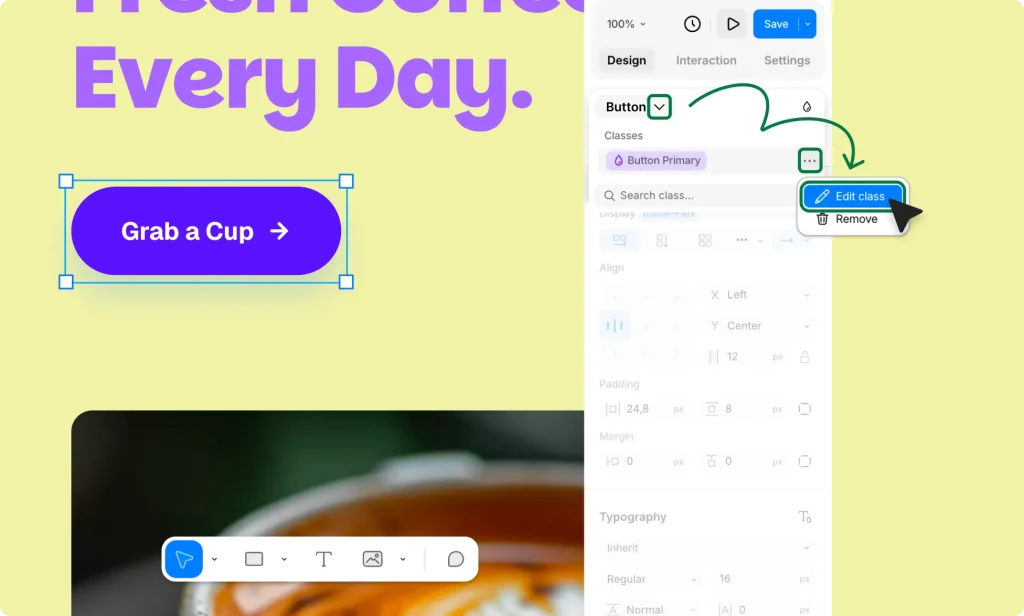
- Select an element that has a linked class.
- Click the arrow icon next to the element name in the Right Panel.
- Then click on the ellipsis (…) icon next to the class you want to edit and select Edit Class.
- Make your changes using the options in the Right Panel.
Either way, your changes apply instantly to every element using that class, keeping styling consistent across your design.
Remove a Class
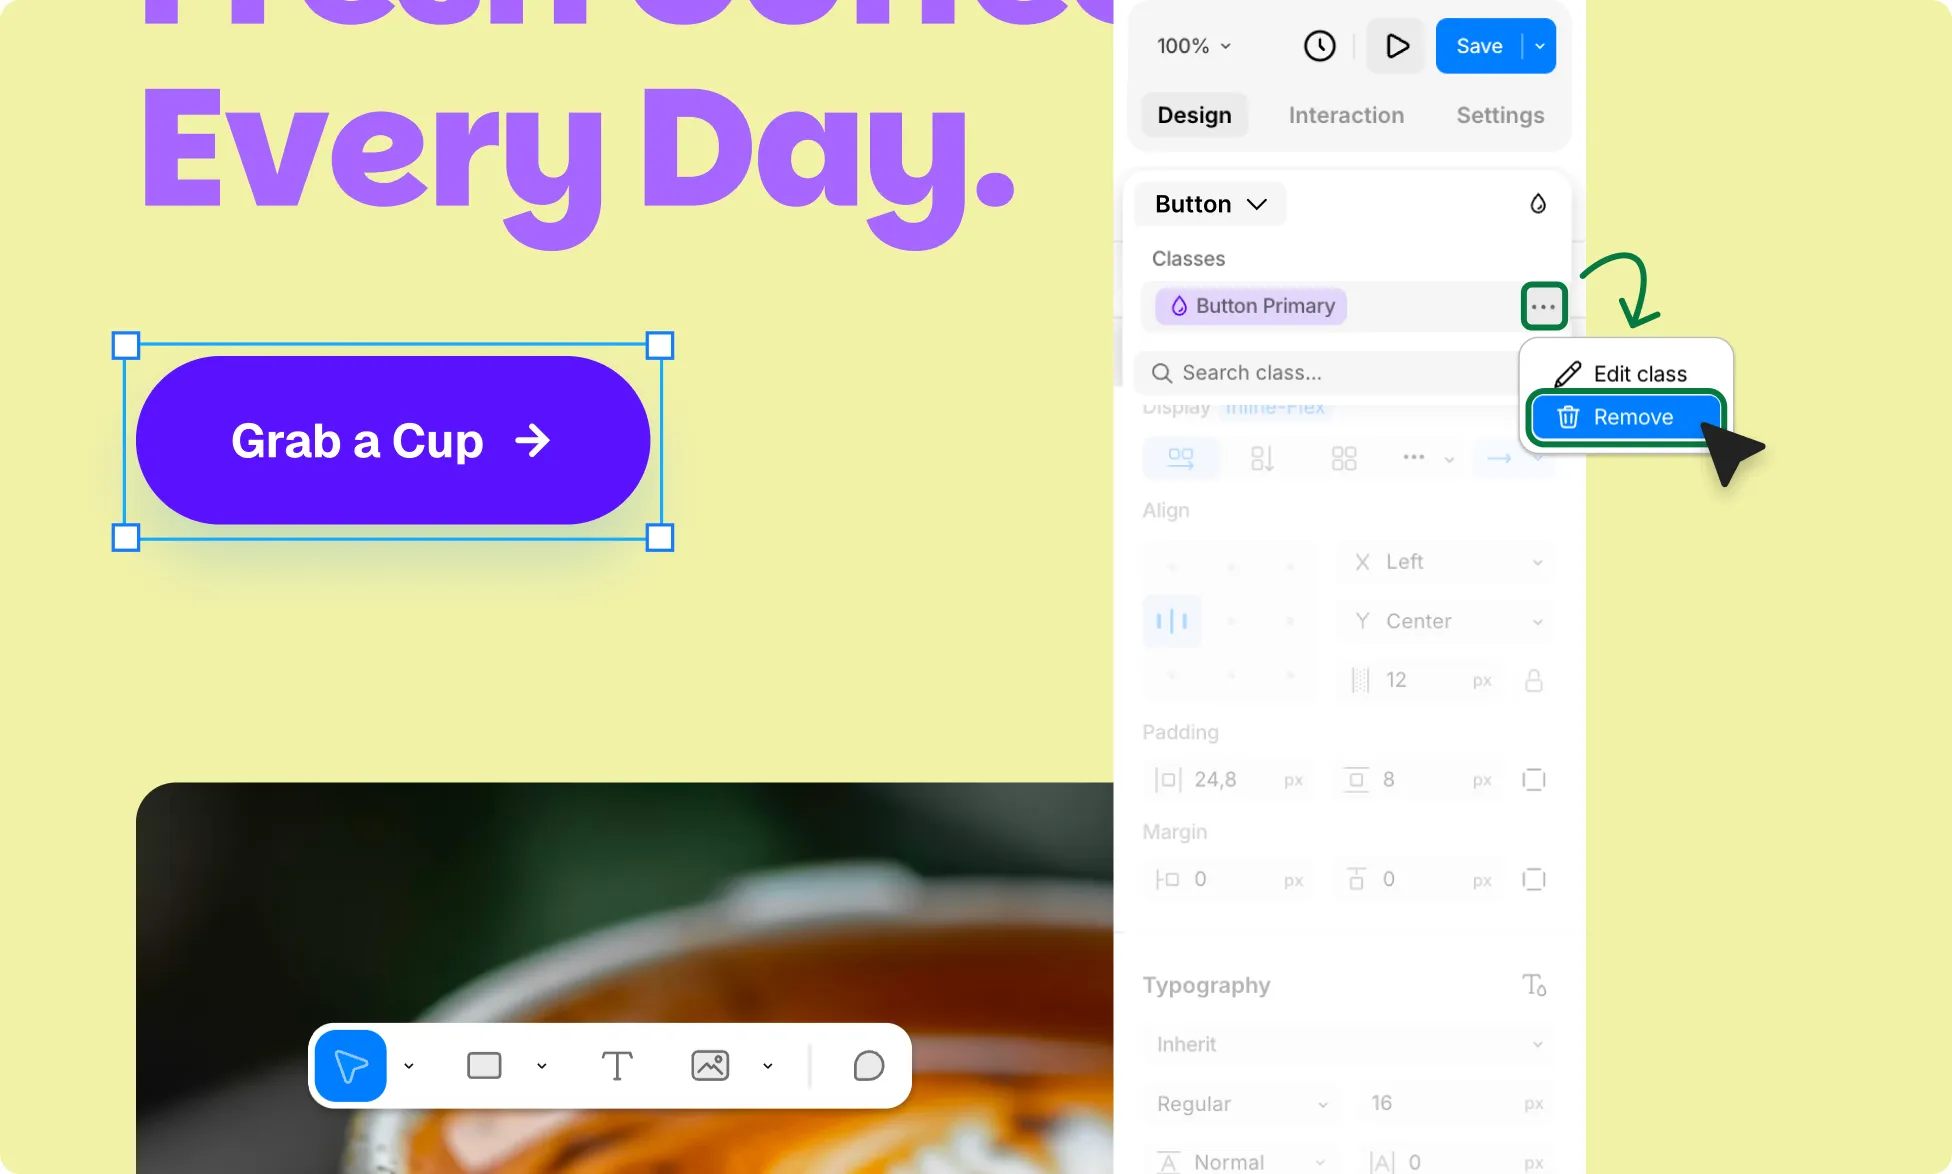
To unlink a class from a specific element:
- Select an element with a linked class.
- Click the arrow icon next to the element name in the Right Panel.
- Then click on the ellipsis (…) icon next to the class you want to unlink and select Remove.
This detaches the class from this element only.
Note that removing the class doesn’t revert the element’s styling – it stays visually the same, just unlinked, so it no longer updates when you edit the class.
And the class itself, and any other elements using it, are unaffected.
Rename a Class
You can rename a class in two ways:
From the Left Panel
- In the Left Panel, go to Pages and select the class you want to style from Assets → Styles → Classes.
- Double-click the class you want to rename and enter the new name.
From the Right Panel During Edit Mode
- In the Left Panel, go to Pages and select the class you want to style from Assets → Styles → Classes.
- Click the class you want to rename to enter edit mode.
- From the top of the Right Panel, click the ellipsis (…) icon next to its name.
- Select Rename and enter the new name.
Delete a Class
You can delete a class in two ways:
From the Left Panel
- In the Left Panel, go to Pages and select the class you want to style from Assets → Styles → Classes.
- Click the ellipsis (…) icon next to the class and select Delete.
From the Right Panel During Edit Mode
- In the Left Panel, go to Pages and select the class you want to style from Assets → Styles → Classes.
- Click the class you want to delete to enter edit mode.
- From the top of the Right Panel, click the ellipsis (…) icon next to its name.
- Select Delete.
Reuse a Class Across Elements
To make another element share the same style, simply assign it the same class.
Any element using that class updates automatically whenever the class is edited – no need to recreate styles by hand.