The LiveChat integration connects your website to LiveChat by adding the LiveChat widget to your site. Visitors can use the widget to start real-time conversations with your sales or support team.
What Is the LiveChat App
The Kirki LiveChat integration adds the LiveChat widget to your website so visitors can contact your team directly. This is useful for sales and support teams that manage customer conversations through LiveChat.
What Do You Need Before Connecting LiveChat
Before connecting LiveChat to Kirki, make sure you have:
- An active LiveChat account.
- Access to your LiveChat Chat Widget installation settings.
- Your LiveChat License ID.
To add LiveChat to Kirki, copy your LiveChat License ID, install the LiveChat app in Kirki, paste it under Configure, and Save.
How to Get Your LiveChat License ID
- Log in to your LiveChat account.
- Open the LiveChat settings at my.livechatinc.com.
- Go to Settings → Channels→ Install LiveChat
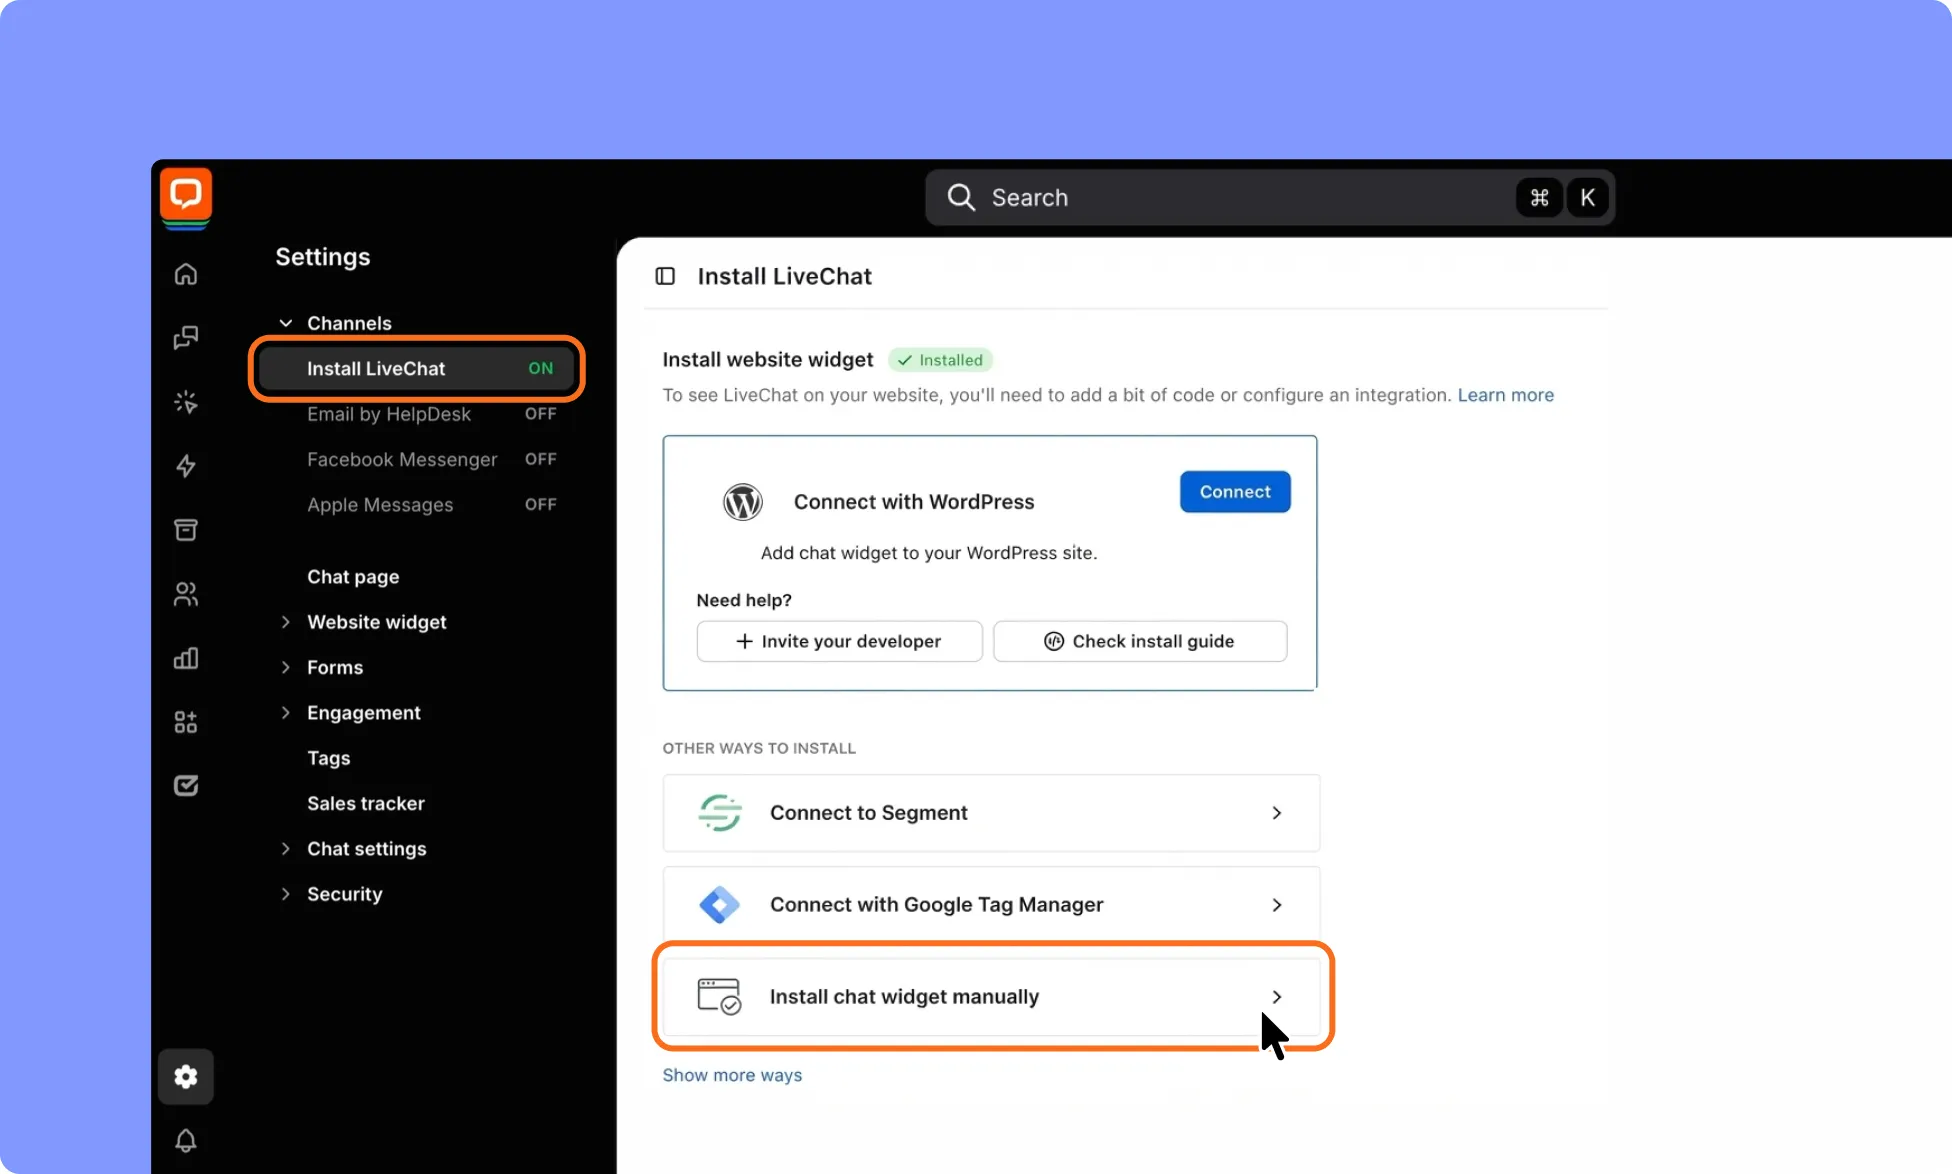
- Locate the LiveChat installation code or widget settings.
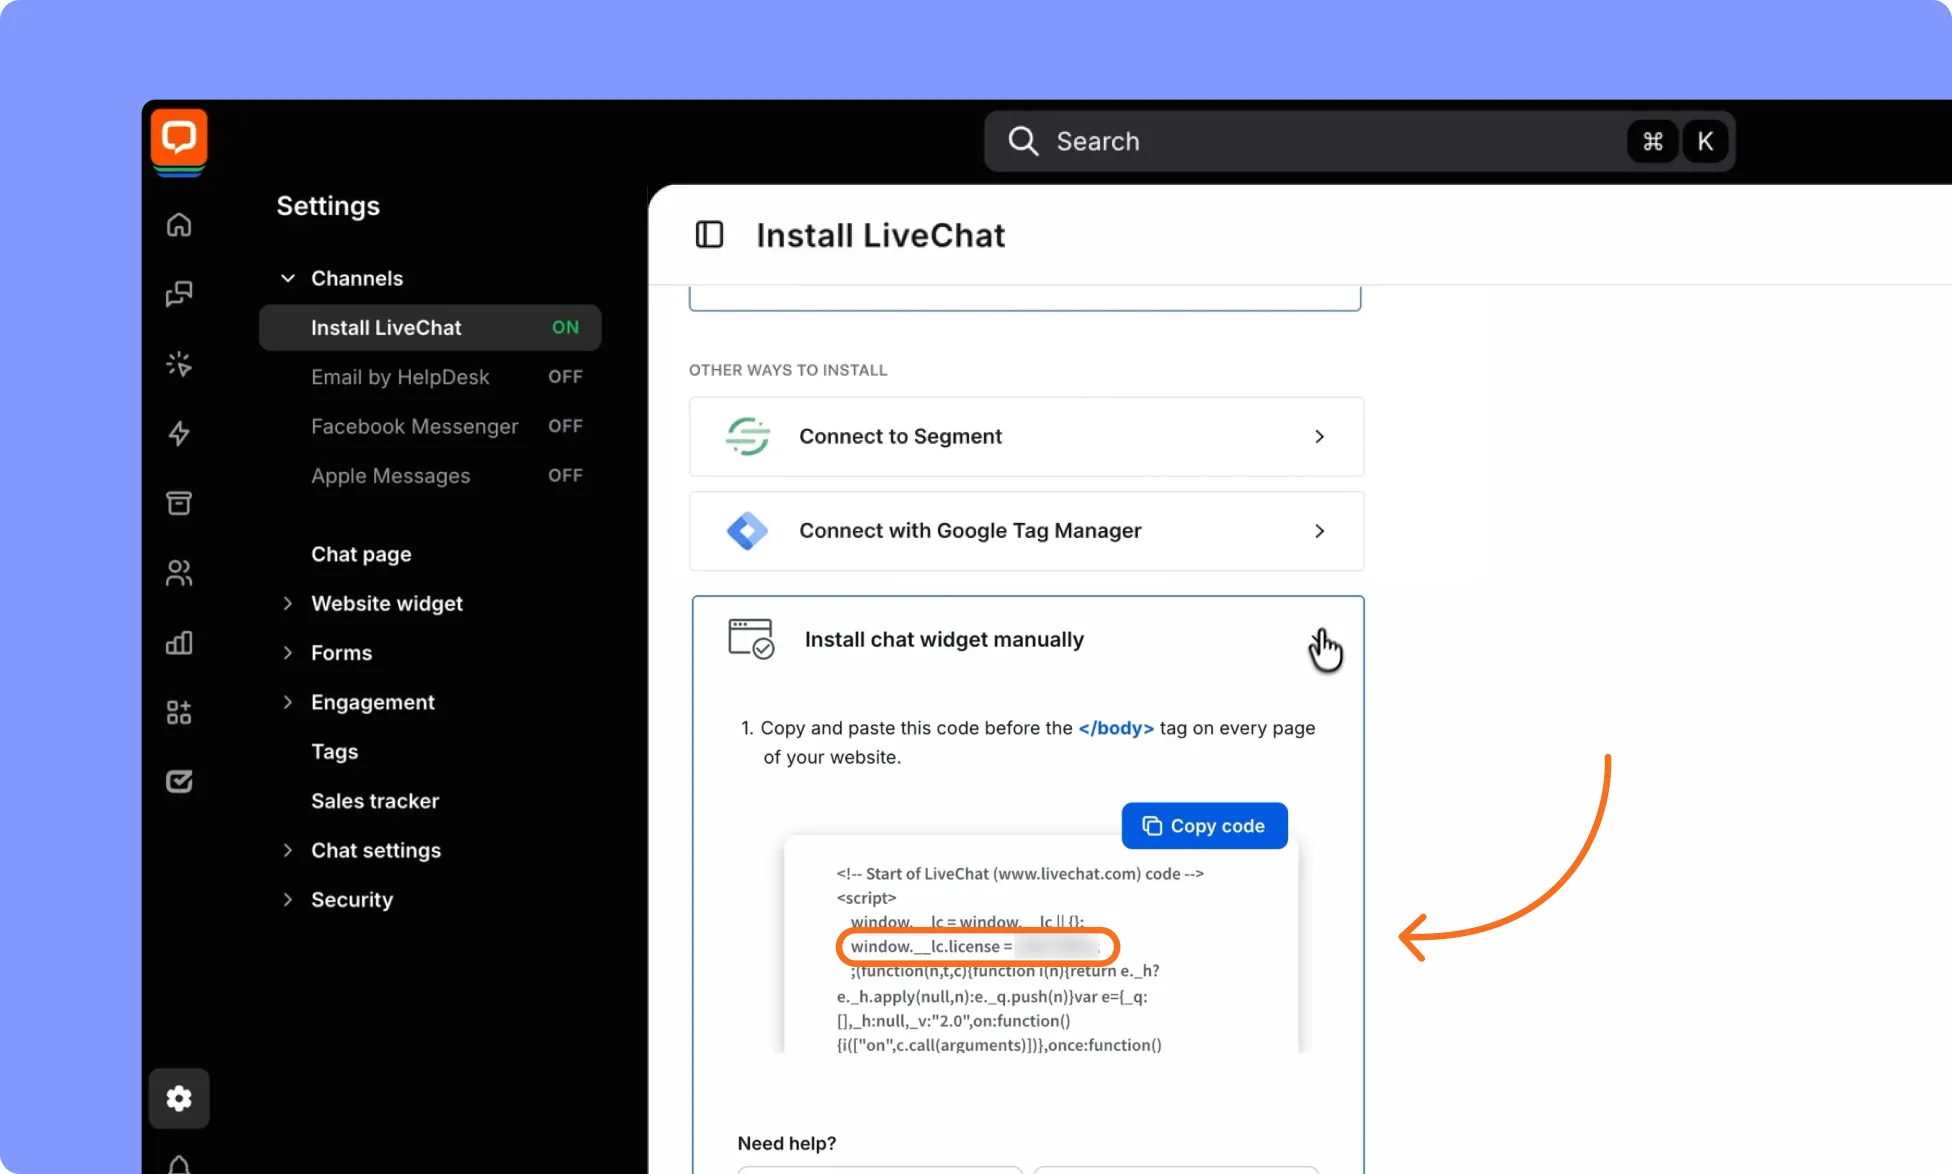
- Copy the number after window.__lc.license =. This is your License ID
Note: The Copy Code button copies the whole installation snippet. Kirki only needs the License ID, which is the number after window.__lc.license = (for example, 12345678). Don’t paste the full snippet into Kirki.
How to Install the LiveChat App in Kirki
- Log in to your WordPress dashboard.
- Go to Kirki → Apps.
- Locate LiveChat.
- Click Install and Configure.
How to Configure the LiveChat Integration
- Once installed, click the ellipsis (…) and select Configure.
- Paste your LiveChat License ID into the provided field and click Save Configuration.
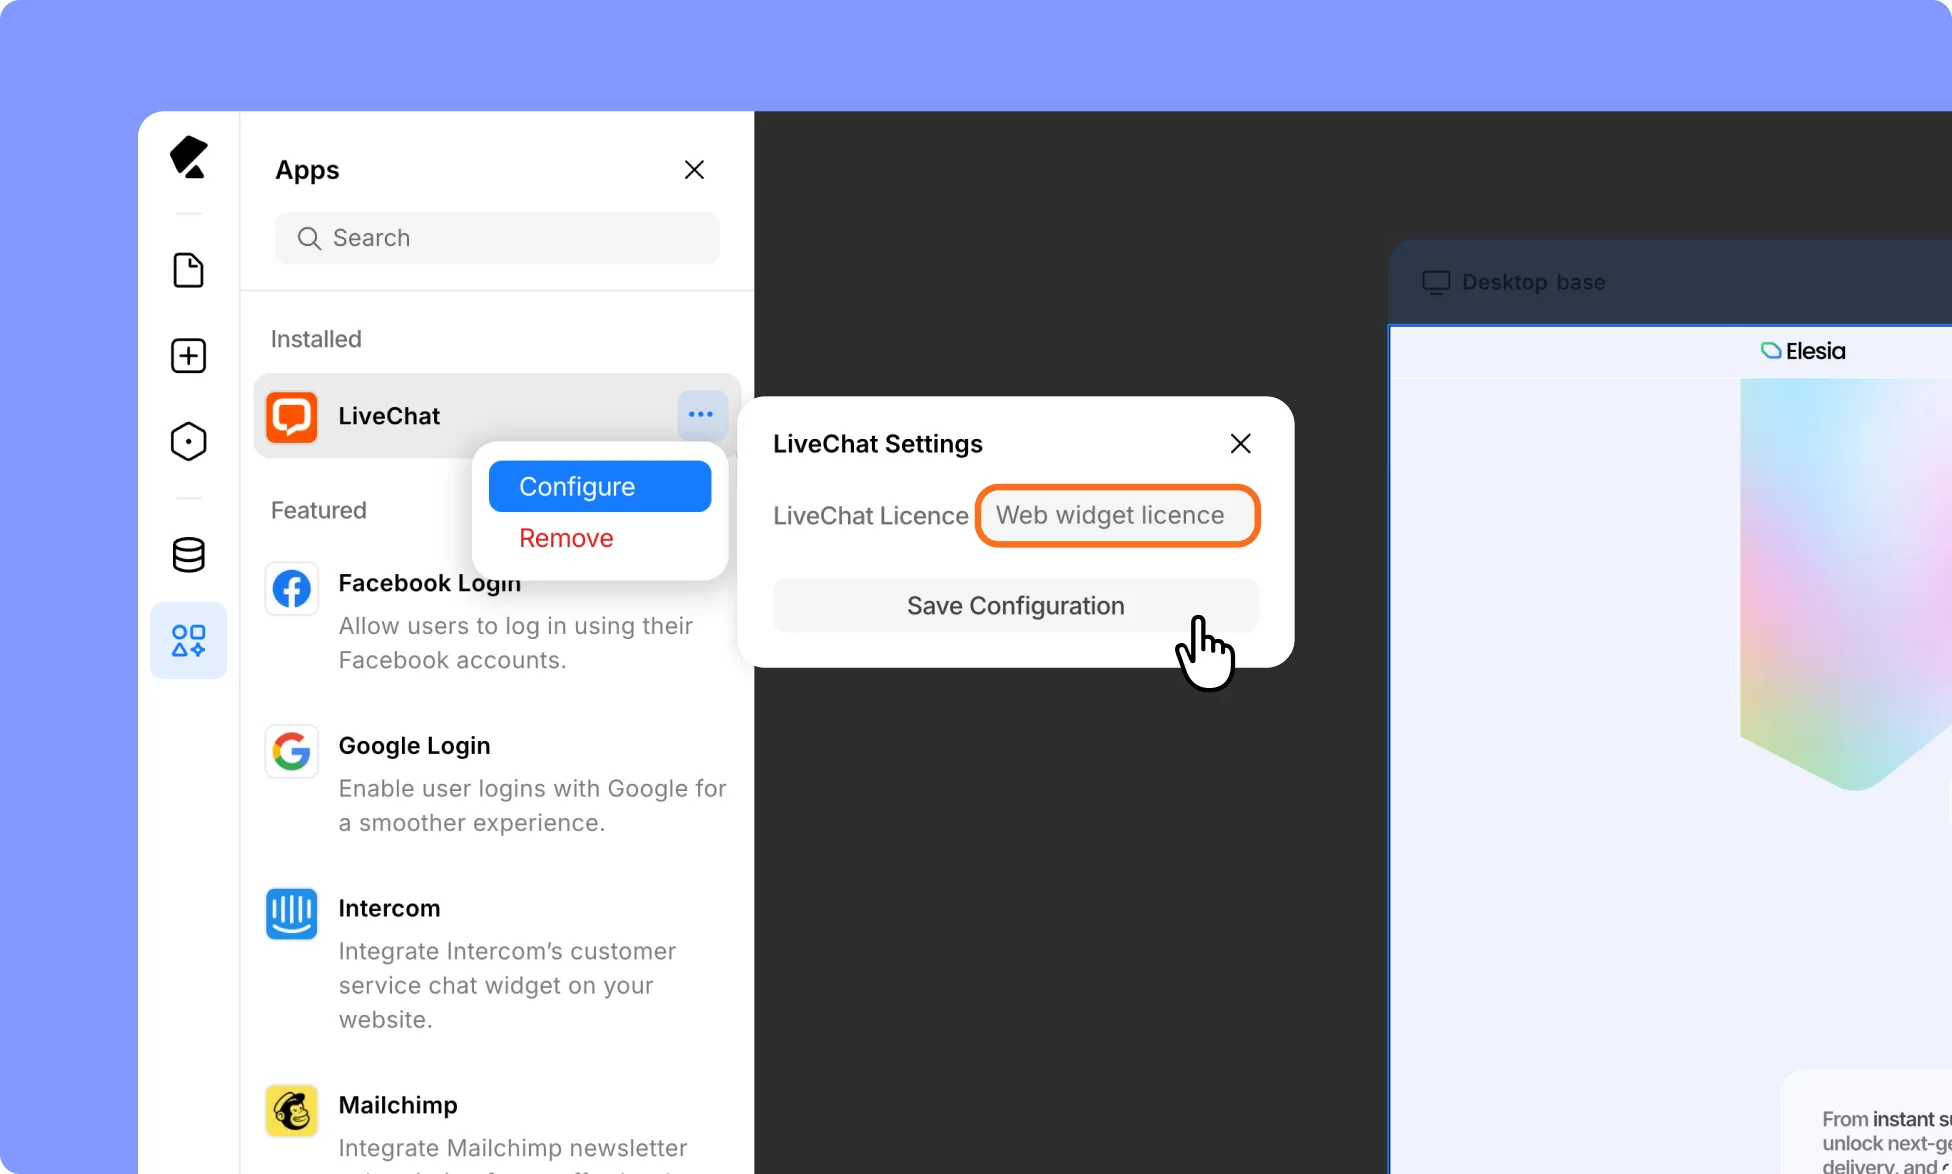
Kirki will use the License ID to load the LiveChat widget on your website.
How to Test the LiveChat Integration
- Open your website in a browser.
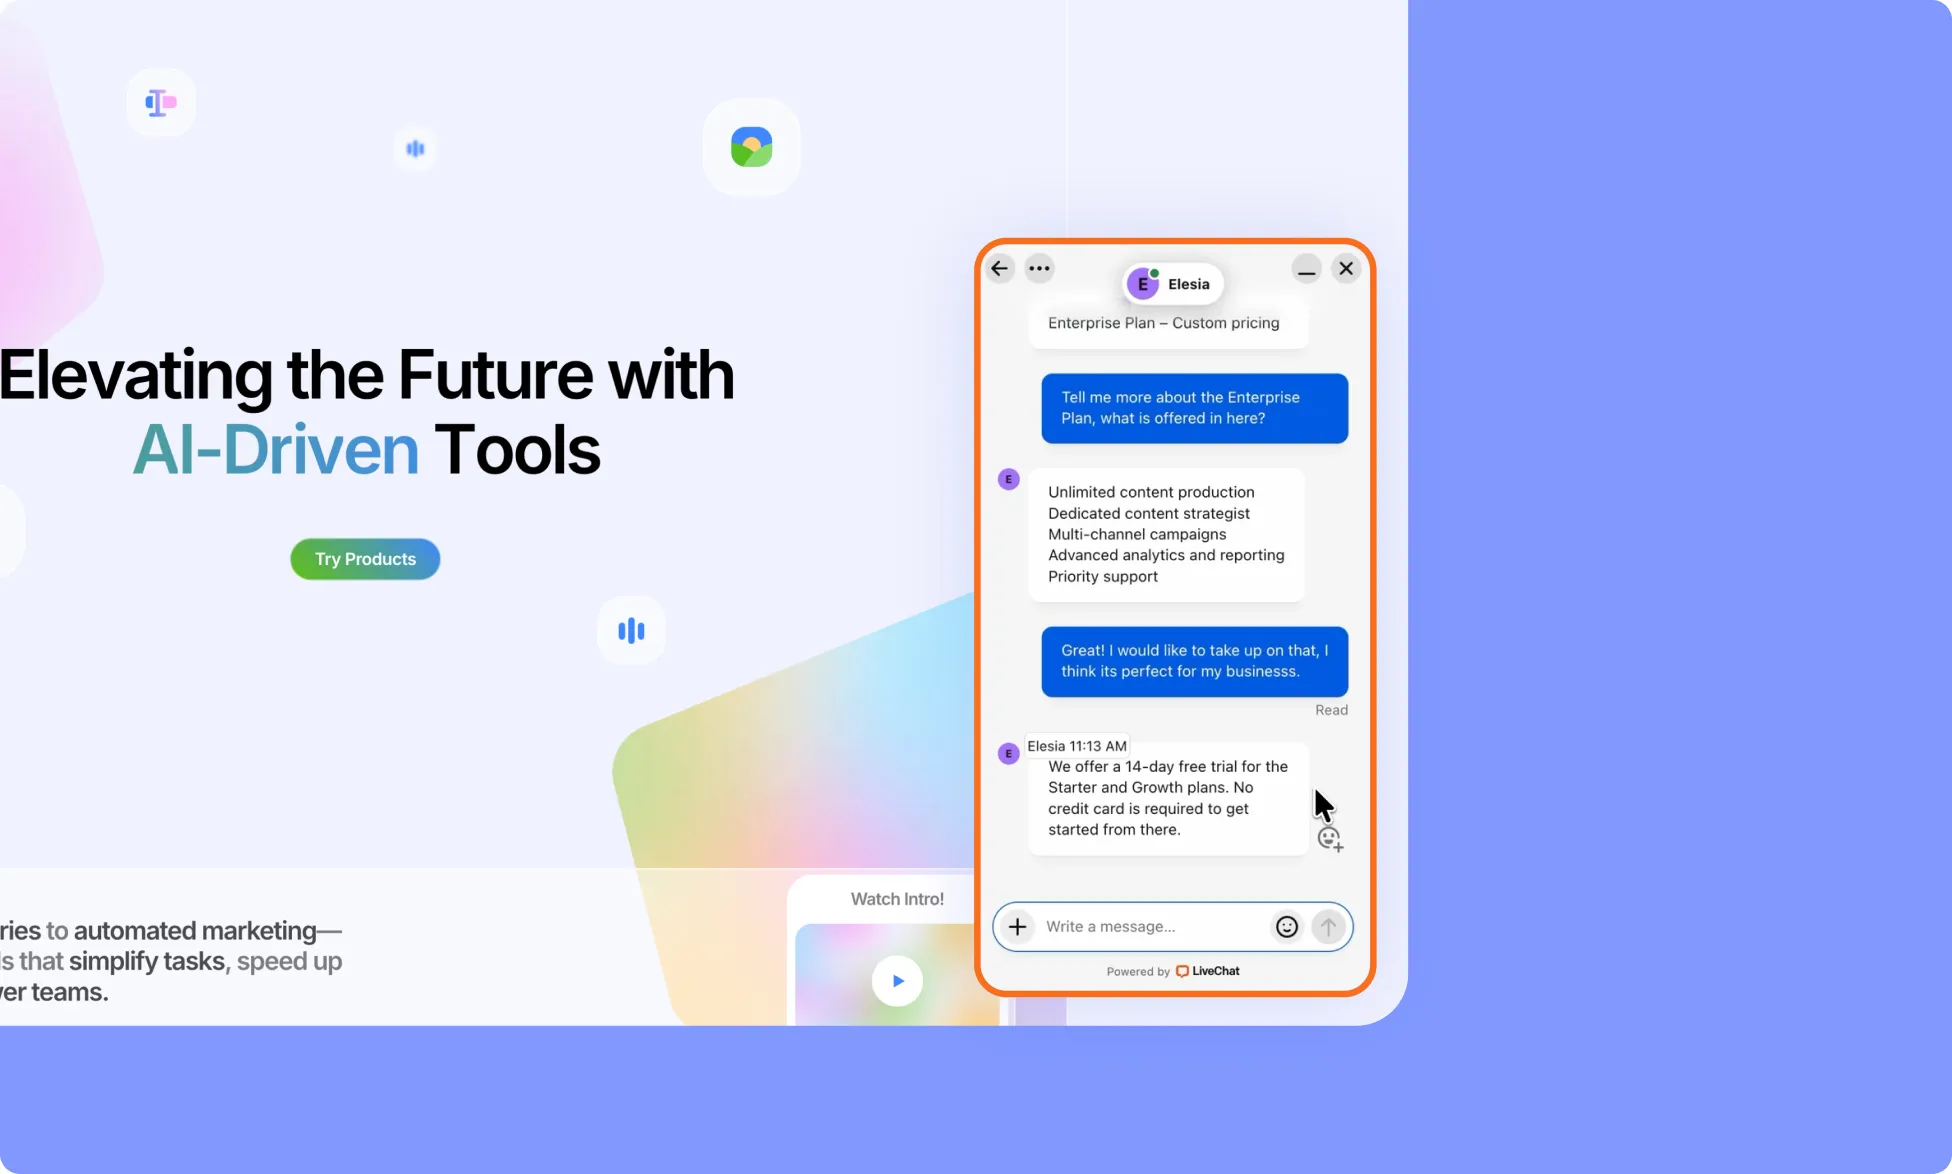
- Confirm that the LiveChat widget appears.
- Open the widget and send a test message.
- Log in to the LiveChat Agent App.
- Go to Chats.
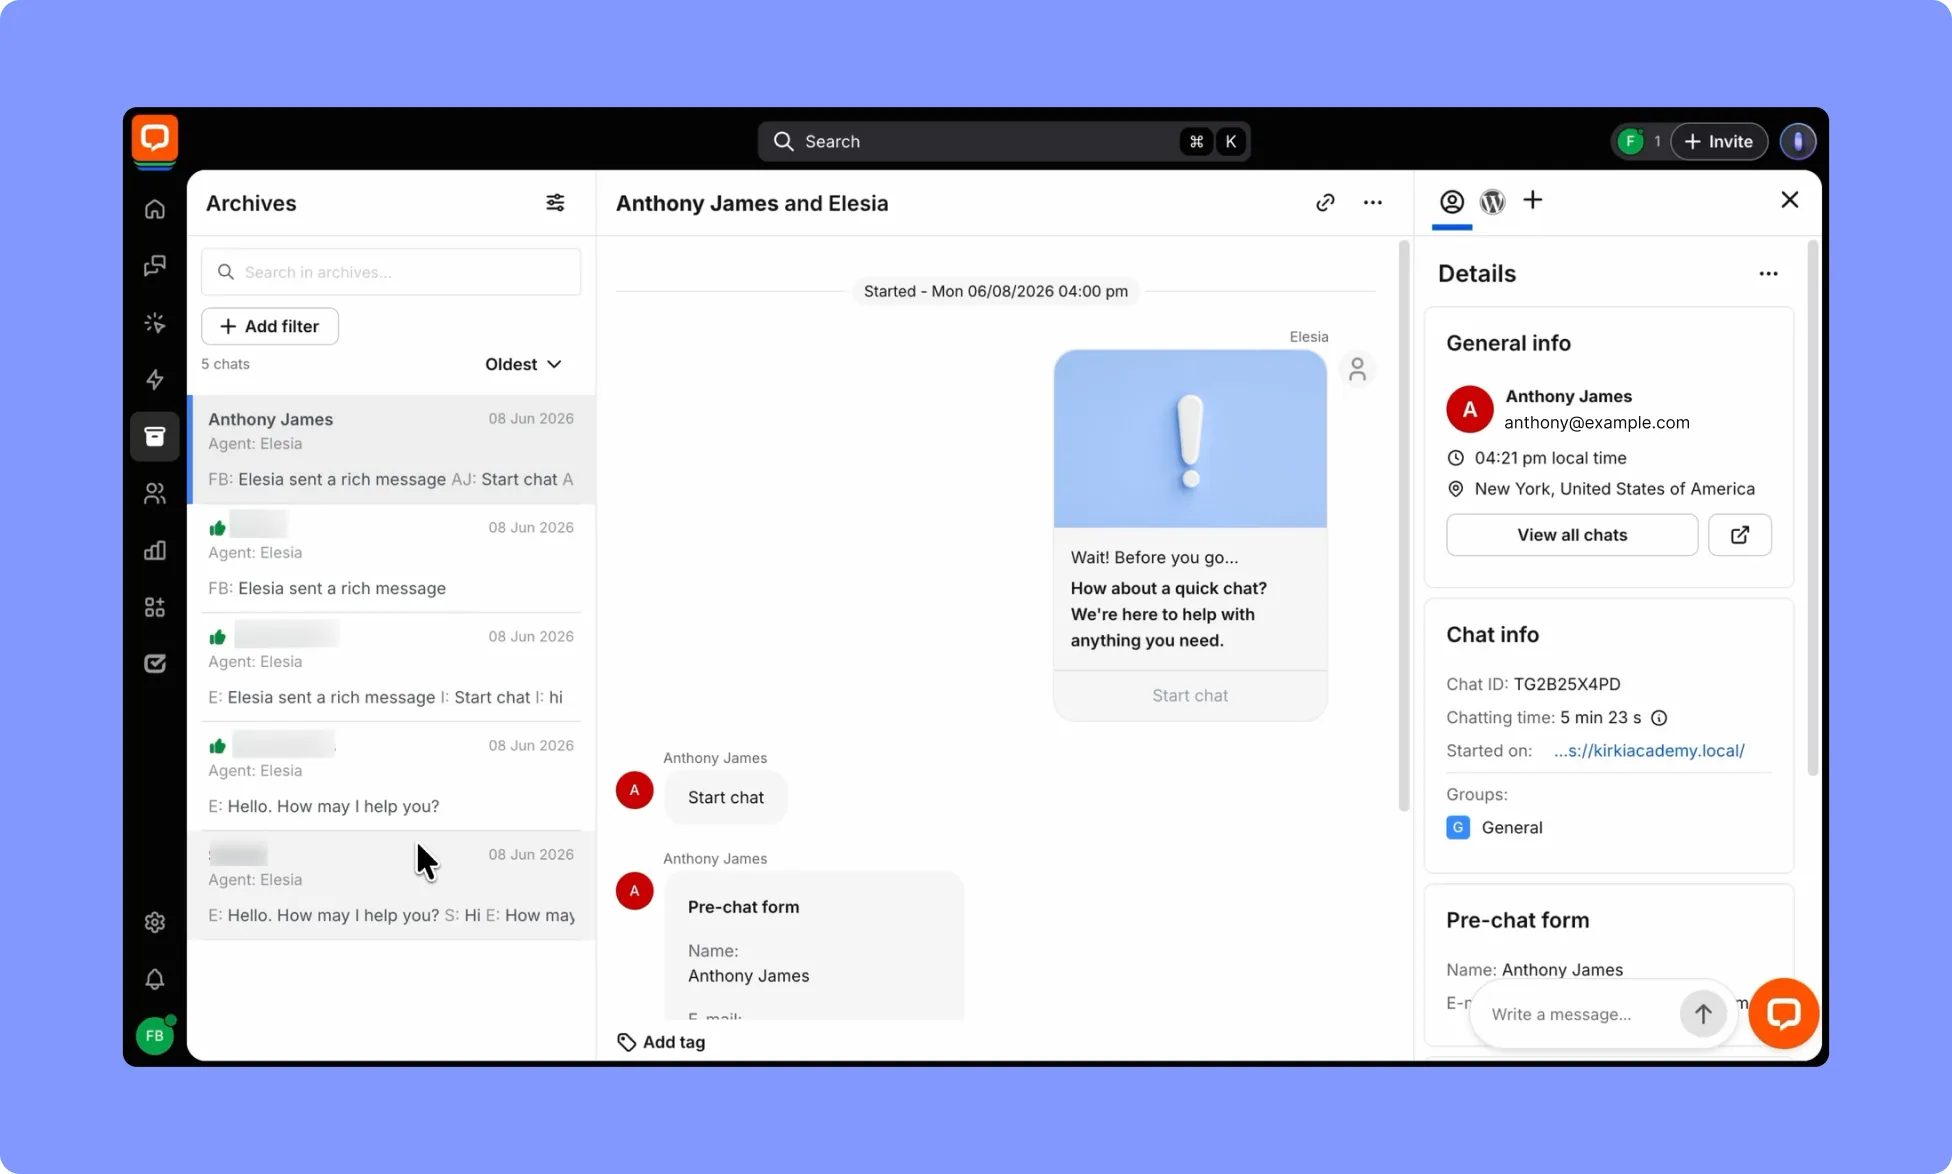
- Confirm that the test conversation appears.