The Drip integration connects your Kirki forms with Drip, an ecommerce-focused email marketing and marketing automation platform. It sends new form submissions or customer details to Drip as subscribers.
What Is the Drip App
Drip is an email marketing and automation platform designed primarily for ecommerce and content-focused businesses. It uses subscriber data, tags, and behavior-based workflows to automate email marketing. The Kirki Drip integration allows you to automatically send new form entries or customer information from your website to Drip as subscribers.
What You Need Before Connecting Drip
Before connecting Drip to Kirki, make sure you have:
- An active Drip account.
- Your Drip API Token.
- Your numeric Drip Account ID.
To connect Drip to Kirki, copy your API Token (and your numeric Account ID . Install the Drip app in Kirki, enter both values under Configure.
How to Get Drip API Token and Account ID
Get Your API Token
- Log in to your Drip account.
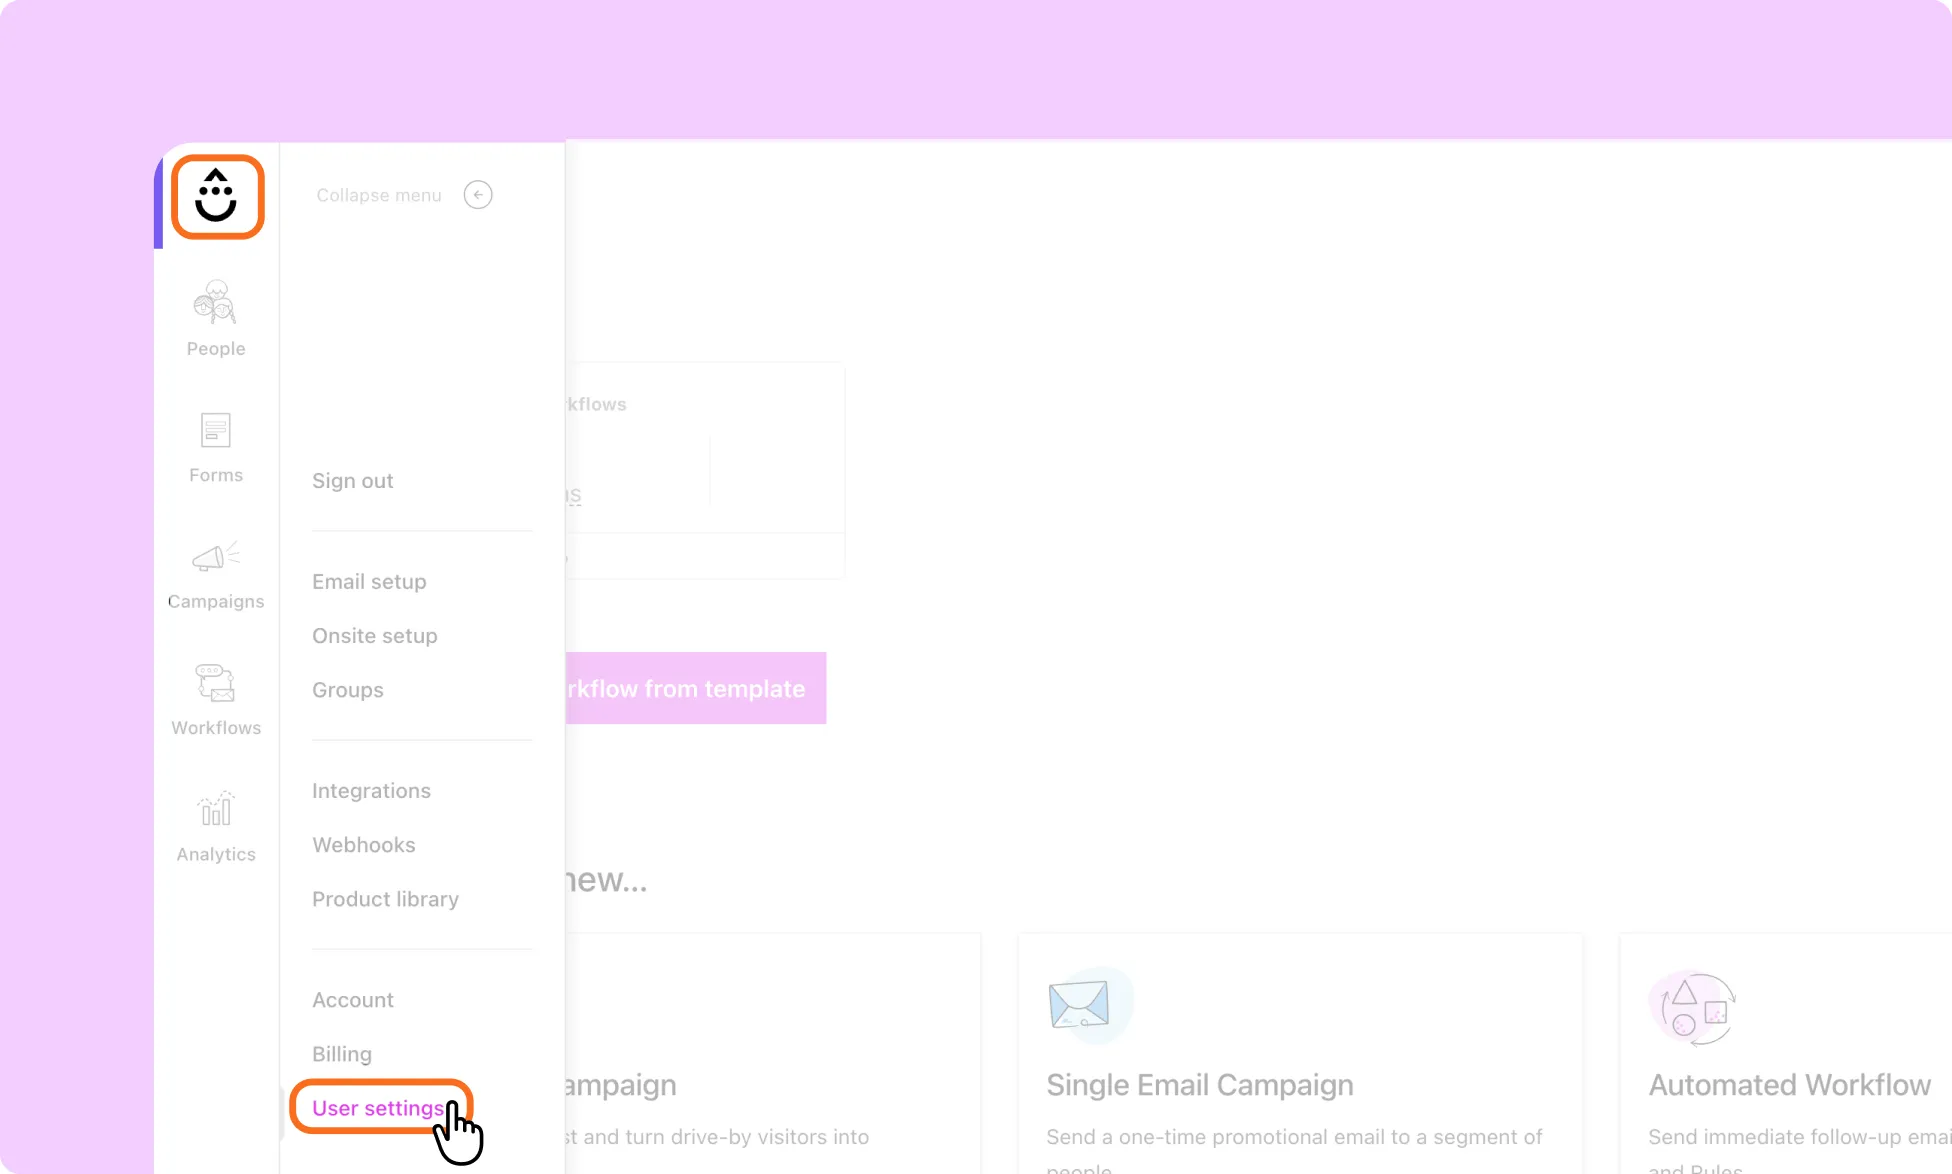
- Click your profile avatar in the top-right corner.
- Select User Settings.
- On the User Info page, locate the API Token field.
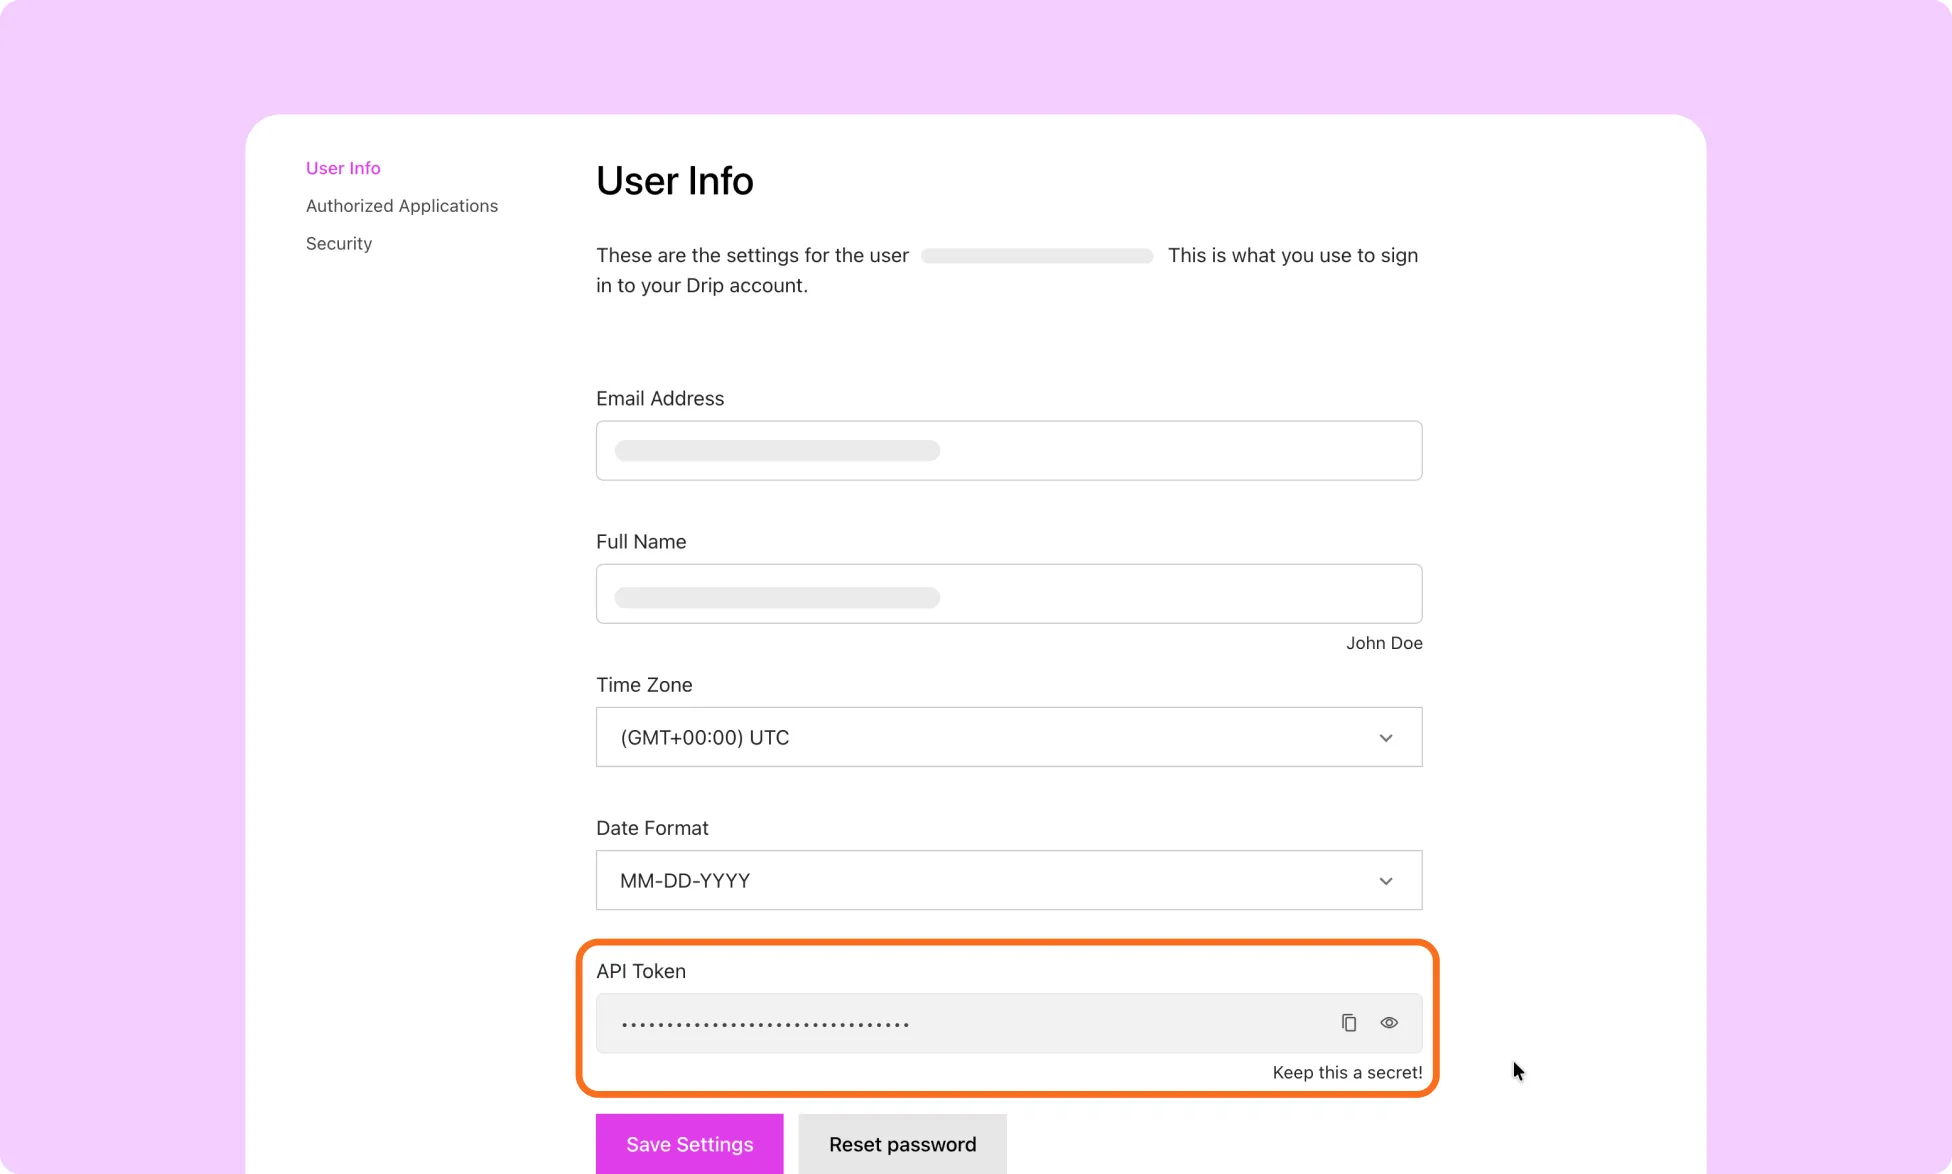
- Copy the API Token and keep it secure.
Note: The API Token is associated with the Drip user who generated it. If that user is removed from the account, you may need to generate a new token.
Find Your Account ID
- Open your Drip dashboard.
- Look at the URL in your browser.
- Find the numeric value immediately after getdrip.com/.
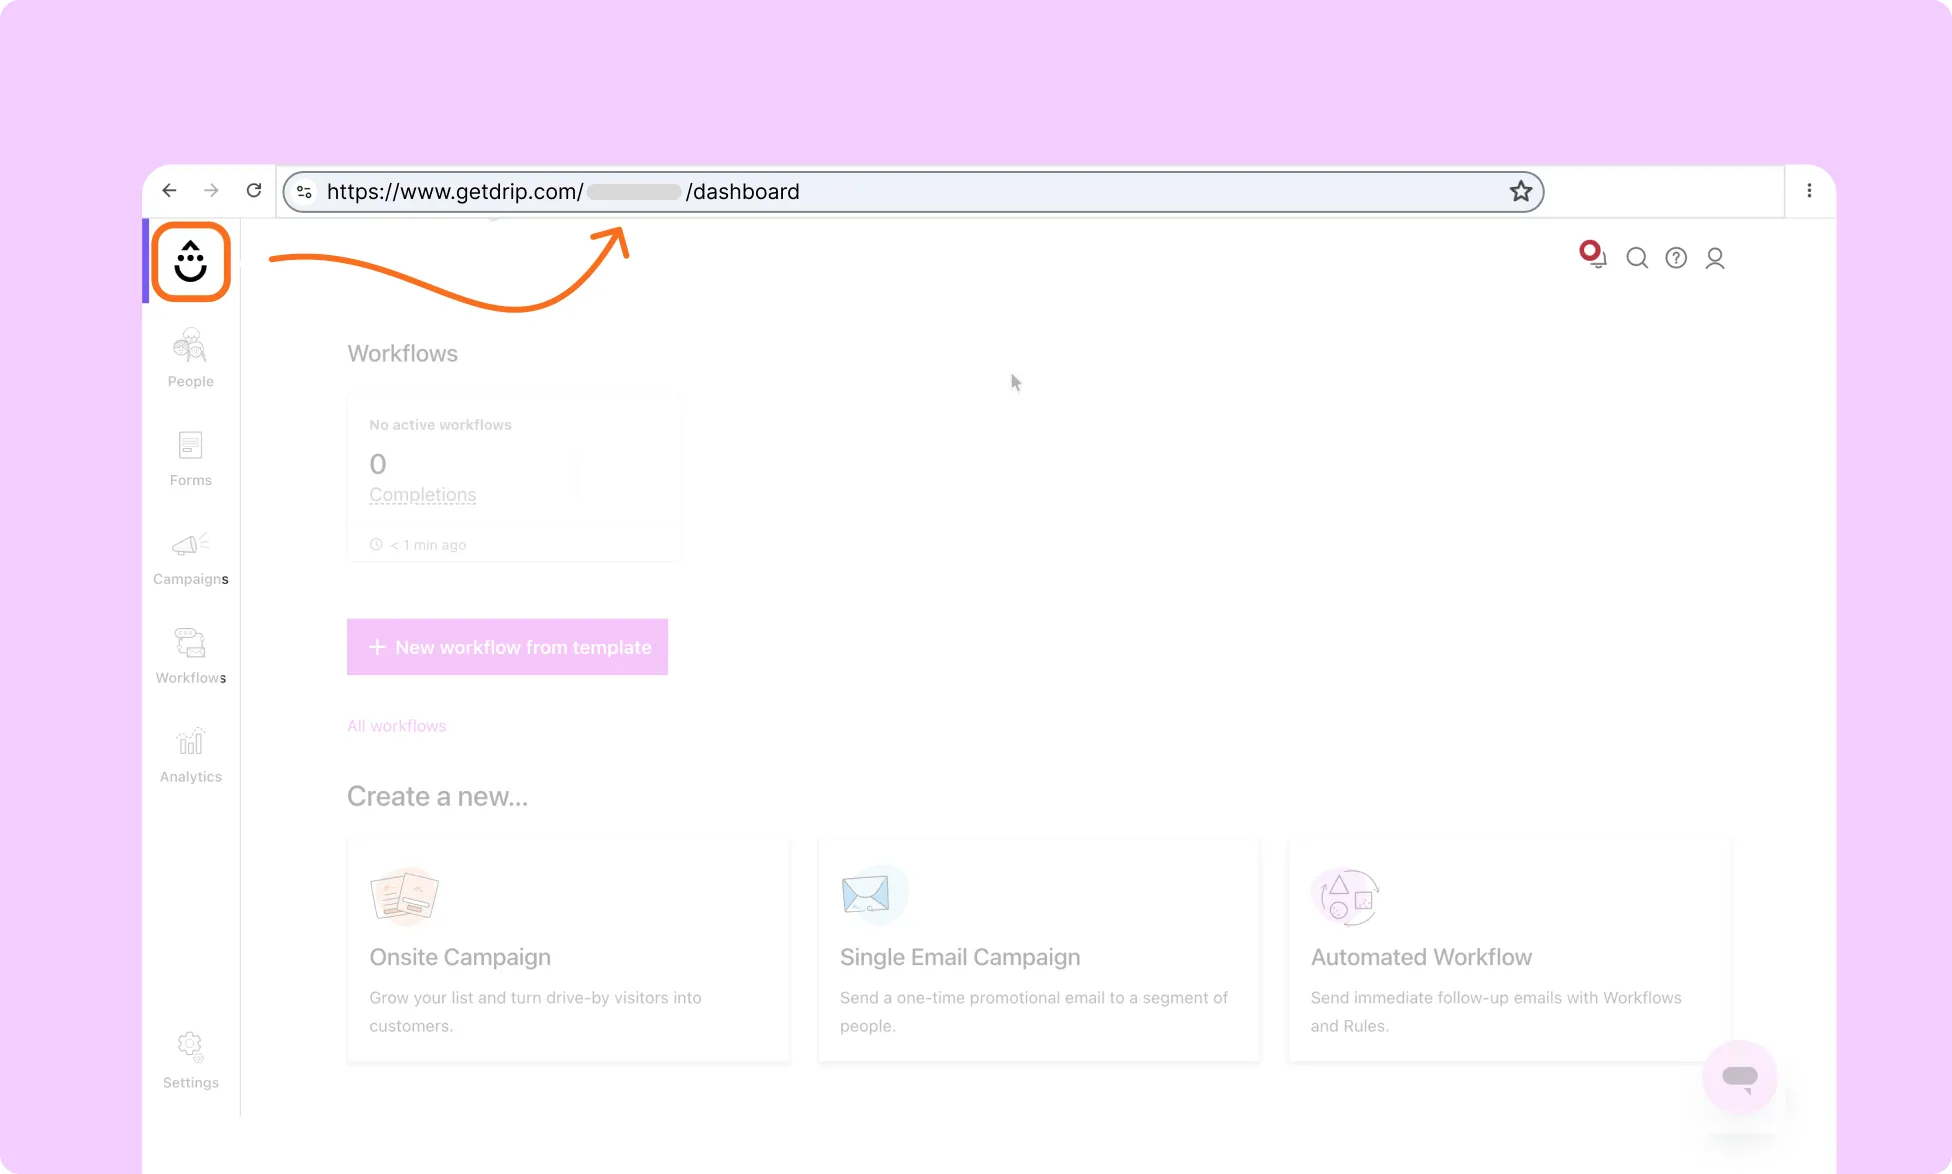
- Copy this numeric value. This is your Drip Account ID.
Keep both the API Token and Account ID available for the Kirki configuration.
How to Install the Drip App in Kirki
- Go to Kirki → Apps.
- Locate Drip.
- Click Install and Configure.
How to Configure the Drip Integration
- After installation, click Configure to open the Drip settings.
- Paste your Drip API Token into the API Token field, and enter your numeric Account ID into the Account ID field.
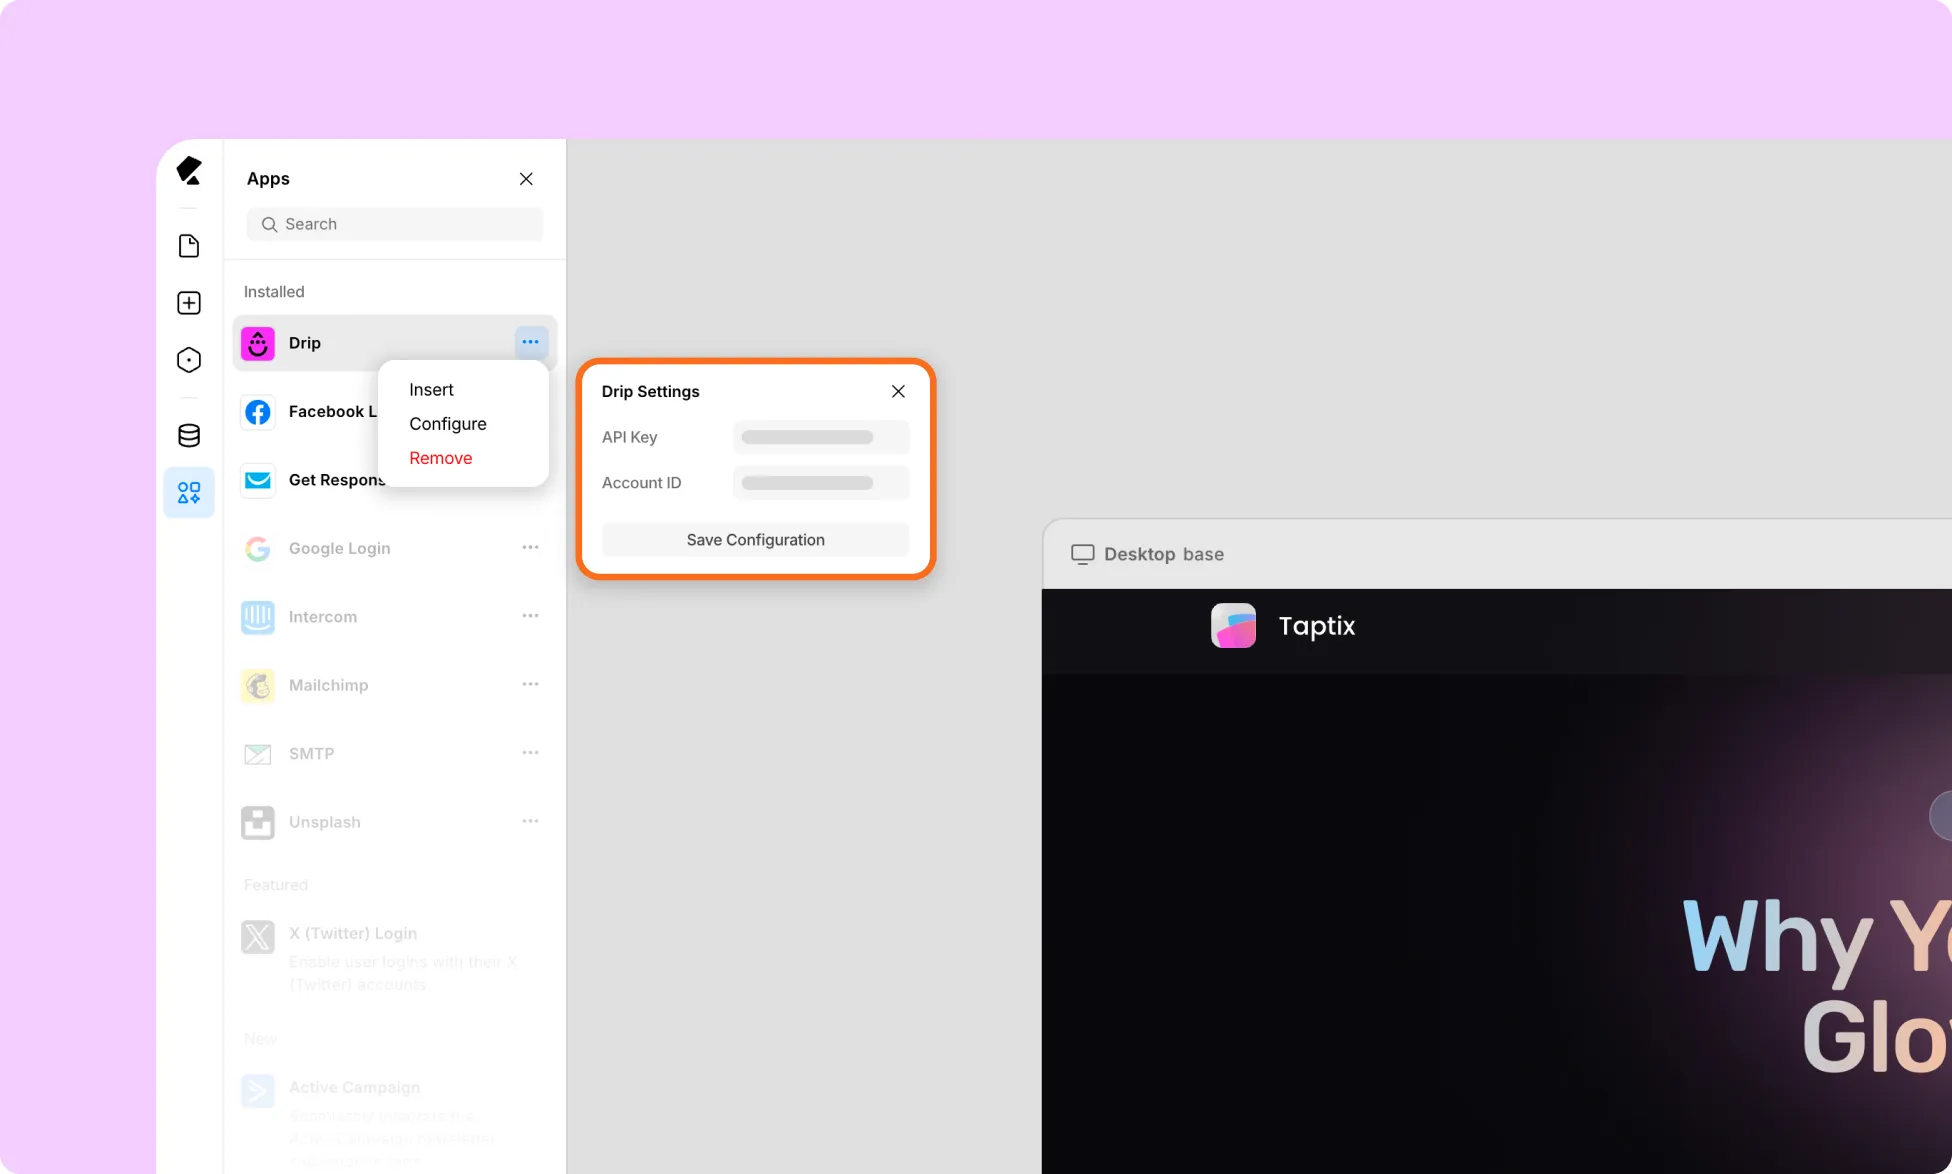
- Click Save Configuration and refresh the Kirki editor page.
How to Connect Drip to a Kirki Form
- Add the Drip Form element to your page using the Insert option in the Drip App in Kirki.
Note: Add the mailing list form element on its own. If you place it inside an existing Form Block, the Submission button will not work as expected.
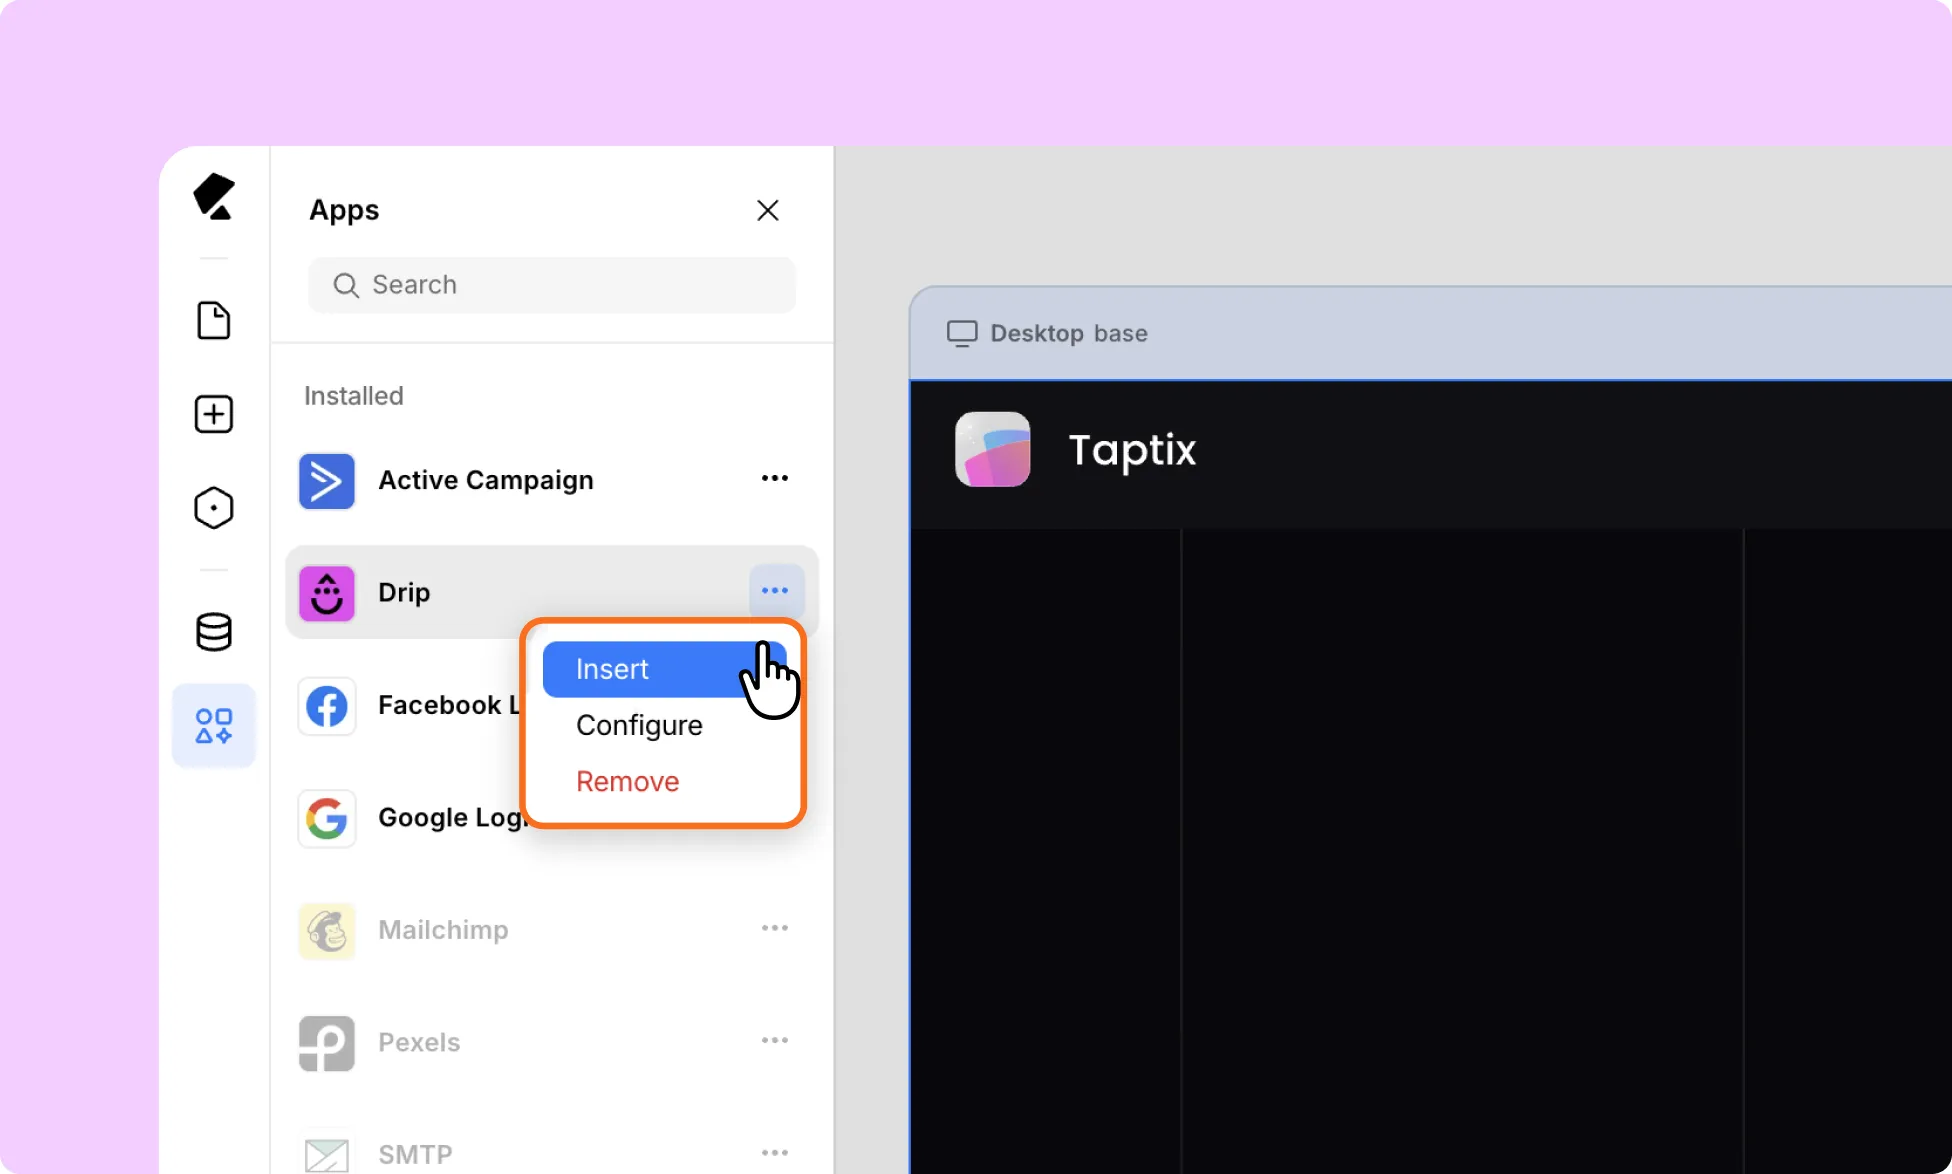
- You use it as a standalone mail subscription form.
Your Kirki form is now connected to your Drip People list.
How to Test the Drip Integration
- Open a Kirki form connected to the Drip integration.
- Submit a test entry using a valid email address.
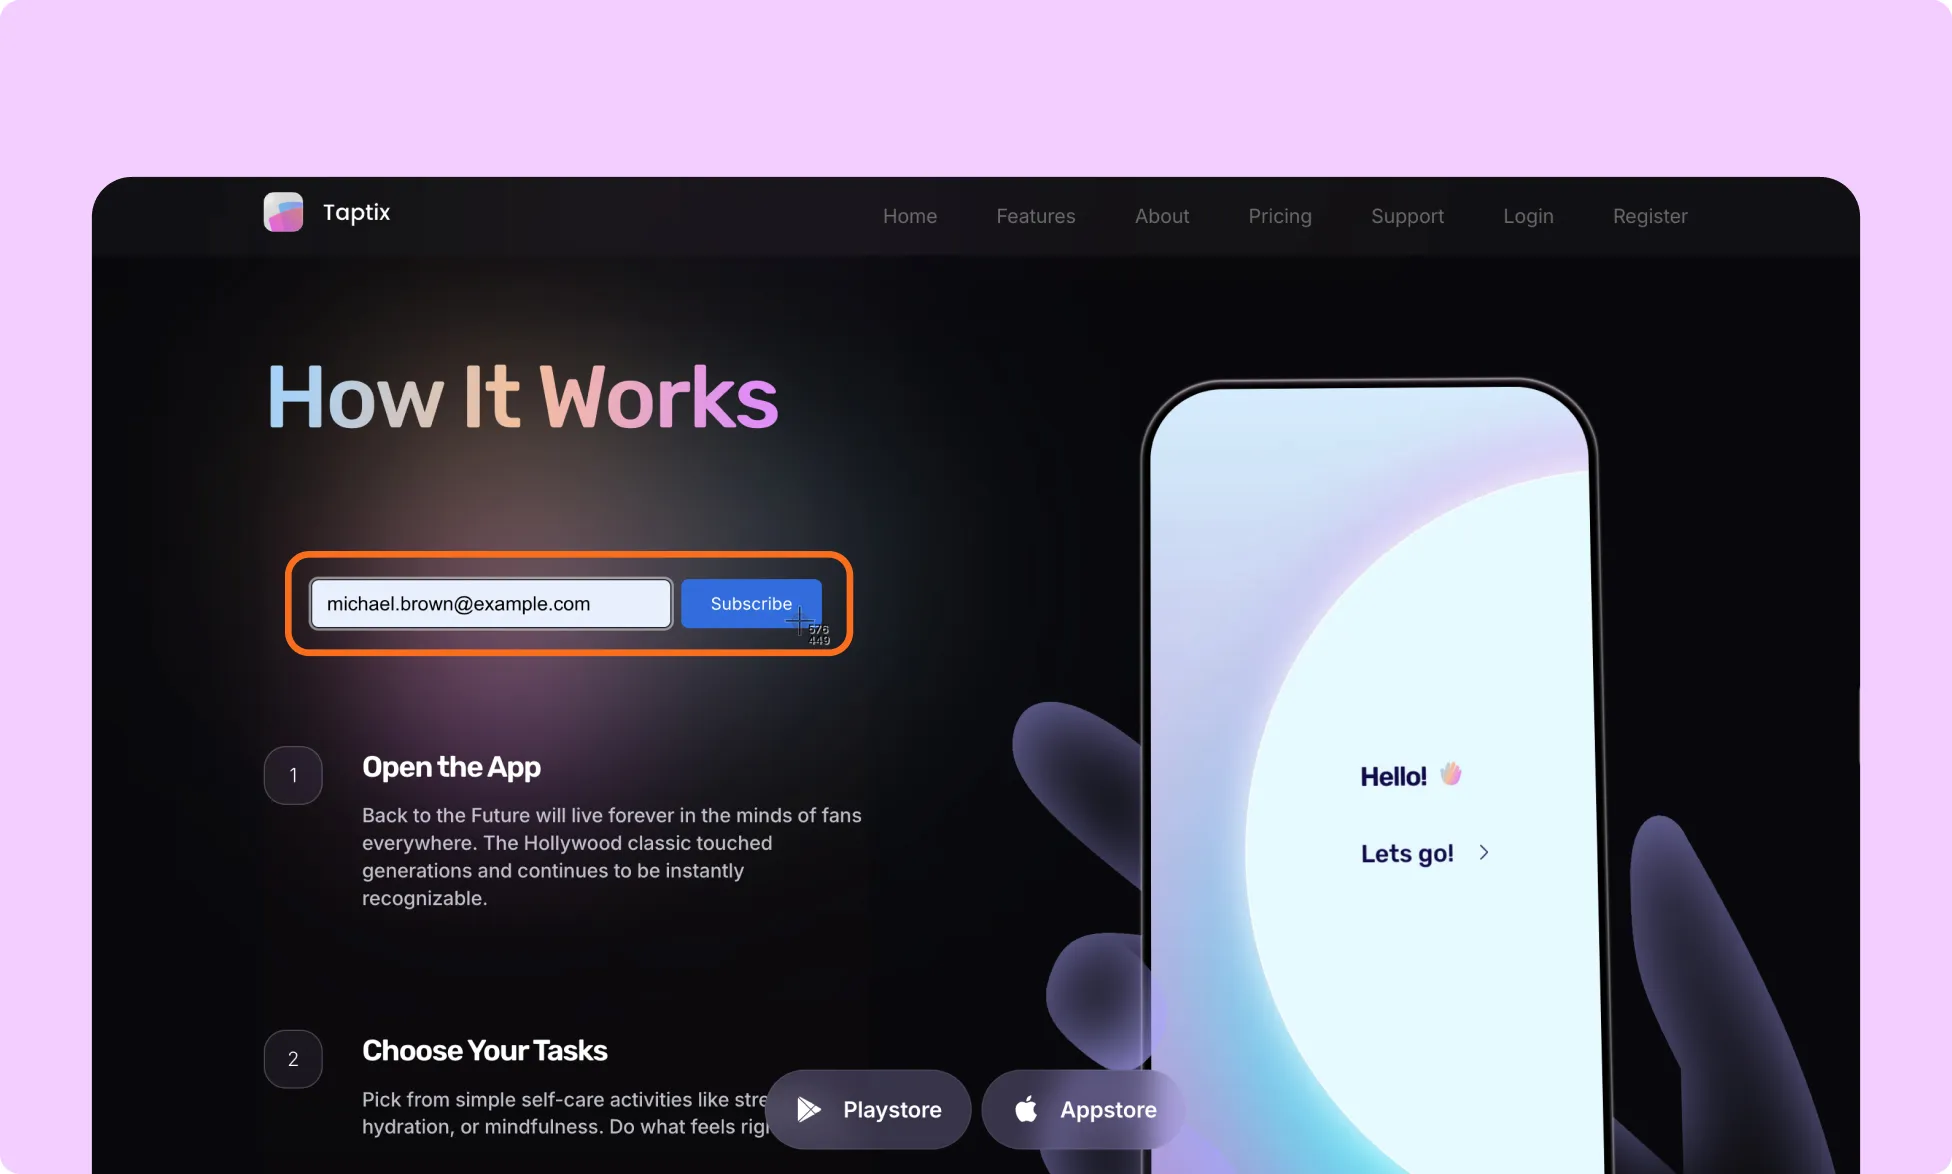
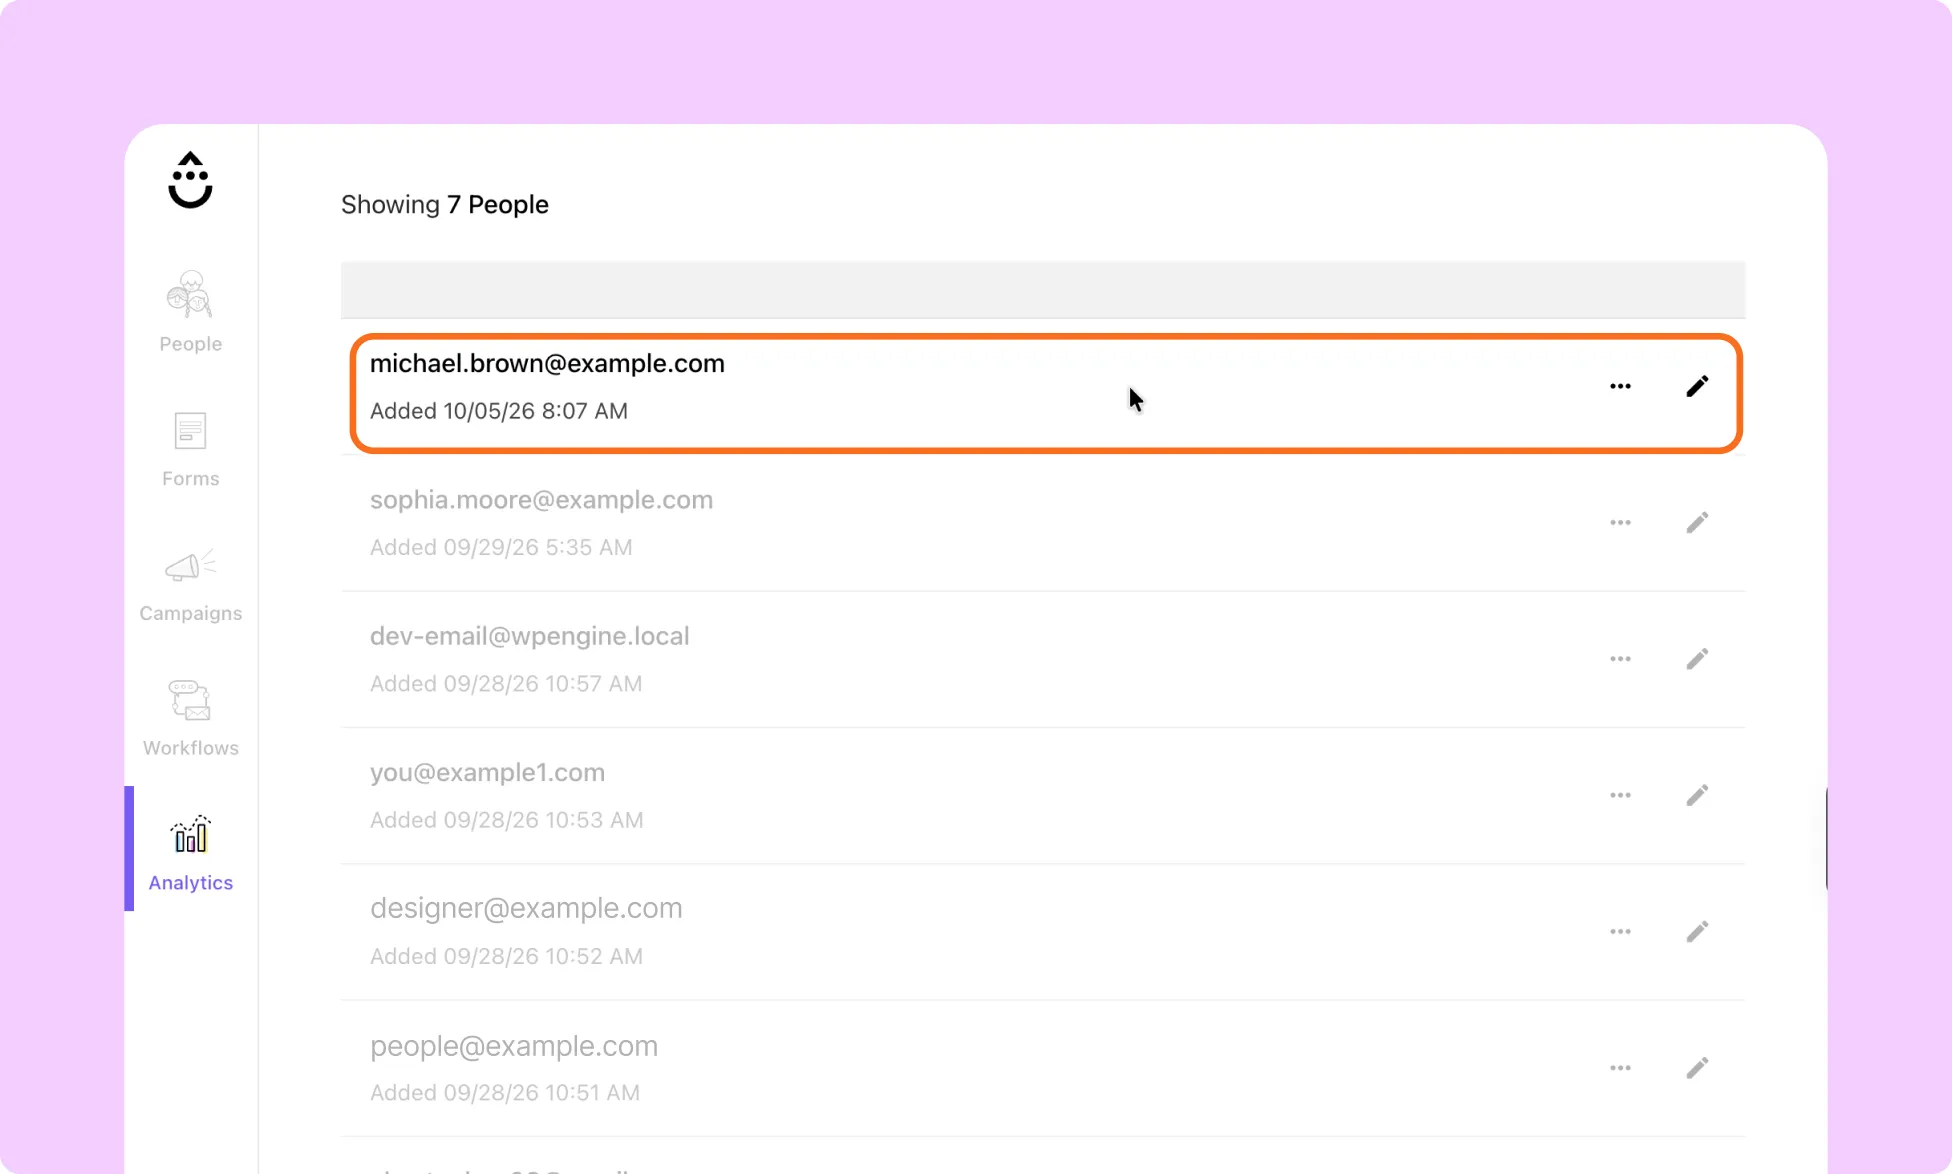
- Log in to Drip. and go to Analytics > New People
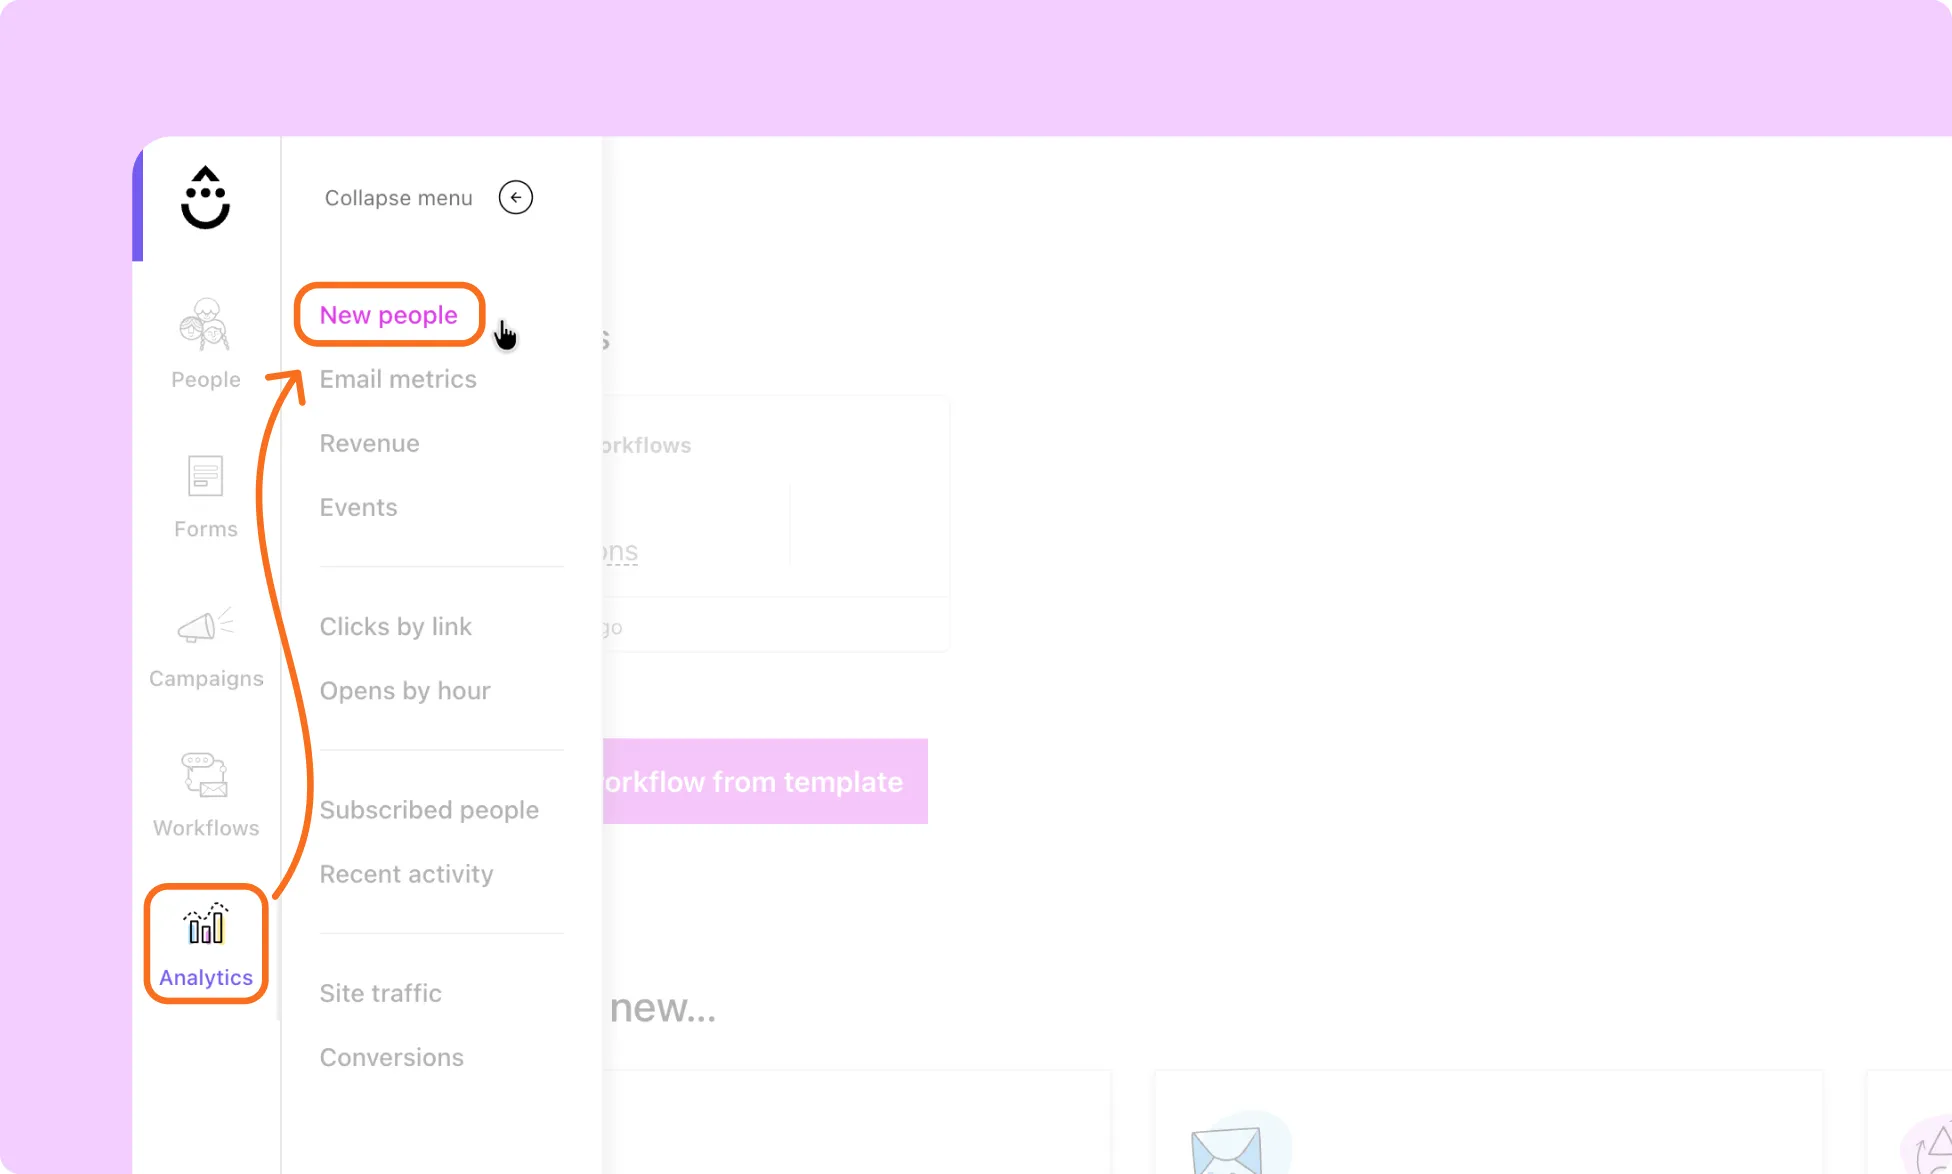
- Confirm that the new subscriber appears with the expected email address.