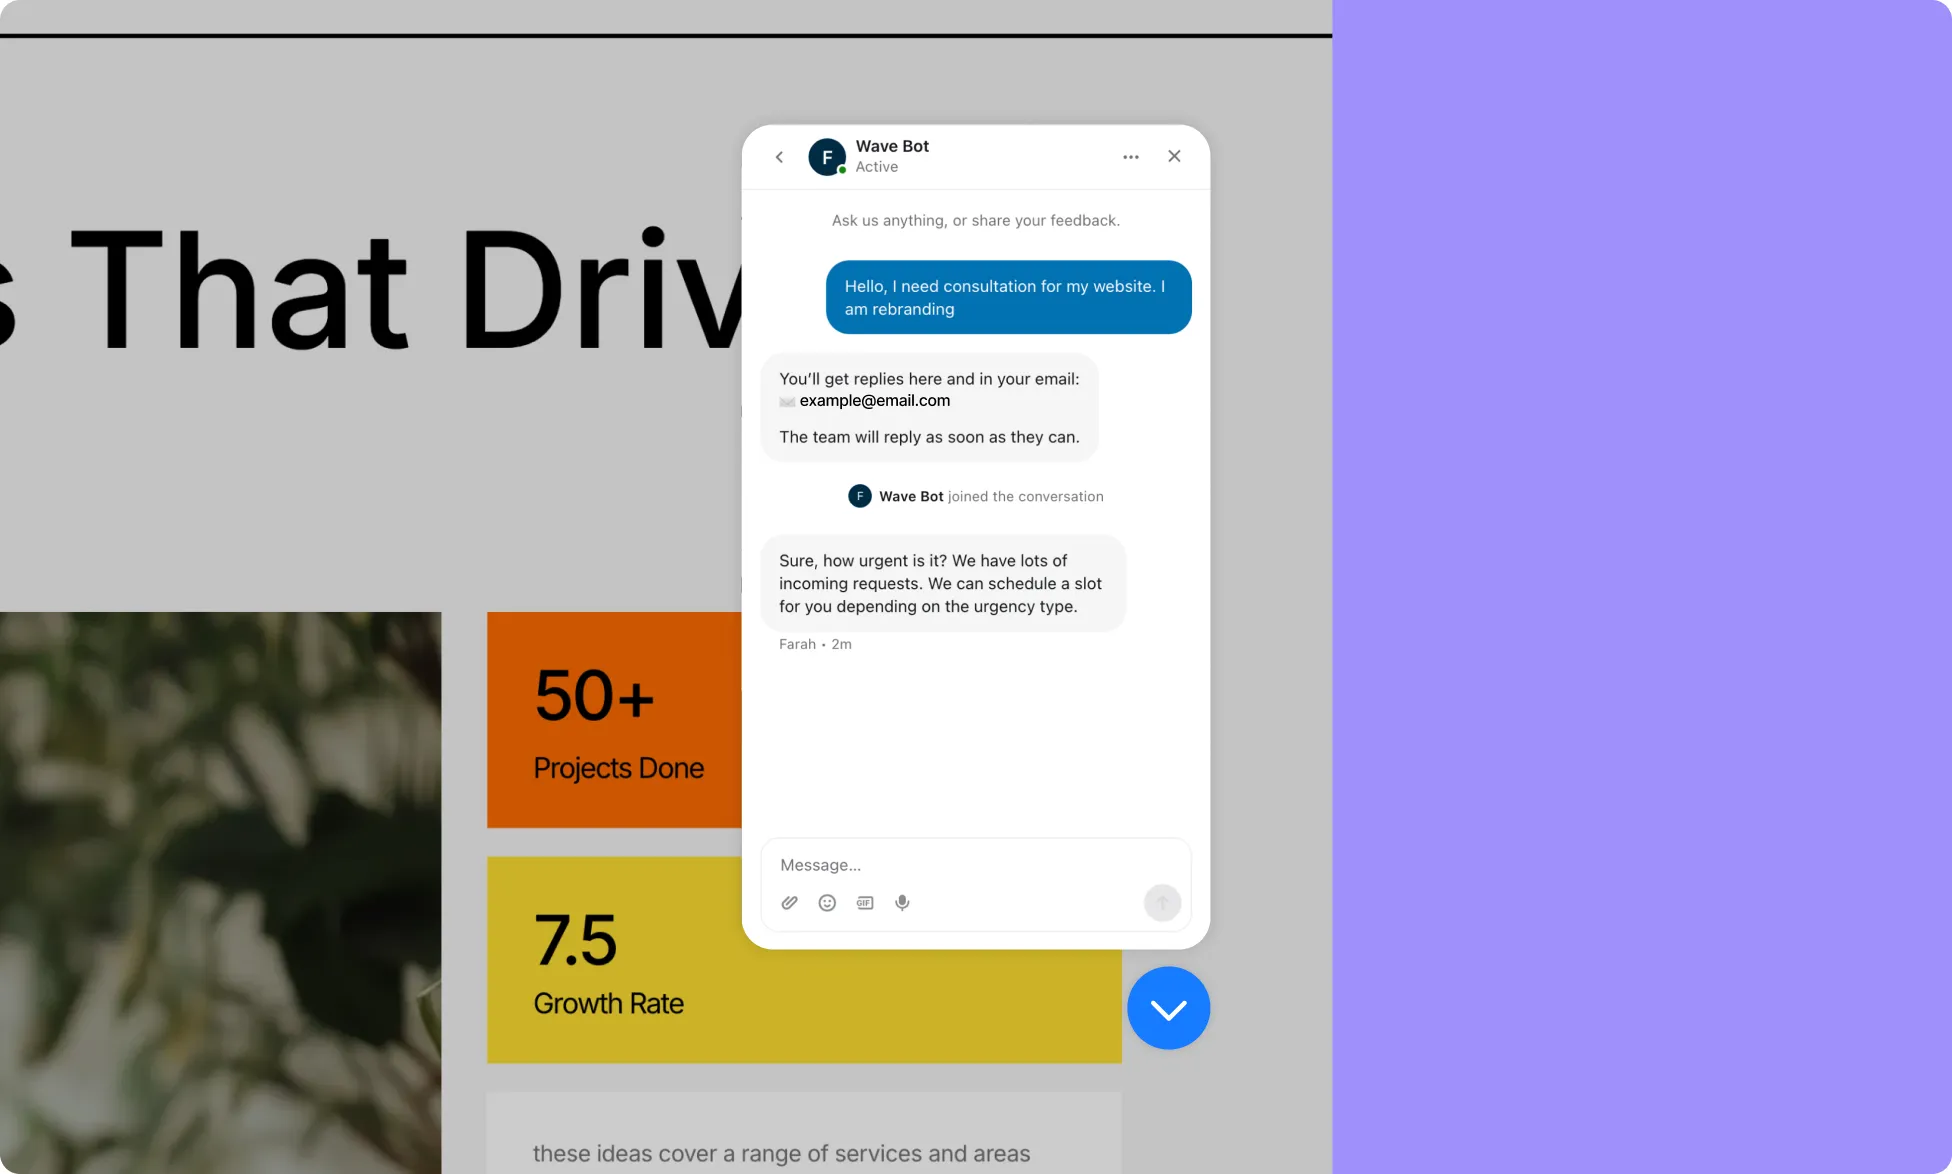
Intercom is a customer messaging platform that provides live chat, shared inboxes, and product messaging. Connect Intercom through Kirki Apps to add the Intercom Messenger to your website so visitors can chat with your team directly.
What Is the Intercom App
Once the Intercom App in Kirki is connected, it links your Kirki website to your Intercom workspace and displays the Intercom Messenger on your site.
This allows visitors to start conversations with your team without leaving your website.
What You Need Before Connecting Intercom
- An active Intercom workspace
- Intercom Messenger enabled for your website
- Permission to manage Messenger settings in Intercom
- Your Workspace ID (also called the App ID)
To add Intercom to Kirki, copy your App ID from Intercom, install the Intercom app from Kirki’s Apps panel, paste the App ID under Configure, and Save.
How to Get Intercom Workspace ID
- You must first go to your Intercom account. Then visit Settings > Channels > Messenger > Install
- Select ‘Select Install for web’ and then choose WordPress for the choice of how to install the messenger.
- Ensure that you’ve toggled on “Enable the Messenger API to continue installation“.
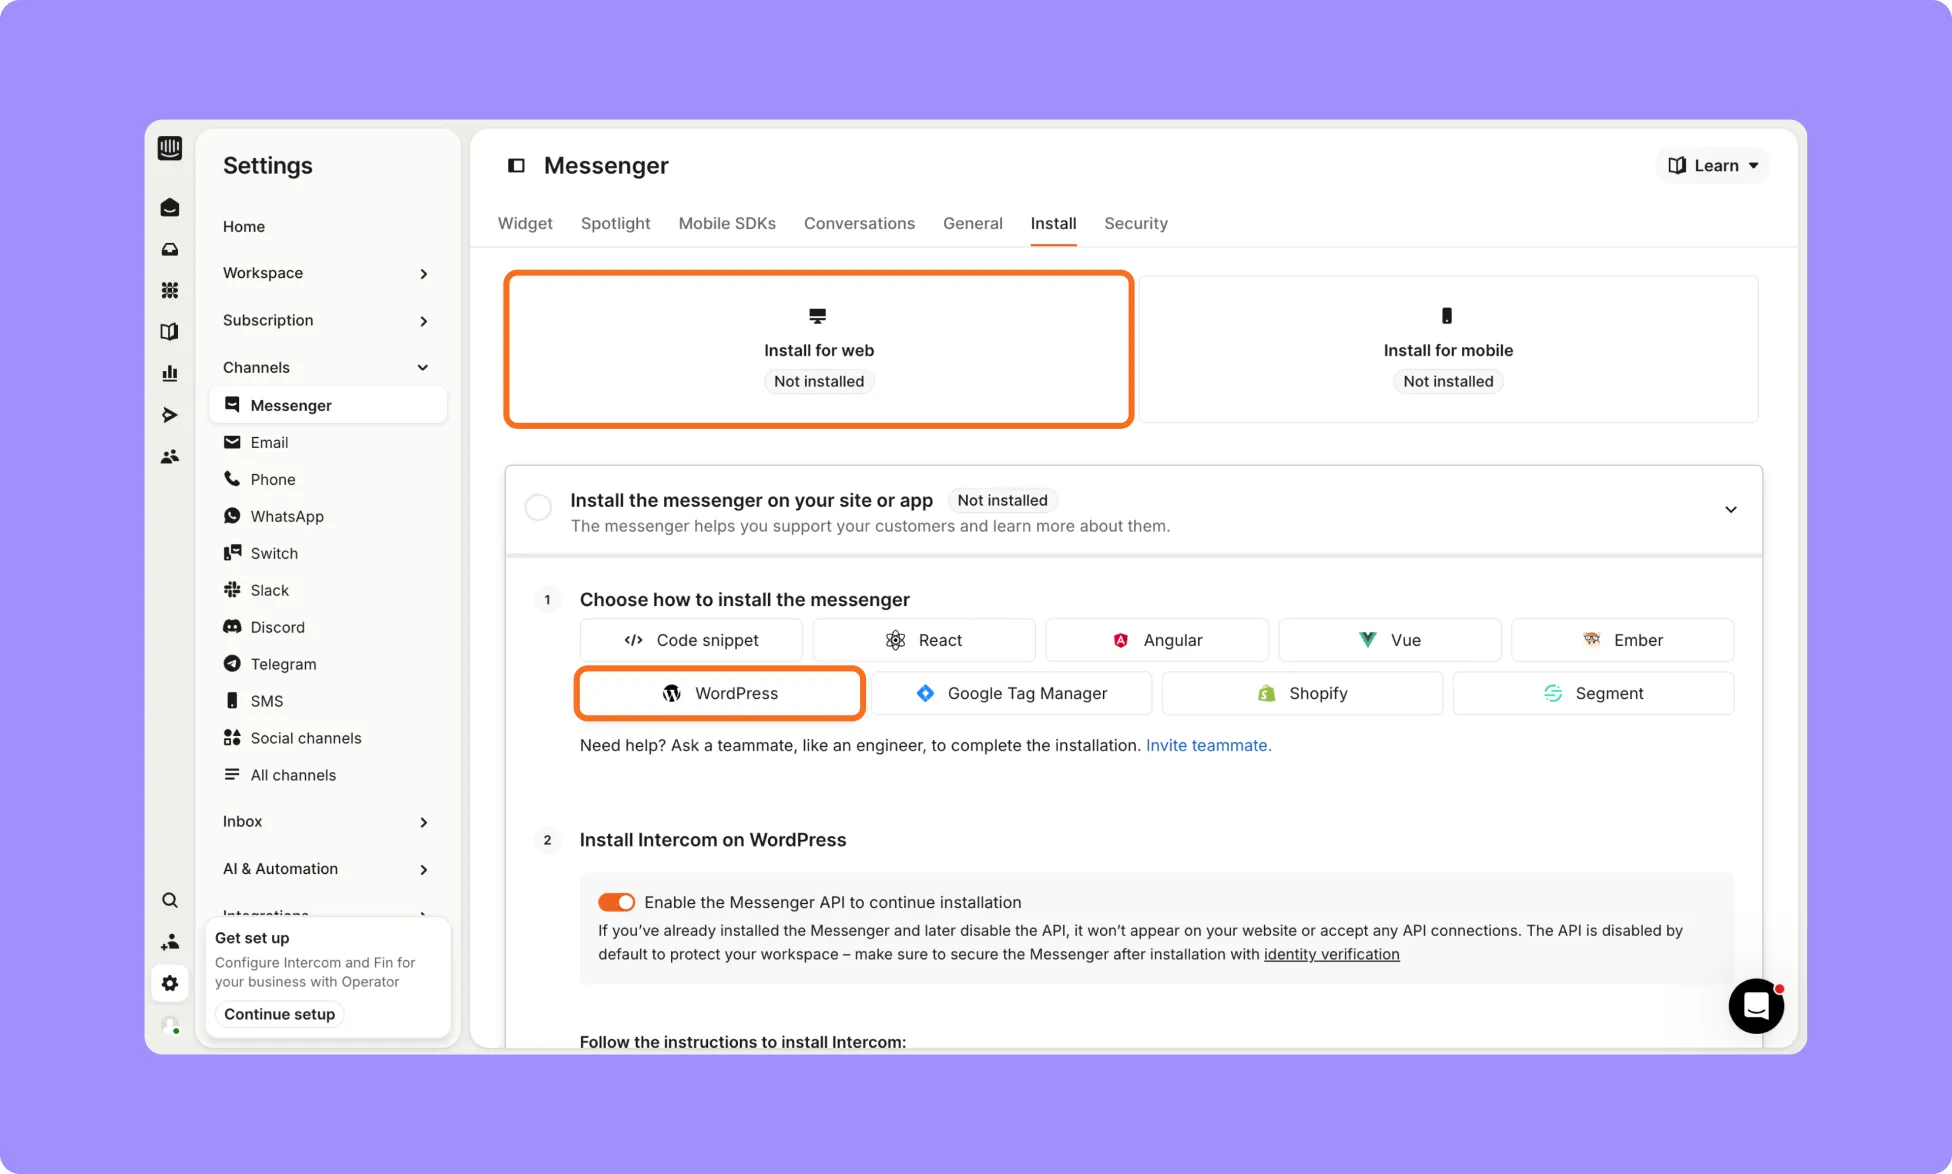
Important: When this is disabled, all requests to Intercom will fail.
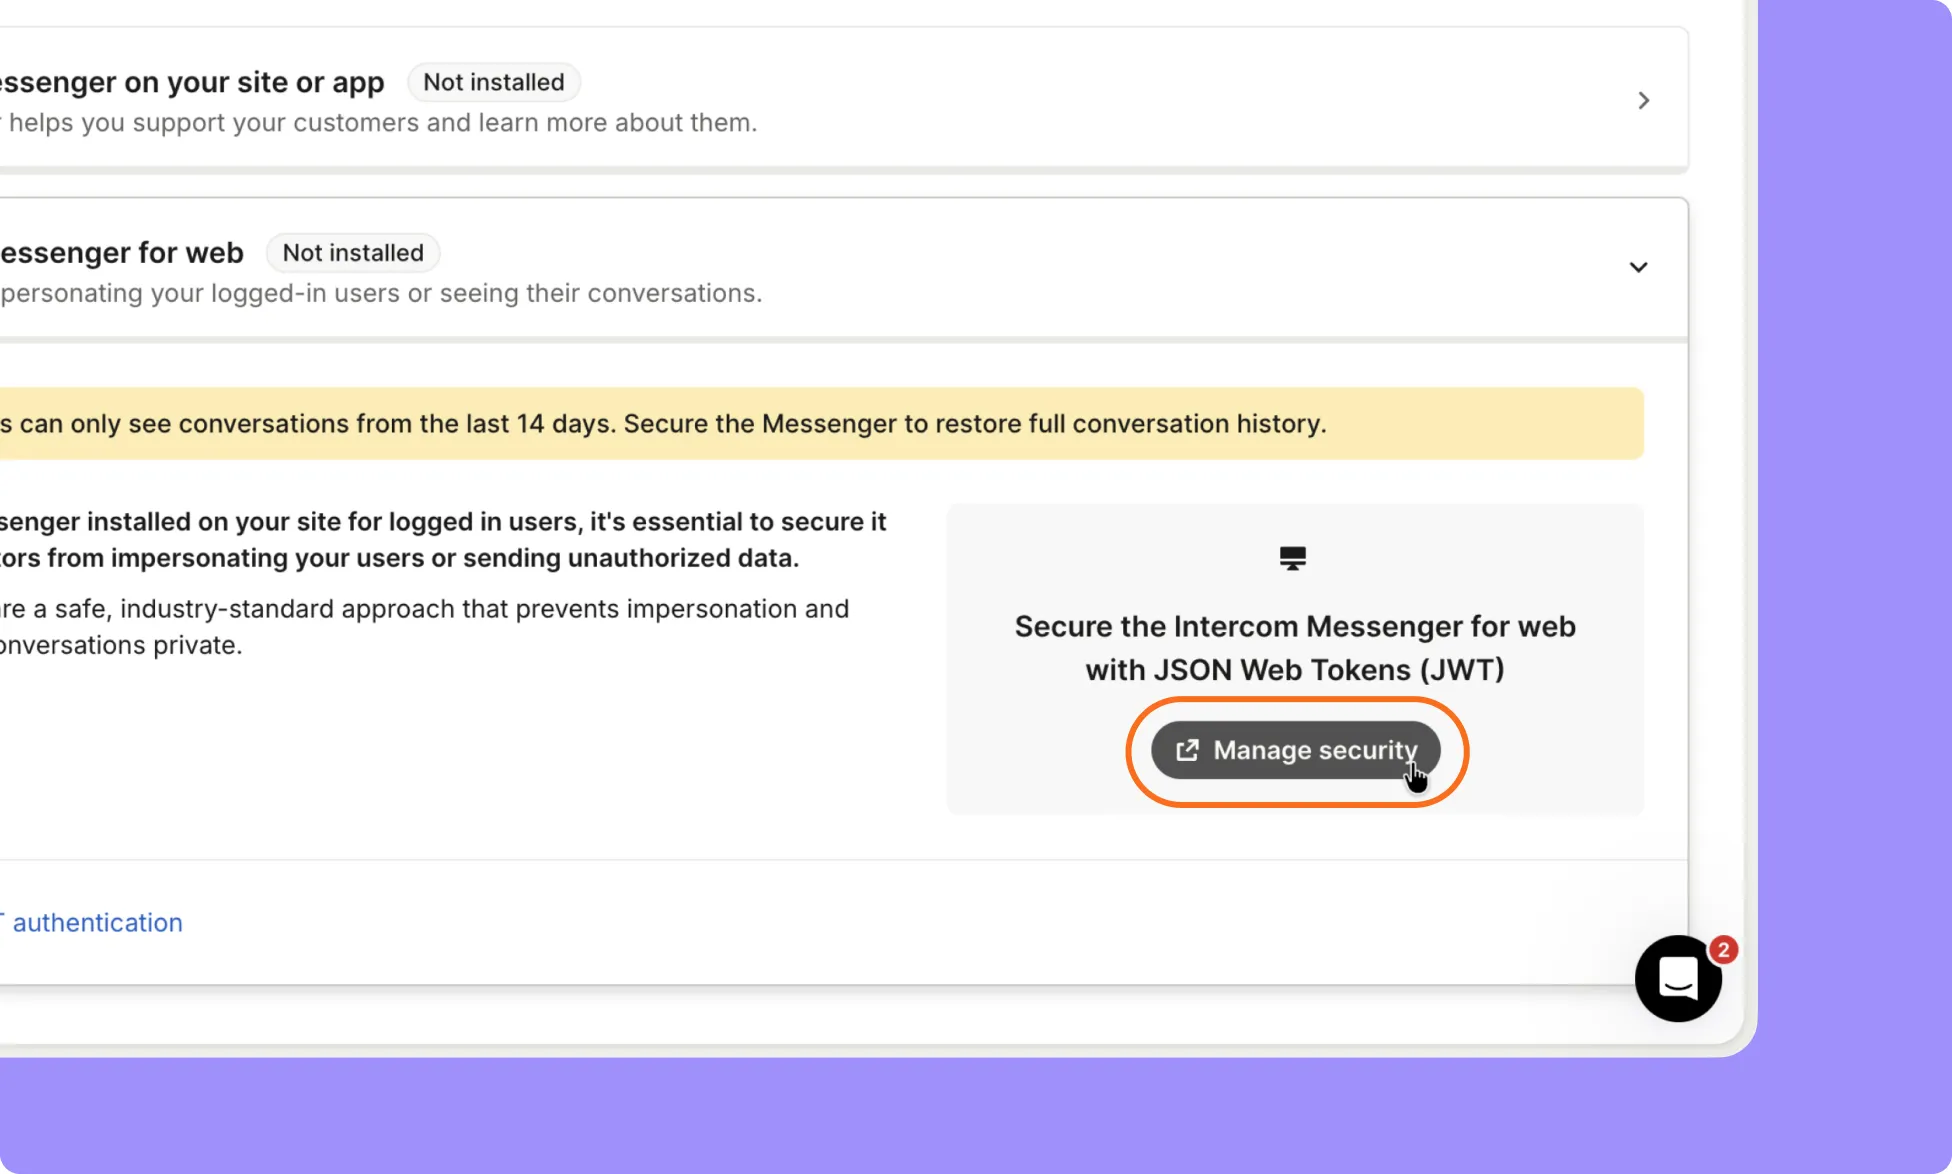
- Scroll down to select Next Step to Secure the Messenger for the web.
- In this section, you will need to click on the button “Manage Security”.
- You will be redirected to the security panel; from there, choose JS for your front-end technology and PHP for the back-end language.
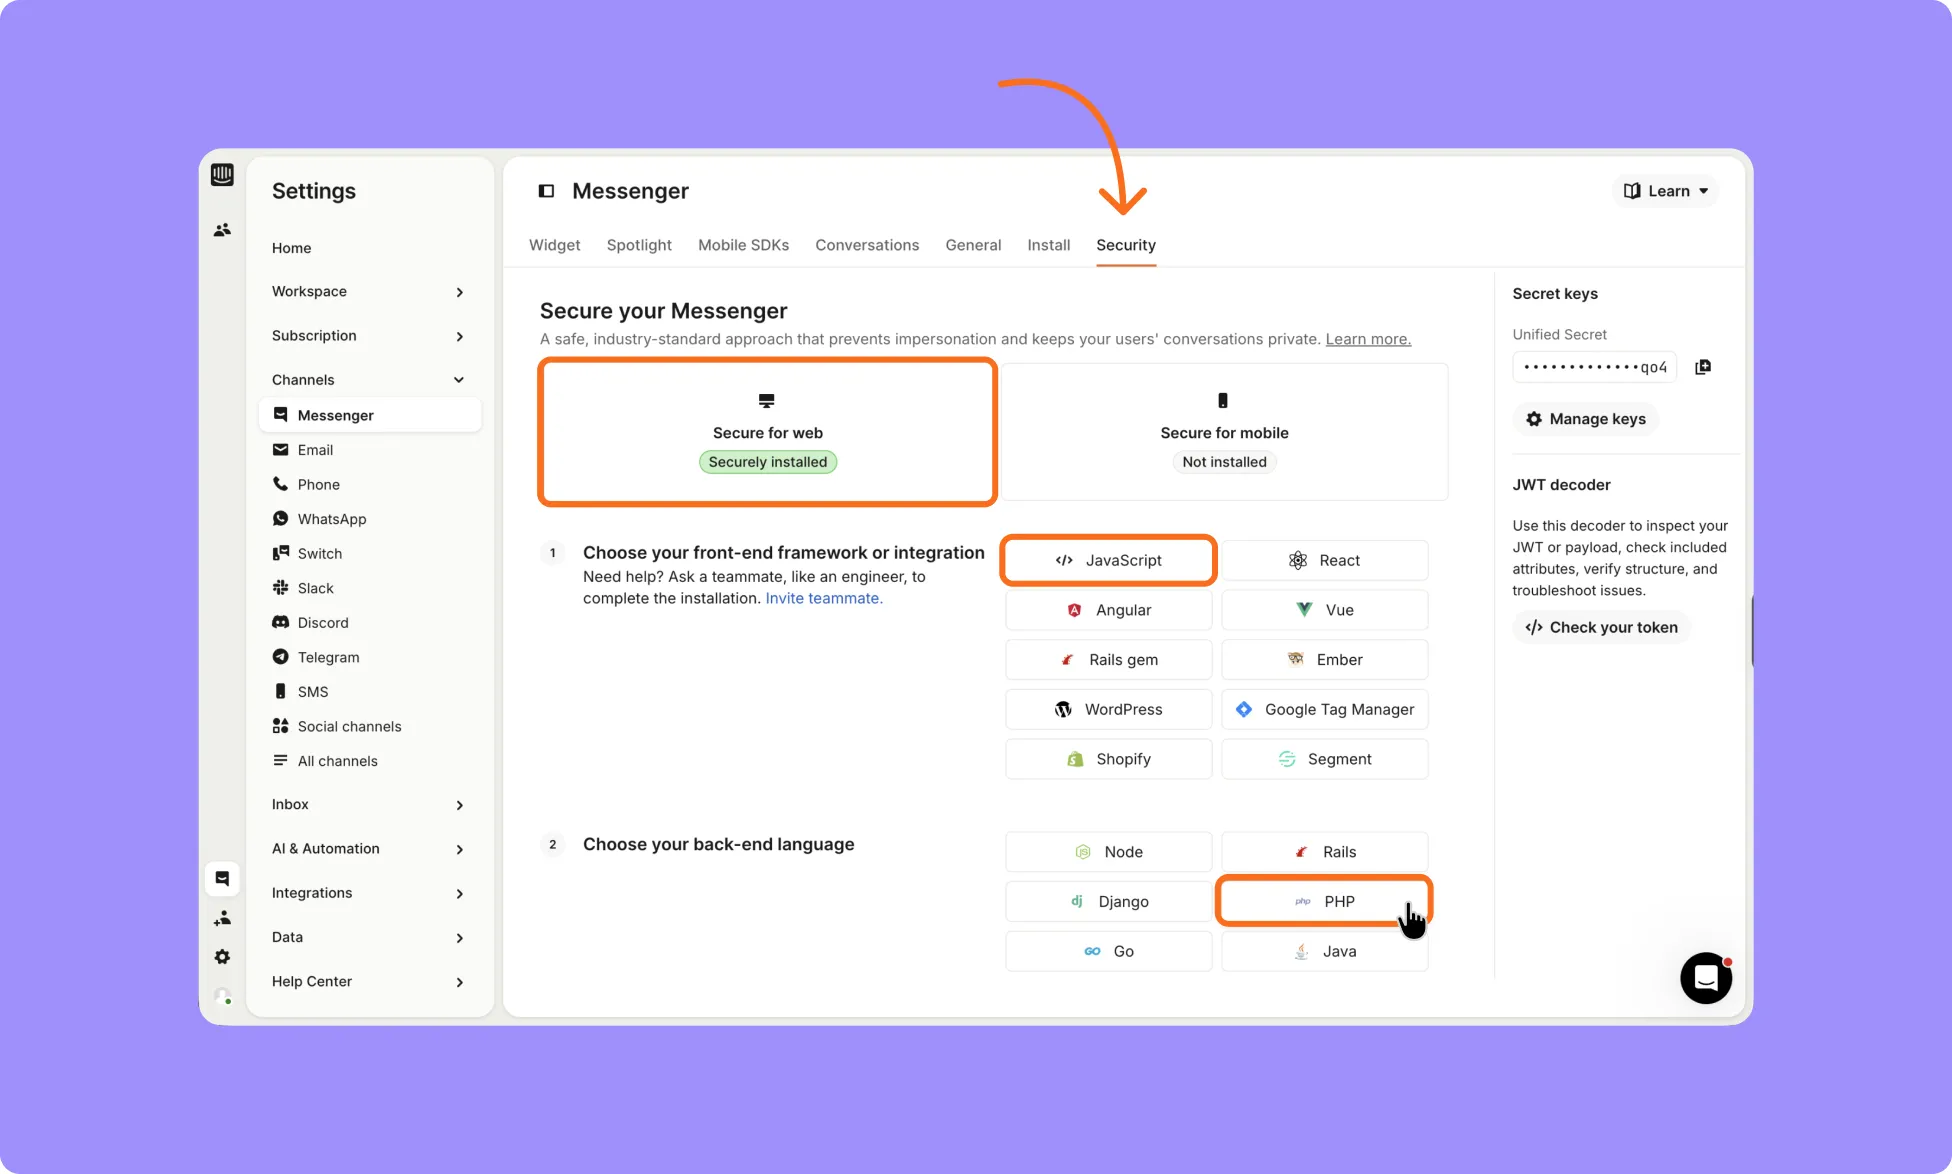
- Scroll down to the 5th section to get the App ID. Copy this to paste it into the Kirki editor for configuration.
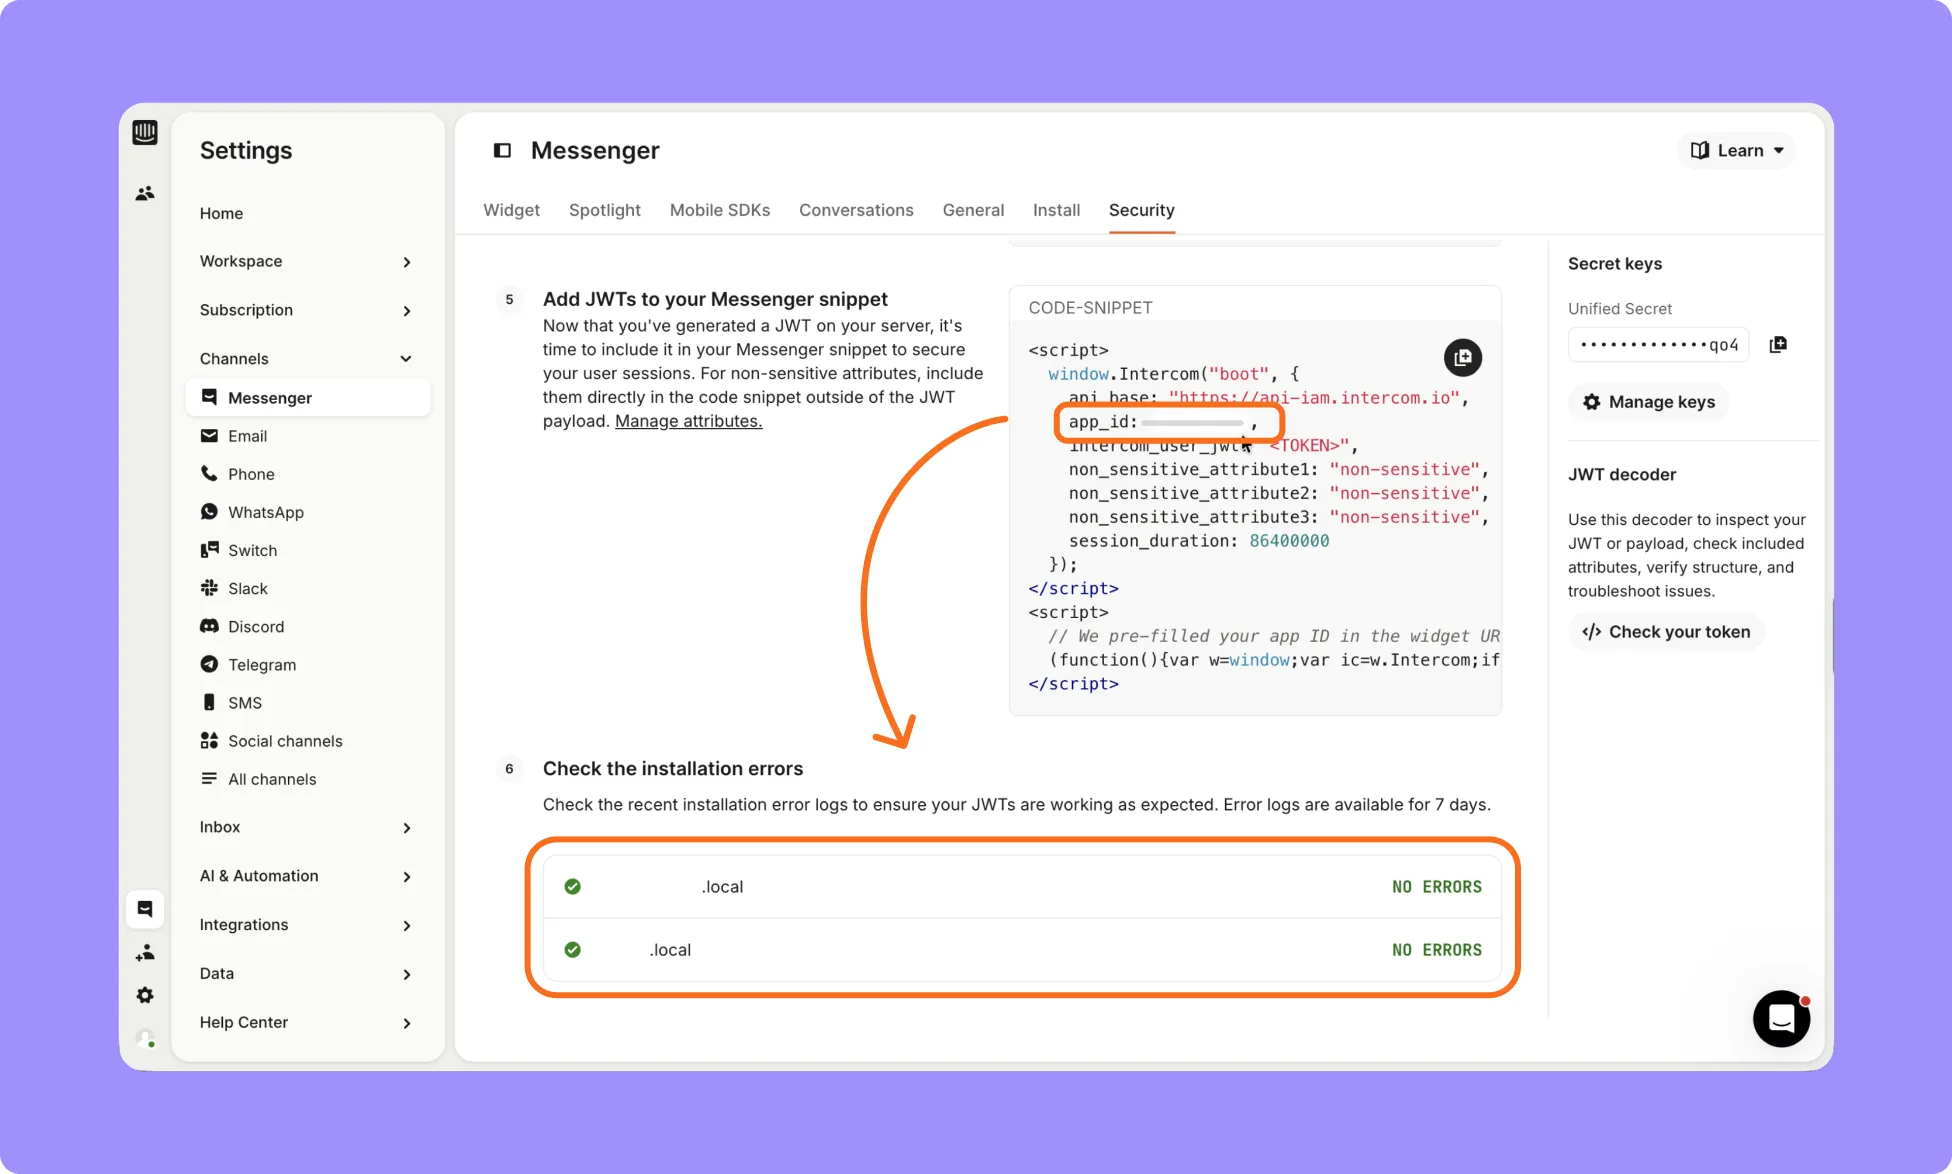
- After configuring in Kirki, check for any installation errors on your website to ensure JWTs are working as expected.
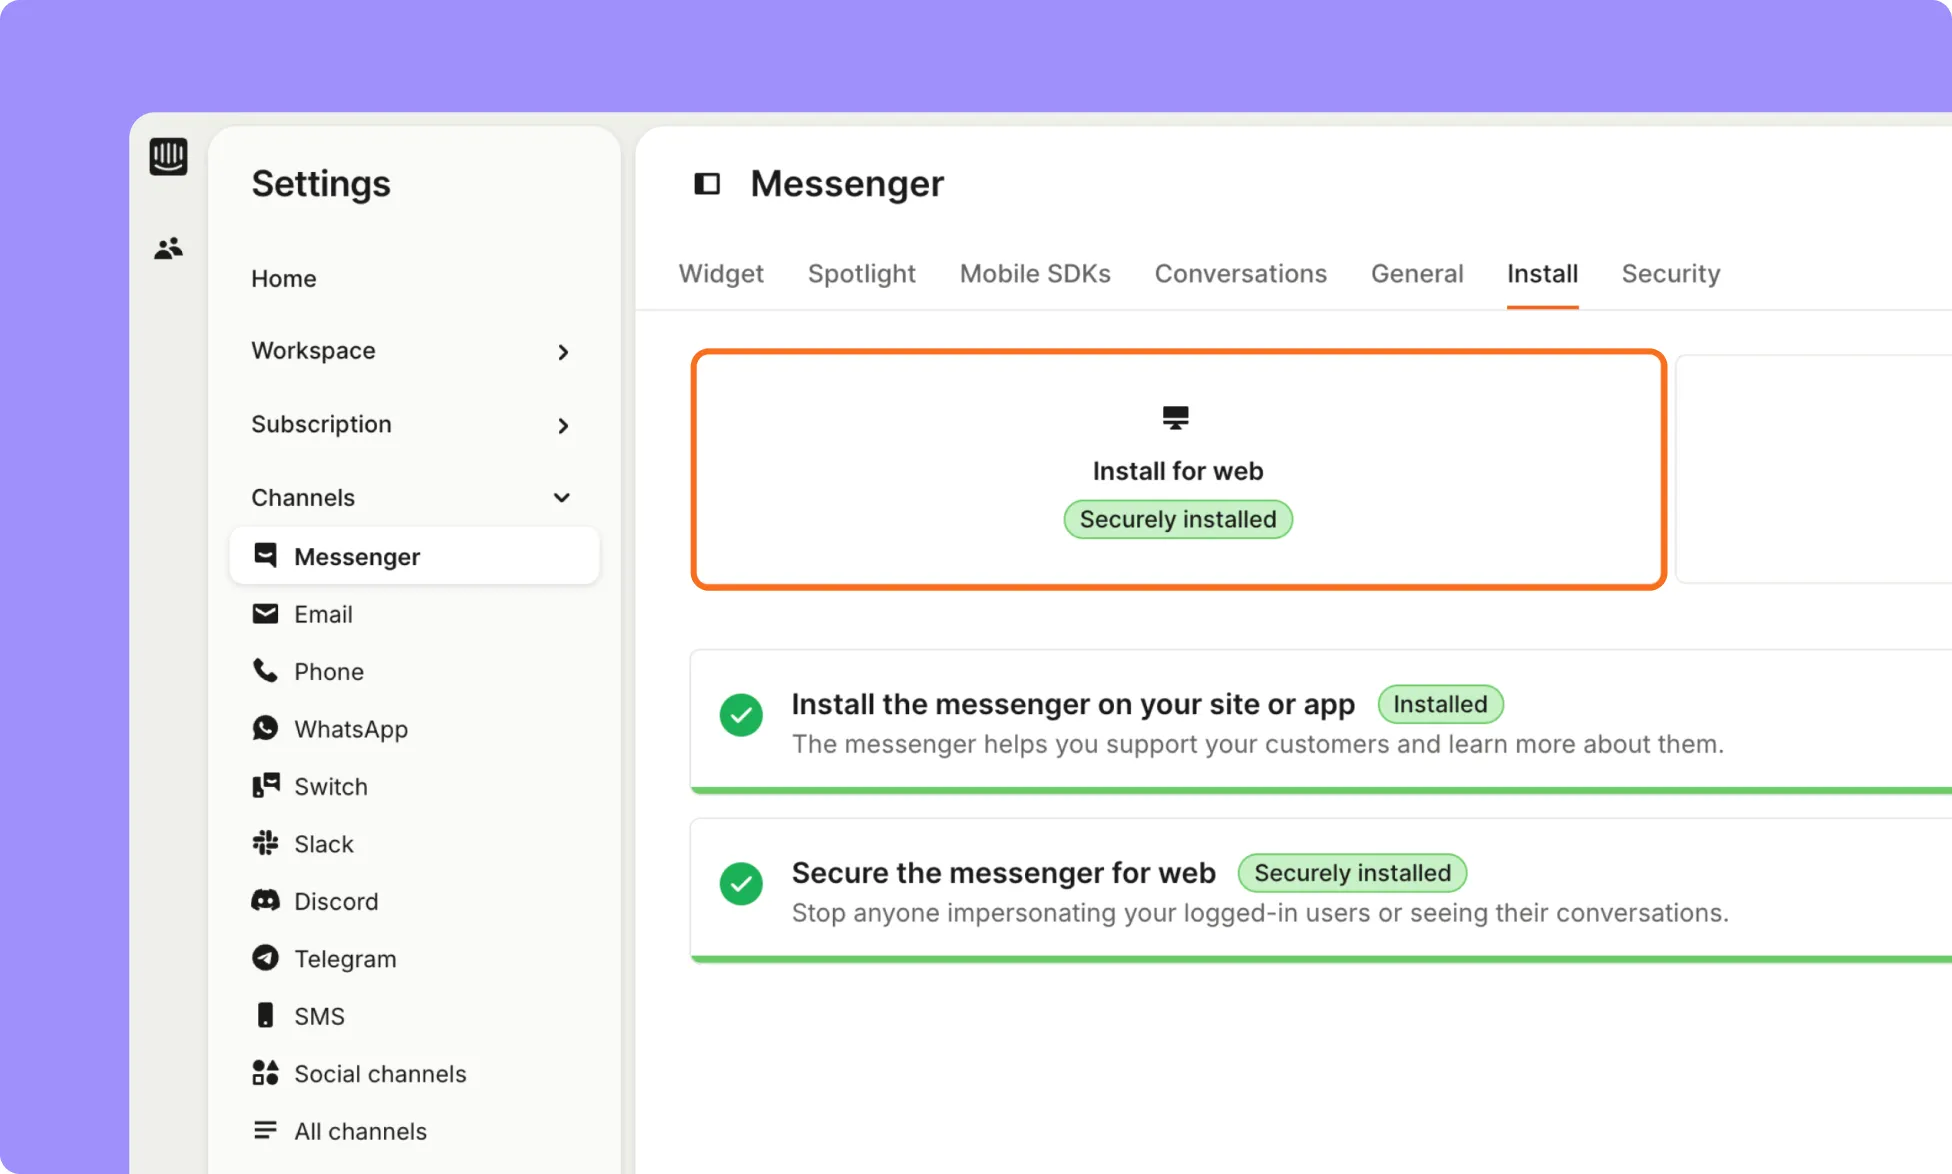
- We can now head back to the install panel and check if all the steps are completed.
How to Install the Intercom App in Kirki
- Open the Kirki Editor.
- Navigate to Apps from the left sidebar.
- Search for Intercom.
- Click Install.
How to Configure the Intercom App
- Once the app is installed, click the ellipsis (…) icon next to it.
- Select Configure.
- Enter your App ID in the provided field and then click Save Configuration.
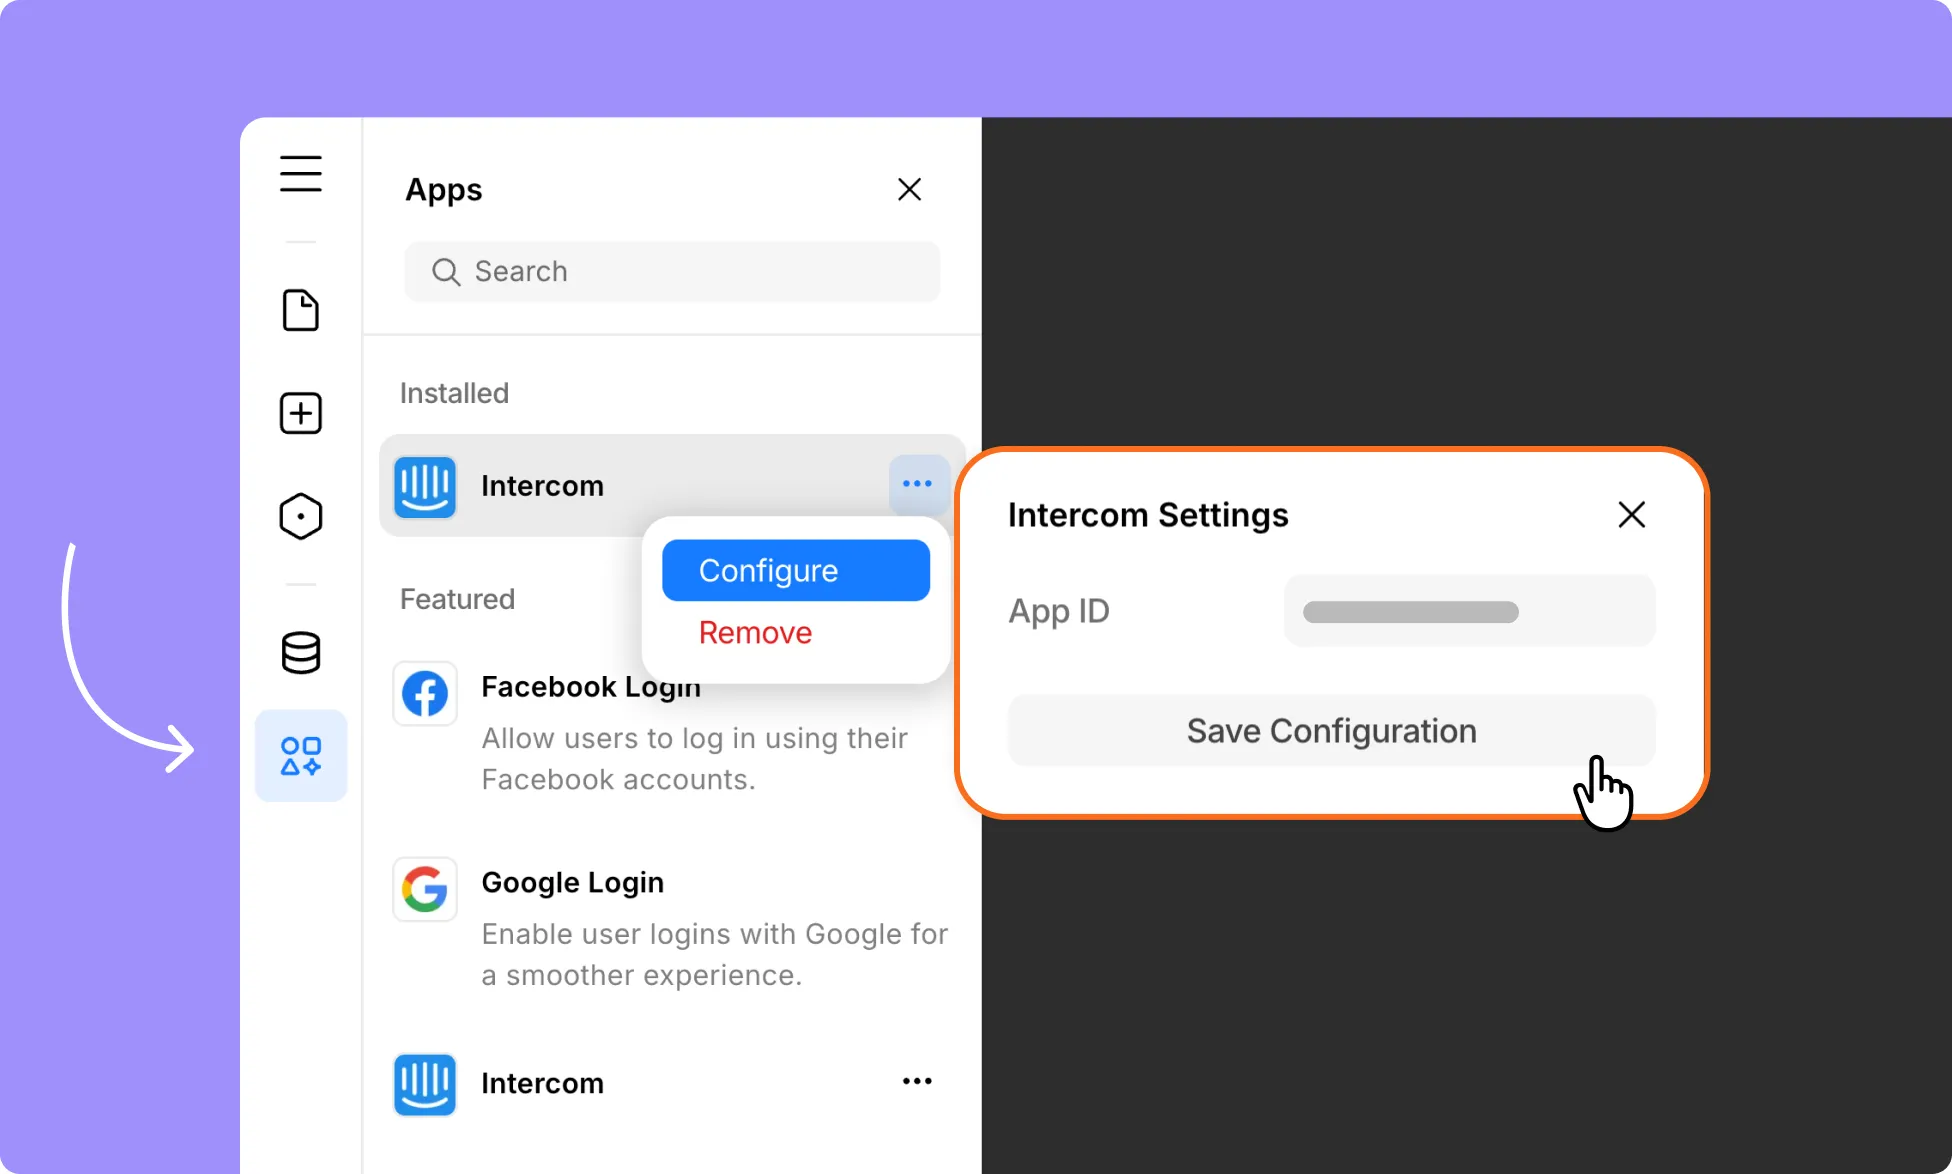
Your Kirki website is now connected to Intercom, and the Messenger can appear on your site.
How to Test the Intercom Integration
- Open your website in a fresh browser window.
- Confirm that the Intercom Messenger launcher appears, usually in the bottom-right corner.
- Click the Messenger launcher.
- Send a test message.
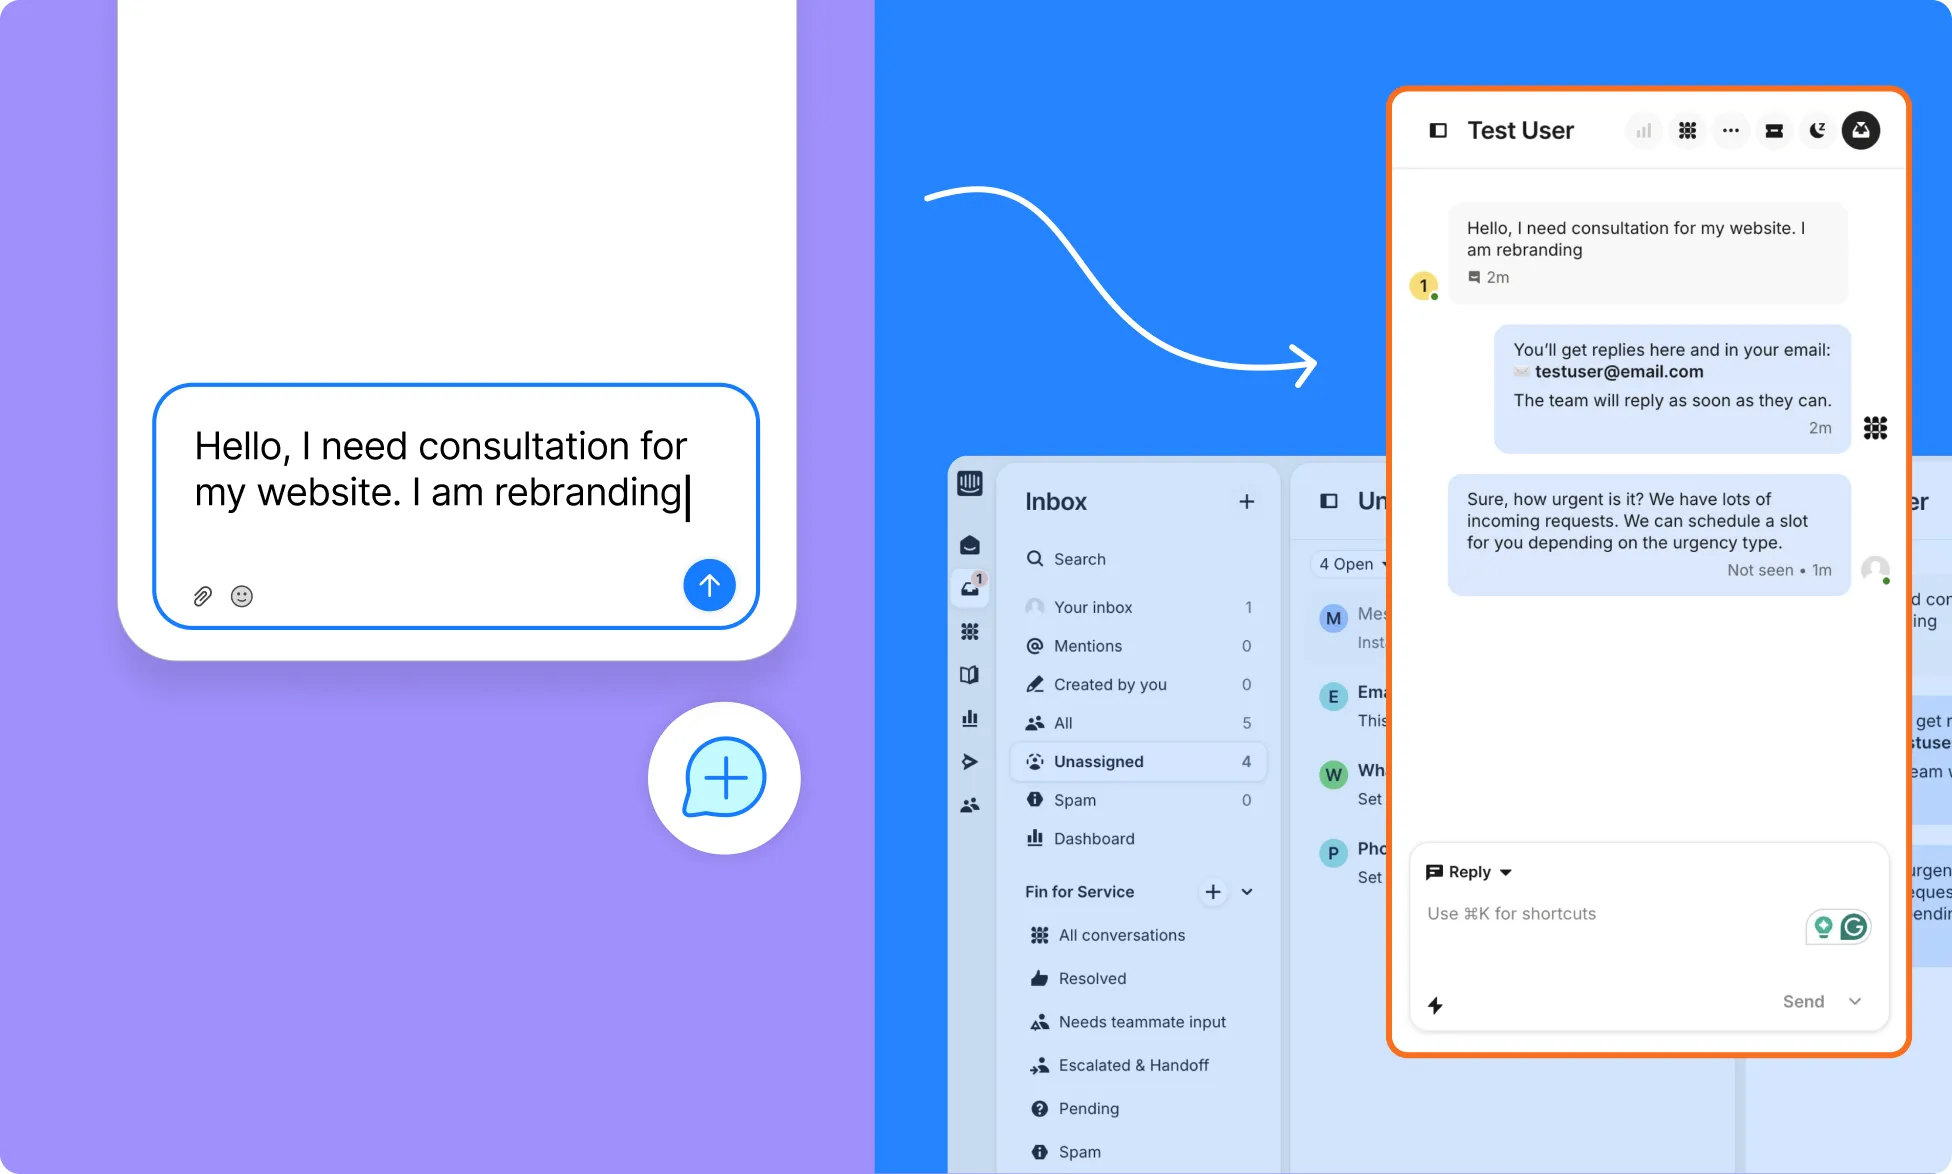
- Log in to Intercom and open your Inbox.
- Confirm that the test conversation appears in your Inbox and your replies are reflected in the website’s messenger launcher.