HubSpot’s Conversations tool provides a live chat widget that lets your team communicate with website visitors in real time. Conversations can be associated with HubSpot contact records, keeping your sales and support interactions connected to your CRM.
Connect the HubSpot Live Chat integration to your Kirki website, allowing visitors to chat with your team through a HubSpot chat widget.
What Is the HubSpot Live Chat App
The Kirki HubSpot Live Chat integration installs the HubSpot tracking code on your website. Once connected, this allows a published HubSpot live chat flow to appear on your site and route incoming conversations to your team.
What You Need Before Connecting HubSpot Live Chat
Before connecting HubSpot Live Chat to Kirki, make sure you have:
- An active HubSpot account.
- Your HubSpot Hub ID (Portal ID).
- At least one user or team available to receive live chat messages.
- A published Live Chat chatflow in HubSpot.
To add HubSpot live chat to Kirki, copy your Hub ID from HubSpot, create and publish a website chatflow, install the HubSpot Live Chat app in Kirki, and paste your Hub ID into its Widget Key field.
How to Find HubSpot Hub ID
- Log in to your HubSpot account.
- Open Settings.
- Go to Tracking & Analytics → Tracking Code.
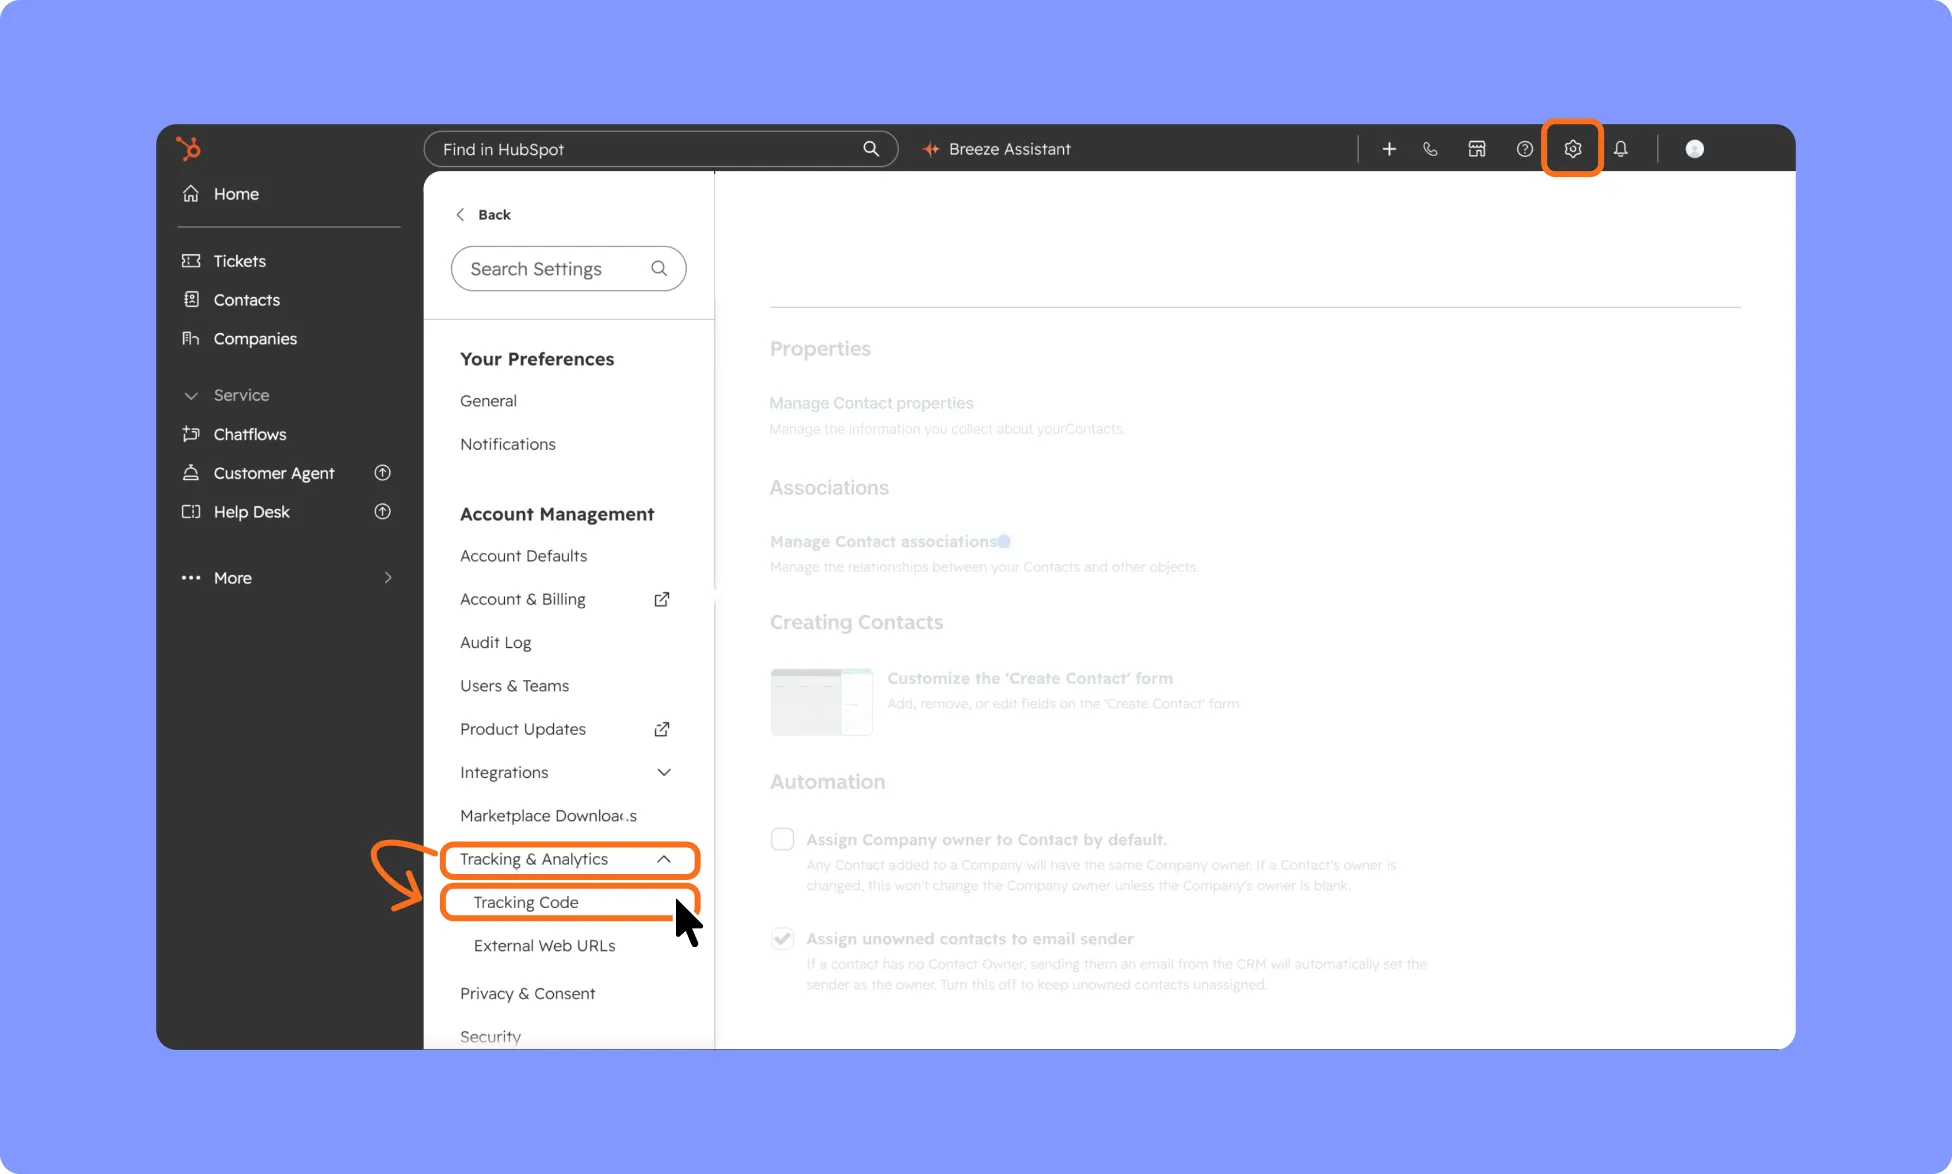
- Scroll down, then expand the WordPress Installation section and locate your Hub ID or Portal ID.
- Copy the ID and keep it available for the Kirki configuration.
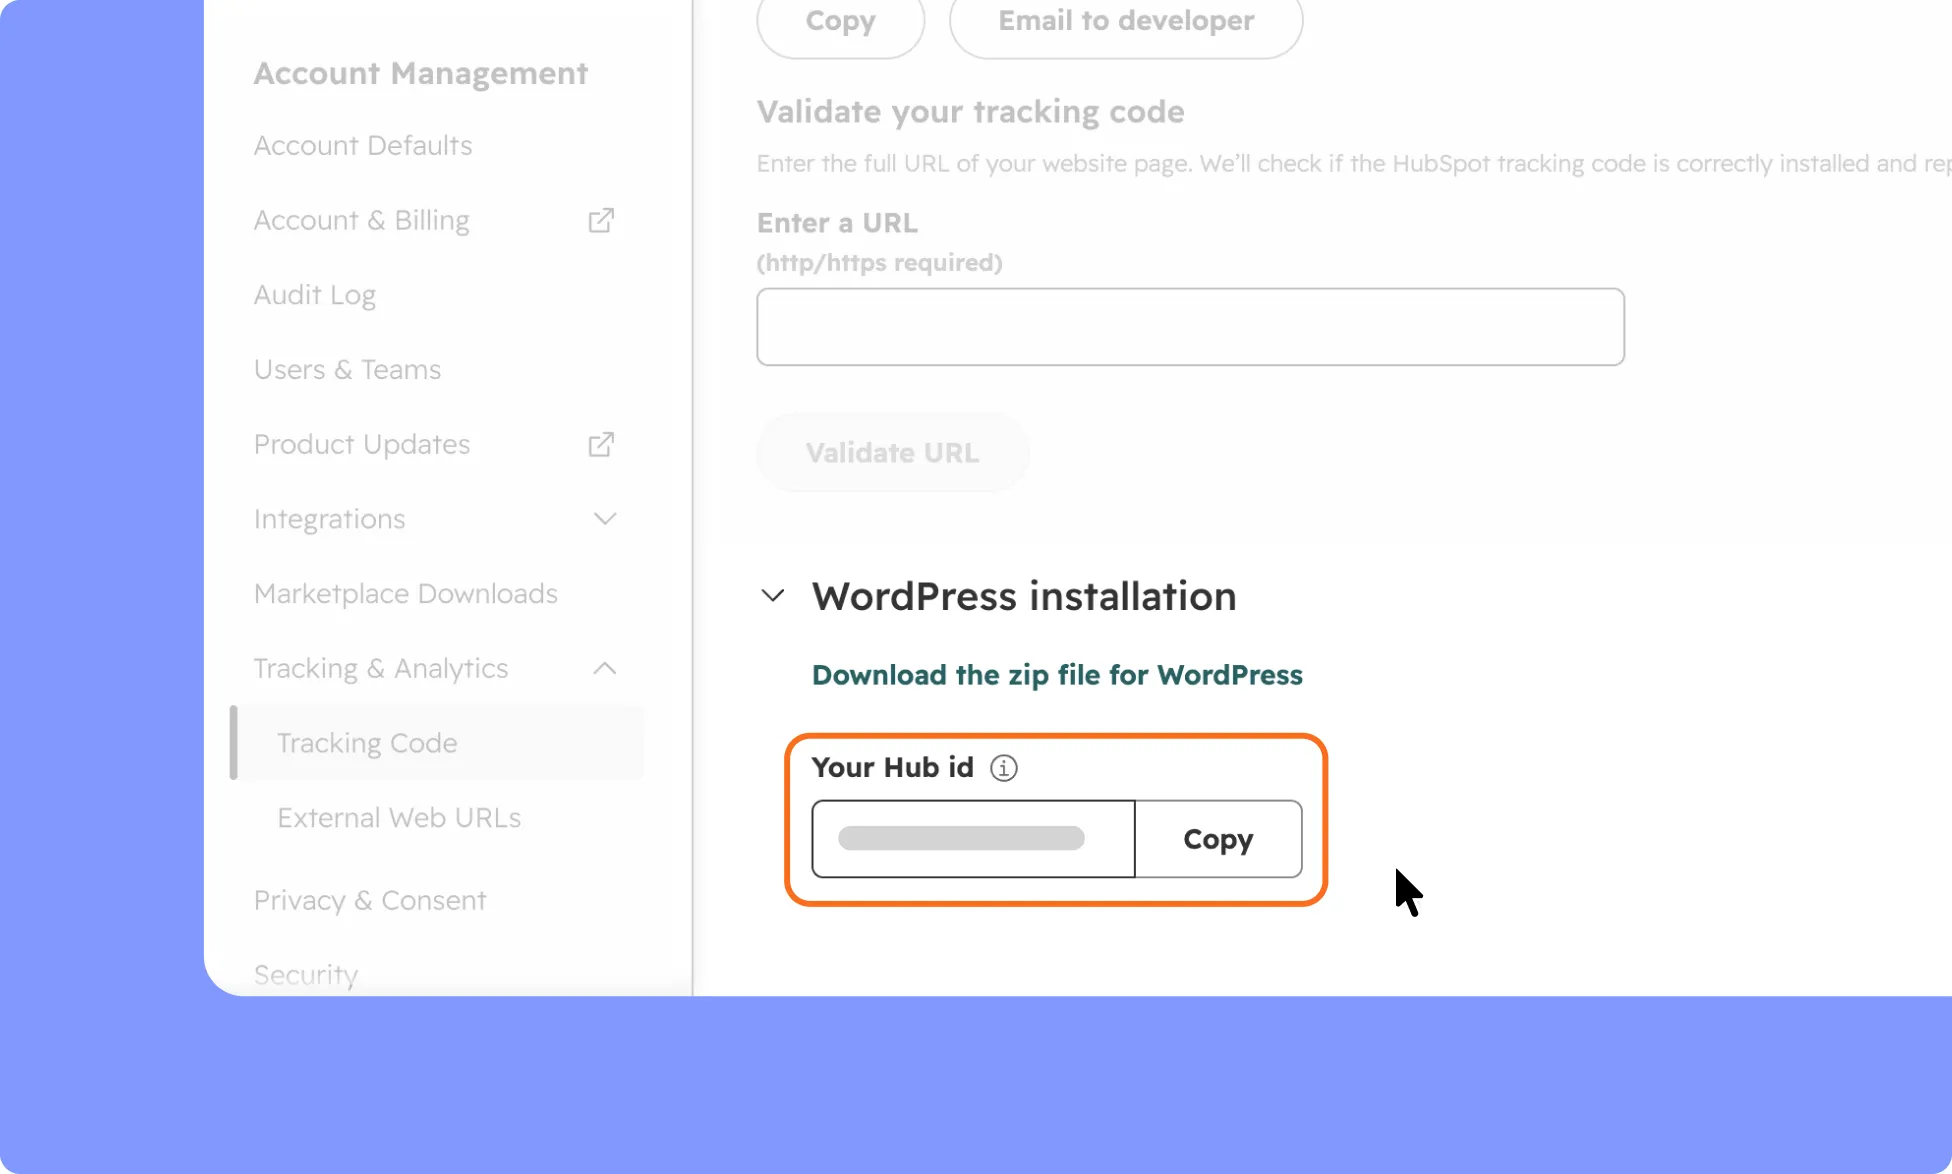
Note: The Hub ID identifies your HubSpot account and allows the HubSpot widget installed on your website to connect to the correct account.
How to Create and Publish a HubSpot Live Chatflow
Before configuring Kirki, create and publish the chatflow you want to display on your website.
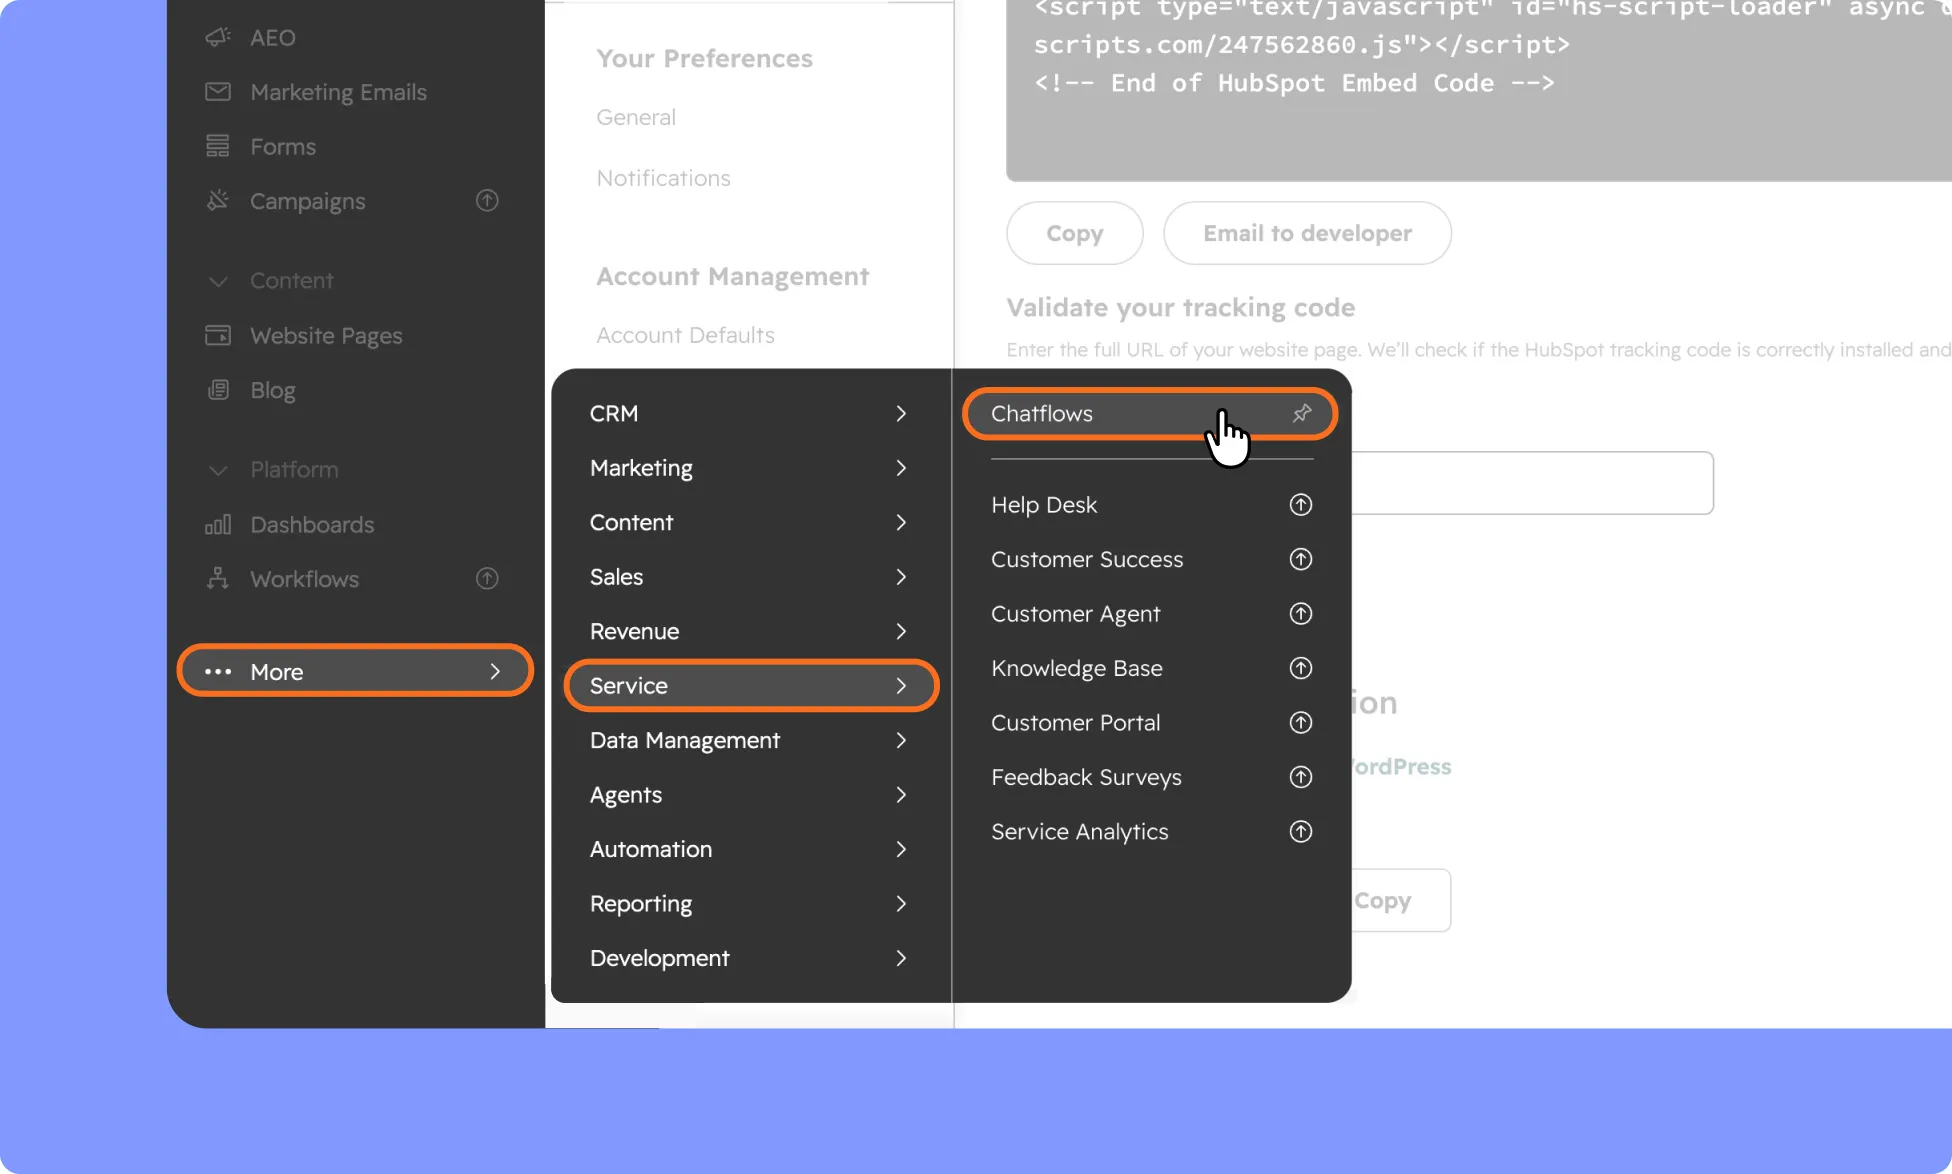
- In HubSpot settings, go to Service and Open Chatflows.
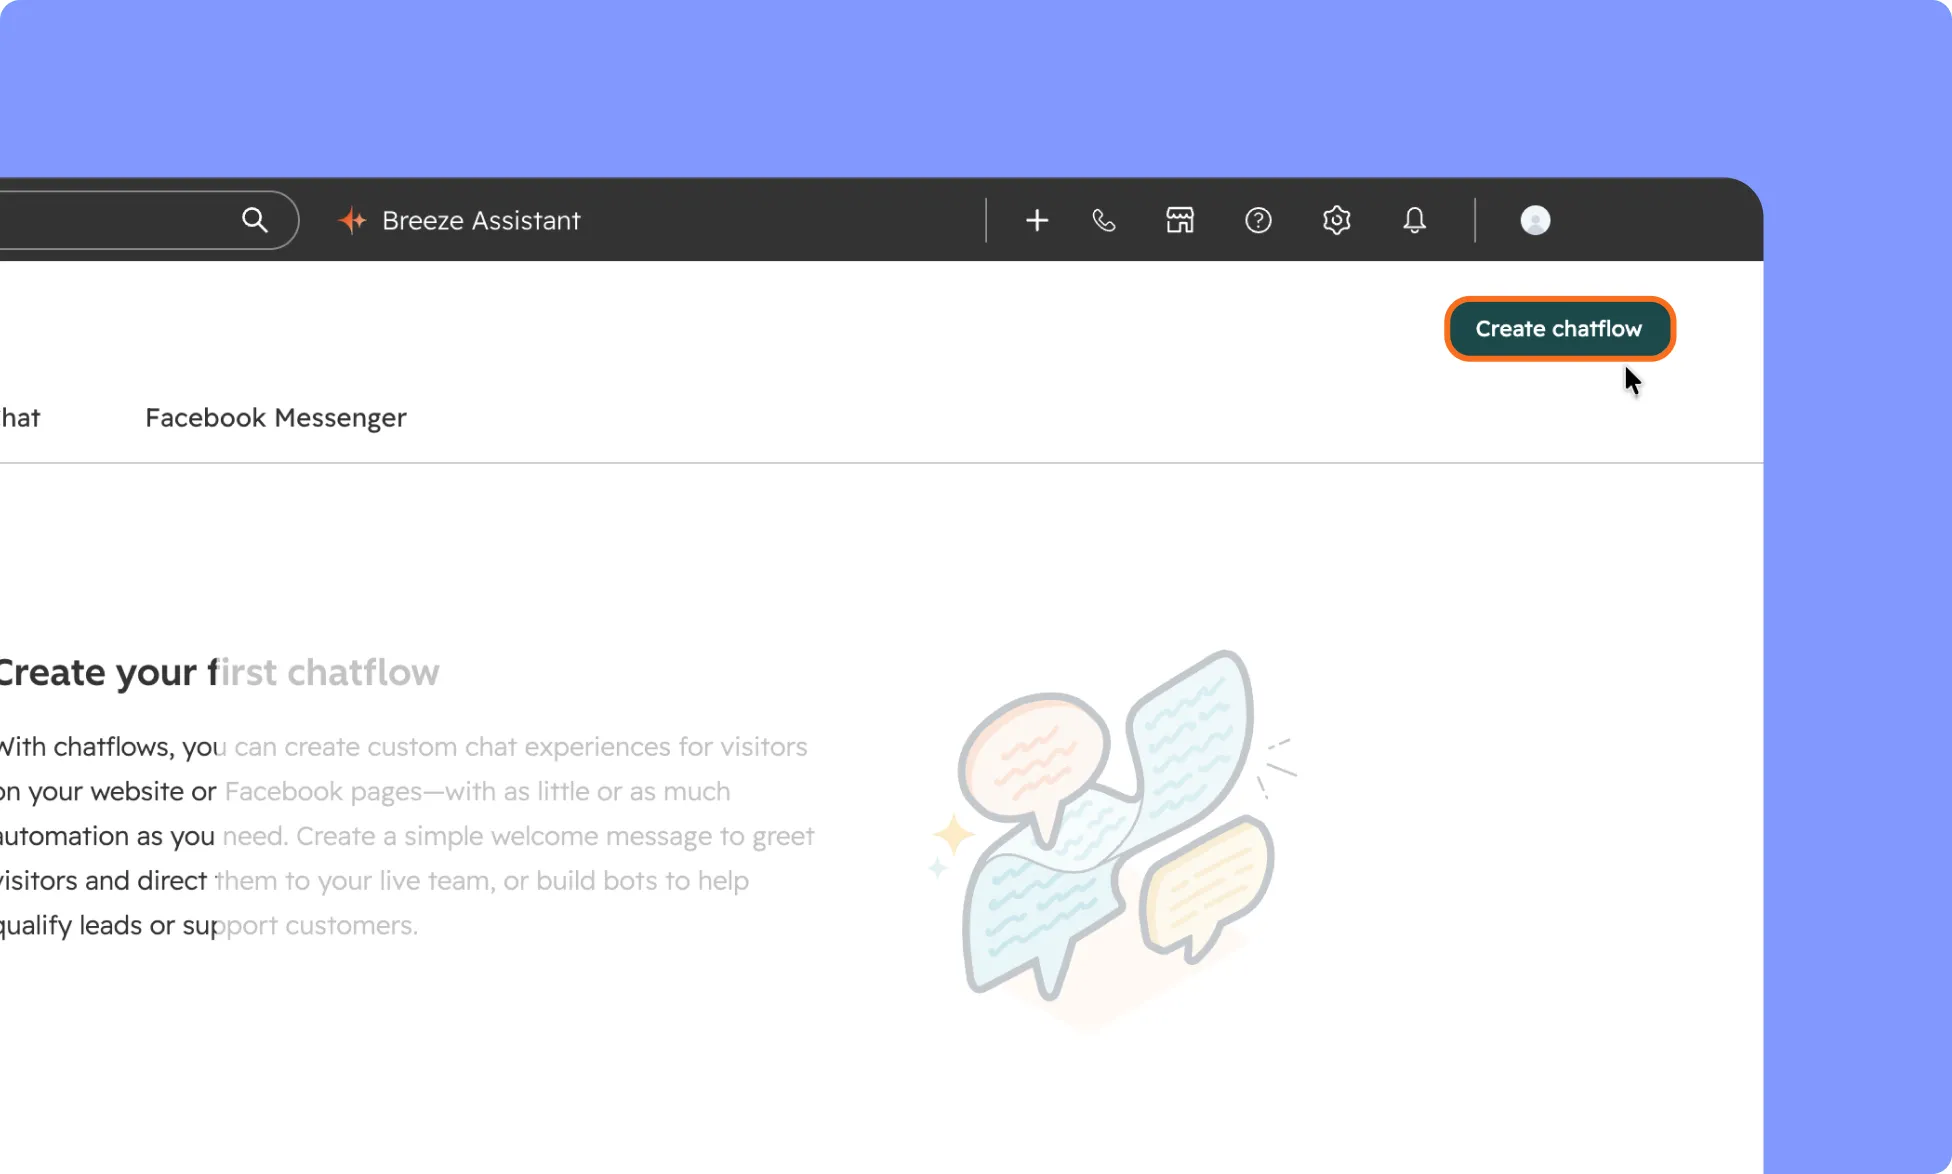
- Click Create chatflow.
- Select Website.
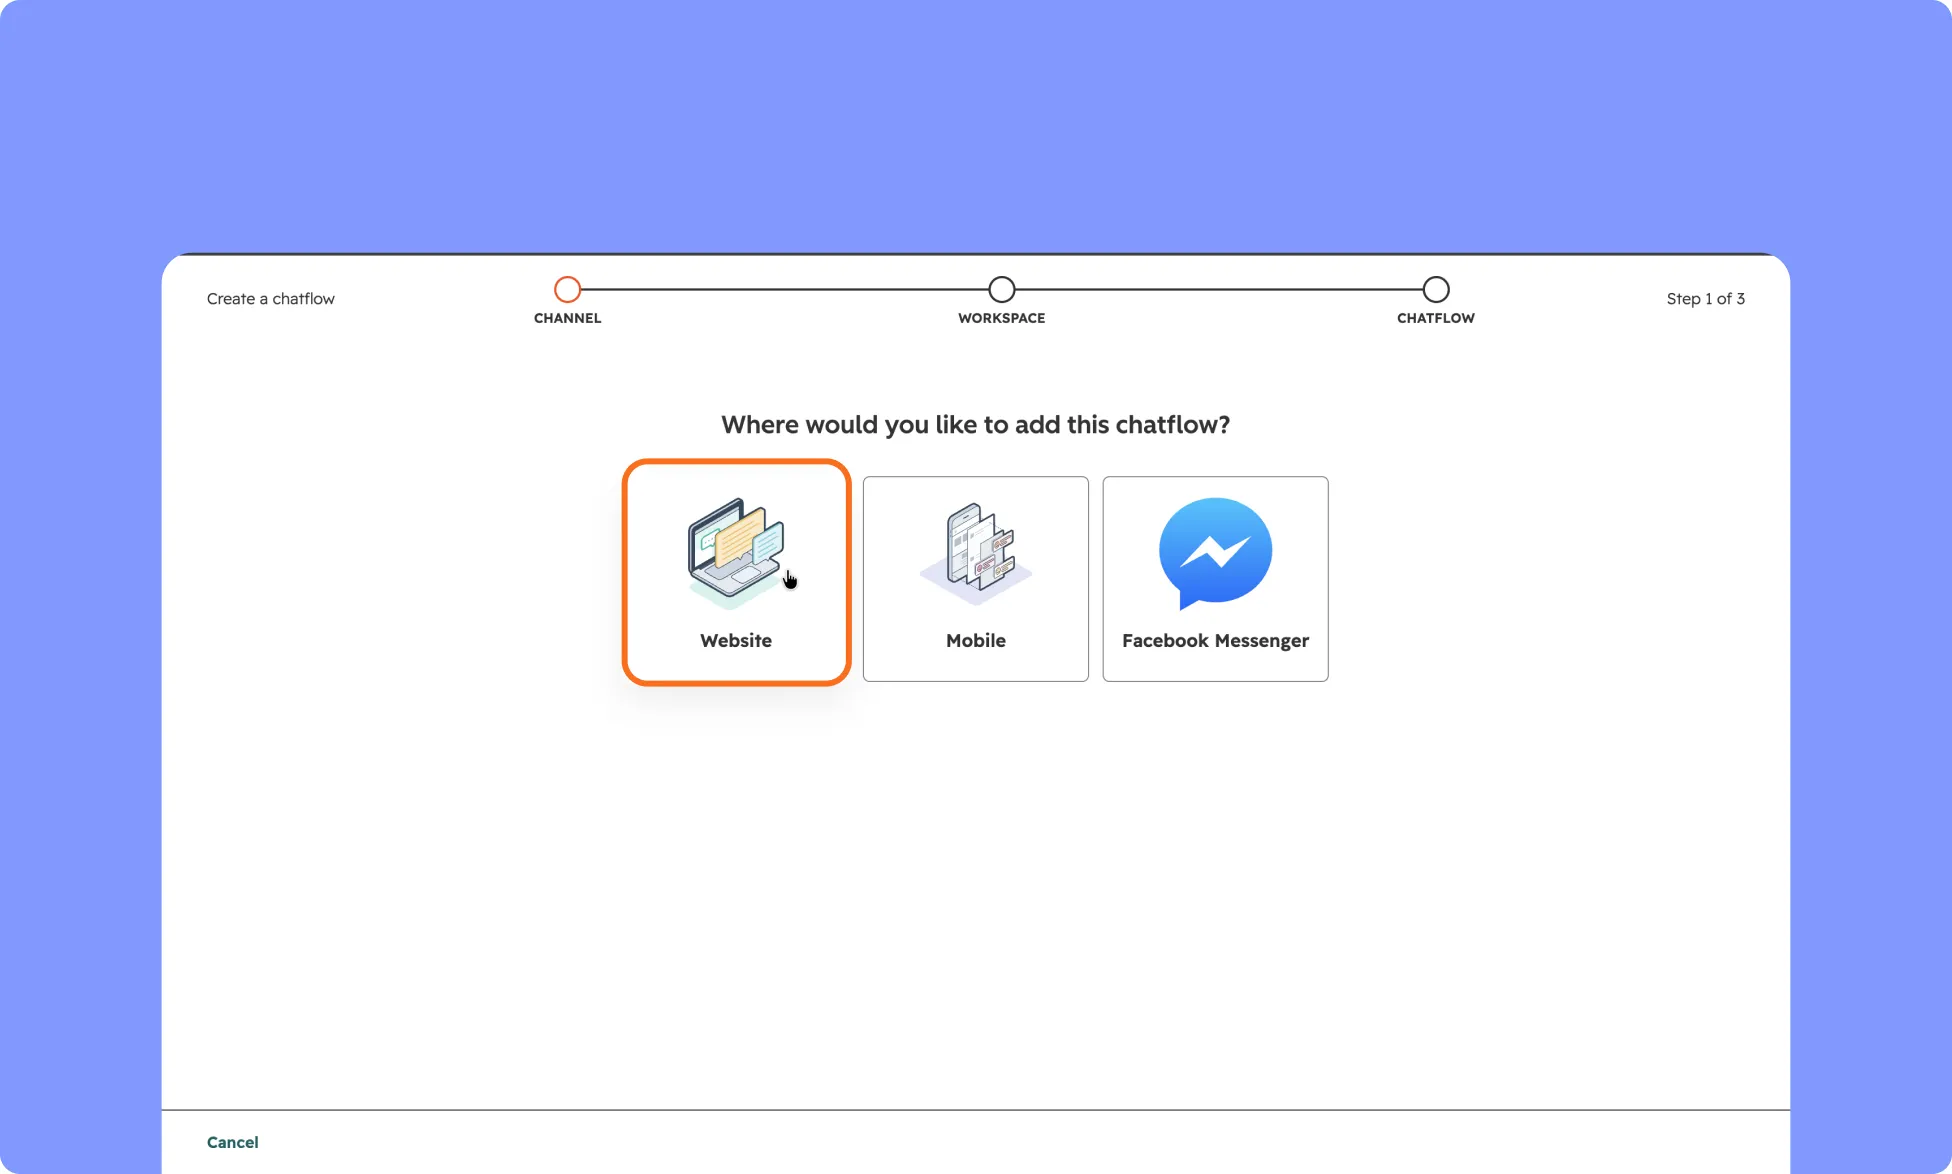
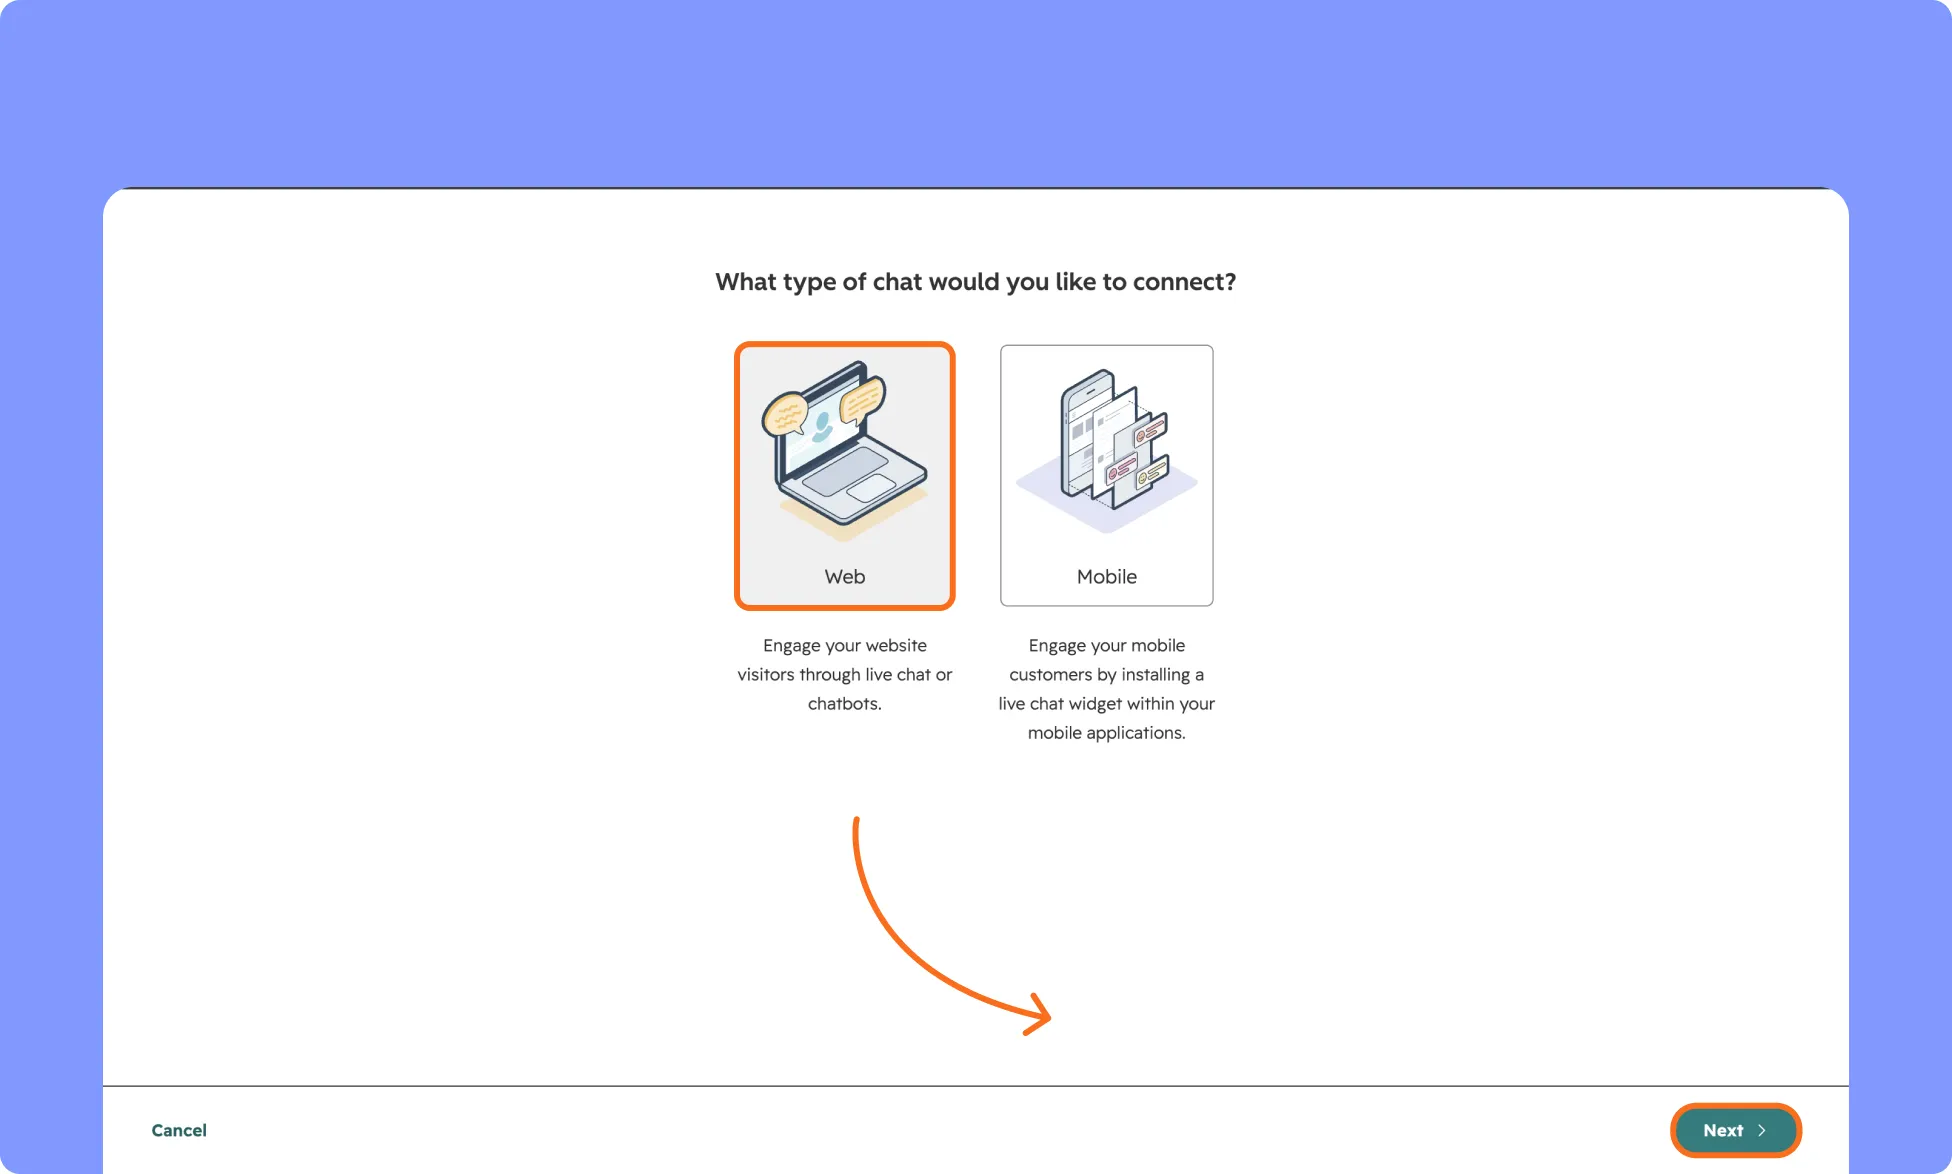
- Choose Live chat widget; if Live Chat widget visuals are not configured before, configure it.
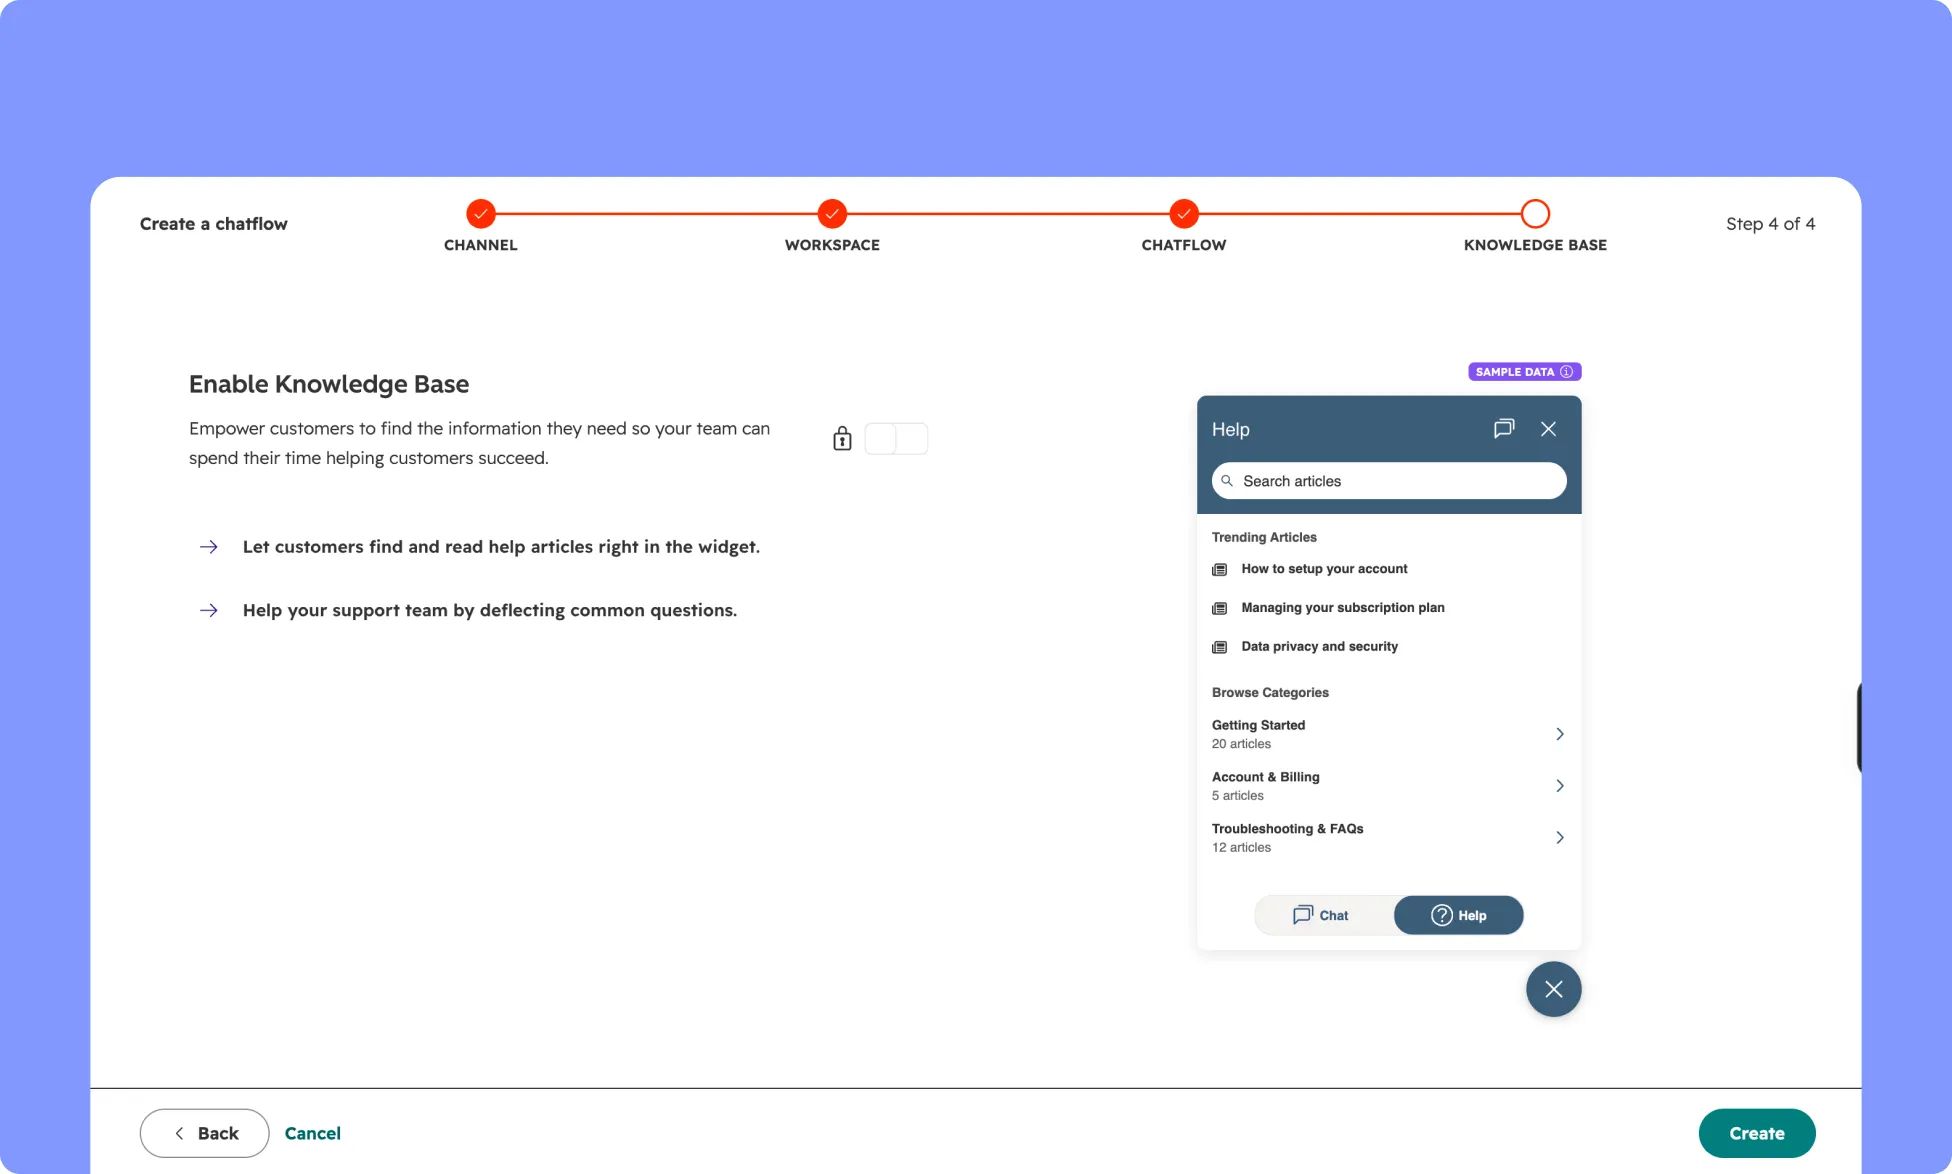
- Continue through the configuration for the Live Chat ChatFlow as prompted in HubSpot. (Channel > Workspace> Chatflow> Knowledge Base)
- After finishing them, publish the Live Chat.
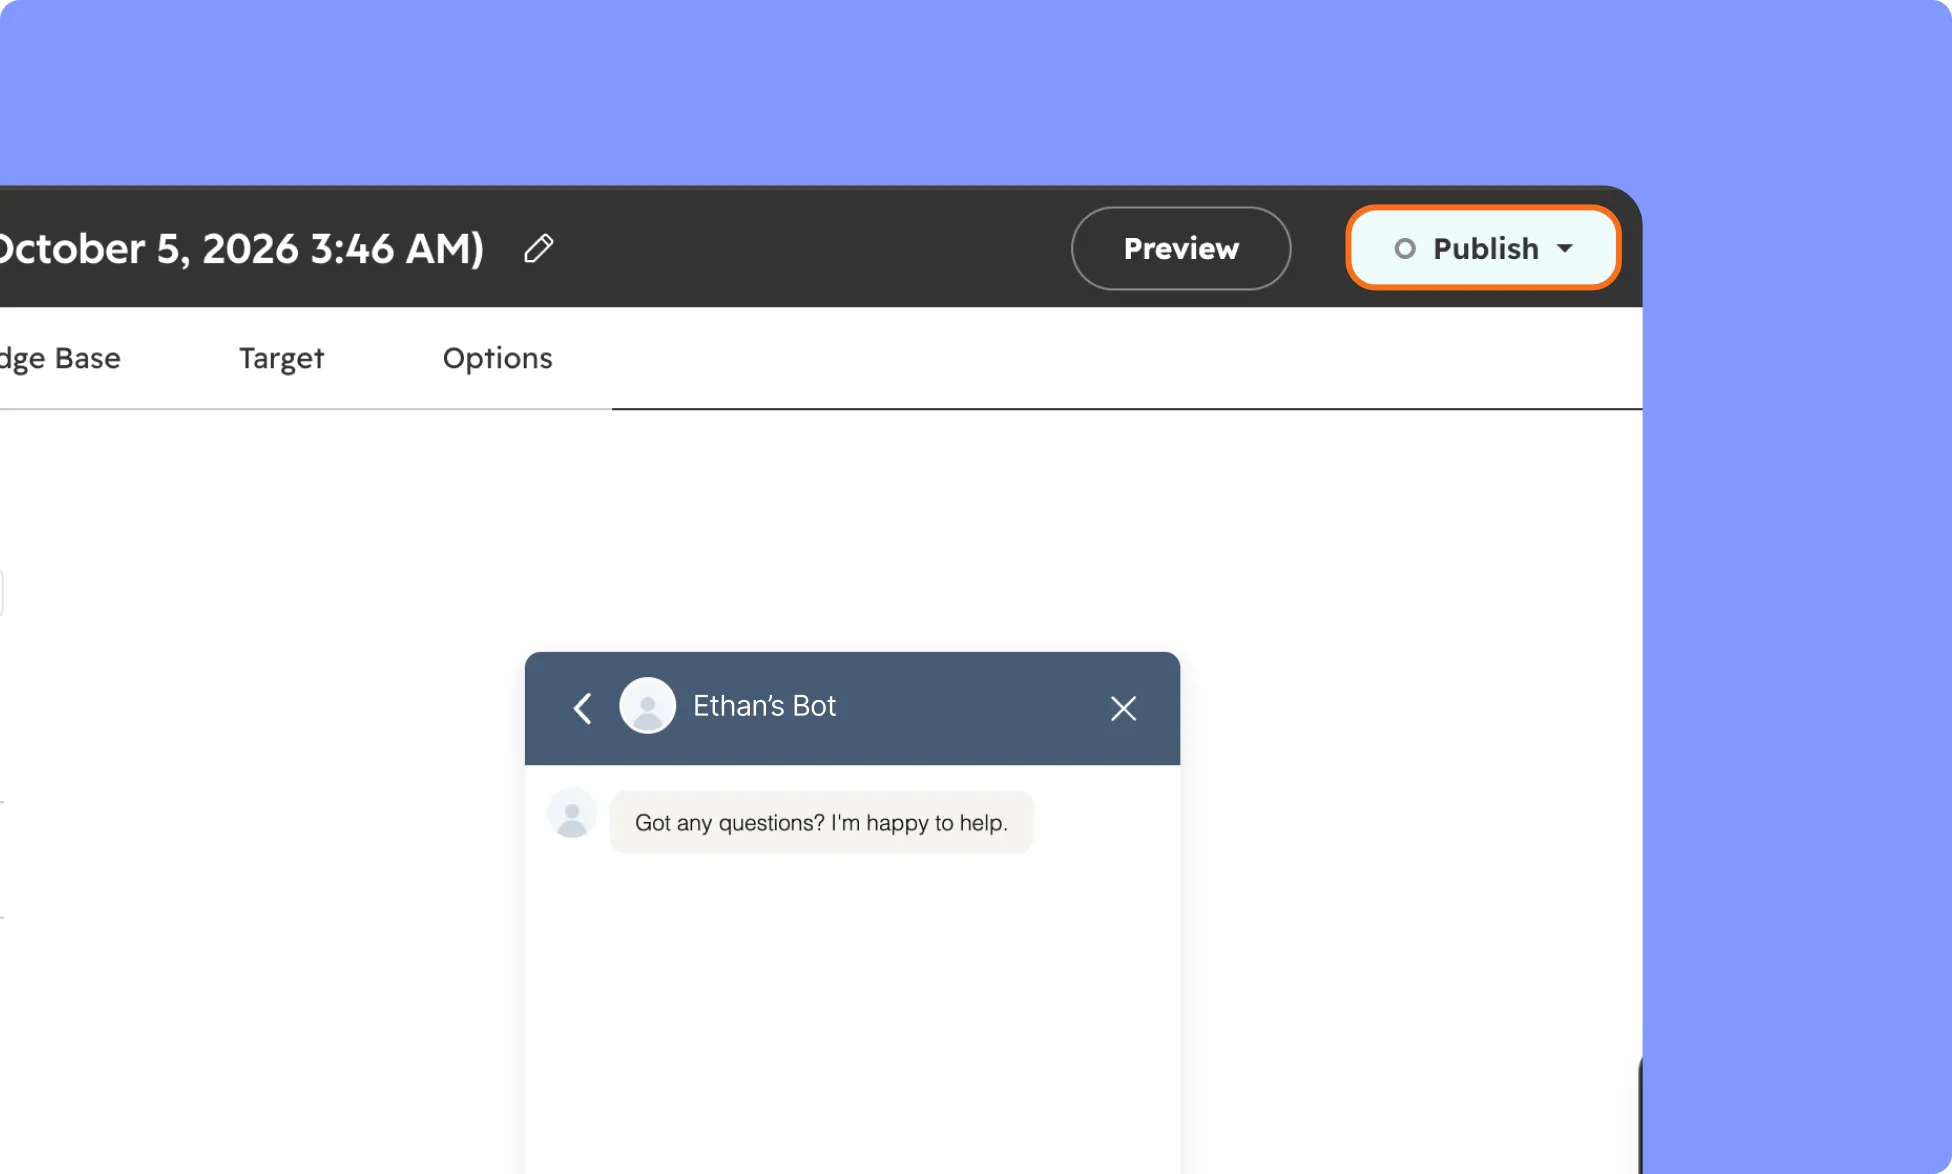
Note: The chatflow must be published in HubSpot before it can appear on your website.
How to Install the HubSpot Live Chat App in Kirki
- Log in to your WordPress dashboard.
- Go to Kirki → Apps.
- Locate HubSpot Live Chat.
- Click Install.
How to Configure the HubSpot Live Chat Integration
- Go to Kirki → Apps → HubSpot Live Chat → Settings.
- Paste your HubSpot Hub ID (Portal ID) into the Widget Key field provided and click Save Configuration.
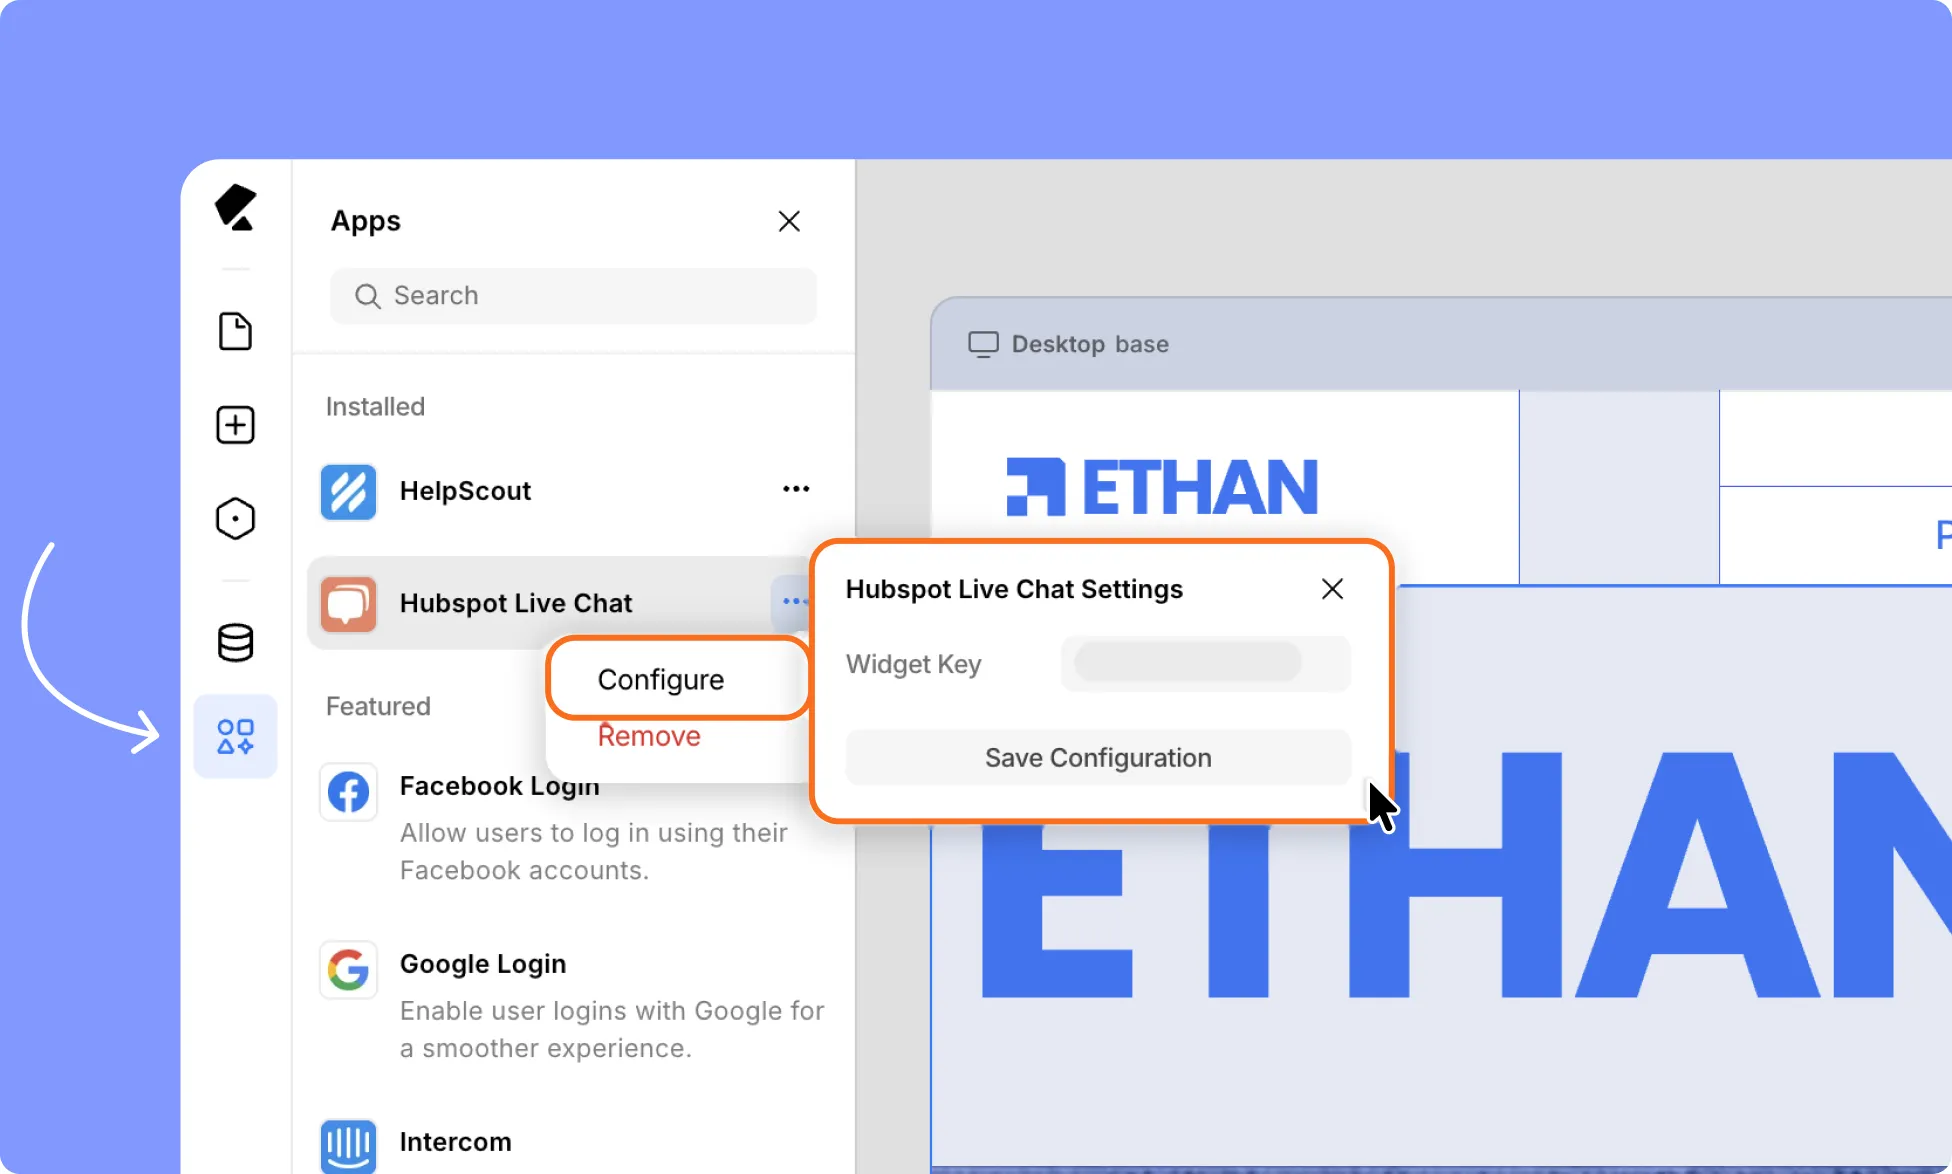
Kirki will install the HubSpot tracking code on your website, allowing your published HubSpot live chat flow to load.
How to Test the HubSpot Live Chat Integration
- Open your website in a fresh browser window or private browsing session.
- Confirm that the HubSpot chat launcher appears.
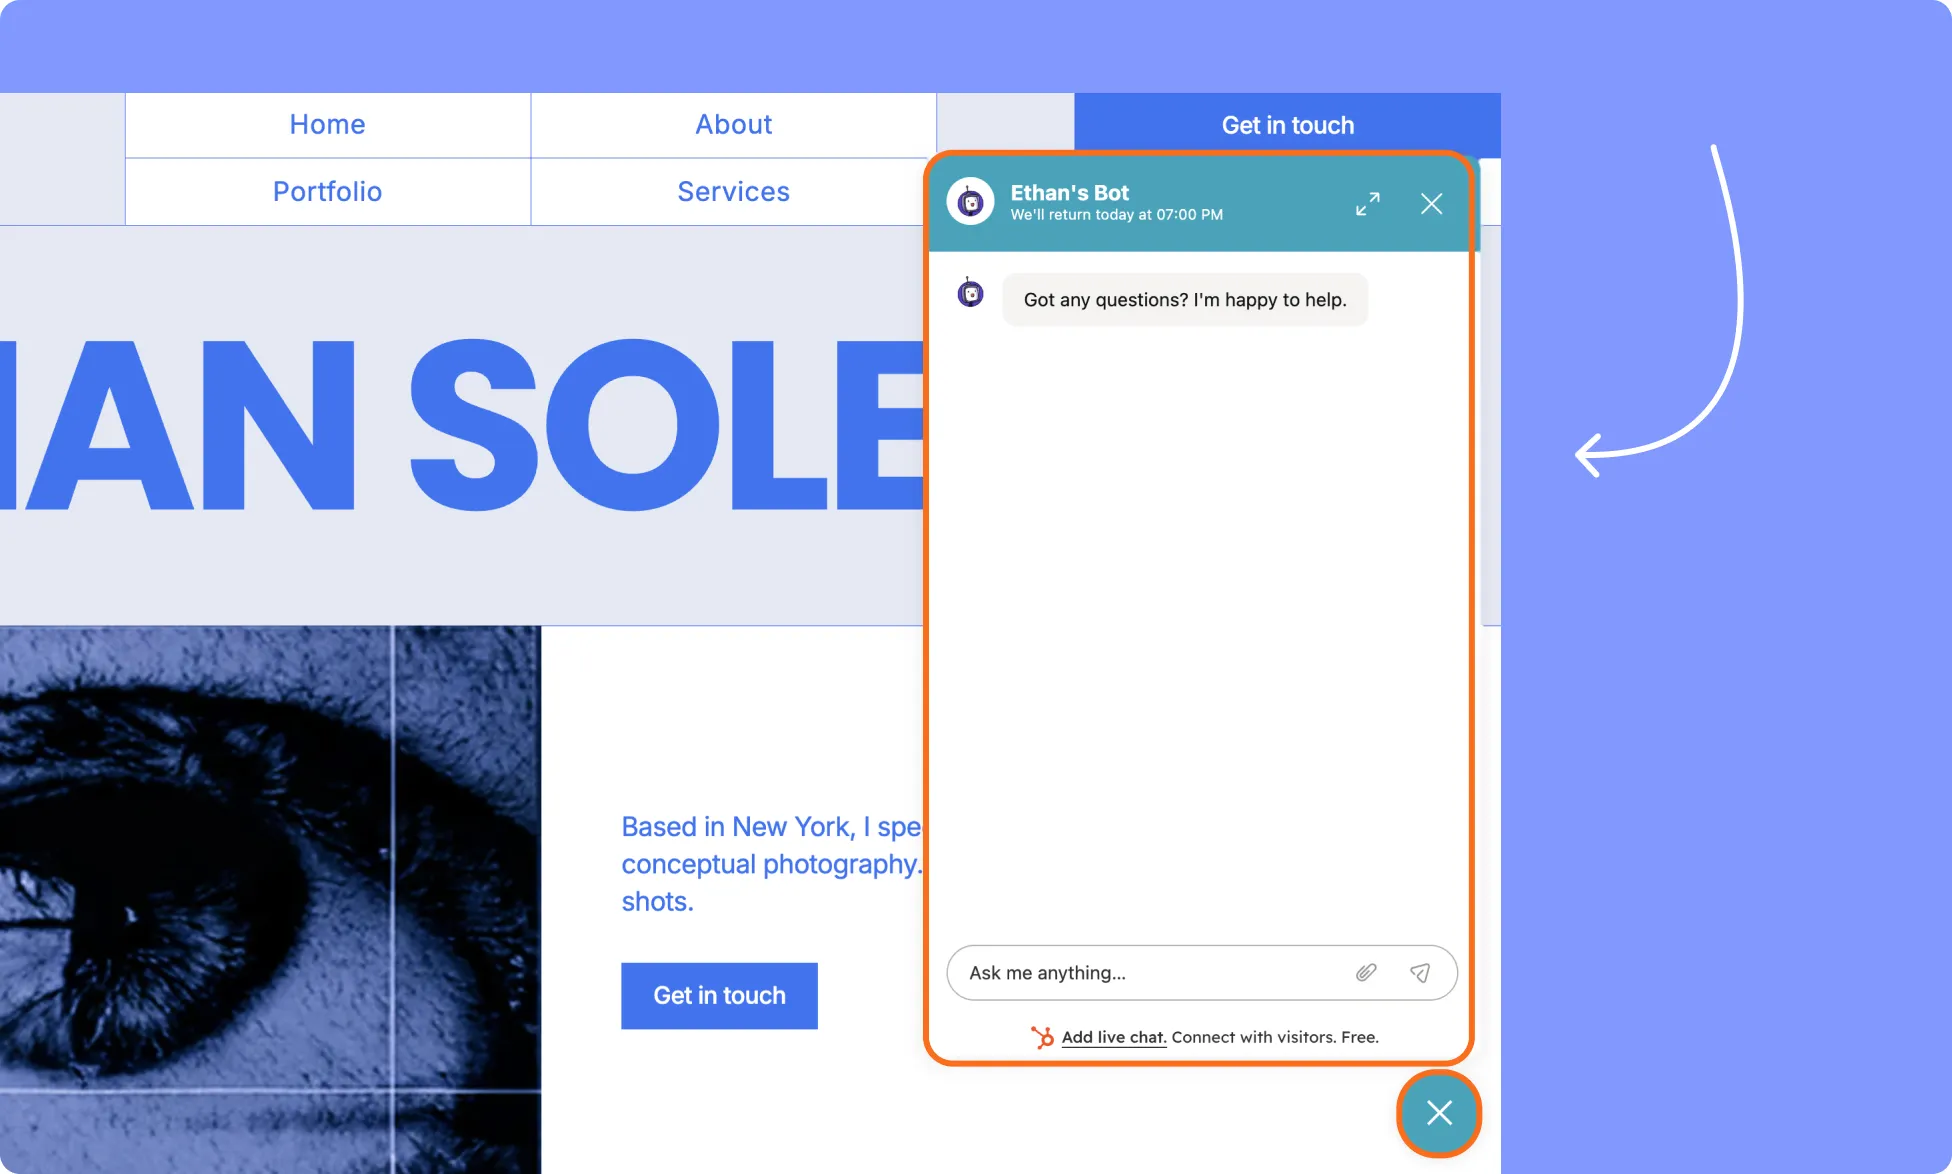
Note: The chat launcher can take a few minutes to appear after you save. If it doesn’t, clear your site cache and reload
- Open the chat widget and send messages.
- In HubSpot, open your Inbox. Confirm the test conversation appears, then reply and check that the reply shows in the widget on your site.