Typography Properties
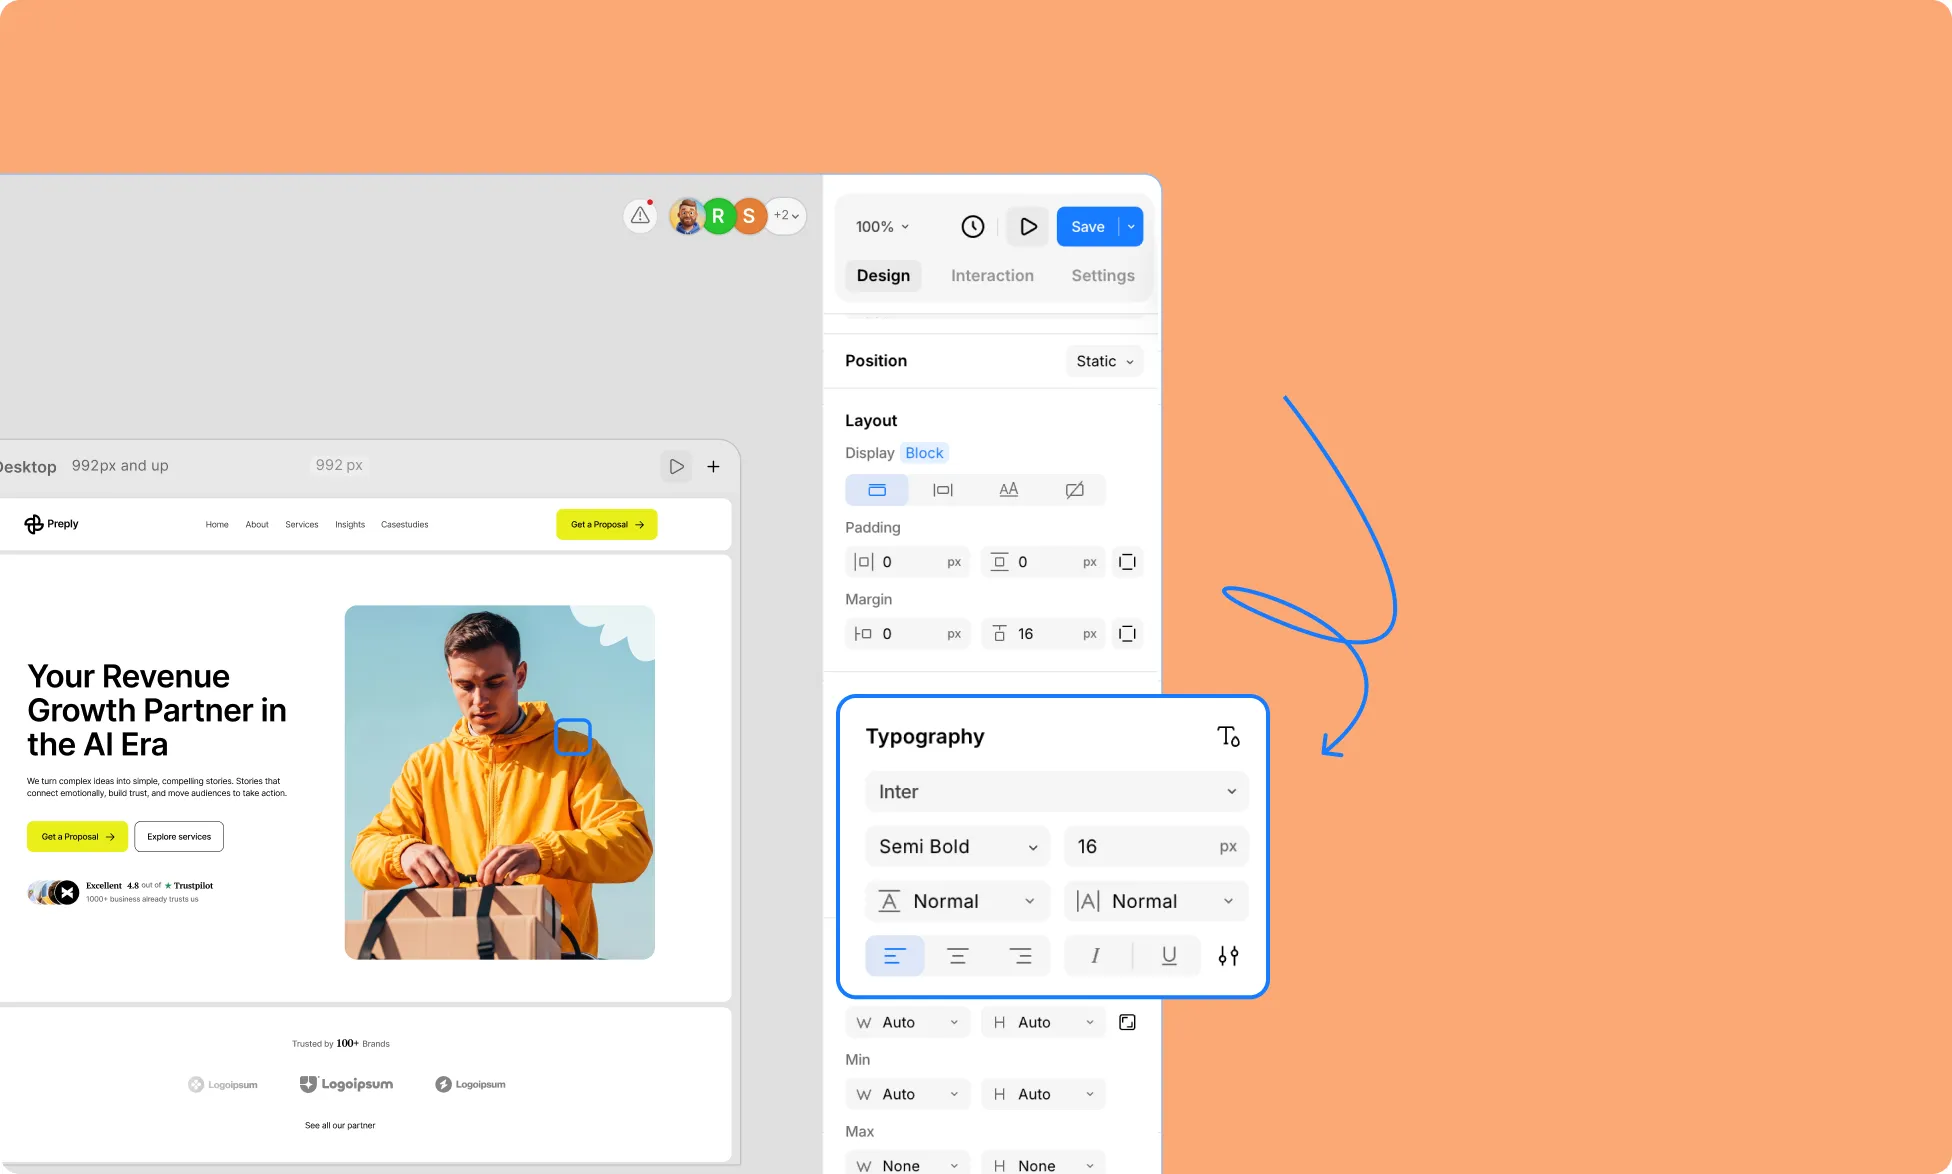
Using the Typography settings in the right panel, you can customize your headings, paragraphs, and other text content so they better align with your brand identity. Adjust the font, size, spacing, and more.
- Font – Choose the font family for your text.
- Font Weight – Adjust the thickness of your text, from light to bold.
- Font Size – Set how large or small your text appears.
- Line Height – Control the space between lines of text for better readability.
- Letter Spacing – Adjust the space between individual characters.
- Alignment – Align your text to the left, center, or right.
- Italic – Toggle italics to add emphasis or style.
- Underline – Add an underline to highlight important text.
Advanced Typography Settings
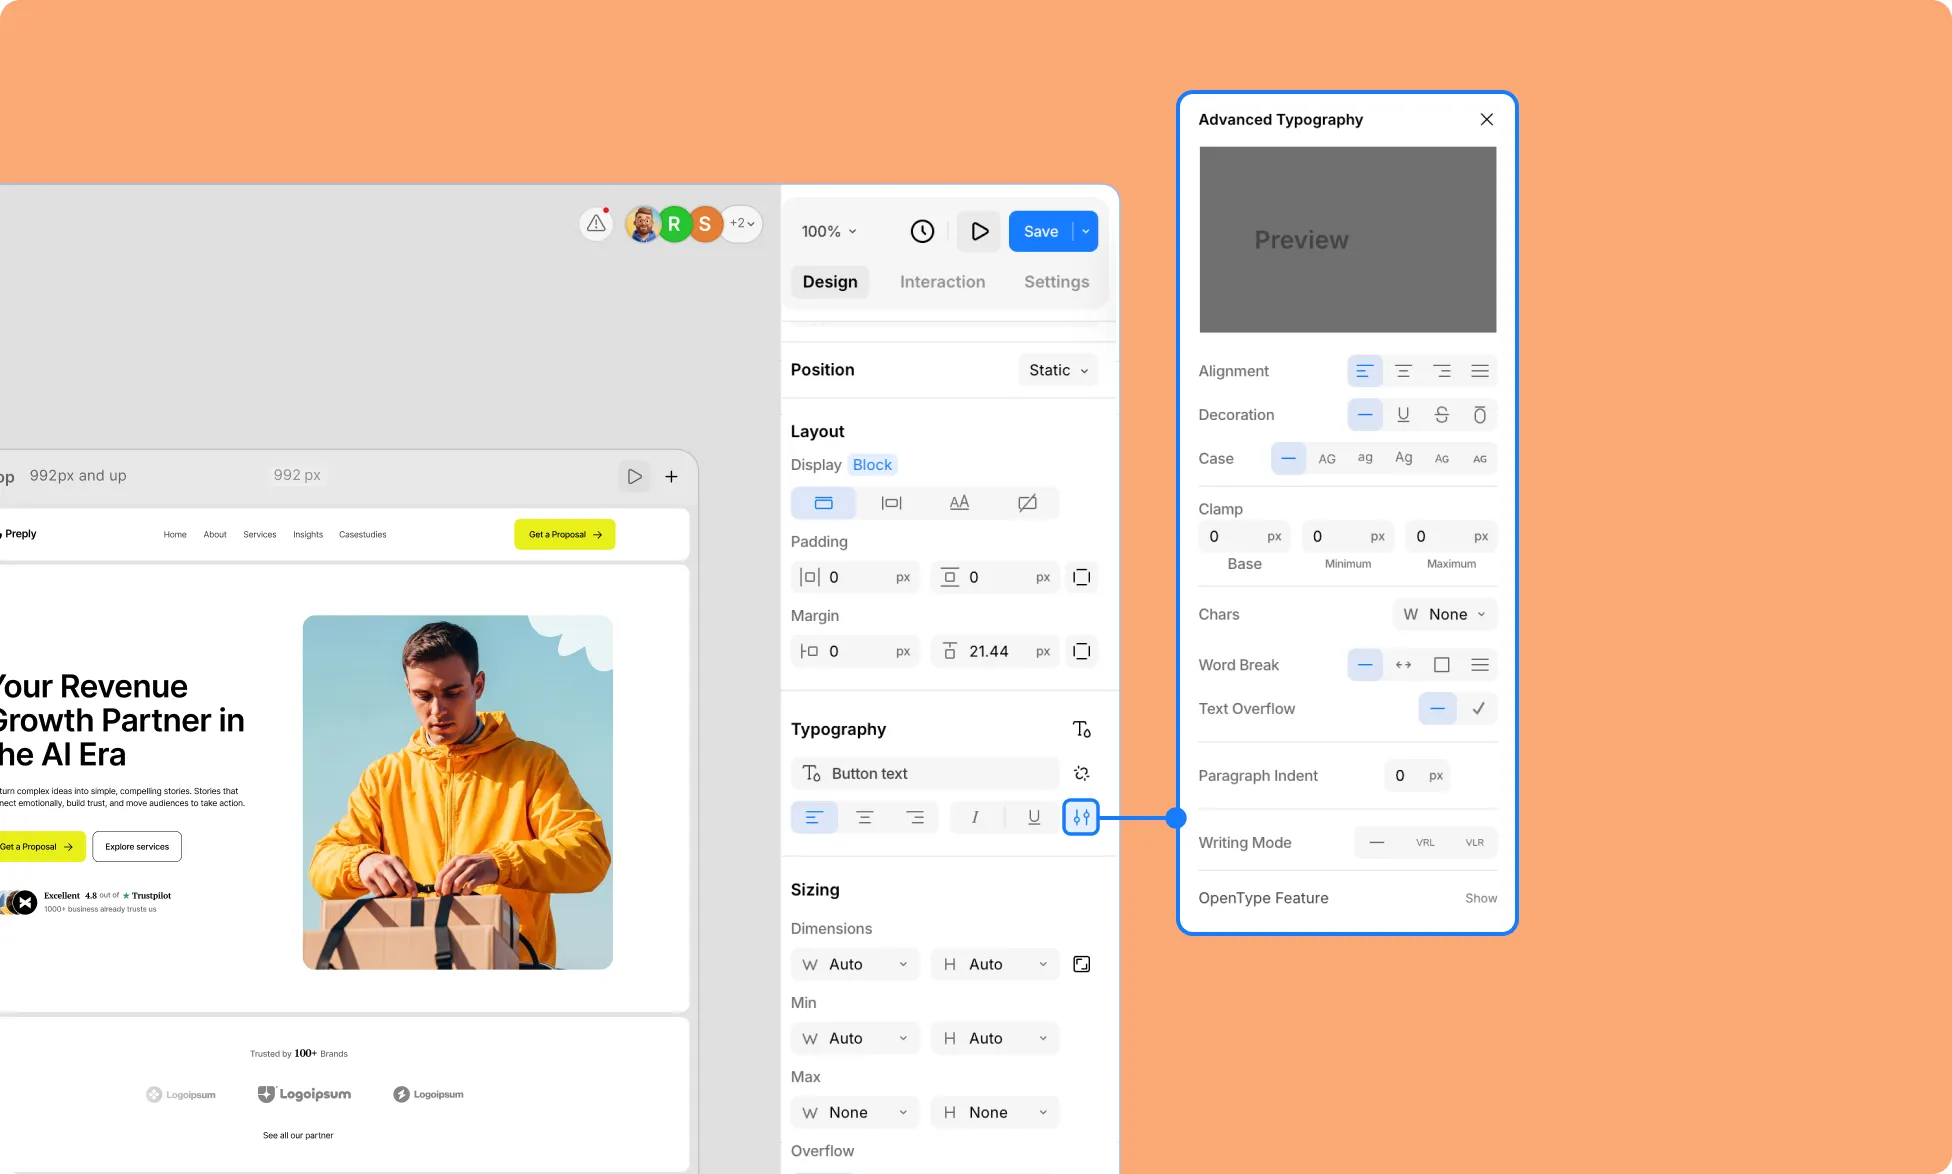
Click the settings icon at the bottom-right corner of the Typography panel to access additional text customization options for even finer control over your typography.
- Alignment – Choose left, center, right, or justify your text across the container
- Decoration – Emphasize text using decorations. Options include:
- No Decoration – Opt for no decoration.
- Underline – Underline your text.
- Line-through – Strike a line through your text.
- Overline – Add a line over your text.
- Case – Select the letter case you want your text to be. Options include the following:
- None – Keep default case.
- Uppercase – Transform all letters to uppercase.
- Lowercase – Transform all letters to lowercase.
- Capitalize – Capitalize initial letters.
- Small Caps – Convert lowercase letters to smaller capital letters while original uppercase letters stay full-size.
- All Small Caps – Convert all letters, including original uppercase letters, to small capital letters of uniform height.
- Clamp – Using Clamp, set a font size that adapts automatically but also stays within a defined range, giving your text flexibility and responsiveness across different screen sizes. It uses three values:
- Base – The preferred font size. This is used as long as it falls between the minimum and maximum values.
- Minimum – The smallest font size allowed. If the base size is smaller, the text will use this value.
- Maximum – The largest font size allowed. If the base size is larger, the text will use this value.
- Chars – Set a container width to limit the horizontal span of text, automatically adding line breaks at the specified width to improve readability.
- Word Break – Use Word Break to control how text wraps when it reaches the edge of its container.
- Normal – The default behavior; text breaks naturally at spaces.
- Keep-all – Prevents words from breaking in Chinese, Japanese, and Korean (CJK) text. For other languages, it behaves like Normal.
- Break-all – Allows text to break at any character to fit within the container (not applied to CJK text).
- Break-word – Forces words to break when necessary to prevent overflow, even if it splits a word midway.
- Text Overflow – Control what happens when text is too long for its container:
- Clip – Overflow text is clipped, aka hidden.
- Ellipsis – Overflow text is replaced with an ellipsis (…).
- Paragraph Indent – Set how much the first line of a paragraph is indented from the left edge.
- Writing Mode – Change the direction in which text flows.
- RTL (Vertical) – Displays text vertically. For LTR scripts (English, Spanish, etc), each new line appears to the left of the previous line. For RTL scripts (Arabic, Hebrew, etc), each new line appears to the right of the previous line.
- LTR (Vertical-lr) – Displays text vertically. For LTR scripts (English, Spanish, etc), each new line appears to the right of the previous line. For RTL scripts (Arabic, Hebrew, etc), each new line appears to the left of the previous line.
Was this page helpful?