Adding Custom Fonts
Getting Started
Canvas
Building Your Pages
Elements
Layers Panel
Customizing Your Pages
Text and Typography
Variables
Dynamic Data Basics
Content Manager
Form Builder
Pop-up Builder
Collaboration
Media Manager
Figma to Kirki
API Integrations
SEO & OpenGraph
Review and Publish
Migration
Getting Started
Canvas
Building Your Pages
Elements
Layers Panel
Customizing Your Pages
Text and Typography
Variables
Dynamic Data Basics
Content Manager
Form Builder
Pop-up Builder
Collaboration
Media Manager
Figma to Kirki
API Integrations
SEO & OpenGraph
Review and Publish
Migration
Adding Custom Fonts
Kirki lets you add Custom Fonts directly inside the editor. Whether you’ve downloaded webfonts from an online source or designed your own, you can easily upload and use them across your website.
Upload Custom Fonts
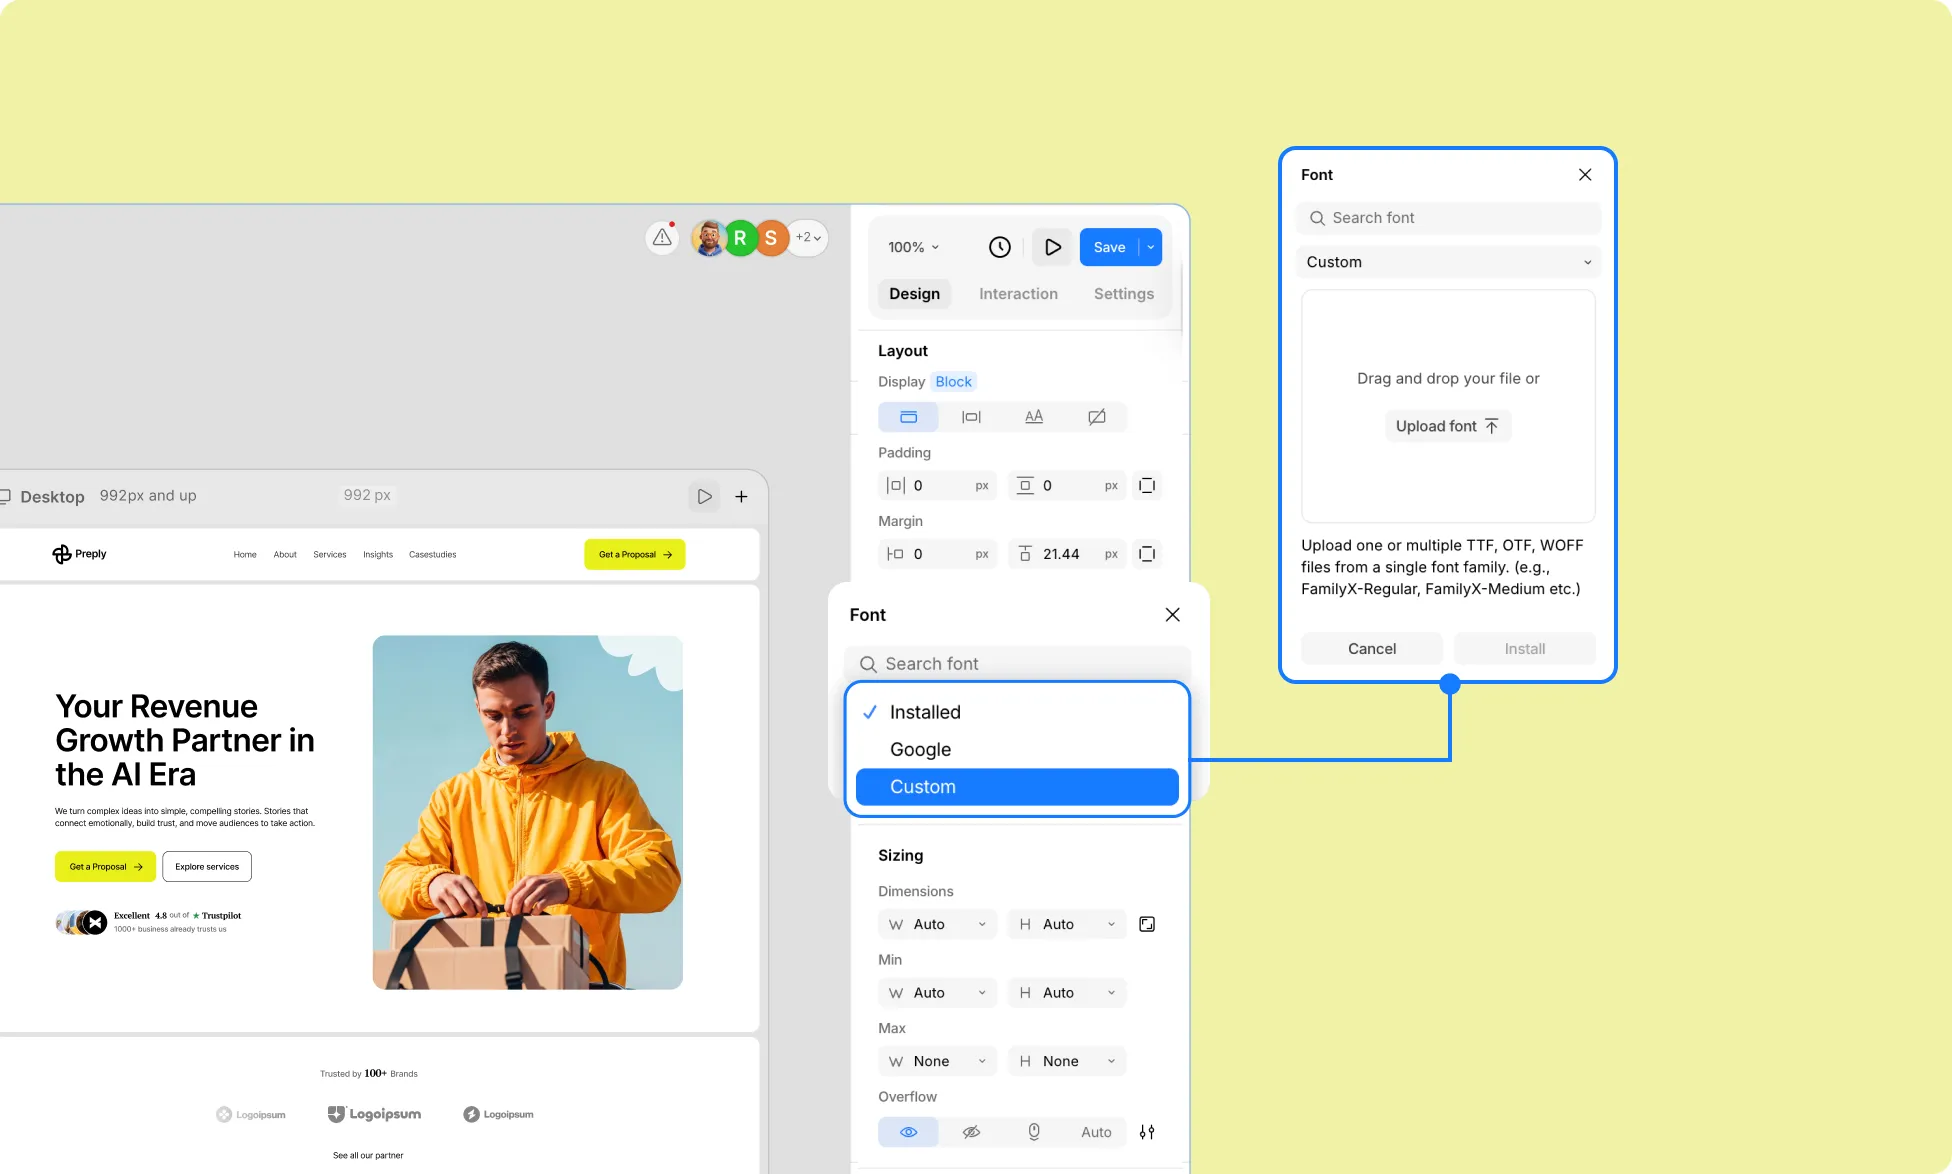
Follow these steps to upload and use a custom font in your design:
- Add a Text element to your page.
- In the Typography settings, on the Right Panel, open the Font dropdown.
- Switch from Installed to Custom.
- Click Upload Font and select your font file. (Supported formats: .OTF, .TTF, .WOFF)
- Once added, the font will appear in the Installed list.
- Select the font to apply it to your text.
Add Google Fonts
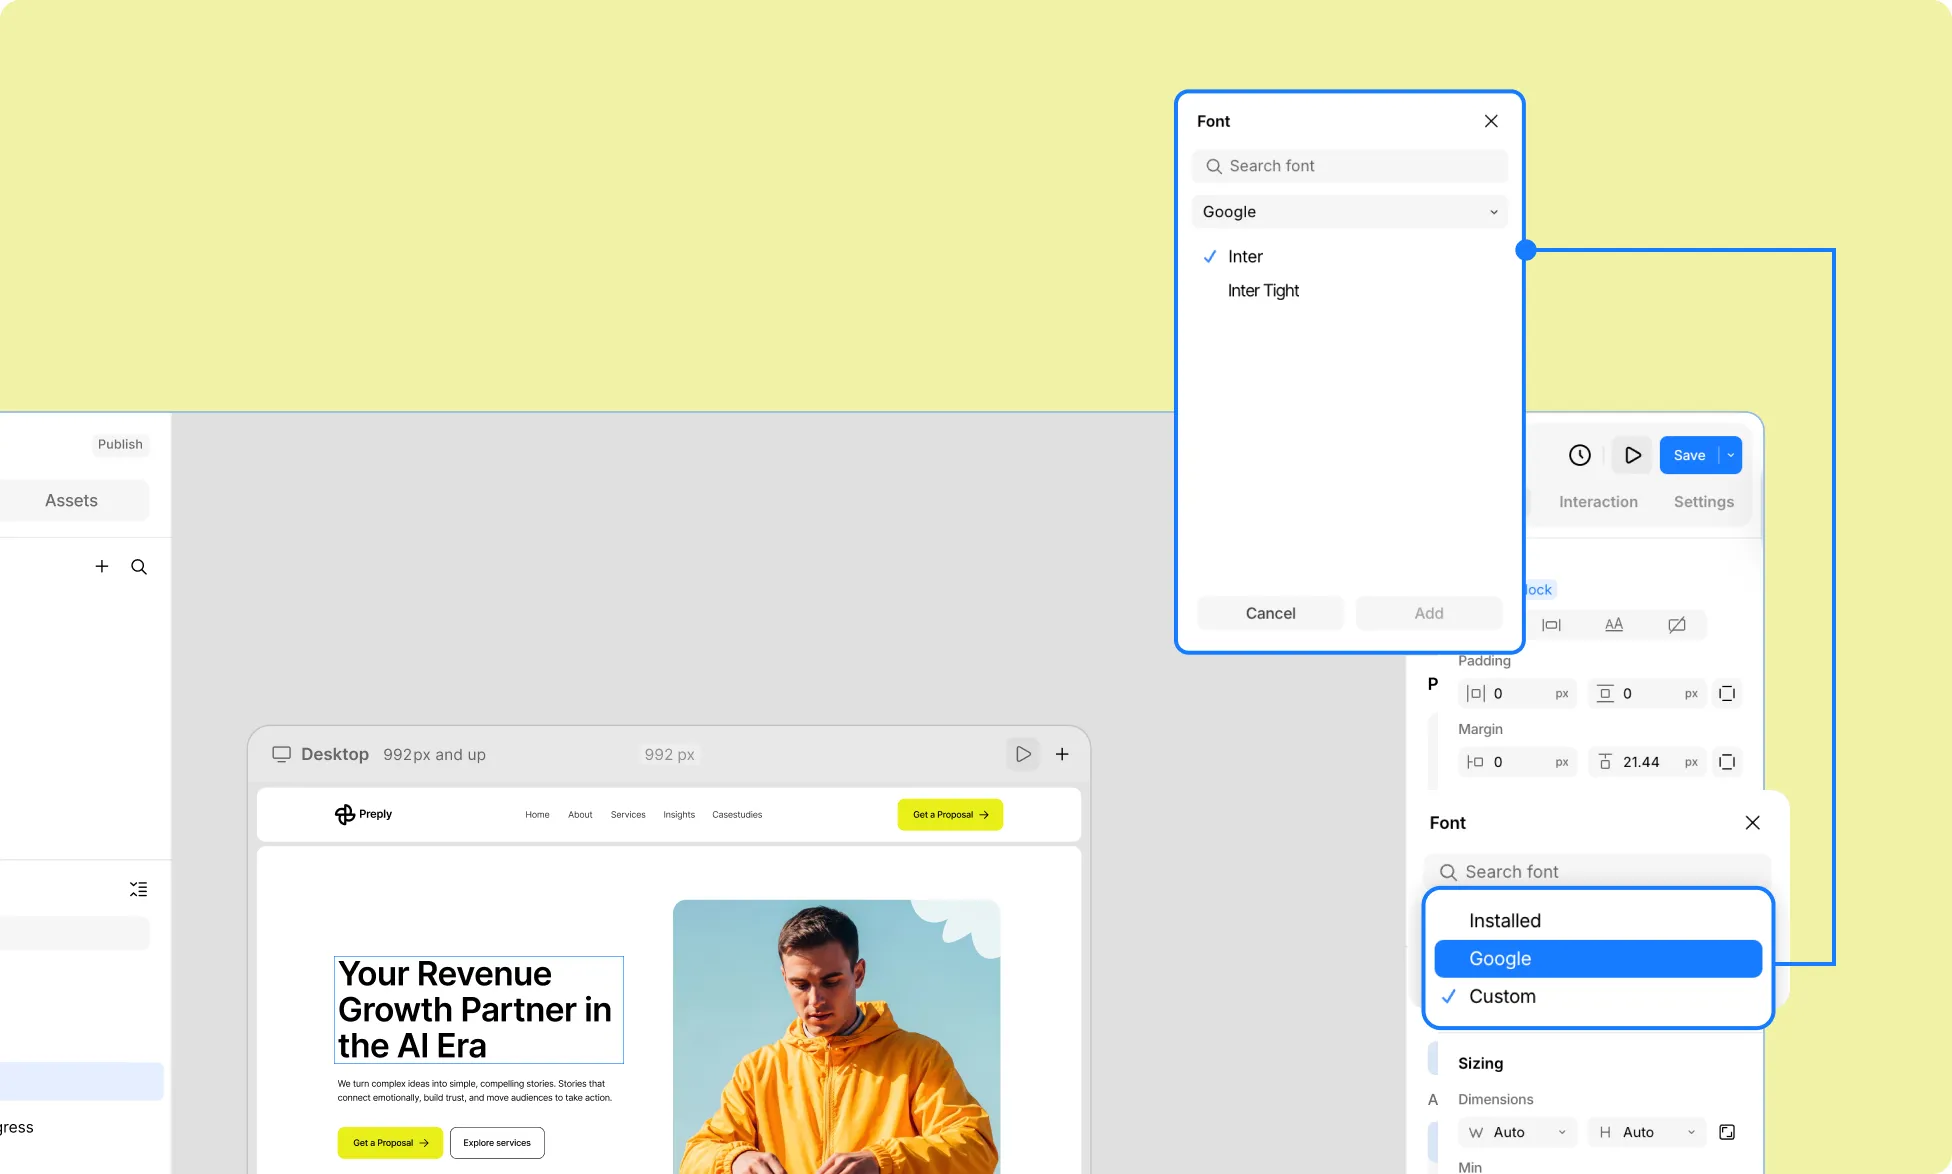
You can also access the Google Fonts library directly within Kirki and use any of the fonts available in your design:
- Add a Text element to your page.
- In the Typography settings, on the Right Panel, open the Font dropdown.
- Switch from Installed to Google.
- Browse the options and click to select the fonts you want to add. Click Add Selected to install.
- Once added, the font will appear in the Installed list.
- Select the font to apply it to your text.
Locally Download Fonts
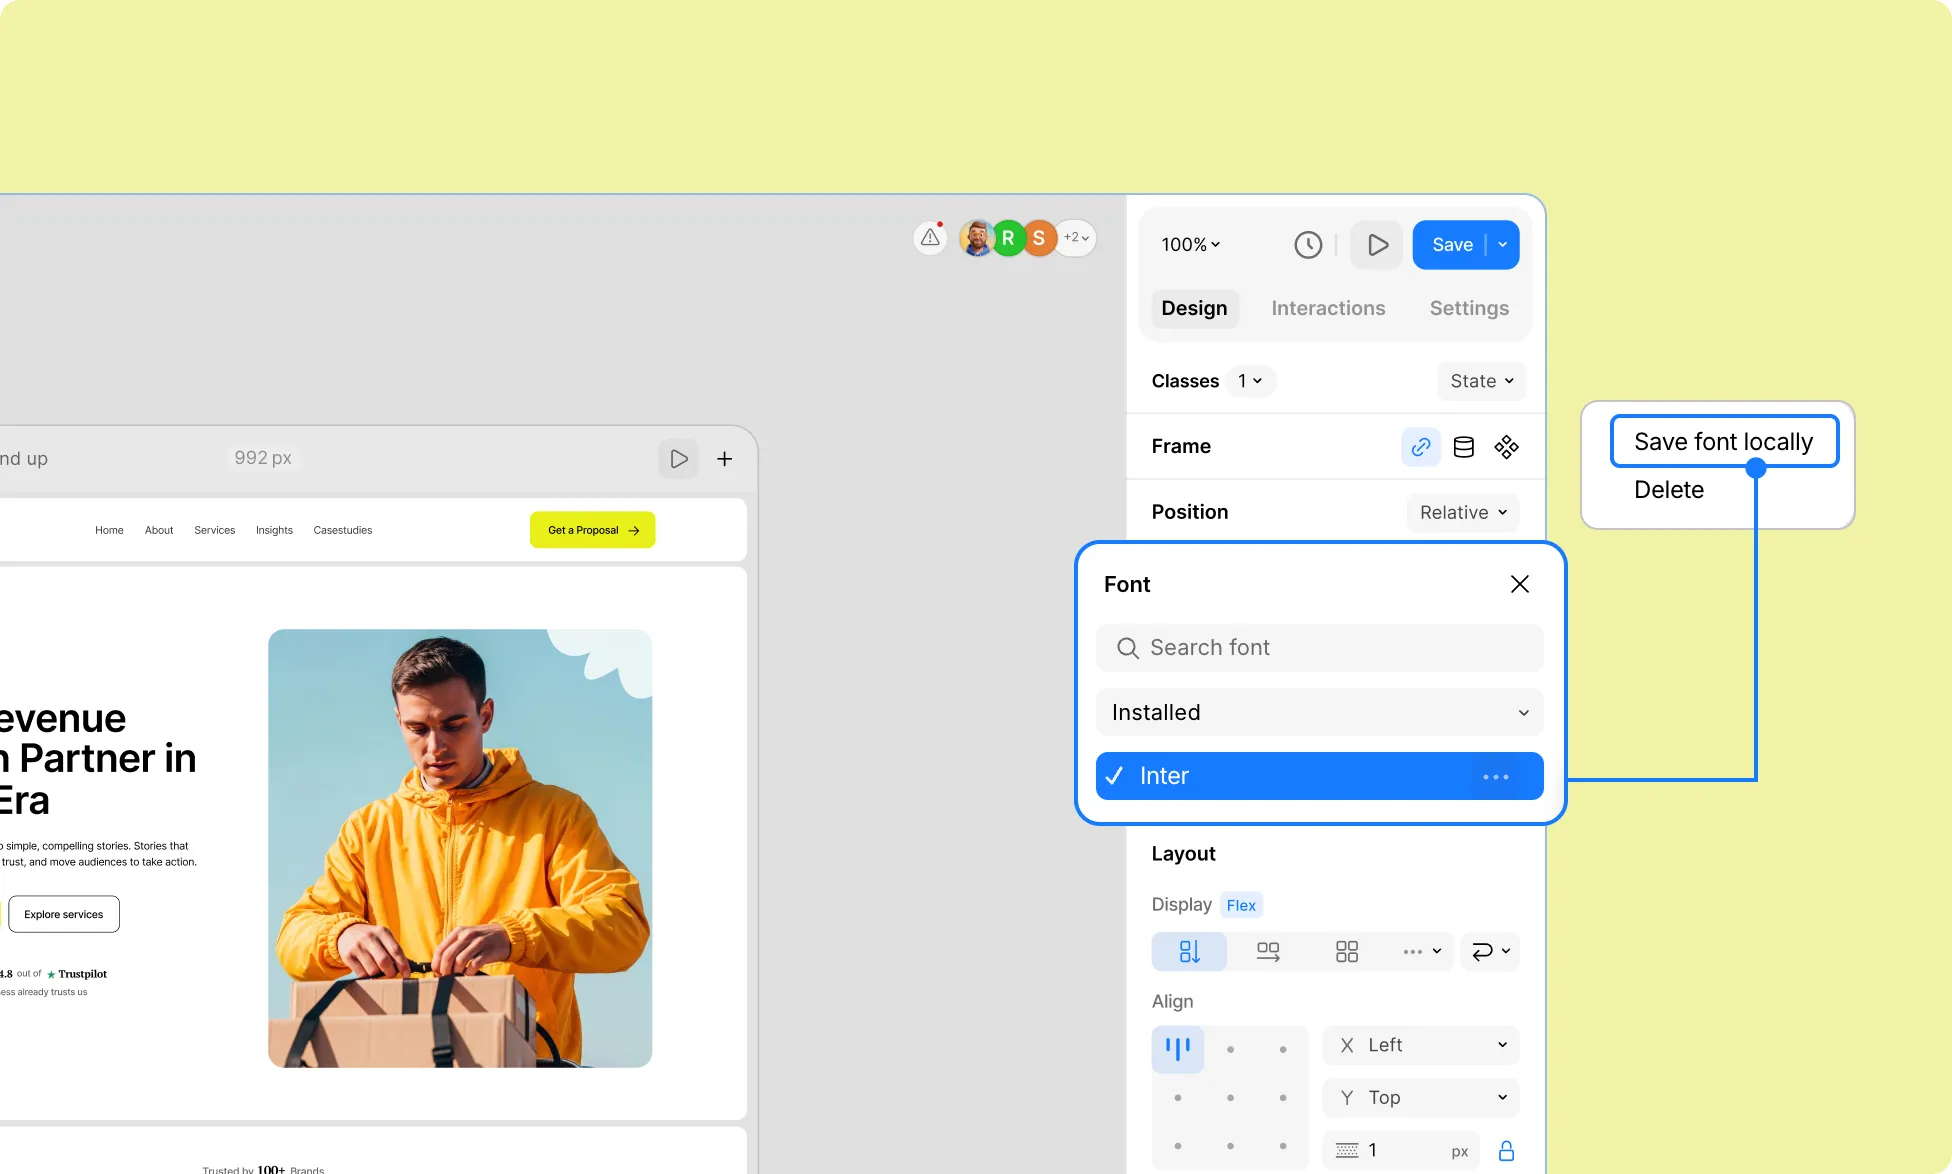
Custom & Google fonts can be downloaded locally. Doing so helps improve performance and ensures availability.
- Select your Text element.
- In the Typography settings, on the Right Panel, open the Font dropdown.
- Find the font you want to download and click the ellipsis (…) icon beside it.
- Select Save Font Locally.
Delete Fonts
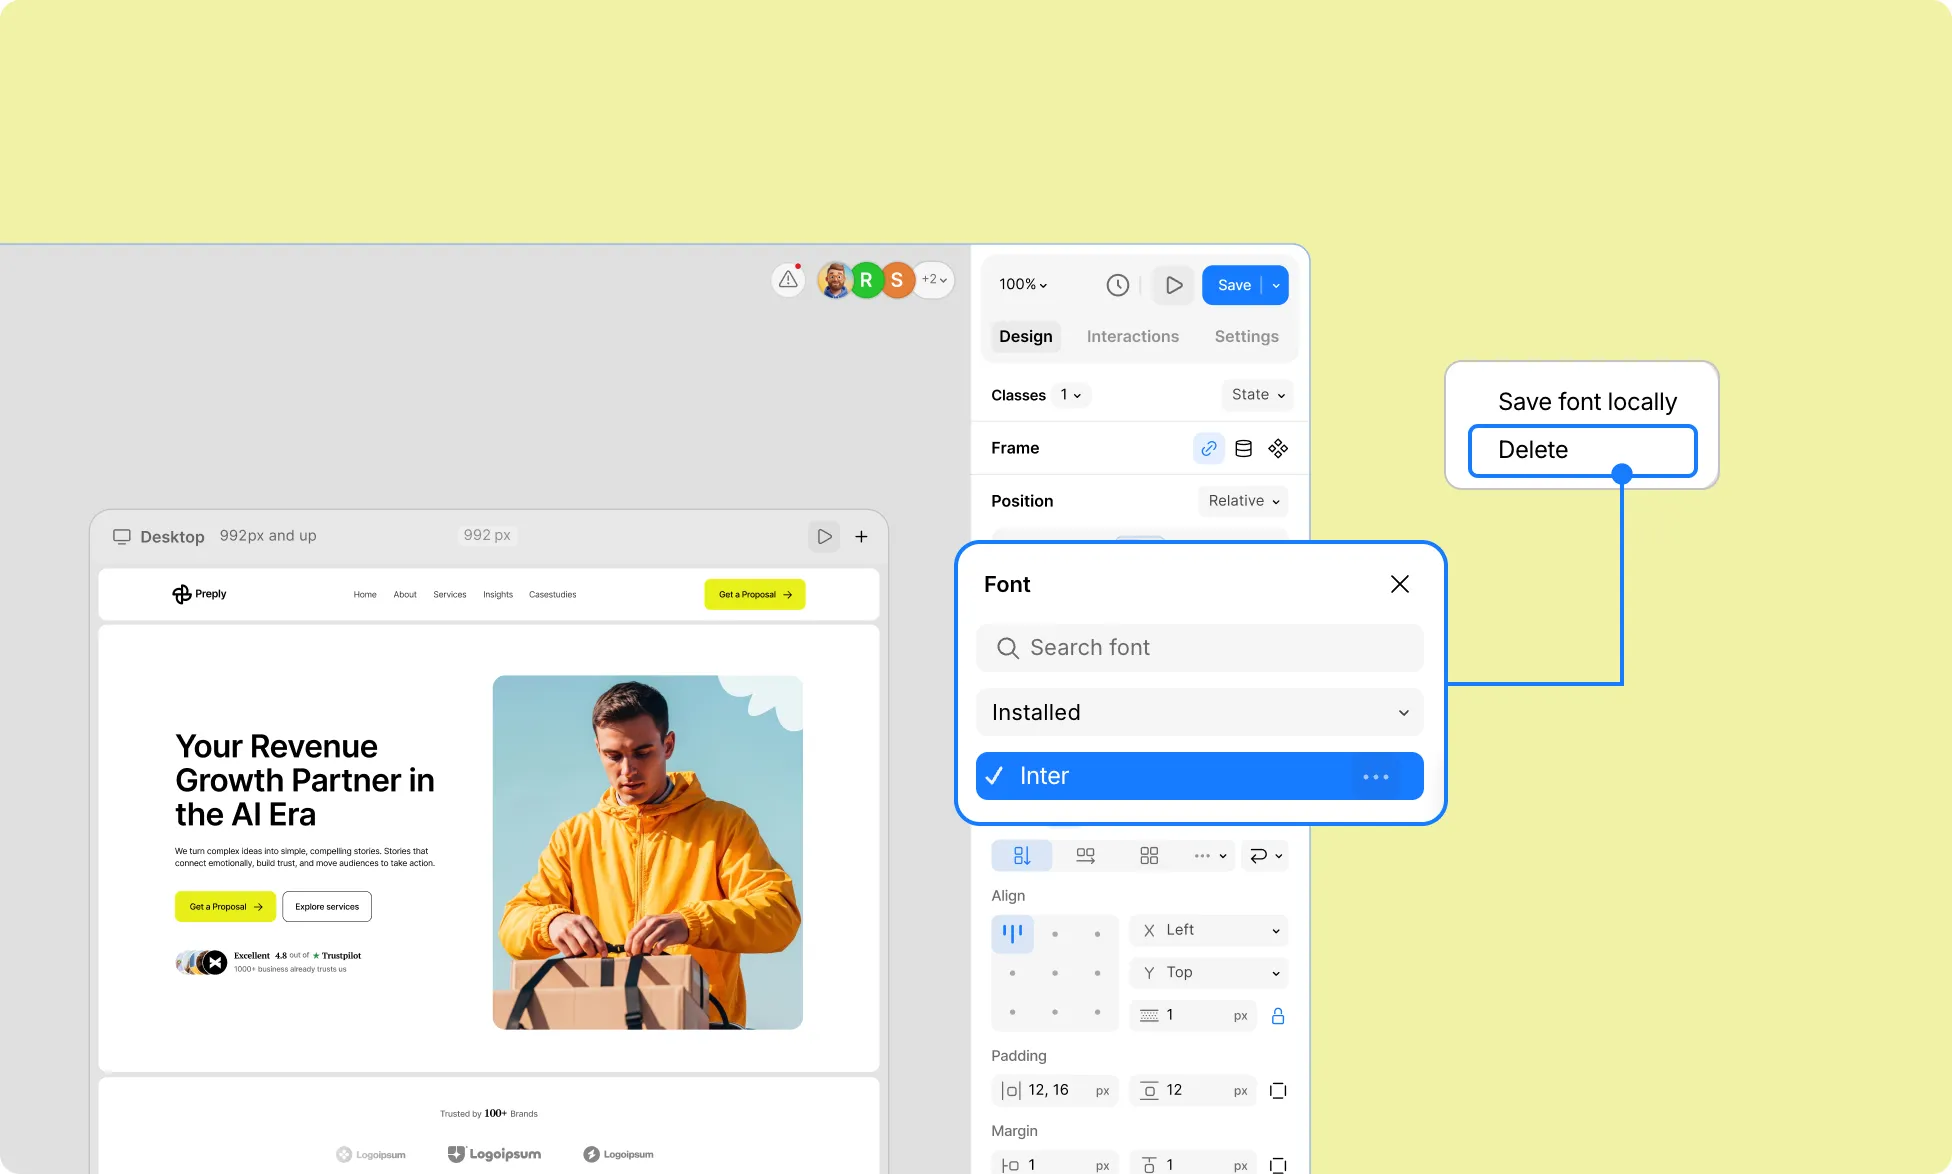
You can also remove installed fonts when they’re no longer needed:
- Select your Text element.
- In the Typography settings, on the Right Panel, open the Font dropdown.
- Find the font you want to remove and click the ellipsis (…) icon beside it.
- Click Delete.
Was this page helpful?